Whether it hosts your resume, a family blog, wedding photos, or an online store, your website is a key point of contact with your audience. And luckily, it isn’t hard to build a new site from scratch. These days, you don’t even need to know how to code. Website builders like Wix, Shopify, and WordPress give full site-creation power to the technologically uninitiated.
Then there’s Weebly. When Rosie Florence built the e-commerce store for her luxury personalized jewelry brand, Florence London, she turned to the Weebly site editor.
“Initially I chose Weebly because it’s the best value and, as a small business, you need to be careful about spend,” Florence says. “As my company grew and my website developed, I realized that Weebly was incredibly user-friendly…. It was perfect for me to get my business up and running, and it’s very easy to teach new staff to use it.”
Florence’s experience is far from unique. Weebly consistently ranks among the best website builders available. This guide will show you why and explain how to take full advantage of Weebly’s features.
Chapter synopsis
- Chapter 1: Introduction.
- Chapter 2: How to make a website with Weebly. This is our step-by-step guide through the Weebly site-building process.
- Sign up for Weebly.
- Choose a website type (e-store or informational).
- Pick a Weebly theme.
- Choose or connect a domain name.
- Add original content to your template.
- Customize your site with Weebly apps.
- Set up an online store (if you need one and haven’t already done this in Step 2).
- Publish your website.
- Chapter 3: How to customize your Weebly website. Make your site unique, regardless of which theme you choose.
- Chapter 4: Why choose Weebly? Find out the advantages of Weebly over competing platforms and the many use-case scenarios in which Weebly can help. This chapter also covers Weebly’s pricing.
- Chapter 5: Embedding online forms in Weebly. We’ll look at how to integrate online forms for payment, donations, surveys, or anything else into your Weebly site using JotForm.
If you’re ready to build your first Weebly website, keep reading. And don’t forget to bookmark this page. When you see how easy it is to build a website on Weebly, you may find it hard to stop at just one.
How to make a website with Weebly
When you first sign up for Weebly, the site takes you through an onboarding process. We’ll walk you through that experience here. This guide assumes you’re a first-time user. If you already have a Weebly account, and you’re returning after completing or abandoning the setup guide, log into your Weebly dashboard, select Edit Website, and skip to step 5.
For new Weebly users, here’s how to make a Weebly website, starting from the very beginning.
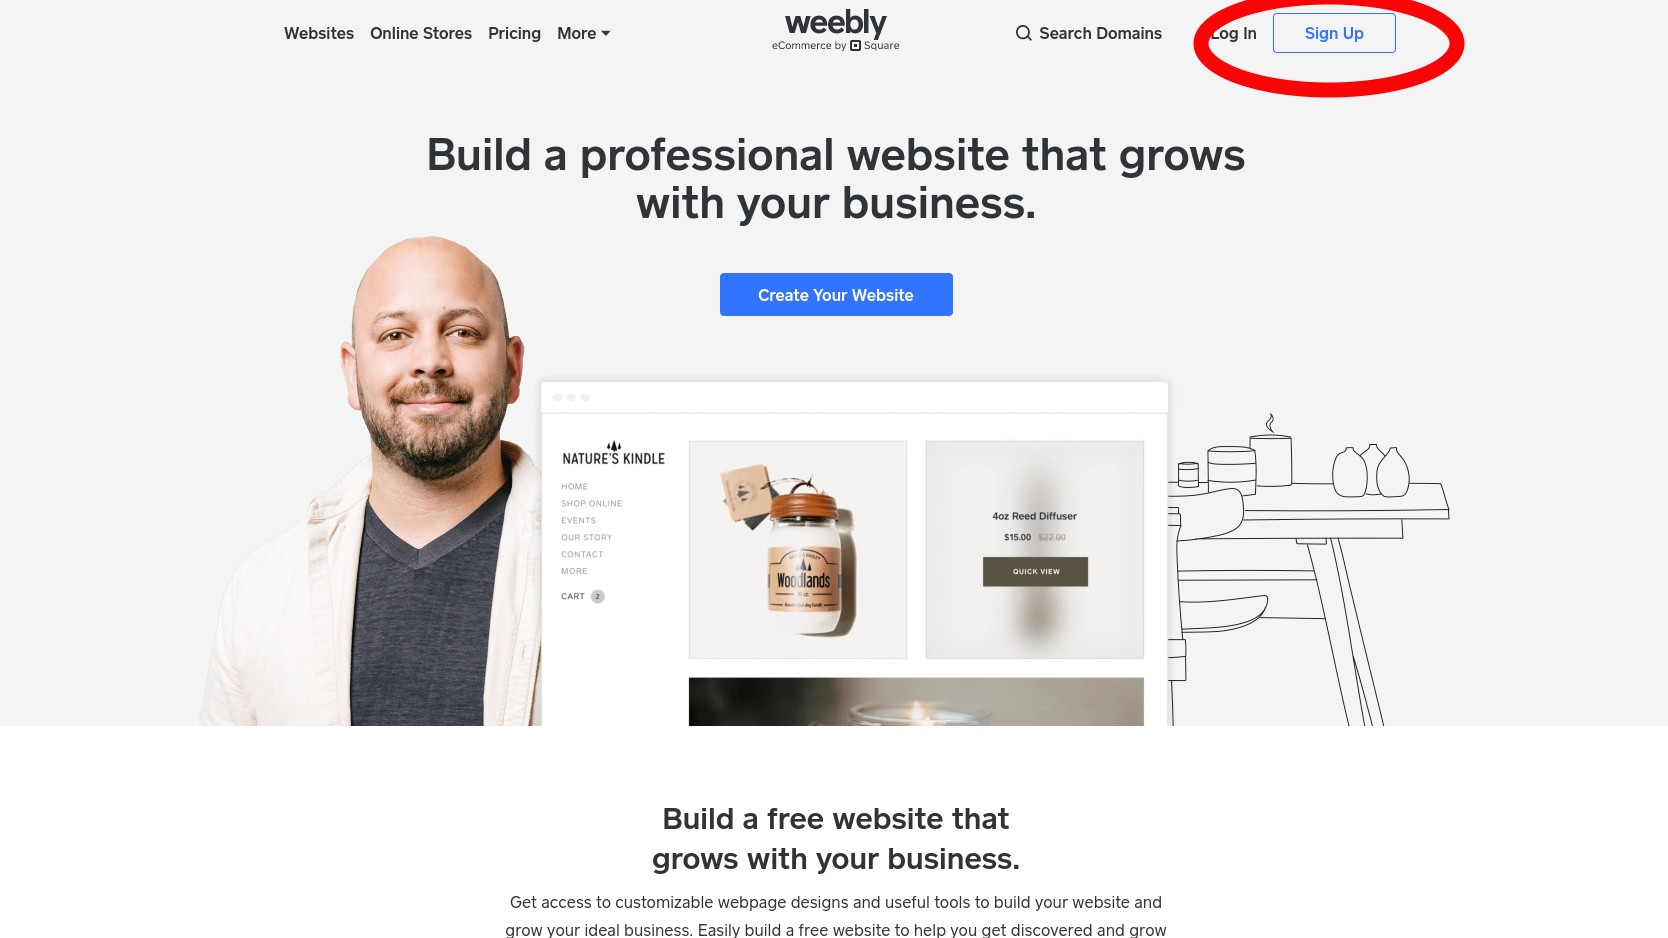
1. Sign up for Weebly
Weebly is a free website builder, so all it takes to get started is an email address and a new password. Just click the Sign Up button at the top of the main Weebly homepage.
2. Choose a website type: E-commerce or not
The Weebly setup guide begins with choosing whether you need to incorporate an online store into your site or not. Select either “I just need a website” or “I need a website with an online store.”
A note about Weebly and the Square Online Store: Since mobile payments provider Square acquired Weebly in 2018, engineers have been working to integrate the two companies’ services. Choosing the e-store option on Weebly’s guided setup actually redirects you to the Square Online Store editor — not Weebly.
However, you can still build a Weebly site, integrate payment solutions, shipping options, and inventory, and run a store through Weebly alone; to do that, select “I just need a website” at the start, and continue with Step 3.
If you choose the “online store” option here, proceed through these four steps:
- Add your store’s name.
- Select the type of products you’ll sell.
- Provide your store’s street address.
- Indicate whether or not you have a Square account.
From there, you’ll head right into the builder dashboard and follow those instructions. (Because taking this path will route you to the Square Online Store editor, not Weebly, you’re done with this guide — but click here to learn how to integrate your online forms with the Square online payment gateway.) For those of you sticking with the Weebly editor, proceed to Step 3.
3. Pick a theme
Weebly themes are packages of color schemes, fonts, and other design elements that provide visual continuity across your site. These themes include templates, which are website “shells” with fields for elements like headers, images, buttons, etc. The template is the skeleton you’ll bulk up with your own content.
Pick from one of Weebly’s free themes. You can change and customize your theme later. Take your time browsing the options. To choose a theme, click the blue Start Editing button in the top right corner of the screen.
4. Choose or connect a domain
Weebly will prompt you to pick a domain name, the part of the URL that identifies your site; for instance, our domain name is JotForm.com. If you already own a domain, you can connect or transfer it at this point. However, custom domains are only available with paid Weebly plans, whether you acquire them while building the site or own them already. Weebly pricing for these plans comes in three tiers:
- Personal. Currently priced at $6 per month when you pay for the full year, this plan gives you a custom domain name but retains Square/Weebly branding and ads.
- Professional. For $12 per month, billed annually, you get the custom domain without Square/Weebly branding or ads. Additional features include video backgrounds and user membership registration.
- Performance. The $26 per month annual Weebly plan provides everything available with the Professional plan along with additional marketing and e-commerce features.
All these paid plans suggest a common question: Is Weebly free? The answer is yes, but with limited features. If you’d rather stick with the free plan, you’ll be limited to a Weebly subdomain — websitename.weebly.com — and your site will contain Weebly branding. Just pick the Subdomain option at the bottom of the window for free publishing.
5. Add original content to your template
The Weebly Editor is the heart of the Weebly experience. Web designers classify Weebly as a WYSIWYG editor — What You See Is What You Get — meaning you build your site by manipulating design elements on the page, not by pecking around in the source code.
Since we’re working with an established template, determined by your theme, the simplest way to start is to replace each element with your own content. Upload your images and rewrite headlines, subheads, and site copy. When in doubt, click on the element you wish to replace. The Weebly Editor is pretty good about presenting all the options.
Delete fields by selecting them and clicking the top-right X. Don’t worry about accidentally erasing your work; Weebly will prompt you to verify the deletion before proceeding. Add new text and images by dragging and dropping from the elements menu on the left side of the page.
You can add new pages, switch or tweak themes, adjust settings, or access Weebly support from a command menu at the top of the page. That’s also where you’ll find the option to add apps, which is the next step in your site-building journey.
6. Customize your site with Weebly apps
The Weebly App Center provides all sorts of tools and page elements not available in the basic site editor. Find marketing plugins, social media integrations, sales tools, and more among the 350+ Weebly apps available in the Center.
You can choose the Weebly FAQ app, for example, to quickly add an FAQ page to your site. Or you can incorporate the Eventbrite app to sell tickets directly through your site.
To integrate an app, go to the App product page and click Add, then follow the prompt and select Connect. You can access installed apps from the site editor, where they’re listed at the bottom of the left-hand element menu.
7. Set up an online store
If you plan to sell through your site, you don’t need to make the leap to a Square Online Store just yet. Go to your website dashboard, choose the Items dropdown on the left side of the screen, and select Library. Select the blue Create New Item button to get your store started.
Once you’ve added even a single item, you’ll see a host of new options on your dashboard. You now have a Manage Store option at the top, right next to the Edit Website button.
To actually start selling, you’ll need to complete the following steps. Luckily, Weebly provides individual tutorials for each of these tasks. You can access those guides through your Weebly dashboard, under Setup Guides.
- Add inventory to your store. Repeat the process of adding items, described above.
- Choose a payment gateway. For free, Personal, and Professional plans, you’re limited to Square and Stripe. With a Performance account, you can also use PayPal.
- Connect your shipping accounts. Also available under the Settings menu on the dashboard, the Weebly shipping page lets you connect your accounts with UPS, USPS, or other shippers; set prices; and provide details on shipping locations.
- Provide tax information. Enter tax rates for all the countries and states you ship to — Weebly provides state tax rates according to the latest available data. You can also add optional calculations, like incorporating tax into item prices or charging tax for shipping costs.
Finally, don’t forget to add your products to the website itself. In the site editor, drag Product and/or Category elements from the menu on the left to build your store on the page.
8. Publish your website
When you’re ready to show your creation to the world, simply click the blue Publish button at the top right of the site editor screen. You’ll know your site is live when a popup announces, “Website Published!”
These steps tell you how to make a Weebly website for the first time, but they don’t say much about how to make your online home unique. Next, let’s look a little closer at the customization options available with Weebly.
How to customize your Weebly website
Weebly websites are easy to build. Just ask Florence, who’s been using a Weebly site to power her business for more than six years. “When I discovered the simplicity of Weebly, I was so relieved,” she says. “The themes, drag-and-drop design, and integrated G Suite were all so easy. I had a professional-looking website within two days.”
A cynical reader might think this sounds too good to be true — surely an easy, free website builder can only lead to legions of drab lookalikes. In fact, the Weebly Site Editor offers great variety. Here are the main elements you can tweak to build a one-of-a-kind website through Weebly.
Weebly themes and templates
First off, let’s get the terminology straight: You won’t see much mention of Weebly templates because those templates are built into themes. There is no Weebly theme without a Weebly template, and vice versa — at least not unless you’re on the developer side of things.
A Weebly template is an HTML file, written in the Mustache templating language, that dictates the placement of elements on a completed page. These elements typically include
- A navigation function, typically a menu
- A banner or headline field at the top of the page
- The body of the page; the template provides instructions about how fields or sections of content fit together within the body
- A footer section, which is the same on every page of the site
The Weebly theme, on the other hand, contains page templates along with all the instructions that make a site visually consistent, including
- Fonts and color schemes
- Collections of stock images
- Options for each element; for instance, a theme might allow you to choose how or where the navigation bar displays, or provide color overlays for certain fields
- Additional functionality; JavaScript allows theme developers to control mobile display changes, preprogram responses to events, and more
The theme you choose determines what your finished site will look like.
To alter the look of your site, select Theme from the command menu at the top of the Weebly Site Editor. Your options will display in the sidebar on the left. Depending on the theme, you can switch colors, change fonts for each type of text (headline, paragraph text, links, buttons, etc.), and toggle optional features on and off.
Once you’ve altered your theme to reflect your unique tastes, it’s time to really switch things up with the power of Weebly apps.
Tools, features, and integrations from the Weebly App Center
The Weebly App Center is packed with options for expanding your site-building toolbox. Many of these apps focus on backend services, providing tools for marketing, social media, e-commerce reporting, and communications. (Check out the Weebly Jotform integration to create and publish forms within the Weebly Site Editor.)
New online business owners should pay particular attention to the App Center’s SEO category. That’s where you’ll find keyword ranking tools like Positionly ($19 to $99 per month) and on-page analyzers like RabbitSEO (free to $45 per month). Check out the options to boost rankings for all of your important keywords. After all, pursuing visibility in search engine results is a crucial marketing strategy for any online endeavor.
The Weebly App Center isn’t just full of marketing tools; it can also help make your site unique. The Site Tools & Features collection is full of apps that will actively change the look and feel of your custom website:
- Does your site need one or more tables? If your theme doesn’t include a table builder, choose Simple Table, a free Weebly app that adds tables to your pages.
- The Tabs app helps you organize site content by nesting topics within tabbed fields.
- The App Center’s Video category lists a variety of players that let you add videos to your site.
- If you’re looking for ways to set your site apart from the crowd visually, browse the App Center’s Structure category. There, you’ll find dozens of specialty features that change the look of your pages, from call-out boxes to custom borders to automatic popup windows.
All these options can be overwhelming. To get an idea of the possibilities, look at some existing Weebly websites that have successfully blended all the elements before you start to build your site. Here’s our list of some of the best-looking Weebly websites out there.
If you’re still not ready to get started with Weebly, stick around. We’re about to discuss exactly why Weebly is such a powerful tool for so many types of users.
Why choose Weebly?
With its intuitive, drag-and-drop editing platform, Weebly is a useful tool for any would-be site operator without much (or any) experience in coding or design. That said, Weebly’s distinct features make it ideal for a few common applications: education, e-commerce, and all-purpose blogging. Let’s look at each of these Weebly use cases.
Weebly for education
Technology has become so prominent in the classroom that it has earned its own abbreviation: EdTech. Weebly presents itself as an EdTech solution for teaching site construction as well as supporting lessons in any subject.
The company provides Weebly Education accounts to teachers for free, including up to 40 student accounts. Additional student accounts are $10 per 10 new users. Teachers can unlock advanced features with a Pro account for $39.95 per year.
A few examples of Weebly Education’s use in the classroom include
- Teacher websites. Creating an original website allows teachers to assign homework, collect completed assignments, provide class updates, and keep parents in the loop with a classroom news blog. The teacher controls access and can either restrict the use of the site to students and their parents or publish publicly to the entire web.
- Student websites. Give students hands-on site-building experience, then assign website creation in place of traditional reports. Teachers maintain full control over the Weebly classroom environment through a teacher’s dashboard. This allows them to set up student accounts, track progress on student sites, and protect access to student creations. Accounts can be set to classroom-only to ensure privacy.
- Remote learning. A Weebly Education classroom site is a key tool for distance learning. Use interactive blogging features such as commenting (with the teacher preserving full moderation powers) and unlimited posts. Host video lessons, maps, and images on the site for multimedia lessons.
While Weebly doesn’t provide recommended age limits for its EdTech package, Common Sense Education suggests limiting the service to grades 4 through 12. The review site gives Weebly four out of five stars, with a matching average rating among teachers.
Weebly for e-commerce
You can build an e-store into any Weebly website. Adding a product through the Items menu on the left side of the Weebly dashboard opens all basic e-commerce options, even if your site has been up and running without a store for years.
In order to collect payments, of course, you’ll have to connect a payment gateway. Weebly provides three options you can access by clicking on the Connect a payment gateway link. They’re all easy to implement with the dashboard’s Setup Guides.
- Square payment collection. Because Square offers both point-of-sale tools and online payment processing, Weebly recommends users sign up for Square if they sell in a brick-and-mortar location as well as online. Fees are 2.9 percent of the sale plus 30 cents per transaction.
- Stripe payment collection. As an online-only payment platform, Stripe is a good choice for merchants who only sell through their website. Like Square, fees are 2.9 percent plus 30 cents per transaction.
- PayPal payment collection. Thanks to its broad user base, offering PayPal as a payment option can increase your sales by up to 18 percent, Weebly reports. While PayPal fees are identical to Square and Stripe in Weebly, only users with a Performance Plan ($26 per month) can accept payments through PayPal.
If you’d rather not connect a payment gateway directly through Weebly, you can instead embed Jotform payment forms into your Weebly site. Skip ahead to Chapter 4 to learn how to do that.
Weebly also provides a range of backend e-commerce tools, from shipping calculators to a coupon builder, making it a strong competitor to top-ranking e-store platforms like Shopify. In fact, Florence prefers Weebly to Shopify. “I have also used Shopify, which is a great platform, but more expensive than Weebly,” Florence says.
Weebly’s most expensive plan (Performance, at $26 per month) is less than a Basic Shopify account ($29 per month). To take full advantage of the Shopify platform, you need a mid-tier account ($79 per month) or an Advanced account ($299 per month).
Florence also notes that Shopify’s designs aren’t as flexible as Weebly’s. “I think you need to be slightly more tech-savvy to make a brilliant website with Shopify than you do with Weebly,” she says.
Weebly for blogging
Weebly blogs are easy to set up. In fact, if you’re not particular about the appearance of your site, you could sign up for an account, write a post, and take your blog live in moments. Blogging features from Weebly include
- Attractive, easy-to-read blog templates. Free Weebly themes are loaded with templates built specifically for blogs. Just pull up a page, write your content, and post — all without futzing over design elements.
- Simple multimedia integration. Drag-and-drop image fields make it easy to illustrate your story. Video integrations via the Weebly App Center turn any blog into a vlog in moments.
- Built-in social sharing capabilities. Share your posts to social media accounts with in-platform tools. You can also schedule posts to move through your social networks ahead of time.
It’s important to note that Weebly isn’t the only low-to-no-code site builder on the internet.
Even with the range of Weebly features we’ve already covered, you may still need a tool that Weebly can’t offer. The platform doesn’t have a strong native online form builder, for instance. Luckily, Jotform is here to fill the gap. In our last chapter, we’ll describe how to host thousands of types of online forms on your site through Jotform’s Weebly app.
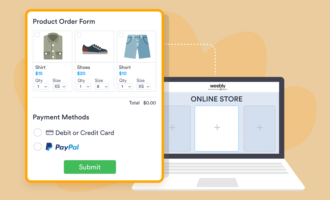
Embedding online forms in Weebly
Online forms let you interact directly with your audience. That may mean collecting payments, registering attendees for events, cataloging leads, creating an email list, or virtually any other type of information collection. But to build forms in Weebly, you need a Weebly integration designed for the task.
Jotform will seem very familiar to Weebly fans, with its code-free, drag-and-drop editing interface. And Jotform works well with Weebly, in ways we’ll outline below. First, though, we’ll explain the simple process of adding a Jotform creation to your Weebly website.


How to post Jotform forms on Weebly
To embed completed forms into your Weebly website, start by visiting the Weebly App Center and downloading the Jotform Weebly app. You can also do this through Jotform.
In the Weebly editing dashboard, drag the Jotform app element from the side panel to place your form exactly where you want it. Then select the form from your Jotform account — or paste the form URL — and you’re ready to publish. Learn more about adding Jotform to Weebly websites here.
Why Jotform is the ideal Weebly form builder
Adding forms to your site through the Jotform Weebly app is about as simple as it gets, but there are other reasons to take advantage of this integration:
- Mobile responsiveness. Like Weebly websites, Jotform creations have mobile responsiveness built in. Just embed the form to create a seamless, desktop-to-mobile experience for your users.
- Access to more than 20,000 free form templates. The Jotform Form Builder lets you build your own forms from scratch, but why do things the hard way? Jotform also provides access to thousands of form templates that you can tweak to start collecting data in moments.
- Additional integrations. With its growing library of integrations, Jotform allows you to connect to essential services through your website. Connect Jotform to Mailchimp, Dropbox, Salesforce, PayPal, and dozens of other apps to bring their functionality to your website.
- Free and paid plans. Signing up for Jotform is free, but paid plans unlock greater benefits. A free Jotform account gives you access to as many as five forms with up to 100 monthly submissions. Paid plans, starting at $19 per month, expand capacity, while Silver ($39 per month) and Gold ($99 per month) Jotform accounts remove many remaining limits and provide advanced features that help with HIPAA compliance.
If you’d rather not download the Jotform Weebly app — or if you simply prefer to deal with code — you can still add online forms to your Weebly site through Jotform. This article explains how. It’s worth noting that, for most site builders, the Weebly integration is simpler to use.
Start building your Weebly website
With this guide in hand, you’re ready to start building your site. Some final words of advice from Florence: “I would find three aspirational websites that are already up and running and study the customer journey on those sites. Try to create a similar journey on your site.”
At a bare minimum, every e-commerce site should have enough pages to “assure your customers you are established and trustworthy,” Florence says. That includes a shoppable homepage, contact information, return policies, terms and conditions, and product care pages, plus “quotes from the press and an ‘as seen in’ section. Again, it builds trust.”
Templates for all of these pages are available through the Weebly website builder. Happy building!


Send Comment:
1 Comment:
October 14, 2020
Good information, thank you.