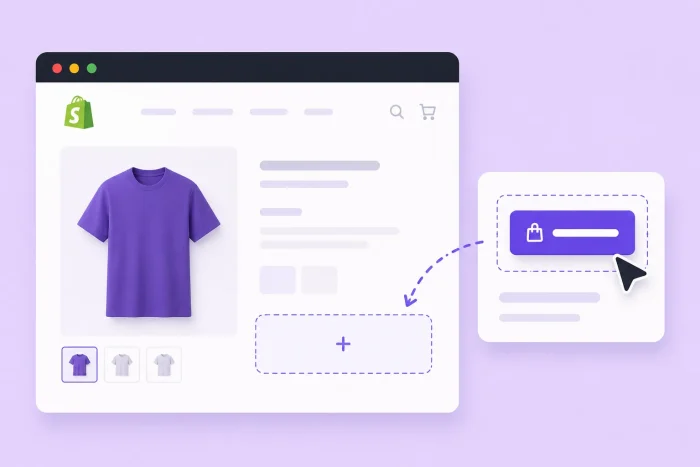
If you’re selling on Shopify, the design of your CTA button is paramount. Whether it goes to a promotional page, a VIP newsletter signup, or an affiliate link, a button that catches the eye gets clicked more often than one that blends into the page — and on a storefront, more clicks mean more sales.
Shopify OS 2.0 themes, including Dawn, have native button blocks, but they give you little control over how those buttons look. The block lets you set the label, the link, and whether the style is solid or outlined, while the colors come from your global theme settings. That keeps your store consistent (which is the point of theme settings), but it also means a button meant to stand out will look like every other button on your site.
Getting a standalone button with its own colors, hover effect, or icon takes one of two approaches. You can add a Custom Liquid block in your theme editor and write the HTML and CSS yourself, or you can use a free hosted widget that handles the styling and gives you an embed code to paste in.
If you want a conversion-optimized, custom CTA button on your Shopify store without editing theme code or paying a developer, this guide covers how to add a button in Shopify using both methods.


Option 1: Use Custom Liquid and CSS
The standard way to get a unique button design into a Shopify storefront without installing a third-party app is to write the code yourself. Shopify’s theme editor includes a Custom Liquid section where you can add your own HTML and CSS, so you can define a button and style it exactly as you want without editing your theme’s files directly.
Here’s how to add a button in Shopify using Custom Liquid and CSS:
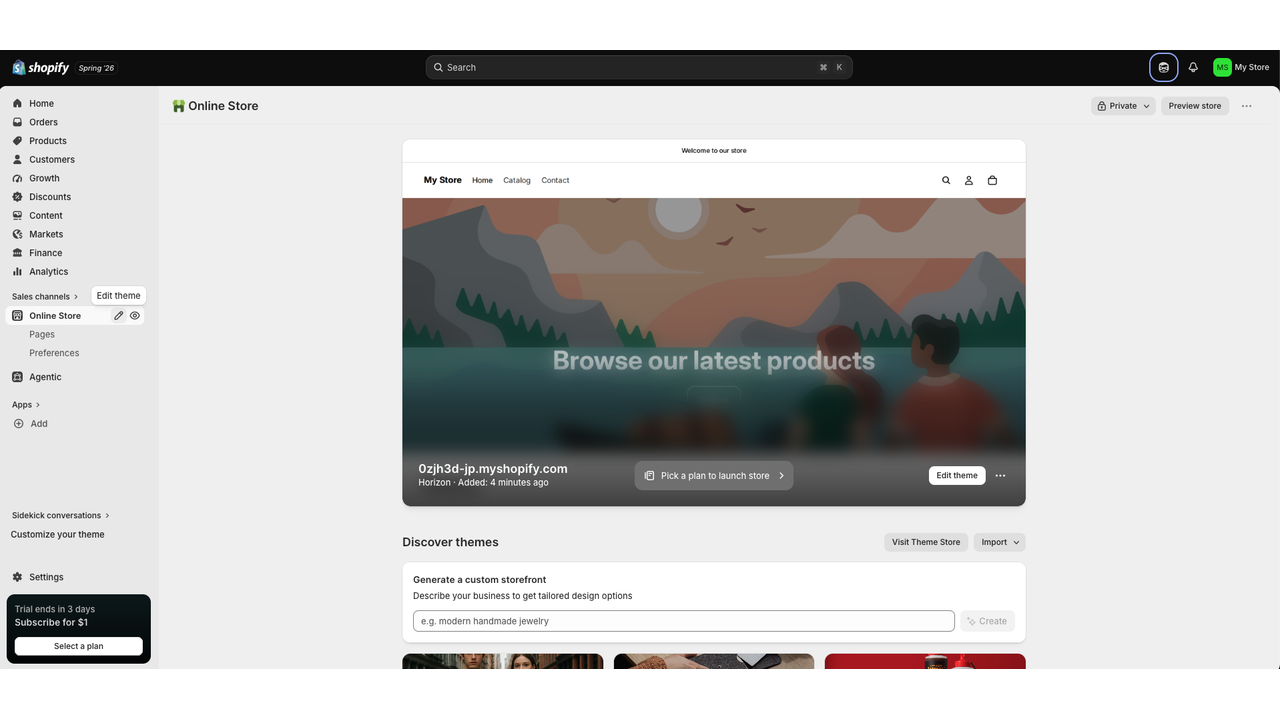
- From your Shopify admin, go to Online Store on the left-side menu. Then click the pencil icon next to Online Store or click Edit theme on the screen.
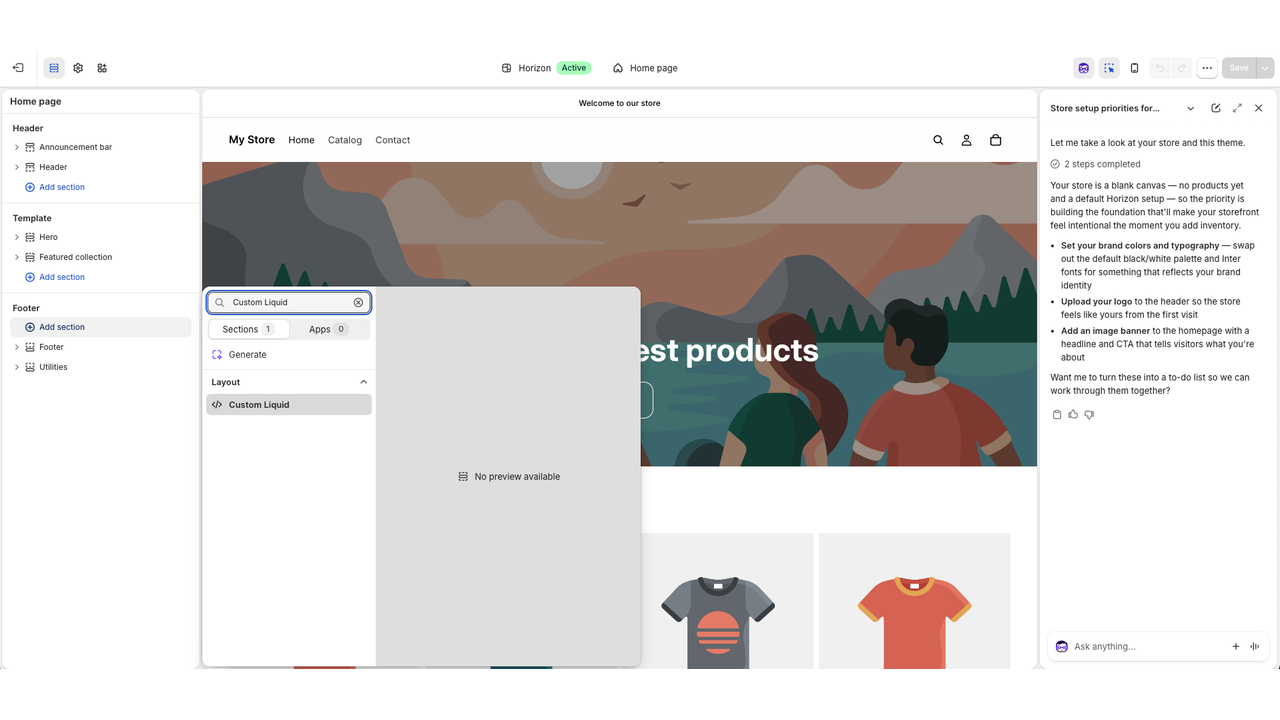
- In the left sidebar, click Add section, search for Custom Liquid, and select it. A text field appears on the right where your code goes.
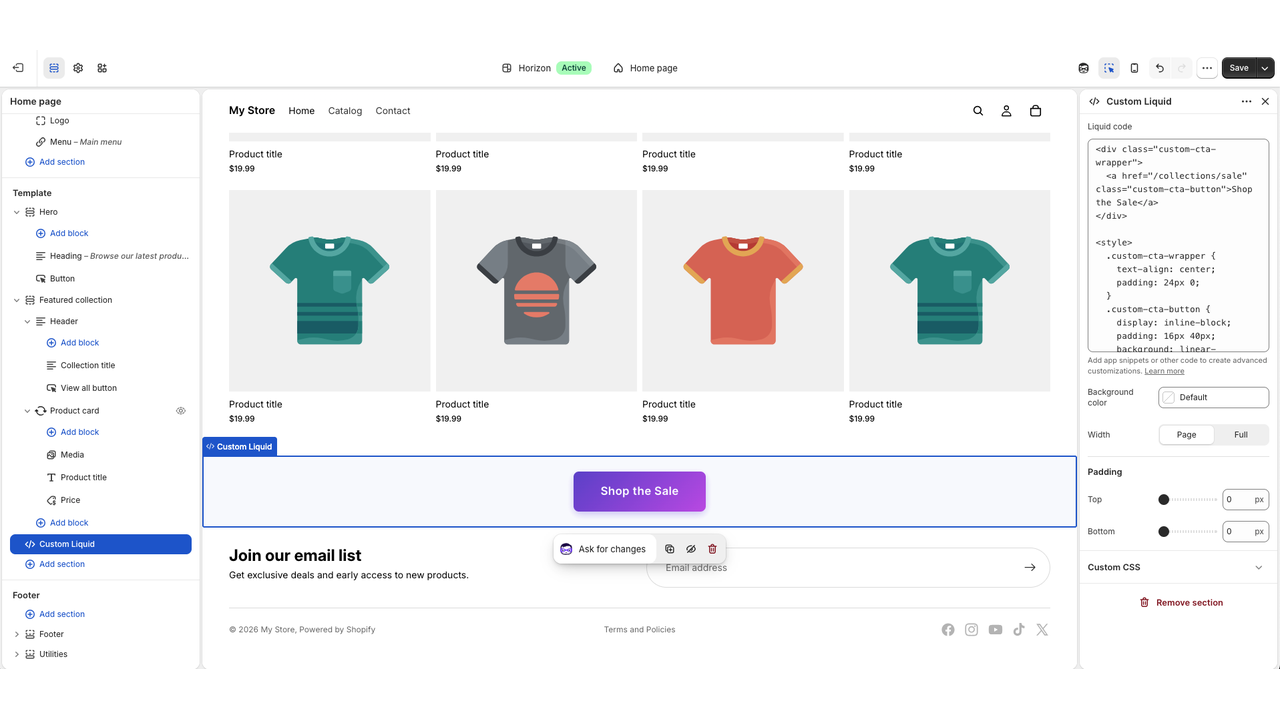
- Add the HTML for your button along with a <style> block containing your CSS, then click Save in the top-right corner. Your changes appear in the preview as you work.
A word of caution when using this method: Writing the styling yourself means you risk making mistakes. Rules written without scoped selectors can affect other elements on the page, and Custom Liquid added to your header or footer displays on every page of your store — so a small error can have a larger impact than just the button you were styling. Shopify also recommends duplicating your theme as a backup before editing code, which reflects how the platform views the risk.
Hiring a developer might solve the technical problem but adds a cost that’s harder to justify for a single button, particularly when you want to test a few versions and each change means another request.
Option 2: Add a free, customizable button widget (recommended)
Want the design control without the risk? A hosted free button widget is a Custom Liquid alternative in Shopify with its own colors, hover state, and icon. You can customize the button in a visual builder, copy the embed code, and paste it into a Custom Liquid block in your theme editor.
Jotform’s Button widget offers the styling options that Shopify’s native block leaves out. You set background, text, and hover colors independently, add an icon before or after the label, and adjust corner radius, height, padding, and drop shadow.
Here’s how to add a button in Shopify using Jotform’s button widget:
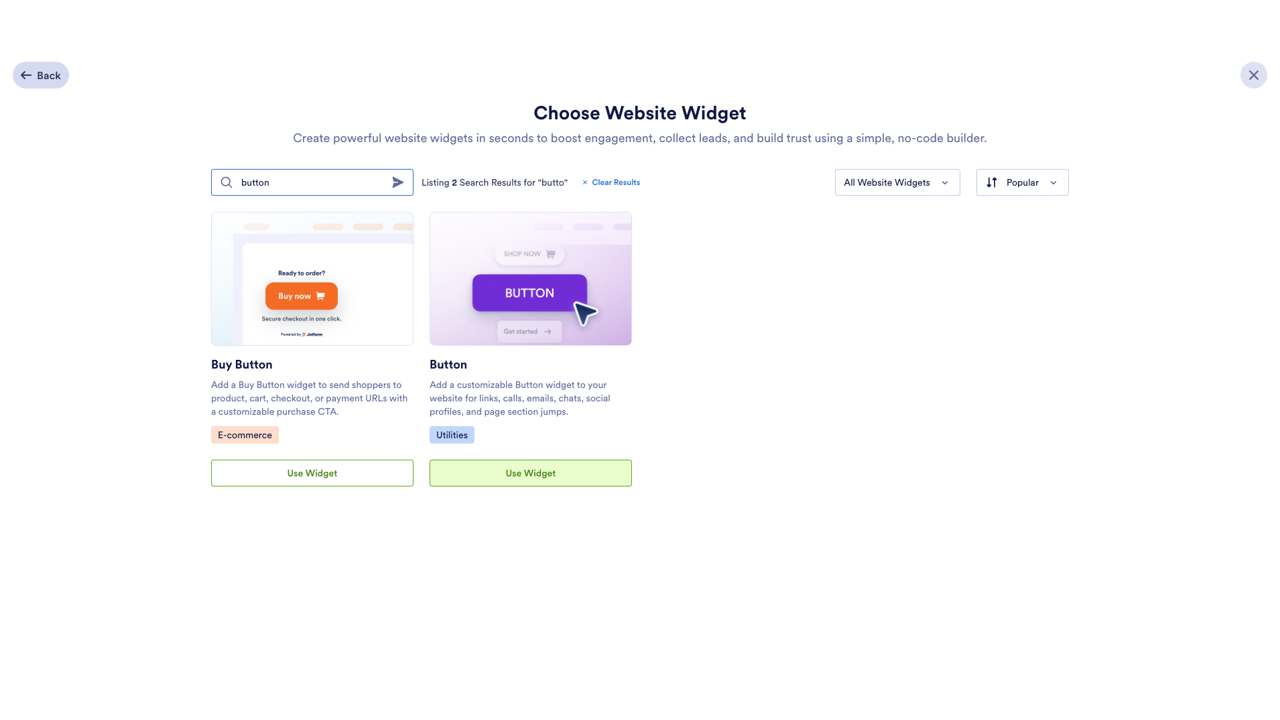
- On your Jotform Workspace page, click Create, select Website Widget, search for “Button,” and then click Use Widget.
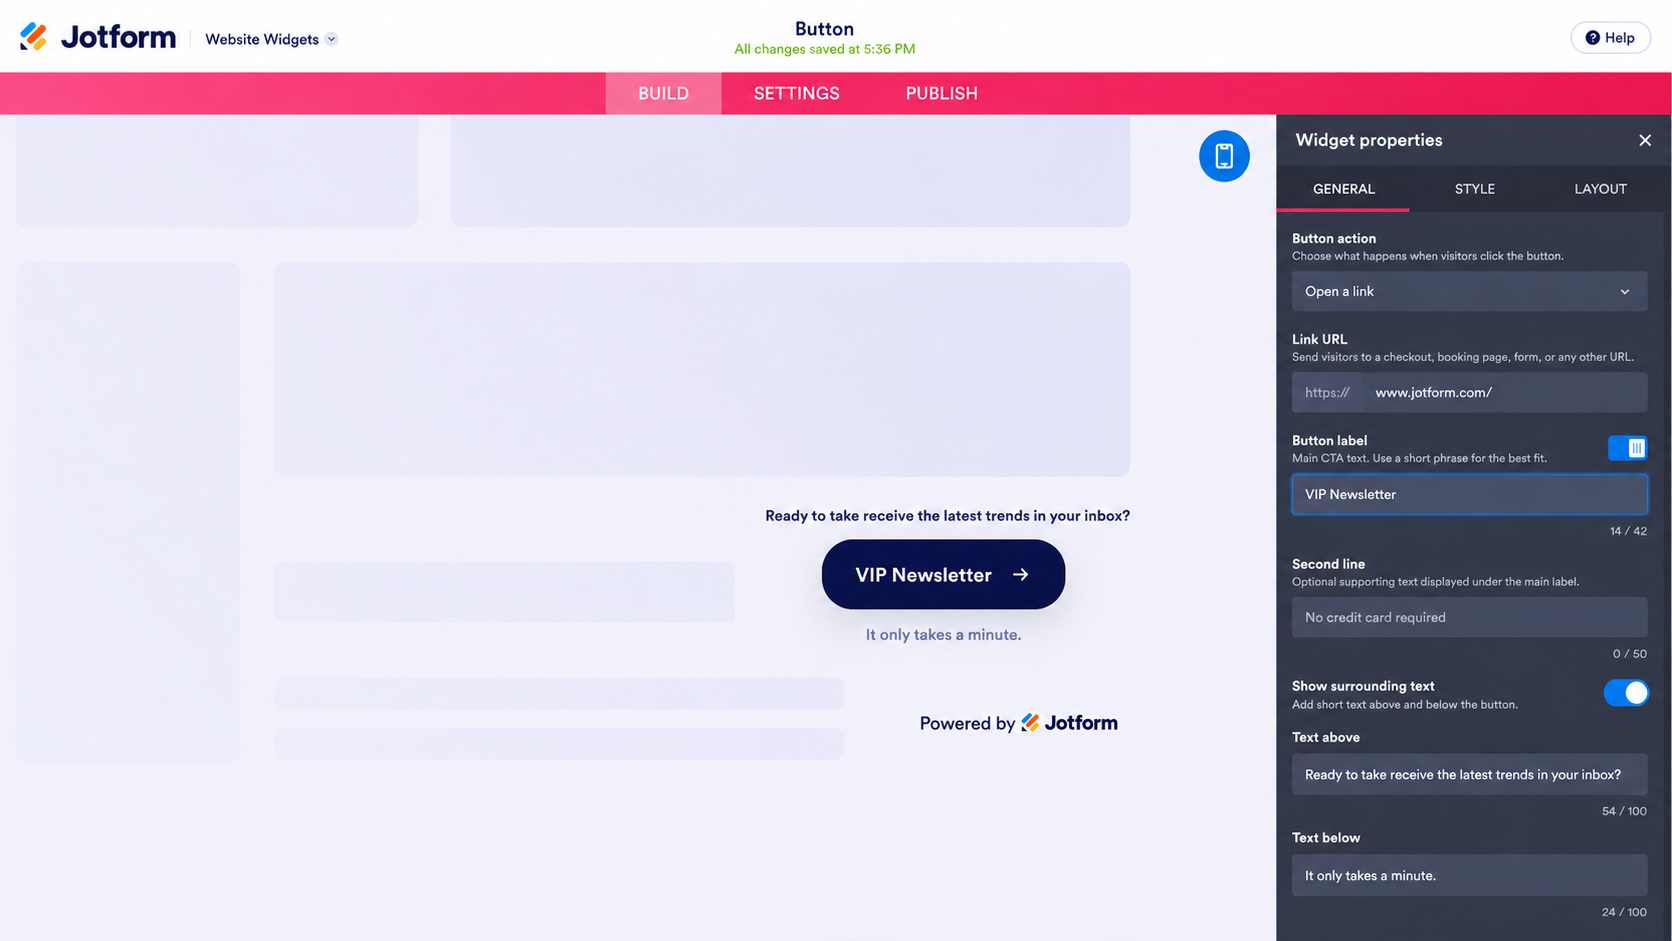
- Under the General tab, choose your button action, enter the requested information (email, phone number, URL link, etc.), and write your button label. Add a second line or surrounding text if your offer needs context.
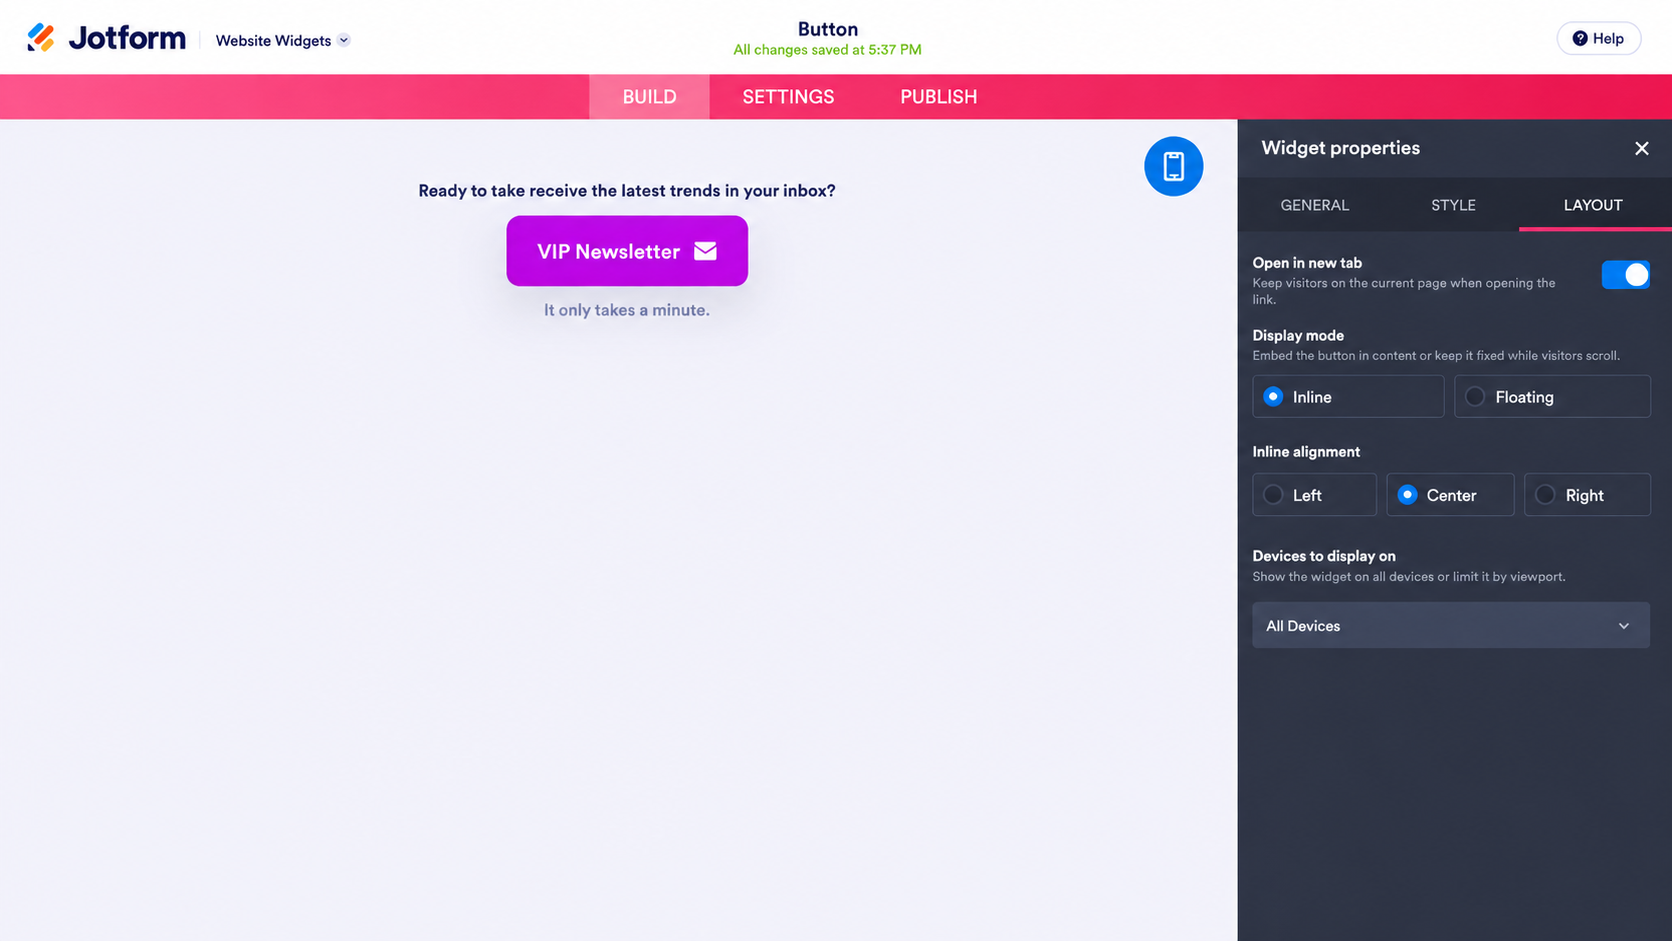
- Under the Styles tab, set your colors, turn on an icon and choose its position, then adjust the shape and size. The Layout tab controls whether the button is inline or floating, and whether it appears on desktop, mobile, or both.
- Click Publish in the top navigation bar, then click Copy Code in the Embed section in the left menu.
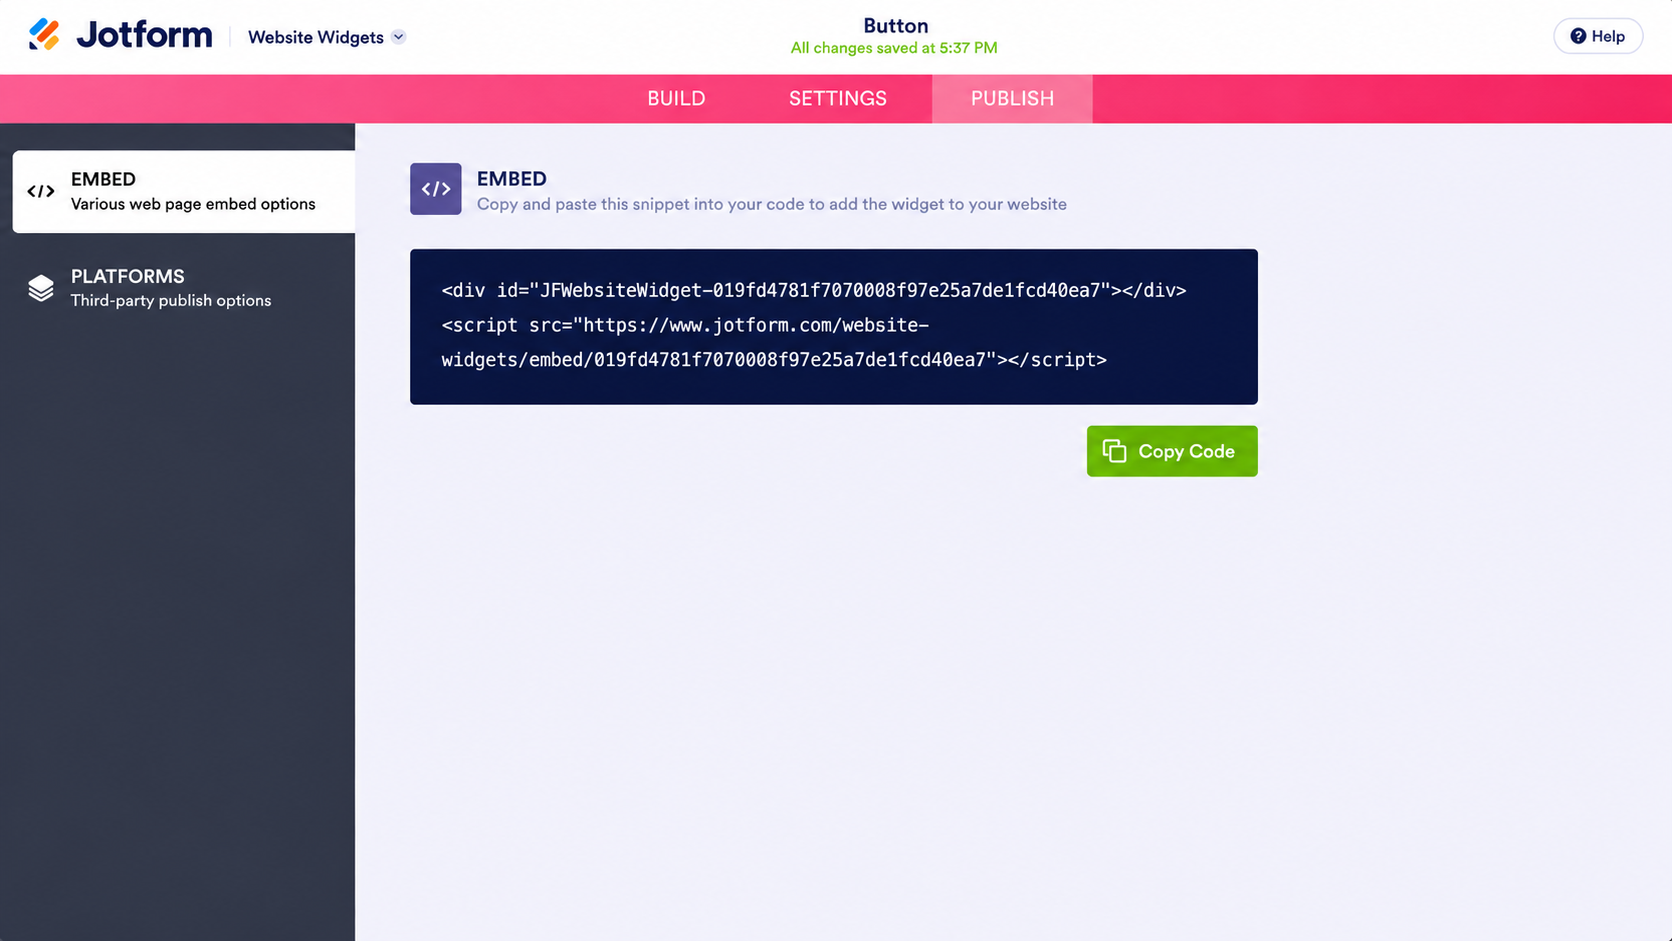
You can also click Platforms and select Shopify for platform-specific embedding instructions.
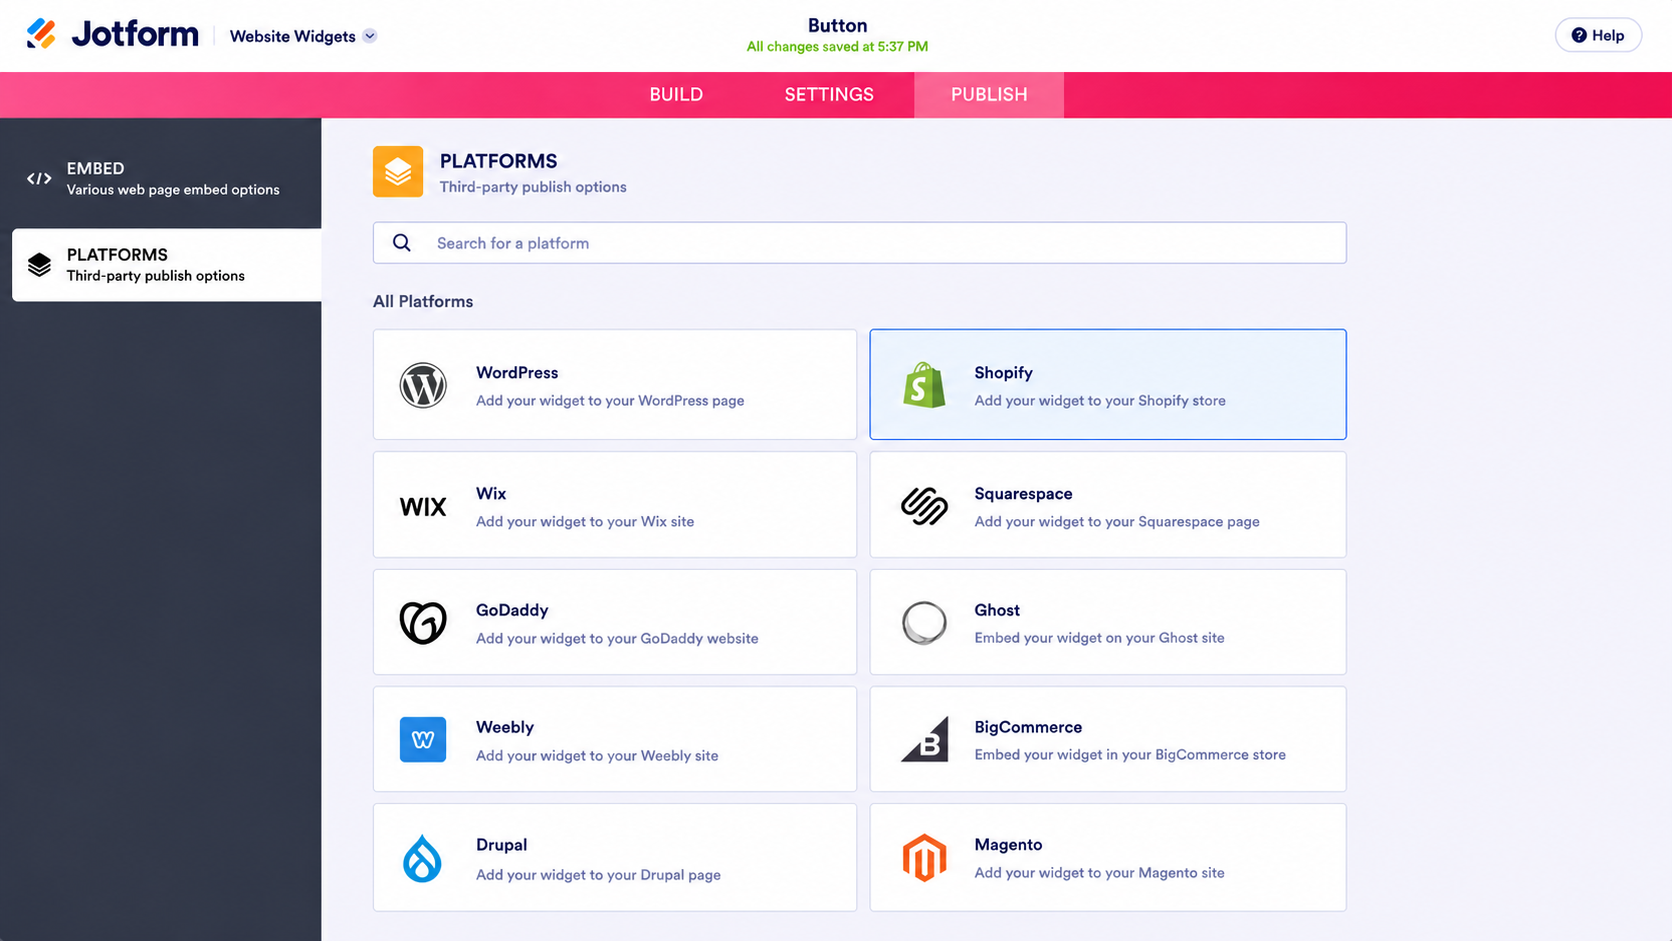
- To embed your custom button in Shopify, open your theme editor, select your page template, click Add section or Add block, choose Custom Liquid, paste your embed code, and click Save in the top-right corner.
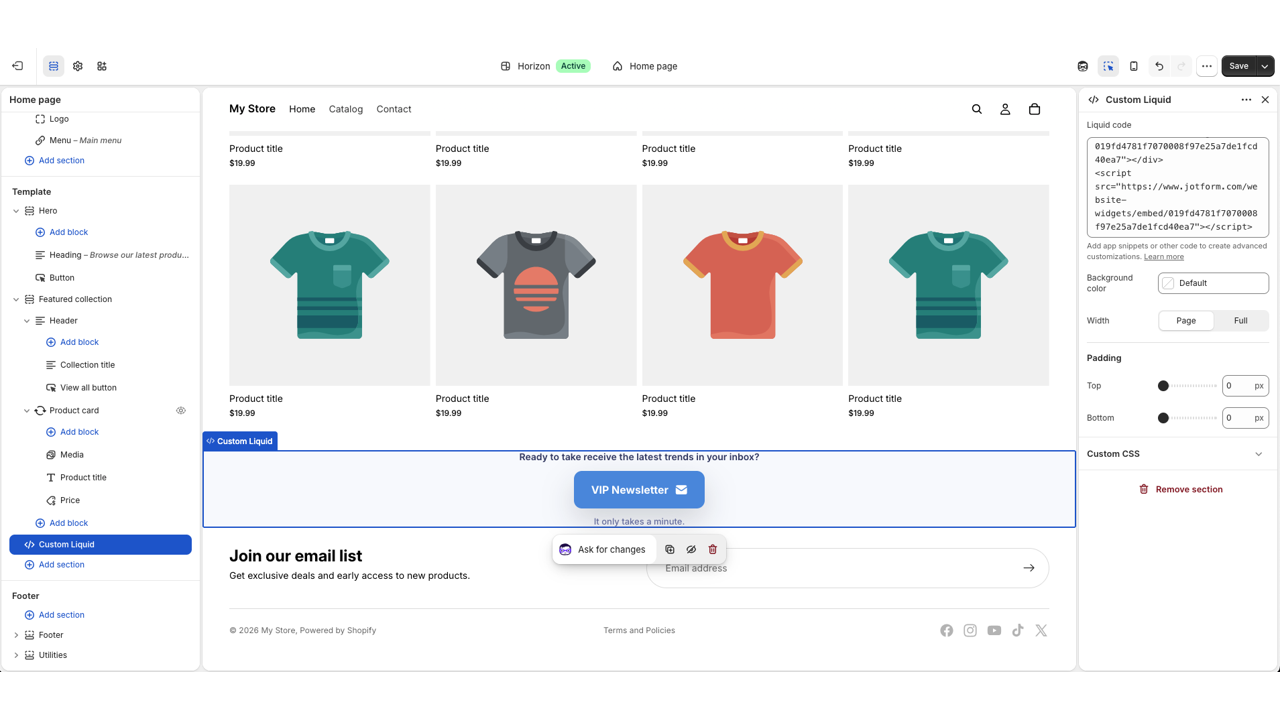
With this option, because you style the button in Jotform rather than directly in your website theme, your changes stay separate from your global theme settings. Testing a different color or label means editing the widget instead of editing theme code again. For the full setup, see how to add a button to a website.
Supercharge your Shopify store with smart, serverless widgets
A button is one of several features you can add to your site without hiring a developer or paying for another monthly app. For a Shopify call-to-action alternative, Jotform’s free website widgets directory has more than 150 options, including several aimed at the same storefront gaps as the button.
For example, an Announcement Bar widget puts your free shipping threshold or sale dates at the top of every page, where shoppers see it before they check out. A Buy Button widget sends shoppers straight to a product, cart, or checkout URL with a purchase CTA, which suits a campaign landing page or a post-purchase upsell. And the e-commerce category has product cards and pricing tables. There’s also a Jotform-Shopify integration that allows you to collect customer information alongside your store.
Each widget embeds the same way as the button, so you aren’t paying for another app subscription every time you want to add a simple feature.
As an e-commerce brand, your time and budget should be spent on things like sourcing products and improving your ad funnels, not writing Custom Liquid so that one button looks different from the rest. Jotform’s Button widget gives you a CTA you can restyle in a minute without touching your theme. Give it a try for free today.
This article is for Shopify store owners, dropshippers, and e-commerce managers who want to add highly customized, conversion-optimized call-to-action buttons without being restricted by theme settings or writing custom Liquid code.














































Send Comment: