
Whether you’re in real estate, healthcare, catering, or other service field, you probably require customer signatures on a regular basis. Documents like consent forms, business contracts, and non-disclosure agreements help provide protection for business owners and consumers alike — but they usually require a signature before they can be processed.
Fortunately, gone are the days of chasing people down for a physical signature. Now you can send a document digitally and receive an e-signature in minutes. And if you’re not sure how to add a signature option to a form, we’re here to help. Here’s how to add a signature in Microsoft Forms, one of the most popular online form creators.

Migrate existing forms instantly
There’s no need to rebuild your online forms from scratch. Instead, migrate existing forms and submission data into your Jotform account in one click — so you can collect data without skipping a beat.
Your form can not be migrated.
Please ensure that your form URL is correct and that your form is set to “public” before attempting to migrate it again.
How to add a signature in Microsoft Forms
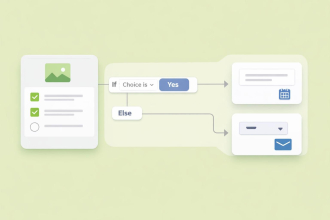
To request a signature on a Microsoft form, your best bet is to use Microsoft Power Automate to generate an approval workflow requesting sign off on the entire form. To ensure the signature is secure, you’ll need to connect your workflow to one of the document-signing integrations available through Power Automate, like Docusign or Adobe Sign. (Keep in mind you’ll need licensing for whichever product you choose to use.)
The good news is that most of the connectors Power Automate offers have different approval templates you can work from, so you won’t necessarily have to build your approval workflow from scratch. With this Adobe Sign workflow template, for example, you can send your Microsoft Forms through approval and signing processes in one workflow.
Check it out…
Learn how to add signatures to your forms so you can better serve clients with Jotform Sign.
How to add a signature field easily with Jotform Sign
When you’re working out how to add a signature in Microsoft Forms, it’s a bit complicated. The process requires multiple steps.
With the free e-signature software Jotform Sign from online form builder Jotform, adding a signature field to a form is easy, quick, and completely code-free.
Here’s how to do it in just a few simple steps:
- In your Jotform account, navigate to the Create Signable Document page and either upload the document you want signed or choose to customize an existing template.
- Click the Add Field button located on the left side of the screen to add and customize fields for signatures, names, dates, initials, and more.
- To collect signatures, click the Send button to email your document to specific contacts or get a shareable link.
Send my document for signature
File type is not allowed.
Maximum file size limit exceeded. (5MB)
Something went wrong.
Jotform also offers a variety of e-signature widgets you can add to any form, too, including the ability to collect e-signatures with Adobe Sign or Docusign. To access those integrations, click the Add Form Element button, then Widgets, and type the one you’d like to use in the search bar.
E-signature tools make it easy and convenient for both your organization and your customers to sign important, time-sensitive documents with just a few clicks. Now that you know how to add a signature in Microsoft Forms and Jotform, you can serve clients and customers quicker and more efficiently than ever before.

AS ALWAYS, CONSULT AN ATTORNEY BEFORE RELYING ON ANY INFORMATION ON THIS PAGE. THE CONTENT ABOVE IS FOR INFORMATIONAL PURPOSES ONLY. JOTFORM IS NOT PROVIDING LEGAL, FINANCIAL OR OTHER ADVICE.
Photo by RDNE Stock project
For your information
This article was written by a real person. No part of the content was generated using AI.


Send Comment: