
Adding a cover page to Microsoft Forms
- Create your Microsoft Form
- Click on Style
- Select one of the suggested styles and cover page designs
- Fill in the heading and description
Your online forms are a reflection of your brand, and a form cover page is what makes the first impression. For Microsoft users, adding a customized cover page to their Microsoft Forms used to be a pipe dream. But with a recent update, Microsoft added the ability to add a cover page that reflects your brand identity, communicates your purpose, and engages your audience.
Adding a cover page to Microsoft Forms is simple, but your options are limited. Read on to learn how to add a cover page to Microsoft Forms (and how a powerful alternative offers the full customization capabilities that Microsoft doesn’t).

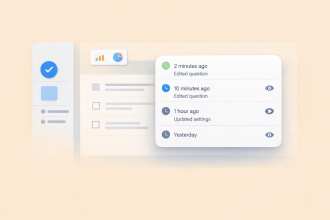
Migrate existing forms instantly
There’s no need to rebuild your online forms from scratch. Instead, migrate existing forms and submission data into your Jotform account in one click — so you can collect data without skipping a beat.
Your form can not be migrated.
Please ensure that your form URL is correct and that your form is set to “public” before attempting to migrate it again.
How to add a cover page to Microsoft Forms
With a recent update, Microsoft Forms has empowered their users to add a new level of customization to their forms in just a few clicks. Here’s how to add a cover page to Microsoft Forms:
- Create your Microsoft Form.
- Click on Style in the top right corner.
- Select one of the suggested styles and cover page designs. If you don’t see a style that fits, click the + icon to select a customized theme. Upload an image from your computer or search for one on Bing.
- Fill in the heading and description for your cover page.
On the plus side, this process is simple and straightforward. The downside, however, is that the customization options in Microsoft Forms are relatively limited in terms of imagery and style. It may be worth considering an alternative form builder that better suits your customization needs.
How to personalize a cover page with Jotform
Jotform offers a more comprehensive cover page creation experience, and it delivers more design options than you’ll find in Microsoft Forms. By creating forms in Jotform, you can add unique images to your cover page directly from your computer. You can even use online images without downloading or converting the image files; simply copy and paste the image URL.
Once you’ve added an image, adjust the width and height to fit your vision, align it with headings and subheadings, and customize the overall form design to match. Jotform’s Form Builder lets you create forms that show off your brand’s personality through a full array of customization options.
With a focus on getting the most out of your forms, Jotform offers a number of other benefits, including
- More than 10,000 customizable form templates
- Data collection and organization with Jotform Tables
- 100-plus integrations with popular third-party apps like cloud storage and customer relationship management (CRM) programs
- E-signature forms through Jotform Sign
Jotform is a powerful alternative to Microsoft Forms, as it’s designed to make the form creation process easier. Adding a completely customizable cover page is possible on any Jotform — all it takes is a few quick steps.
How to add a cover page in Jotform
You can create a customized cover page with Jotform using two simple approaches. The key difference between these two methods is the layout of the form itself. Jotform has two main form layouts to choose from:
- Card layout provides a form that displays only one question at a time. It’s best suited for short forms.
- Classic layout gives you a traditional form that will be more familiar to most users and is closer to the Microsoft Forms layout. This form is designed as a scrolling page with multiple questions.
Each layout has its own benefits, so you can judge which fits your needs best. For example, card forms are easier to design, but they aren’t as customizable as forms in the classic layout.
Once you’ve chosen the layout that’s right for you, it’s time to personalize your cover page.
Card layout
With its modern design, the card layout allows you to add a welcome page to the beginning of your form. Follow these easy steps to add a welcome page to your form:
- Click Create in the Workspace section, the select Form.
- Select a way to create your form. You can select either Start From Scratch, Use Template, Import Form, or Create Signable Document, depending on your needs.
- Choose Card Form as your Form Layout.
- In the Form Builder, click Edit Welcome Page at the top of your form.
- Click on the heading text, image, and subheading to edit them to fit your needs.
- To change the image, upload an image of your choice or choose a premade icon.
- Adjust your theme by clicking the Form Designer paint roller icon on the right.
From there, simply add your questions and get your form ready to send. If you want to use the same welcome page for another form, select the form from the list in Workspace and click More, then Clone. Then customize the cloned form as needed.
Classic layout
Although there isn’t a specific cover page page section available in the classic layout, that doesn’t mean it’s not possible to add one. To add a cover page to a classic layout form, you just need to create your own in a new section using a handy workaround. Here’s how to add a cover page to your classic Jotform form:
- Click Create Form in the Workspace section.
- Select a way to create your form. You can either select Start From Scratch, Use Template, Import Form, or Create Signable Document, depending on your needs.
- Choose Classic Form as your Form Layout.
- On the left side of the Form Builder, click the Add Form Element (+) button.
- Scroll to the bottom of the Basic Form Elements and add a Page Break to your form.
- In your first section, add elements for Image, Heading, Short Text, Long Text, or Paragraph to customize your cover page however you’d like.
- Adjust your theme using the Form Designer on the right to fit your needs.
You can also share your form as a template so your team can skip the cover page creation process and get right to customizing their forms. Select the form from the list in Workspace and click More, then Share as template.
Cover pages help your organization succinctly communicate a form’s purpose and engage respondents. That makes a well-made cover page especially valuable in gathering responses — and that’s why the right form-building platform can make all the difference in the quality of your forms and form responses.


Send Comment: