
Creating a Microsoft Form
- Sign into Microsoft Forms
- Click + New Form.
- Add a title for your form of up to 90 characters.
- Click + Add New to add a question to the form.
- Select the type of question you want to use.
- Choose a Theme
- Click Share to share your form through a link or QR code or by email.
Microsoft Forms is an excellent choice for creating online forms, quizzes, surveys, and polls to gather data to make better decisions.
Victoria Blasich, project manager with Freemind Seattle, a Microsoft-approved vendor, notes there are endless applications for Microsoft Forms, from collecting office supply requests to gathering feedback from trade shows. Microsoft Forms is also helpful for personal use, such as collecting stories and images from family members for an annual holiday newsletter.
Whether you need forms for business, educational, or personal use, you can follow the same steps to set one up. Using Microsoft Forms is easy, even if you have no prior experience building forms online.

Migrate existing forms instantly
There’s no need to rebuild your online forms from scratch. Instead, migrate existing forms and submission data into your Jotform account in one click — so you can collect data without skipping a beat.
Your form can not be migrated.
Please ensure that your form URL is correct and that your form is set to “public” before attempting to migrate it again.
How to create a Microsoft form
Here are the step-by-step instructions to create a form.
1. Sign into Microsoft Forms using your Microsoft 365 school or work credentials. You can also sign in with your Hotmail, Outlook, or Live account credentials.
2. Click + New Form.
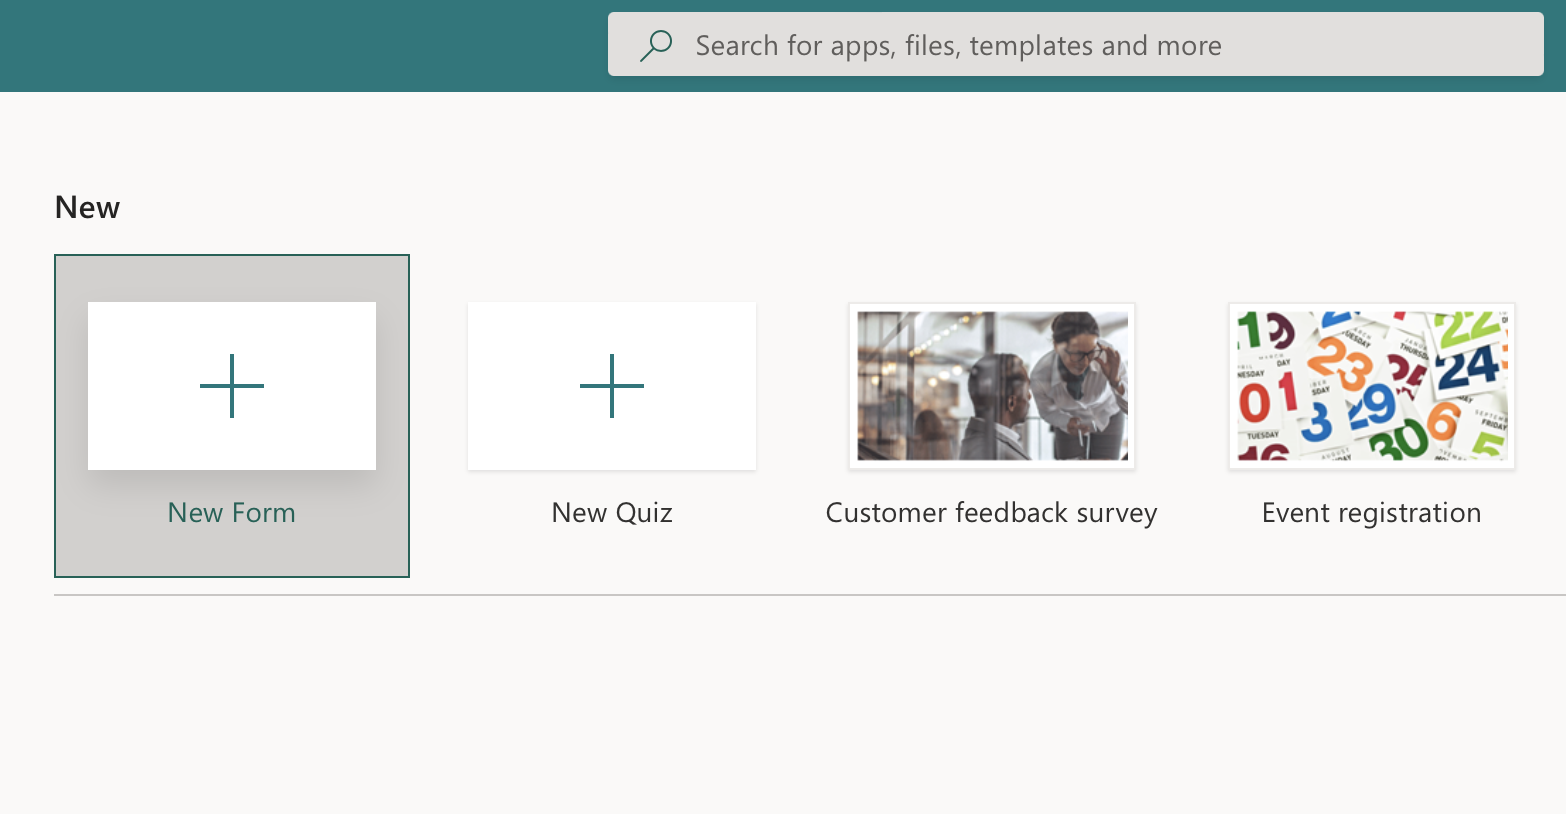
3. Add a title for your form of up to 90 characters. You also have the option to add a description to your form of up to 1,000 characters.
4. Click + Add New to add a question to the form.
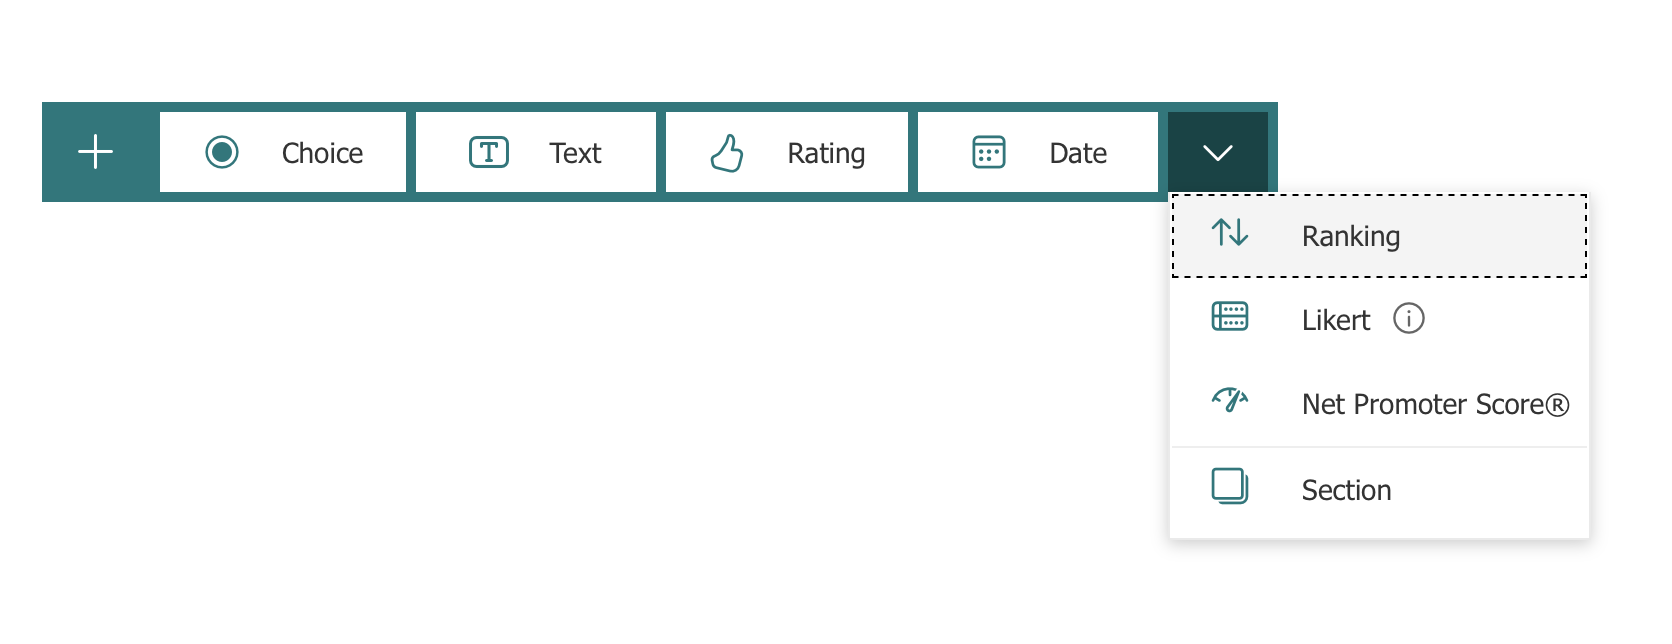
5. Select the type of question you want to use. Options include Choice, Text, Rating, or Date. You can also see additional question types by clicking the down arrow. Add your questions.
6. Click on Theme in the upper right and scroll down to select one that works for your needs.
7. Once your form is complete, click Share to share your form through a link or QR code or by email.
Tips for making the most of Microsoft Forms
When you create a Microsoft form, keep these helpful tips in mind to enhance your results and make the process easier.
- Sections: If your form has a lot of questions, you may want to organize them into sections to improve the user experience. Click Section to add a new section to the form. Organizing questions this way makes it easier for both the respondent and the form creator.
- Text formatting: You can emphasize certain words or phrases in the questions by bolding, italicizing, or underlining the text using keyboard shortcuts. Microsoft Forms also lets you change font color and size. See our guide on how to change fonts in Microsoft Forms.
- Customization: Your forms shouldn’t all look the same. Have fun with your form, says Blasich: “You can customize a form with color, images, a thank-you message, and more.” Figure out what is most appropriate for the purpose of the form.
- Deletion: Keep in mind that if you delete a question, it will be removed permanently, along with any responses that have been previously collected for that question. Be careful when using this function.
- Preview: “Utilize the preview function often — especially if you have long blocks of text or images,” suggests Blasich. Once it’s complete, you can preview what it will look like on a mobile device or desktop using the Preview button.
- Editing: If you want to edit your form after previewing it, click Back to return to editing mode.
- Clarity: When writing your questions, ensure that they are in plain language and easy to understand. If the questions are unclear, you may not get quality responses.
- Targeting: Always consider your target audience and their current knowledge when determining what questions you will ask them. Questions should be relevant to your audience if you want their responses to be helpful.
- Operational settings: “Play with the settings such as start time, end time, and whether you get a notice every time someone submits a response,” says Blasich.
For more information, see our guide: Microsoft Forms tips.
Now that you know how to create a Microsoft form, it’s time to get started. You’ll be on your way to gathering valuable data to make better decisions in no time.


Send Comment: