
10 invaluable Microsoft Forms tips
- Share forms by embedding them directly into a webpage
- Share forms using a QR code
- Set up form submission email notifications
- Make surveys easier to fill out with conditional logic
- Customize the form’s style to make it distinctive
- End the form submission period automatically
- Set time limits for form completion
- Show users immediate results
- Make a copy of an existing form
- Export form responses to Microsoft Excel
Microsoft Forms is an excellent option for creating forms, surveys, and polls. It’s easy to learn and highly intuitive to use, so you never feel like you’re lost in the software. But if you’re a new user — or have limited experience with the tool — you might be missing out on some features that could help you accomplish your goals faster and easier.
In this article, we’ve rounded up 10 Microsoft Forms tips and tricks to show you how to get the most out of this form builder.

Migrate existing forms instantly
There’s no need to rebuild your online forms from scratch. Instead, migrate existing forms and submission data into your Jotform account in one click — so you can collect data without skipping a beat.
Your form can not be migrated.
Please ensure that your form URL is correct and that your form is set to “public” before attempting to migrate it again.
10 invaluable Microsoft Forms tips
1. Share forms by embedding them directly into a webpage
Many Microsoft Forms users share their forms via email. However, if you want to make the form or survey available to a large group of people, consider embedding it into your website or intranet. (To ensure only the right people fill out the form, check the survey distribution settings and adjust them to fit your needs.)
Here’s how to embed Microsoft Forms into a website or intranet:
- In the survey you want to embed, click the Collect responses button.
- Click on the </> icon to select Embed.
- Click Copy to copy the embed code.
- Paste the code intoyour website where you want the form to appear. Note that you may need to update the source code on the web page to properly render the form on the site.
2. Share forms using a QR code
QR codes make it easy for anyone with a smartphone to access your form, and they’ve become common in many industries, especially healthcare, retail, and hospitality. Microsoft Forms makes it easy to create a QR code that will take users to a specific form.
Here’s how to create a QR code in Microsoft Forms:
- Open the relevant form.
- Click Collect responses.
- Select the QR code icon (three squares).
- Select Download.
- Savethe QR code to your device. You can now add the QR code to printed or digital materials.
Pro Tip
Check out How to create a QR code for Microsoft Forms to learn more about the QR code features offered by Microsoft Forms.
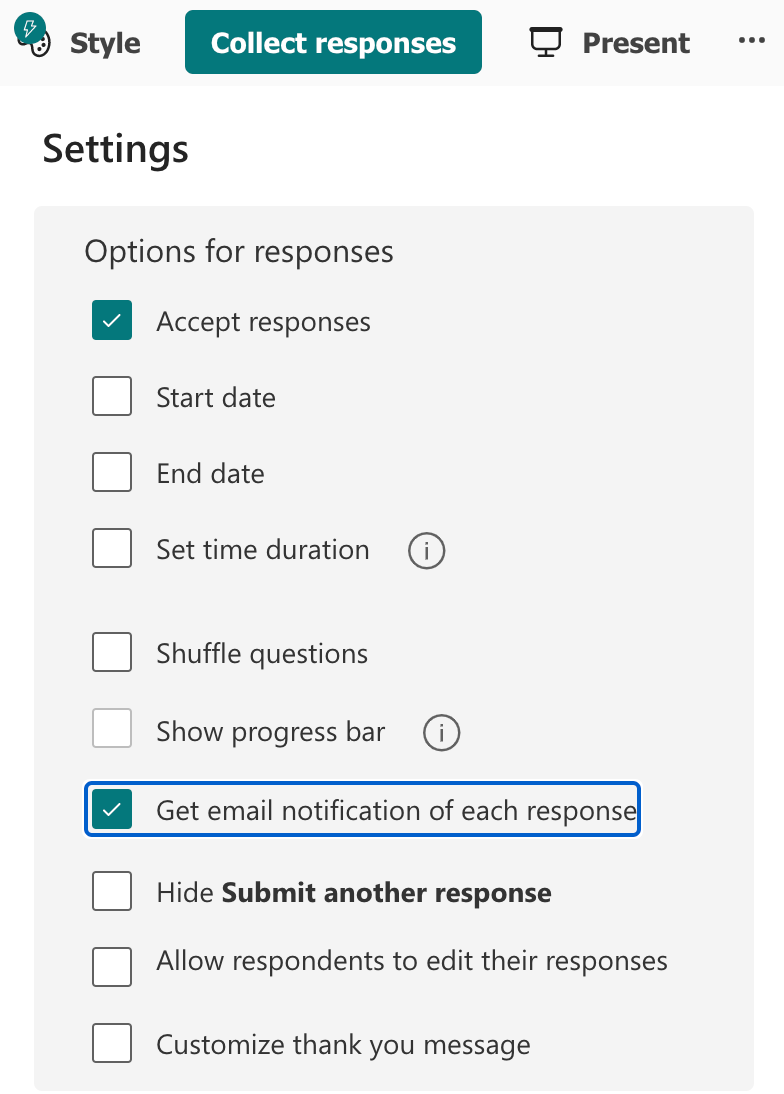
3. Set up form submission email notifications
You can stay on top of your form submissions by getting email alerts every time someone fills out a form. Follow these instructions to set up Microsoft Forms email notification:
- Open the relevant form.
- Click the ellipsis button on the upper-right corner of the form builder.
- Click Settings.
- Select Get email notification of each response.
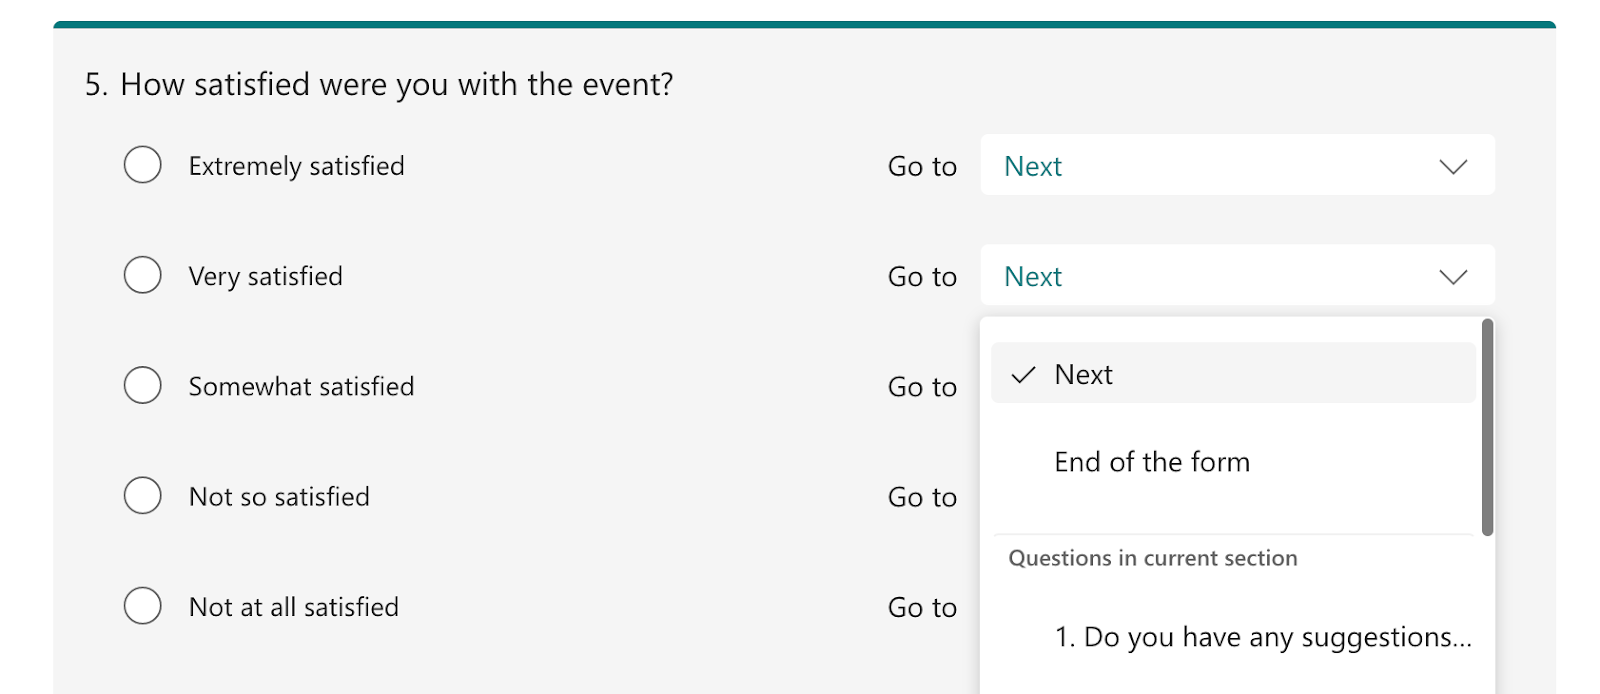
4. Make surveys easier to fill out with conditional logic
To avoid making respondents answer more questions than necessary, use conditional logic (also known as branching logic) to construct your forms. This ensures that respondents are only asked questions that are relevant to them, according to their answers to previous questions.
Once you’ve added all the questions to your form, you can apply conditional or branching logic. Here’s how to do it:
- For the question you want to add branching logic to, click on the ellipsis or More options for this question.
- Select Add branching.
- This will open the Branching options page. From here you can configure the conditional logic that’s right for your form.
5. Customize the form’s style to make it distinctive
No one wants their forms, surveys, quizzes, and polls to look the same as everyone else’s. Luckily, Microsoft Forms allows you to customize its themes — so you can get a look and feel that matches your brand or organization.
Here’s how to customize a style in Microsoft Forms:
- Open the relevant form.
- Click on Style.
- Select the style you want to use.
- Click the plus sign (+) to create a Customized Theme.
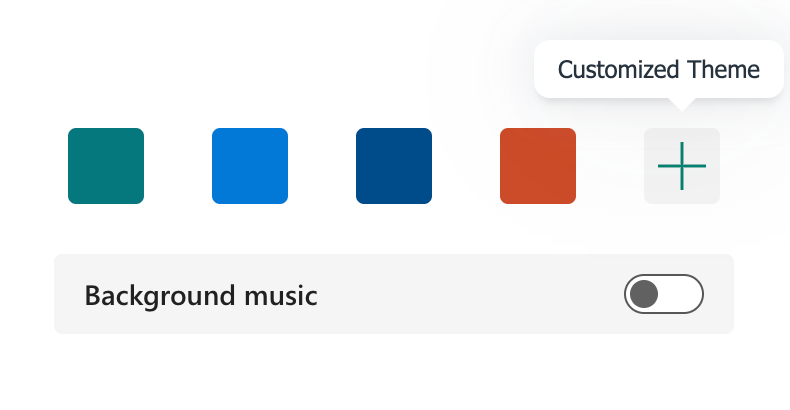
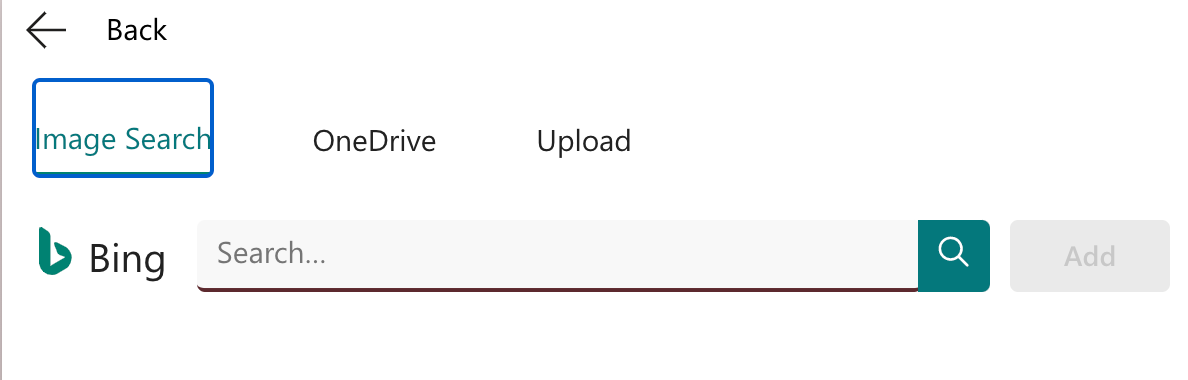
5. You can now change the theme’s background image, colors, and other details. If you don’t have a specific background image you’d like to use, you can search for one directly on Bing through Microsoft Forms.
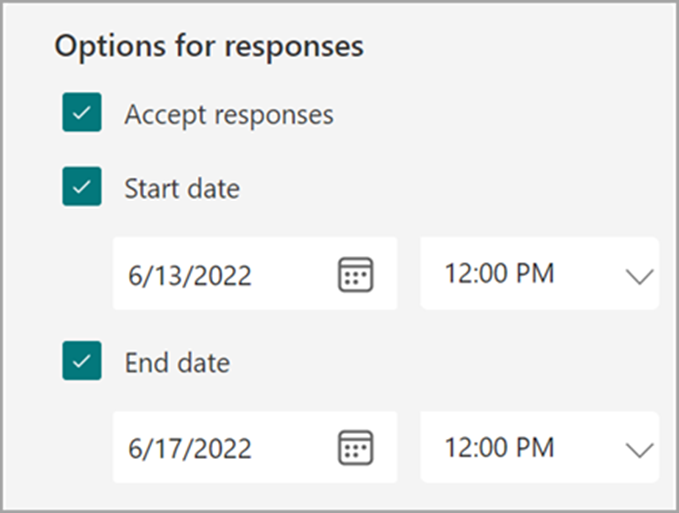
6. End the form submission period automatically
Sometimes a form, quiz, survey, or poll is time-sensitive. For example, in a school setting, students may need to take a quiz within a set amount of time.
Here’s how to set a submissions deadline in Microsoft Forms.
- Open the relevant form.
- Click on theellipses or More form settings.
- Select Settings.
- Select Start date and End date and fill in the respective dates. You can also specify the times.
7. Set time limits for form completion
If it’s important for the users to see the time they have remaining to complete the form while they have it open, you can display a timer bar for them.
Here’s how to add this in Microsoft Forms:
- Open the form for which you want to display a timer bar.
- Click on theellipses or More form settings.
- Select Time duration.
- Set the durationthe user has to complete the form. This will display the timer bar when they have the form open.
8. Show users immediate results
In some cases, such as when you’re administering a test or quiz, you may want to show the user their results right away. Microsoft Forms can automatically mark the test or quiz, which will save you time and show the user their results as soon as they complete it. Note that you’ll need to select New Quiz (not New Form) to see this feature.
Here’s how to change the settings in Microsoft Forms to show quiz or test results:
- Open the form for which you want to show results.
- Click on the ellipses or More form settings.
- Click Settings.
- Toggle the bar for Show results automatically to the on position.
Pro Tip
Combine instant results with wider reach by allowing anyone with the link to respond to your Microsoft Form—here’s how to make Microsoft Forms public.
9. Make a copy of an existing form
If you need to reuse a form you’ve already made but want to change some elements, make a copy of the original form and edit the copy instead of editing the original form. This way, you can still have the original version available if you need it later on.
Here’s how to make a copy of an existing form in Microsoft Forms:
- Sign into Microsoft Forms.
- Click My Forms.
- Find the form you want to copy.
- Click on the ellipsis or More Options button for the form.
- Click Copy. A duplicate of the form will appear.
Pro Tip
You’ll also want to know how to rename a form in Microsoft Forms so the copy doesn’t get confused with the original.
10. Export form responses to Microsoft Excel
Microsoft Forms integrates seamlessly with Microsoft Excel, so it’s easy to export your answers to the spreadsheet software. This makes it possible to analyze the raw data and garner insights.
Here’s how to export form responses from Microsoft Forms to Microsoft Excel:
- Open the form for which you want to export responses.
- Click on the Responses tab.
- Select Open in Excel.
Jotform: A free Microsoft Forms alternative
While Microsoft Forms is a great option for creating forms, surveys, and polls, it’s certainly not the only solution on the market. If you’re looking for a free Microsoft Forms alternative, look no further than Jotform. It’s an easy-to-use tool that helps you create forms, surveys, polls, and a whole lot more.
Unlike Microsoft Forms, Jotform comes with tens of thousands of templates you can use to build any kind of online form, survey, or poll. Each template is fully customizable using the drag-and-drop editor, so you can create something that fits your exact requirements. Plus, Jotform has many of the same features of Microsoft Forms, such as conditional logic, custom themes, QR codes, email notifications, and more.
You can also analyze your results in Jotform Tables, which is ideal for collecting, organizing, and managing data. Plus, Jotform Report Builder allows you to build attractive reports to help you analyze your results.
The Microsoft Forms tips and tricks in this article will help you maximize your use of the software, but if you want advanced functionality for free, give Jotform a try.
Photo by Alexa Williams on Unsplash


Send Comment: