
Making Microsoft Forms publicly accessible
- Sign in to Microsoft Forms
- Open the form that you want to make public
- Click on Collect Responses
- Locate the Send and Collect Responses pane
- Choose the external users you would like to share the form
Forms and questionnaires can give you valuable data, so you want to be sure that enough people fill them out to make that data statistically significant. Microsoft Forms makes your forms publicly accessible as a default, so you can collect more responses from a broader base.
If you have an Office 365 Education or a Microsoft 365 Apps for business plan, you can decide who’s able to access and respond to your forms. You can create a form that’s geared toward a specific audience, like a certain team within your business. This will ensure that you receive only the responses from your desired audience so your form response data remains accurate and relevant.
But if you want to reach a broader audience and make the form publicly accessible so anyone can respond, it’s easy to do in Microsoft Forms. Here’s how you do it:
- Sign in to Microsoft Forms.
- Open the form that you want to make public or create a new form.
- Click on Collect Responses (which is located under the Questions tab if you’re on the mobile site).
- Locate the Send and Collect Responses pane.
- Open the dropdown list under Send and Collect Responses and choose the respondents you want to have access and response capabilities.
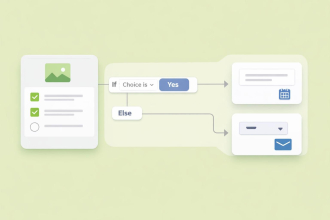
Depending on what plan you have, you might see the option to choose from three response options:
- Anyone can respond: Any form recipient inside or outside your organization can submit a response. This option makes the form public and is the default setting for basic Microsoft plans.
- Only people in my organization can respond: This option allows only people within your organization who have a Microsoft Office work or school account to respond. It limits the audience, but it’s ideal if you’re looking to keep the form within your business or organization.
- Specific people in my organization can respond: You get to pick and choose who can respond within your organization, and you can input their specific email addresses.
If you want to make the form public, then anyone can respond with any email address. The “Only people in my organization can respond” and “Specific people in my organization can respond” options will require you to have Office 365 Education or Microsoft 365 Apps for business.

Migrate existing forms instantly
There’s no need to rebuild your online forms from scratch. Instead, migrate existing forms and submission data into your Jotform account in one click — so you can collect data without skipping a beat.
Your form can not be migrated.
Please ensure that your form URL is correct and that your form is set to “public” before attempting to migrate it again.
How to share your Microsoft Form
Once you’ve decided who will be able to respond to your form, you’ll need to decide how you’ll share that form and collect responses. You can share Microsoft Forms with a link or QR code, embed the form in a webpage, or send the form via email.
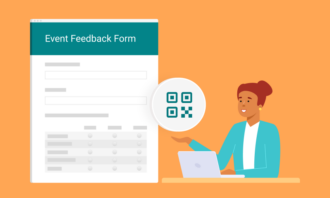
Use a link or QR code
If you use a link or QR code to share your form, you can insert the link or QR code file into an email, a website, or even on a sign or document that your audience will see.
To share the form via a link, click on Collect responses, then click the Link icon. A text box will display a web address that’s unique to your form. Copy that address to use it on your website, in an email, or other location.
To use a QR code to share the form, click on the QR code icon, then click the Download button. A PNG file of your QR code will download to your device, and you can insert that code in a document or other material. Your audience can scan the QR code on a mobile device to quickly and easily access your form.
Embed your form
To embed your form in a website, click the Embed icon. A text box will display a code that’s unique to your form. Copy that code and then paste it into a webpage to embed the form directly in the site.
When you embed a form, your audience can access and complete the form directly on your website. They won’t be redirected to another site, which can increase the chances that your audience takes the time to complete the form.
Send your form via email
To share your form via email, click on the Email icon. That button will prompt your email application to open. From there, you can add the email addresses of those you want to receive the form, or you can decide to send the form to entire groups in your email contacts. You can add a customized email message to introduce the form, and your audience will receive a link to the form directly in their inboxes.
Using email to share your form ensures that your target audience receives it. You don’t have to worry about reaching them through other outlets, like your website or social media pages.
Manage access options easily with Jotform
While it’s easy to change the access settings for your Microsoft Forms, you’ll need an Office 365 Education or Microsoft 365 Apps for business to use all of those options. With Jotform, you can enjoy three access settings without the need for an expensive subscription.
Jotform’s forms are set to public access by default. However, you can also make your form private and give access only to specific recipients. You can even provide access only to members of your company.
Using these different access options can help ensure that your form results contain the relevant data that you’re looking for. Making forms public will help you get the greatest variety of responses, and it’s an ideal option for many situations where you’re looking for a broader audience.


Send Comment: