
Making survey sections with Microsoft Forms
- Open the specific form
- Click the dropdown arrow
- Select Section
- Insert a section title and description
Online forms — like employee onboarding forms and customer feedback surveys — are invaluable tools for business owners. They’re affordable, convenient, and user-friendly, and they can help you better understand and engage with your employees, existing clients, and other target audiences with just a few, straightforward questions.
But even the most well-intentioned forms can fall flat if they’re poorly designed. Here are a few things to keep in mind when you’re creating one:
- Ask questions in a logical order from the respondent’s perspective, not from your perspective as the survey issuer. This will ensure your form is more engaging and less confusing.
- Keep your form short and simple. Not only are long forms tedious to design, but respondents will be less likely to complete them.
- Group related information together to help users better understand the context for each question and make the form easily digestible.
One simple way to improve form readability, organization, and length is to create survey sections. Dividing a long form into short sections that are easy to complete improves the user experience and increases the likelihood that respondents will fill it out completely and accurately.
Here’s how to make survey sections with Microsoft Forms, one of the most popular online form builders on the market.

Migrate existing forms instantly
There’s no need to rebuild your online forms from scratch. Instead, migrate existing forms and submission data into your Jotform account in one click — so you can collect data without skipping a beat.
Your form can not be migrated.
Please ensure that your form URL is correct and that your form is set to “public” before attempting to migrate it again.
How to make survey sections with Microsoft Forms
Learning how to make survey sections with Microsoft Forms is less complicated than you may think. Just follow these steps.
- Navigate to Microsoft Forms, open the specific form or questionnaire in which you’d like to add sections, and click the + Add new button. (If you haven’t created your form yet, check out this helpful resource.)
- Next, click the dropdown arrow in the menu to show more question types.
- Select Section.
- Insert a section title and description — such as “Multiple Choice Questions” or “Education History” — to make it easy for the respondent to understand what the questions in that section are about.
It’s important to note that, with Microsoft Forms, sections are, by default, displayed on separate pages.
And that’s it! In only four steps, you’ve learned how to make survey sections with Microsoft Forms.
Now, if you need to make any changes to sections — like duplicating, removing, or moving a form section in Microsoft Forms — simply click the three horizontal dots in the upper right corner of the section. This More settings for section button allows you to make a copy of the section questions, remove a section header and/or all its associated questions, or rearrange the order of sections.
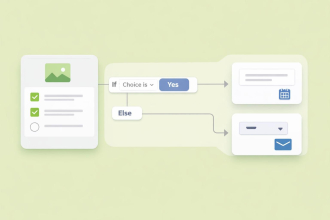
You can also add branching in this More settings for section menu, similar to conditional logic functionality. Branching your sections enables respondents to only see questions that apply to them based on their previous answers.
While Microsoft Forms is easy to use, it’s not the only available online form builder that lets you add sections to your forms.
How to leverage a Microsoft Forms alternative: Jotform
With online form builder Jotform, you can create powerful forms, apps, tables, and PDFs — all from one platform. It’s easy to use, fully customizable, and completely code-free. Users of all programming and design backgrounds can automate workflows, generate data-driven reports, build e-commerce stores, and create engaging, informative quizzes and surveys.
Jotform also enables you to add sections to your forms in not just one, but two ways.
One option is to use page breaks which, like in Microsoft Forms, creates a new page each time you add a section. To add a page break in your Jotform form, simply click the Add New Page Here button at the bottom of your form. You can also expand the Add Form Element panel on the left, then click the Page Break button or drag it to place the break in the desired location in your form.
Alternatively, you can use Jotform’s Form Separators widget, which creates a section in a single page rather than splitting your form into multiple pages. While page breaks can make forms less overwhelming and more digestible, a basic section divider can achieve the same end.
To insert this widget into your quiz or survey, just select Add to Form. Then, click and drag the separator line (which you can also customize, changing the line’s color, thickness, and spacing) to move it around your form.
As you can see, adding sections to your forms isn’t just important, it’s also easy with the right software. So, now that you know how to make survey sections with Microsoft Forms and Jotform, you can build surveys that are easy for respondents to use, read, and, most importantly, complete.
Photo by Mikey Harris on Unsplash


Send Comment: