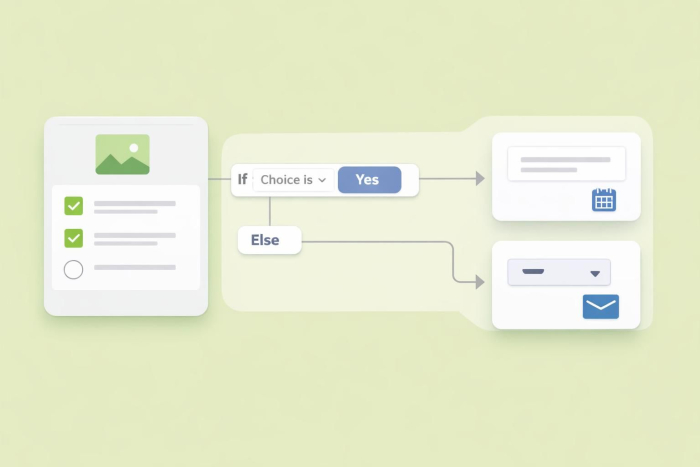
How to add branching logic to Microsoft Forms
- Open branching settings: Go to the question where you want to start the logic, click the More settings (three dots) icon in the bottom-right, and select Add branching.
- Assign logic to answers: For the question you’re editing, click the dropdown menu next to each answer choice.
- Direct the flow: Choose the destination for each response:
- Go to a specific question to skip irrelevant content
- Go to a section to move users into a different category of questions
- Go to the end of the form to allow respondents to submit immediately
- Verify the path: Click Preview at the top of the form designer to test the user experience and confirm that your logic works as intended.
When answering a survey, users don’t want to slog through dozens of questions that aren’t relevant to them or their needs. They want a process that’s quick, efficient, and useful.
Microsoft Forms includes a branching feature that allows you to direct users to specific questions, sections, or the end of a form. This functionality makes your surveys and assessments more user-friendly while eliminating unnecessary questions and improving completion rates.
When you’re learning how to use Microsoft Forms, one of the most important features is branching. Here’s how to use Microsoft Forms to collect data by adding conditional logic to your forms.

1. Open the branching options
First, decide which question you want to add conditional logic to. You can add branching options to any (or every) question in your survey.
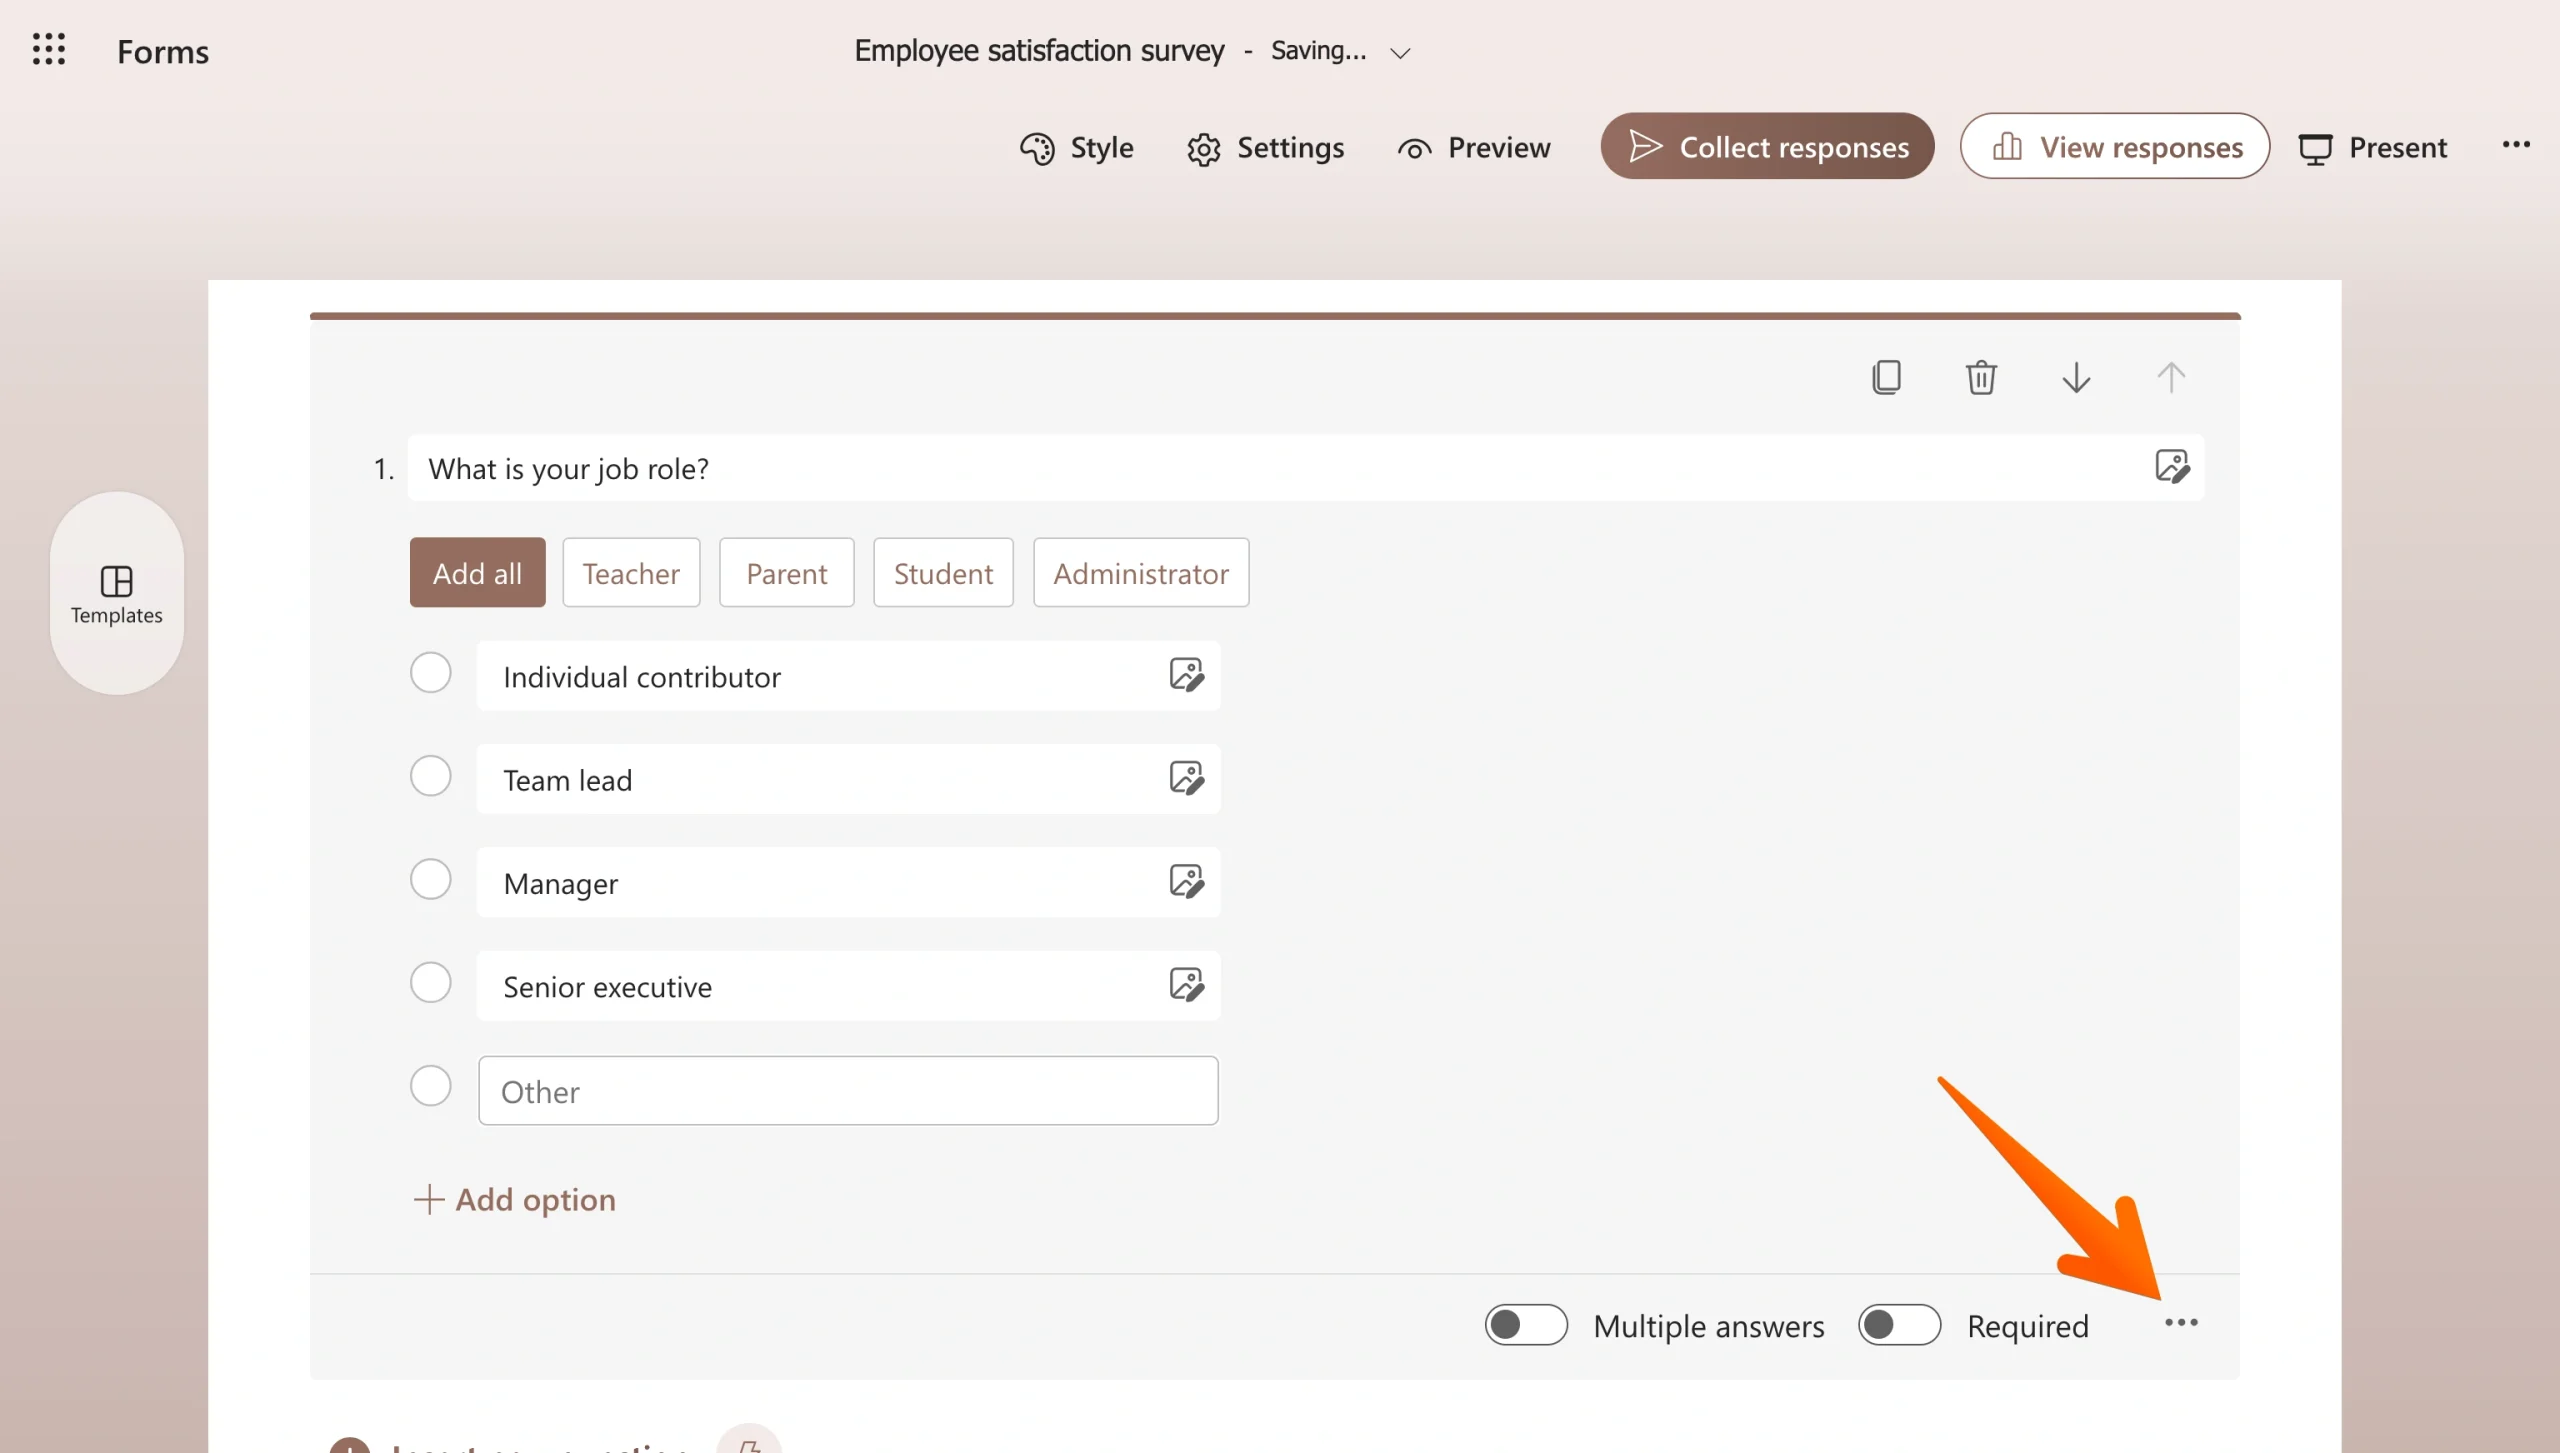
Open your form and click on the question you want to start adjusting. Click the three dots in the lower-right corner of the question card.
Once you click the three dots, a small sub-menu will pop up. Choose the Add branching option so that you can identify what happens after each answer.
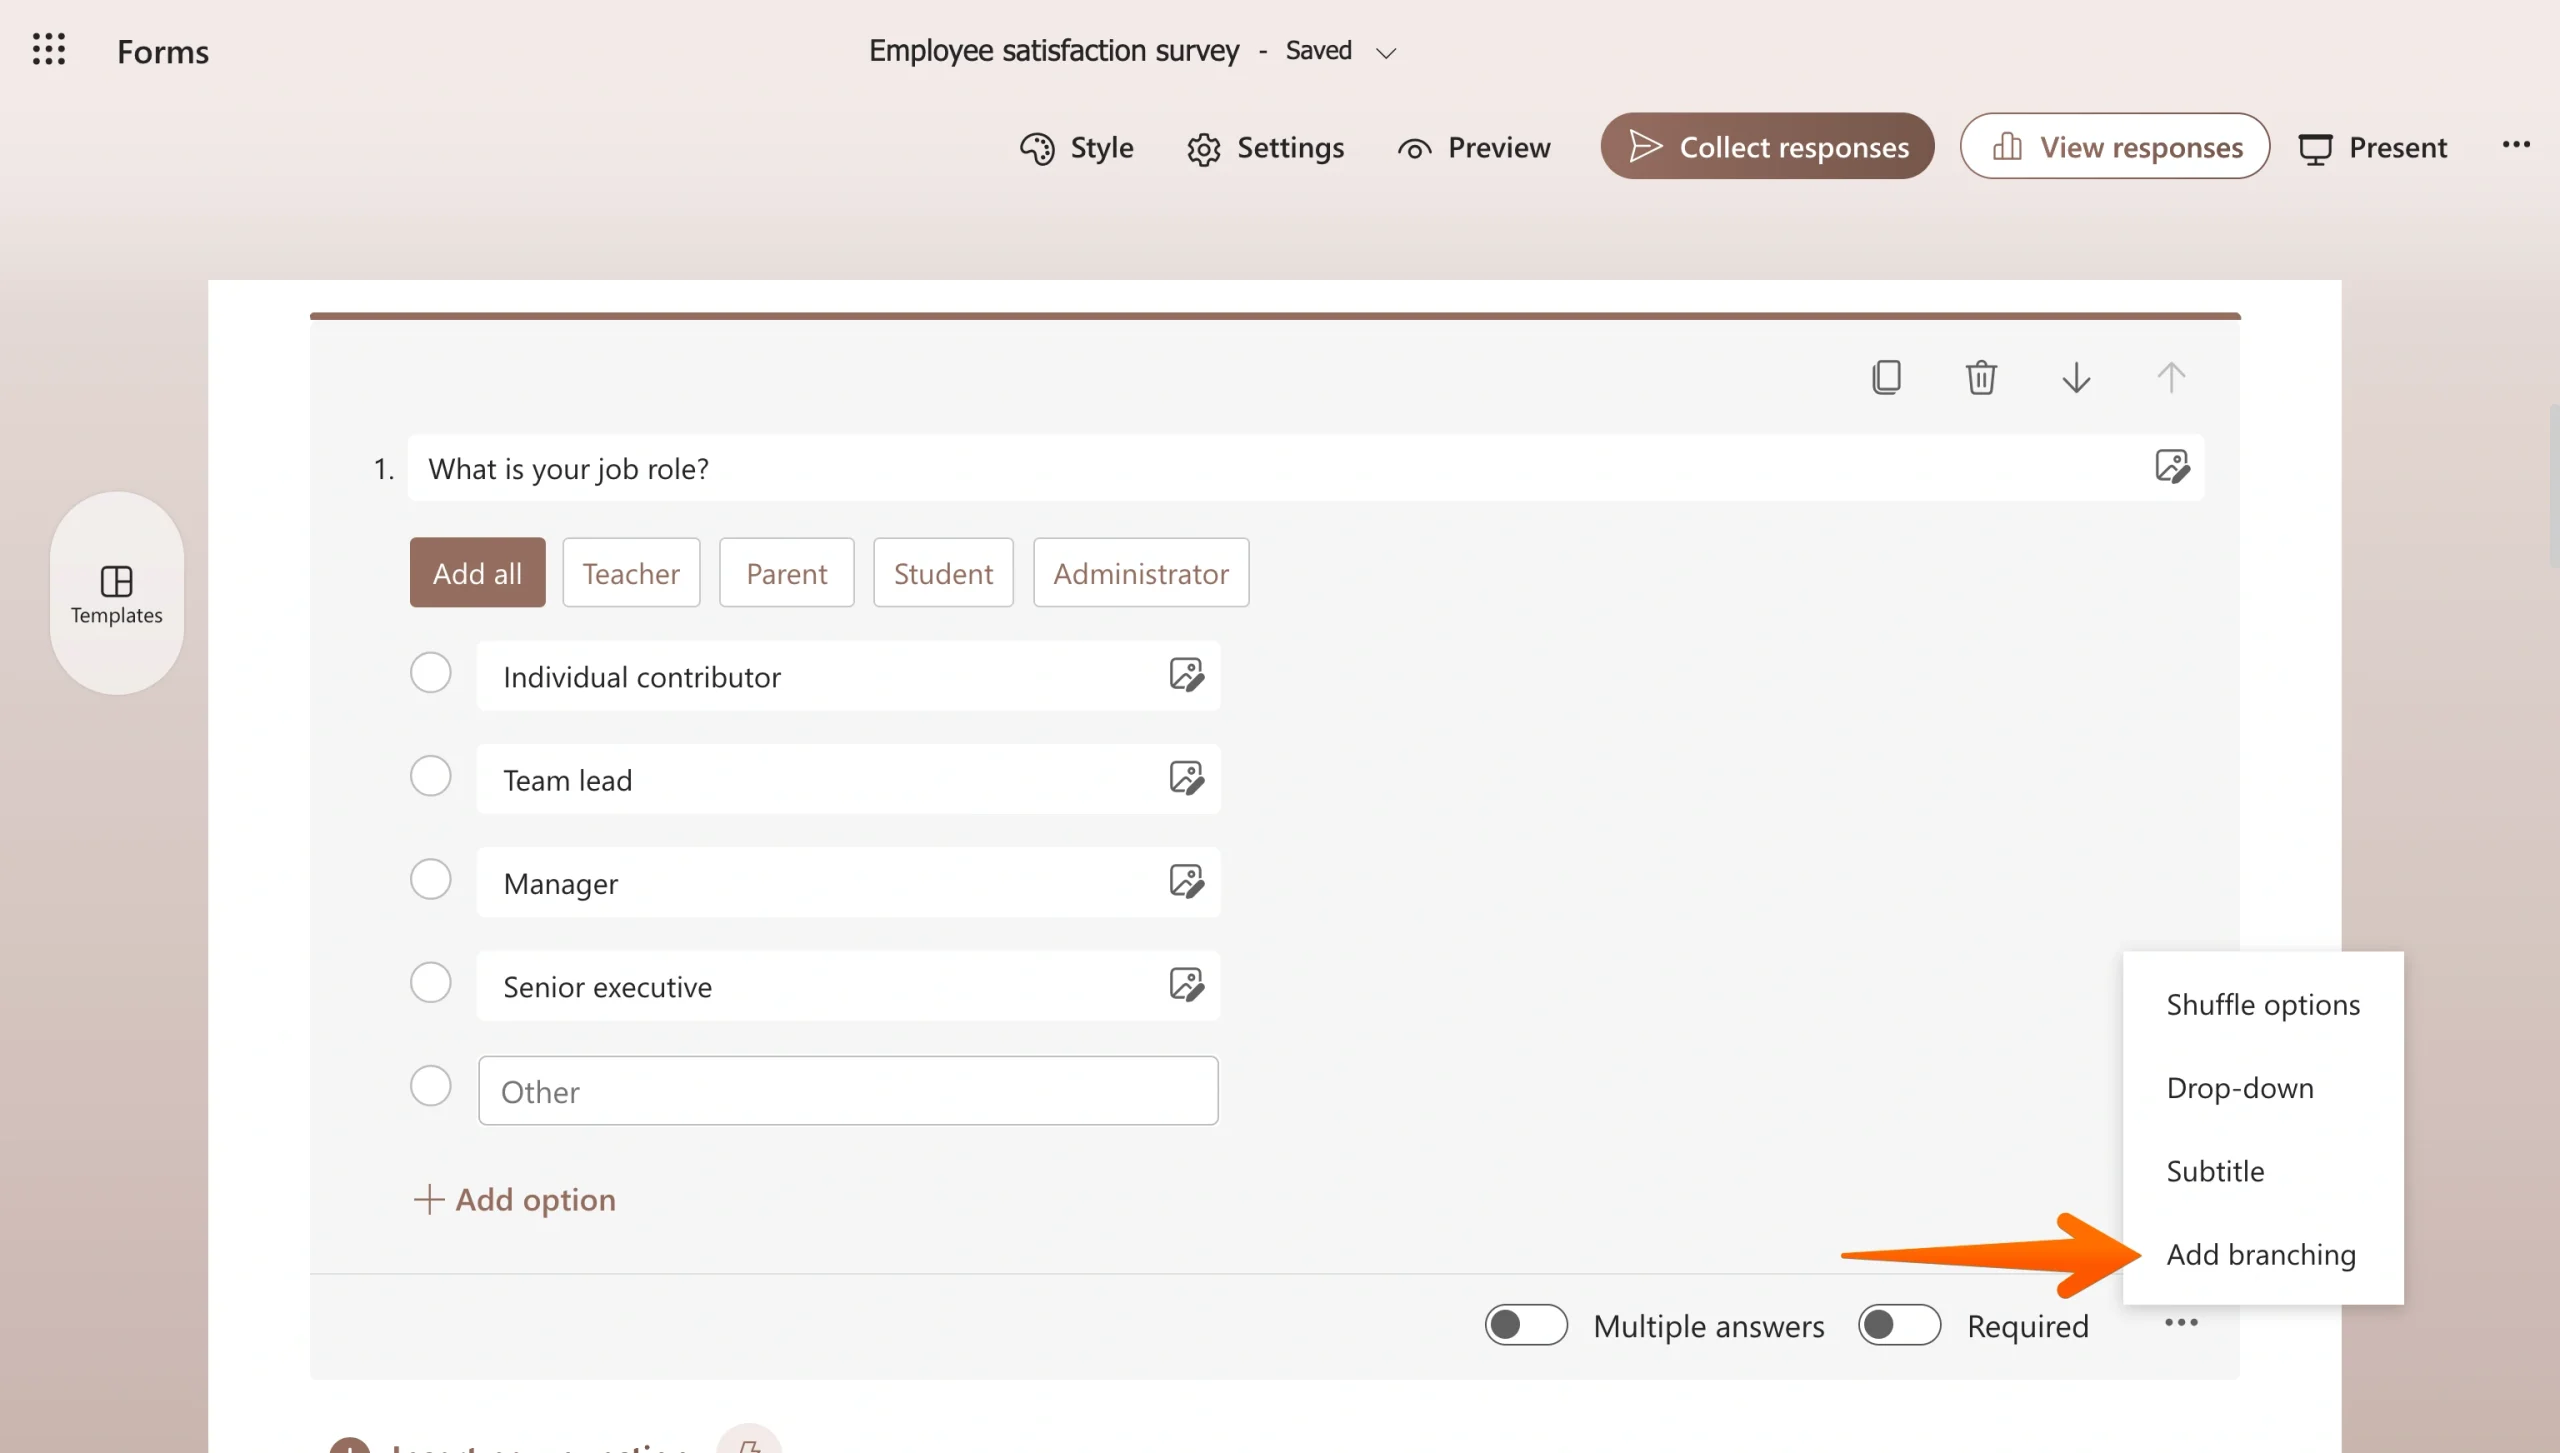
Branching allows you to choose where to send users based on each possible response to any given question. You can move them to the next sequential question, skip over a few irrelevant questions, or redirect them to the end of the form.

Migrate existing forms instantly
There’s no need to rebuild your online forms from scratch. Instead, migrate existing forms and submission data into your Jotform account in one click — so you can collect data without skipping a beat.
Your form can not be migrated.
Please ensure that your form URL is correct and that your form is set to “public” before attempting to migrate it again.
2. Map your logic
After you select Add branching, Microsoft Forms displays branching controls for the question you’ve selected. There is a separate dropdown menu for each answer choice. These dropdowns determine where respondents go next after selecting a particular answer.
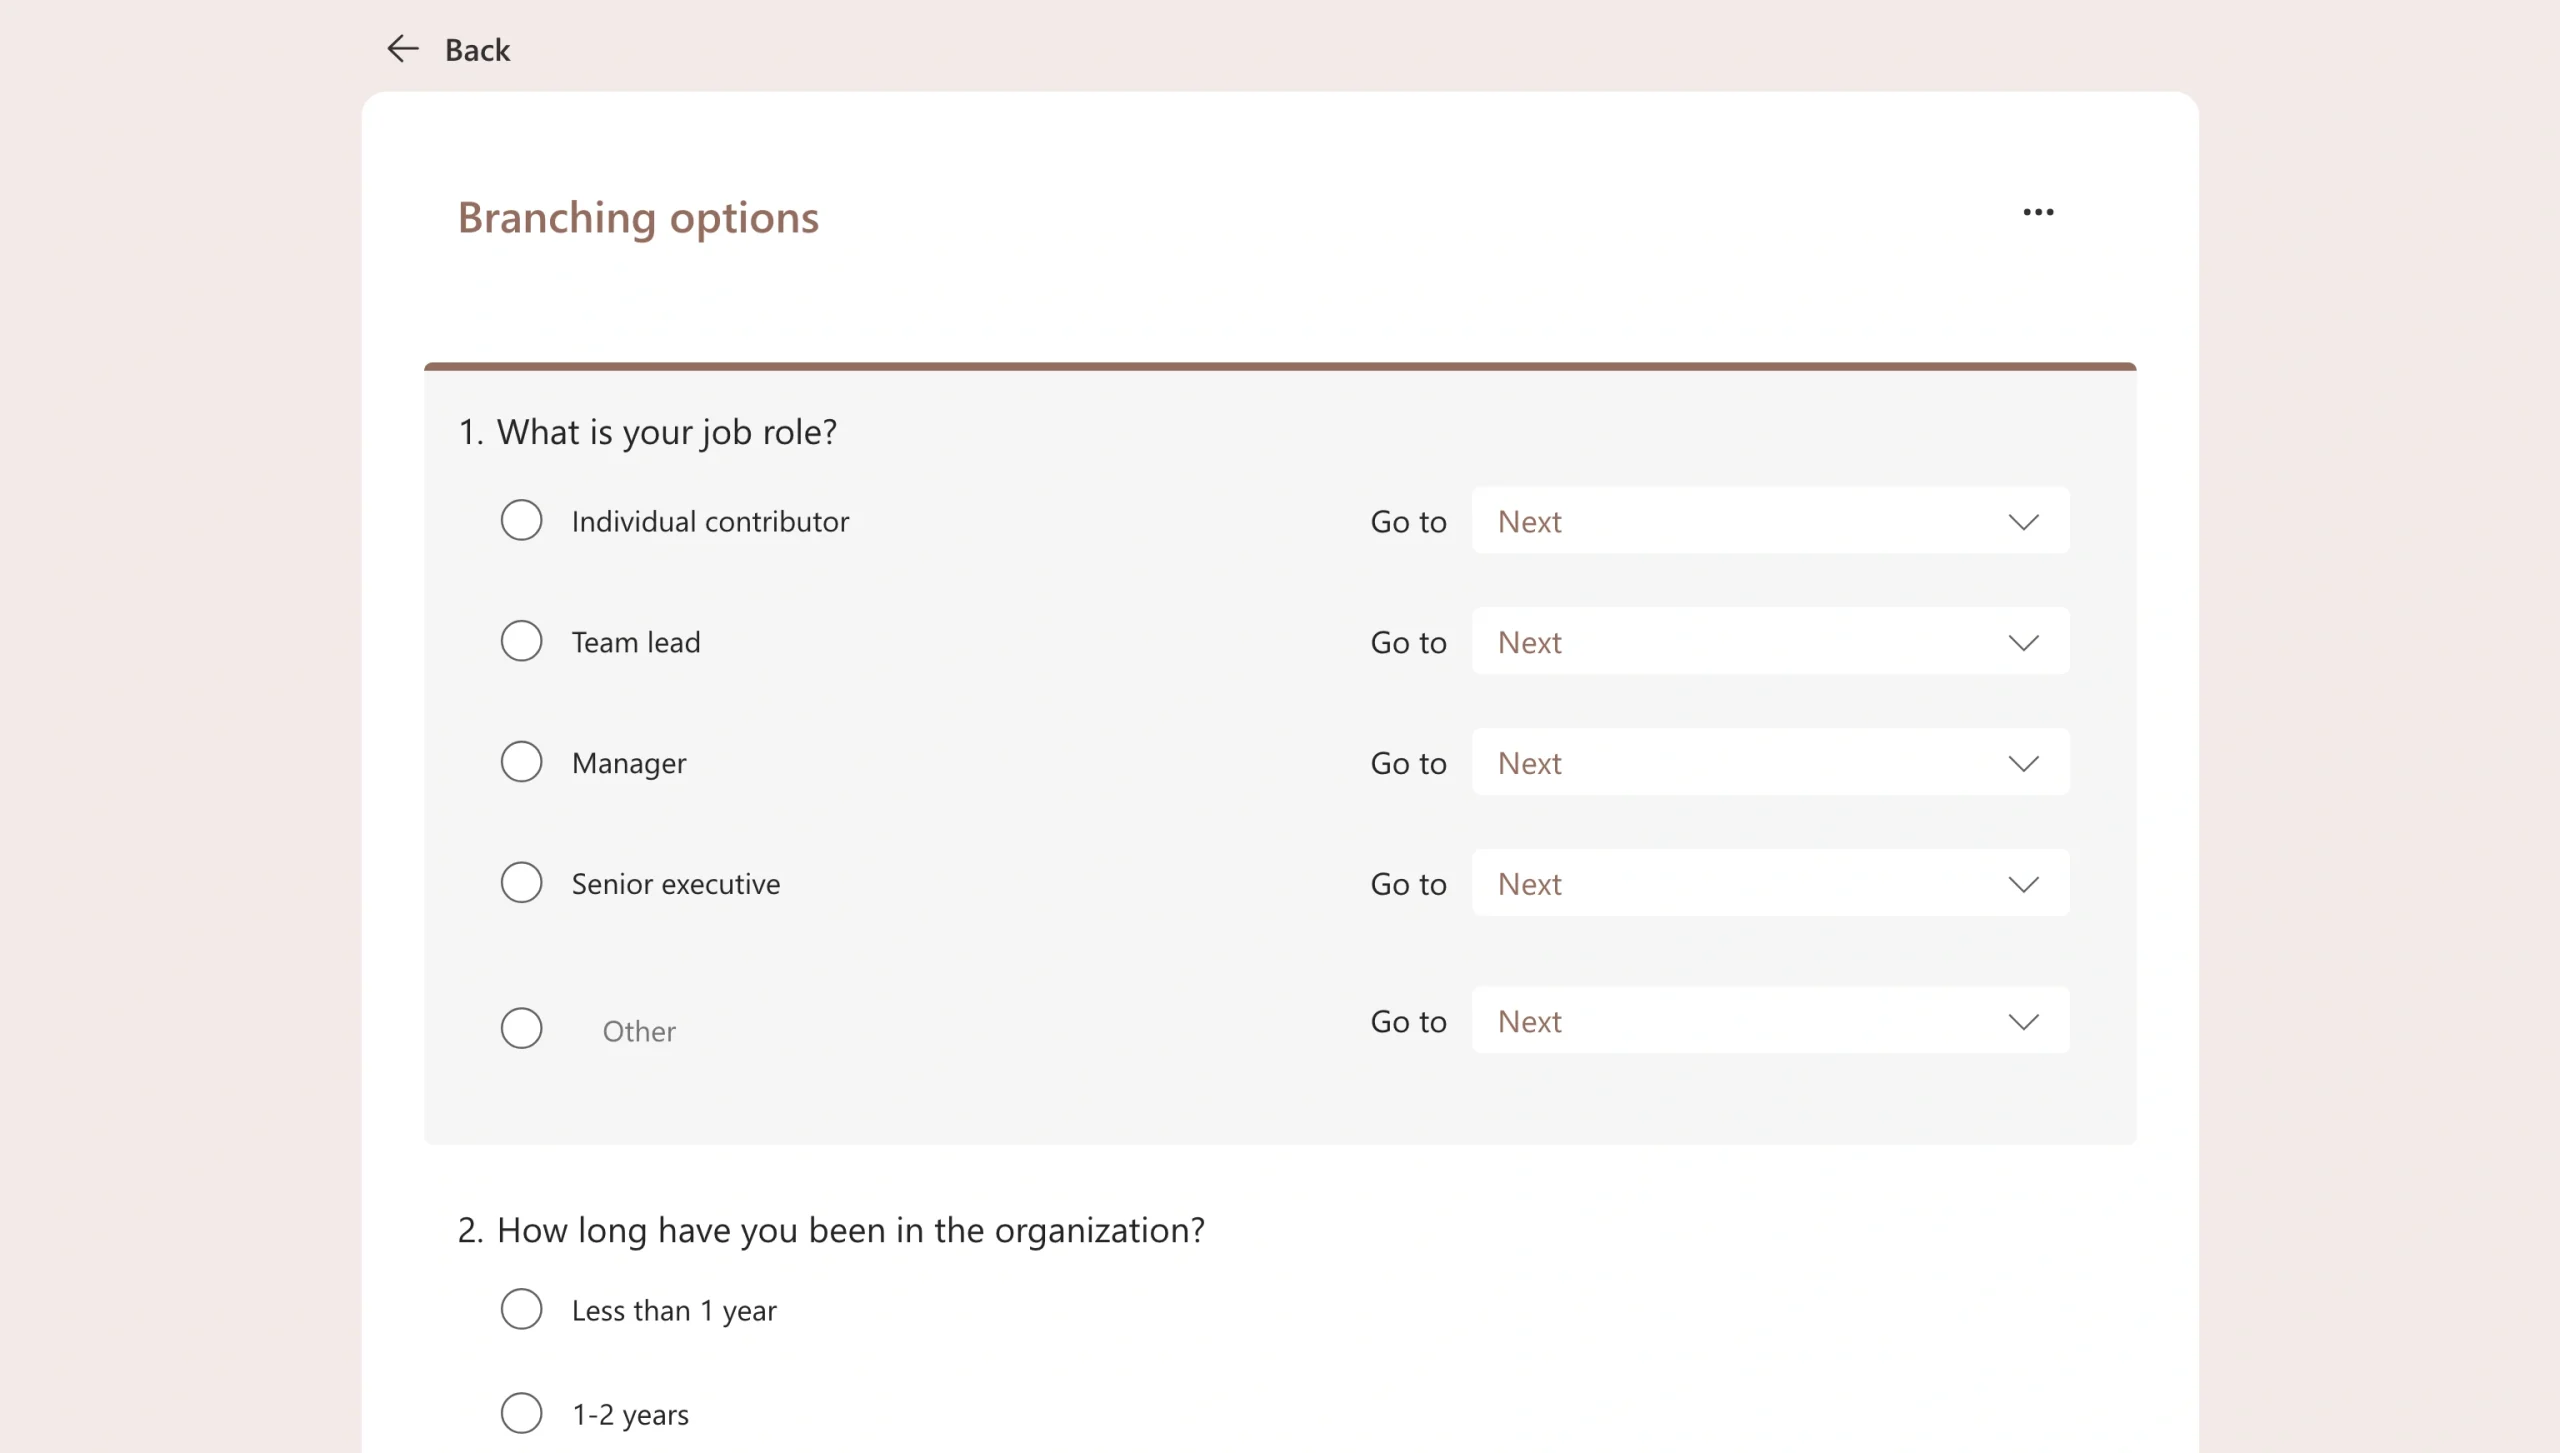
Click the dropdown next to an answer choice to view available destinations. You can assign a different destination to every response, creating customized paths throughout your form.
Let’s say you’re creating an event registration form. Attendees could be directed to different questions based on whether they’re attending in person (dietary requirements or parking needs) or virtually (which platform they’ll be joining on). This approach helps reduce form fatigue because respondents only see questions that apply to them.
If you don’t add branching logic for a response, users will be moved to the next question.
Pro Tip
A Microsoft Forms drop down list can make longer forms feel cleaner and easier to complete, especially when combined with branching that sends respondents only to the questions relevant to their answer.
3. Manage the next question
Once you open the dropdown menu next to a response, you’ll have three main options. First, you can direct users to a specific question based on their answer.
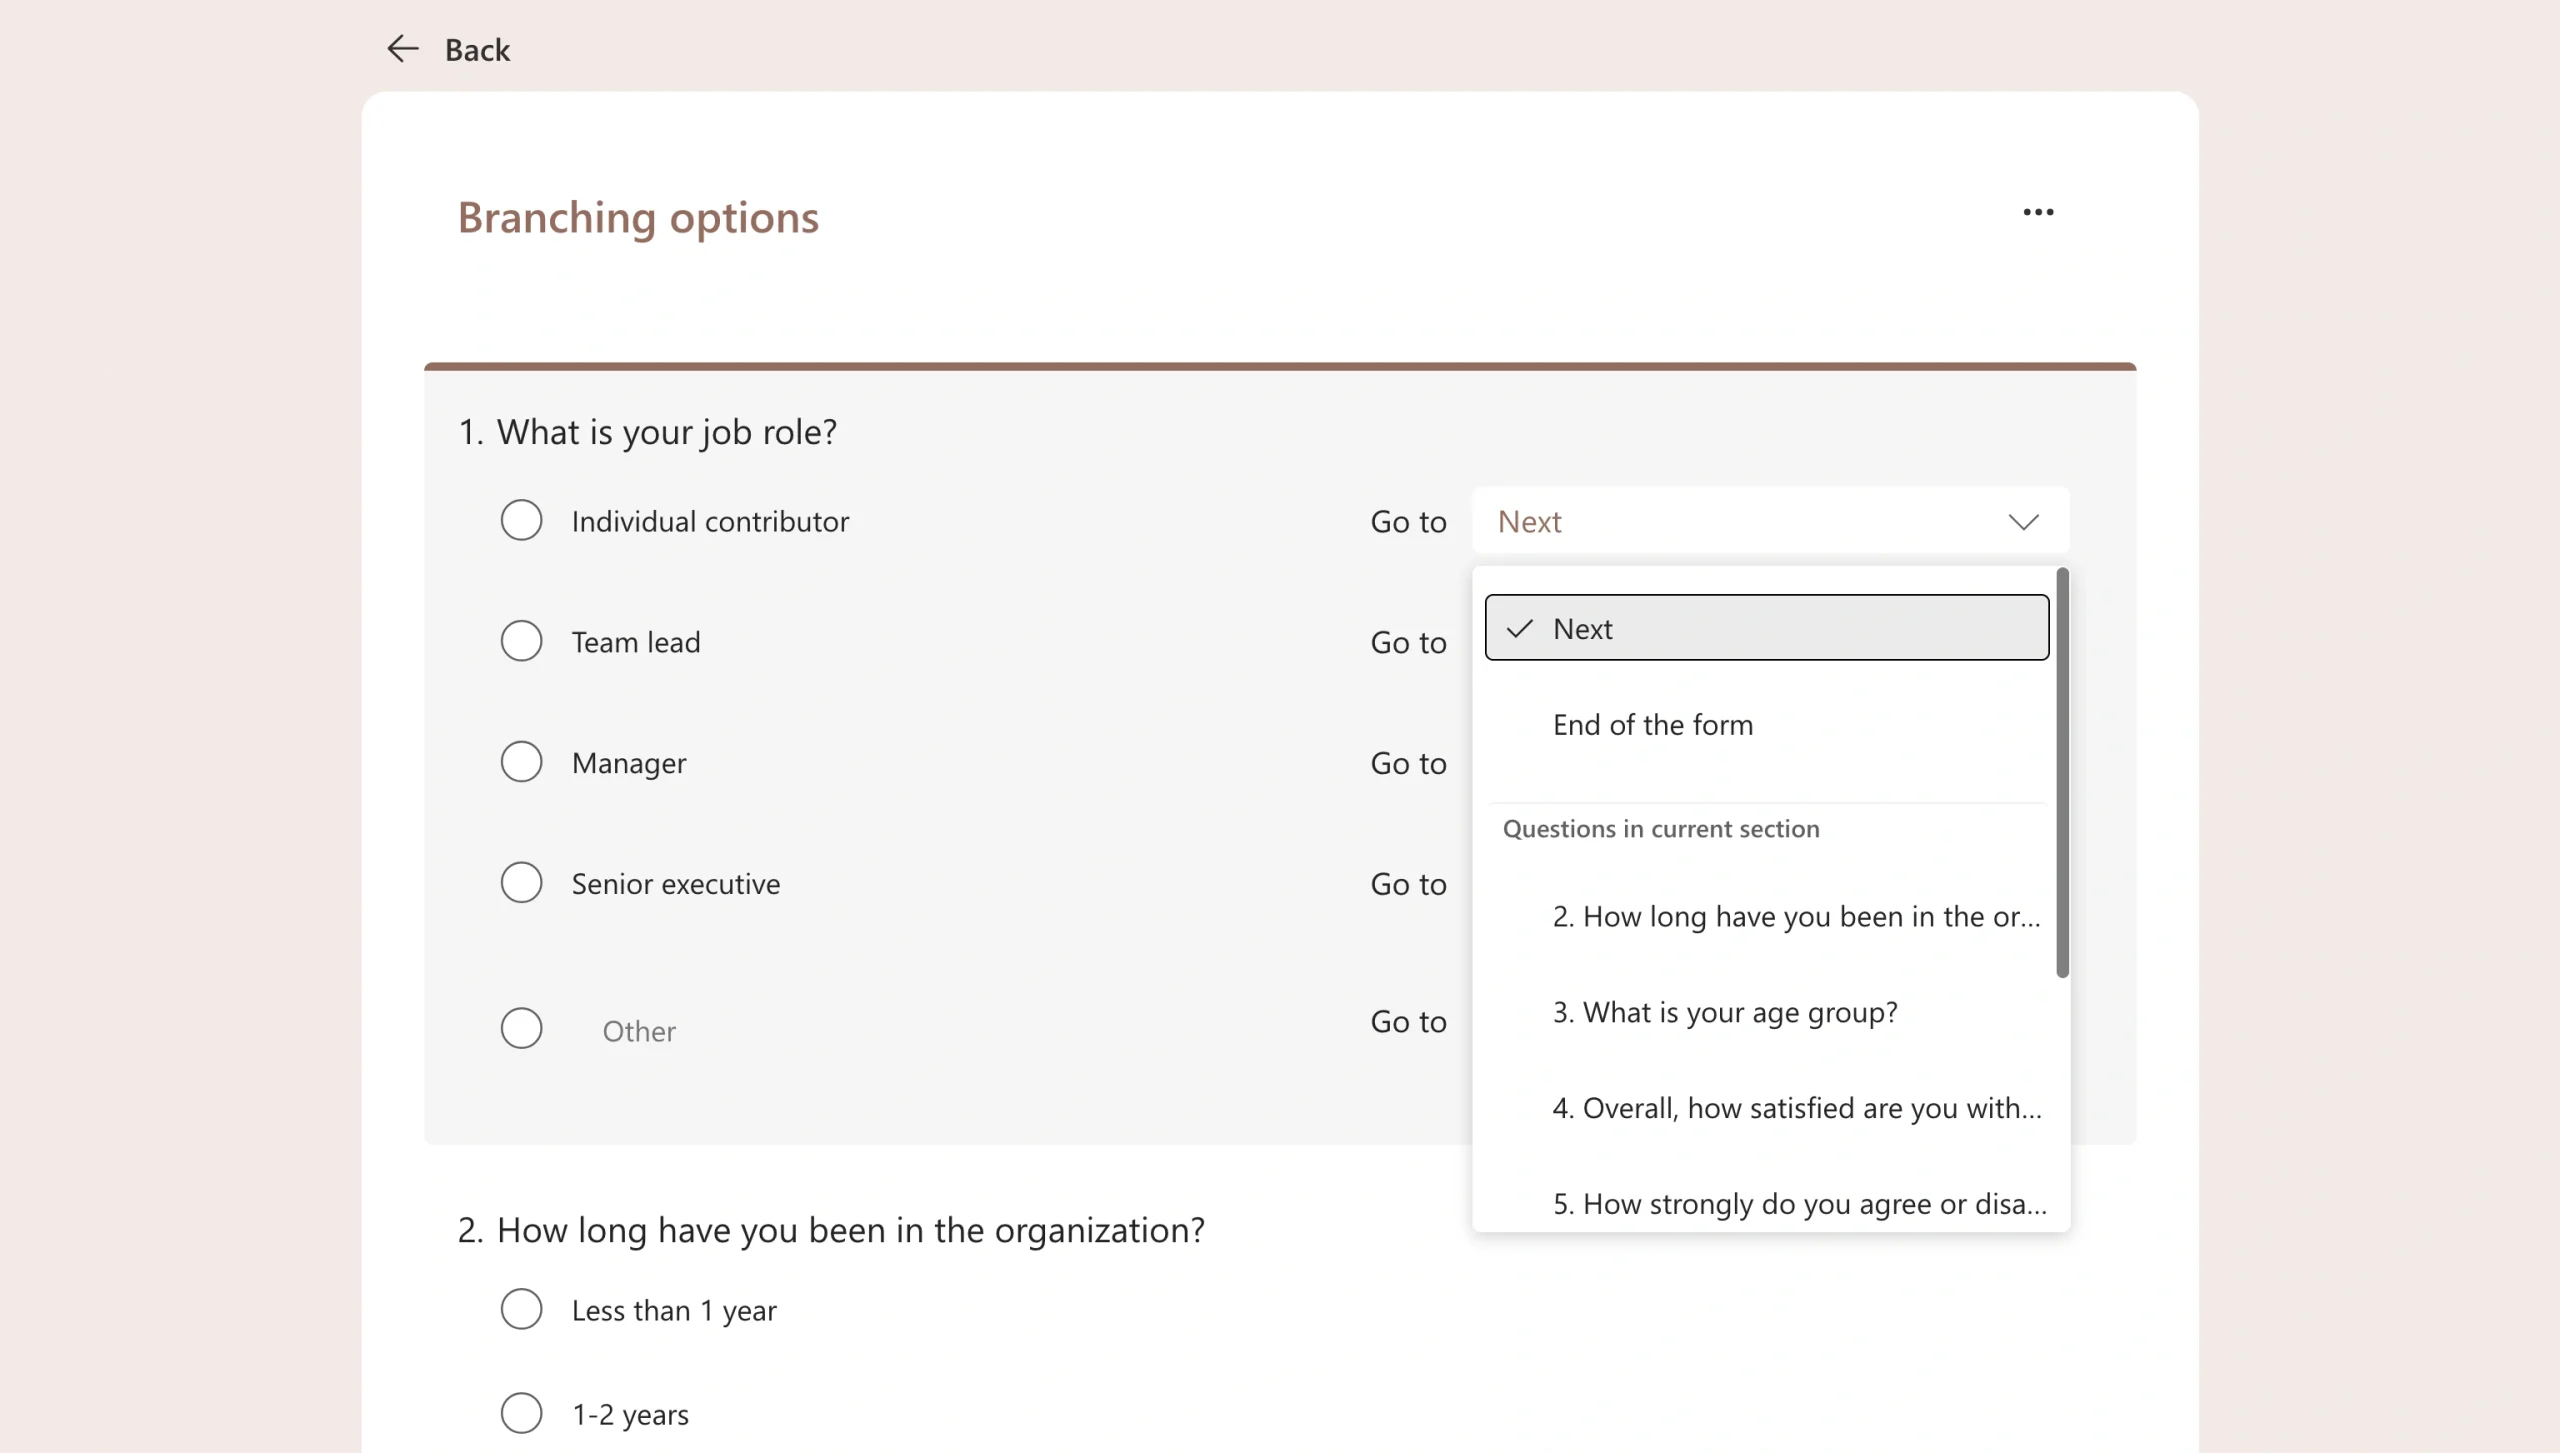
Sending users to the next relevant question allows them to skip over content that isn’t useful or pertinent to their journey. If you’re using one quiz or survey for multiple audiences, the question redirect branching feature is very useful.
You can also send respondents to an entirely different section or document. You could create different branching forms for users with very high and very low purchasing intent, for instance.
Finally, you can send respondents directly to the end of the form so they can skip right past any questions that aren’t relevant.
For example, if someone indicates they’re not eligible for a program, you can end the form immediately so that they don’t answer unnecessary questions.
4. Test your work and share
Before sending your form to respondents, verify that every branch works correctly. After configuring your logic, click the Back button in the upper-right corner to return to the main form editor.
Next, click Preview (the eye icon) at the top of the screen.
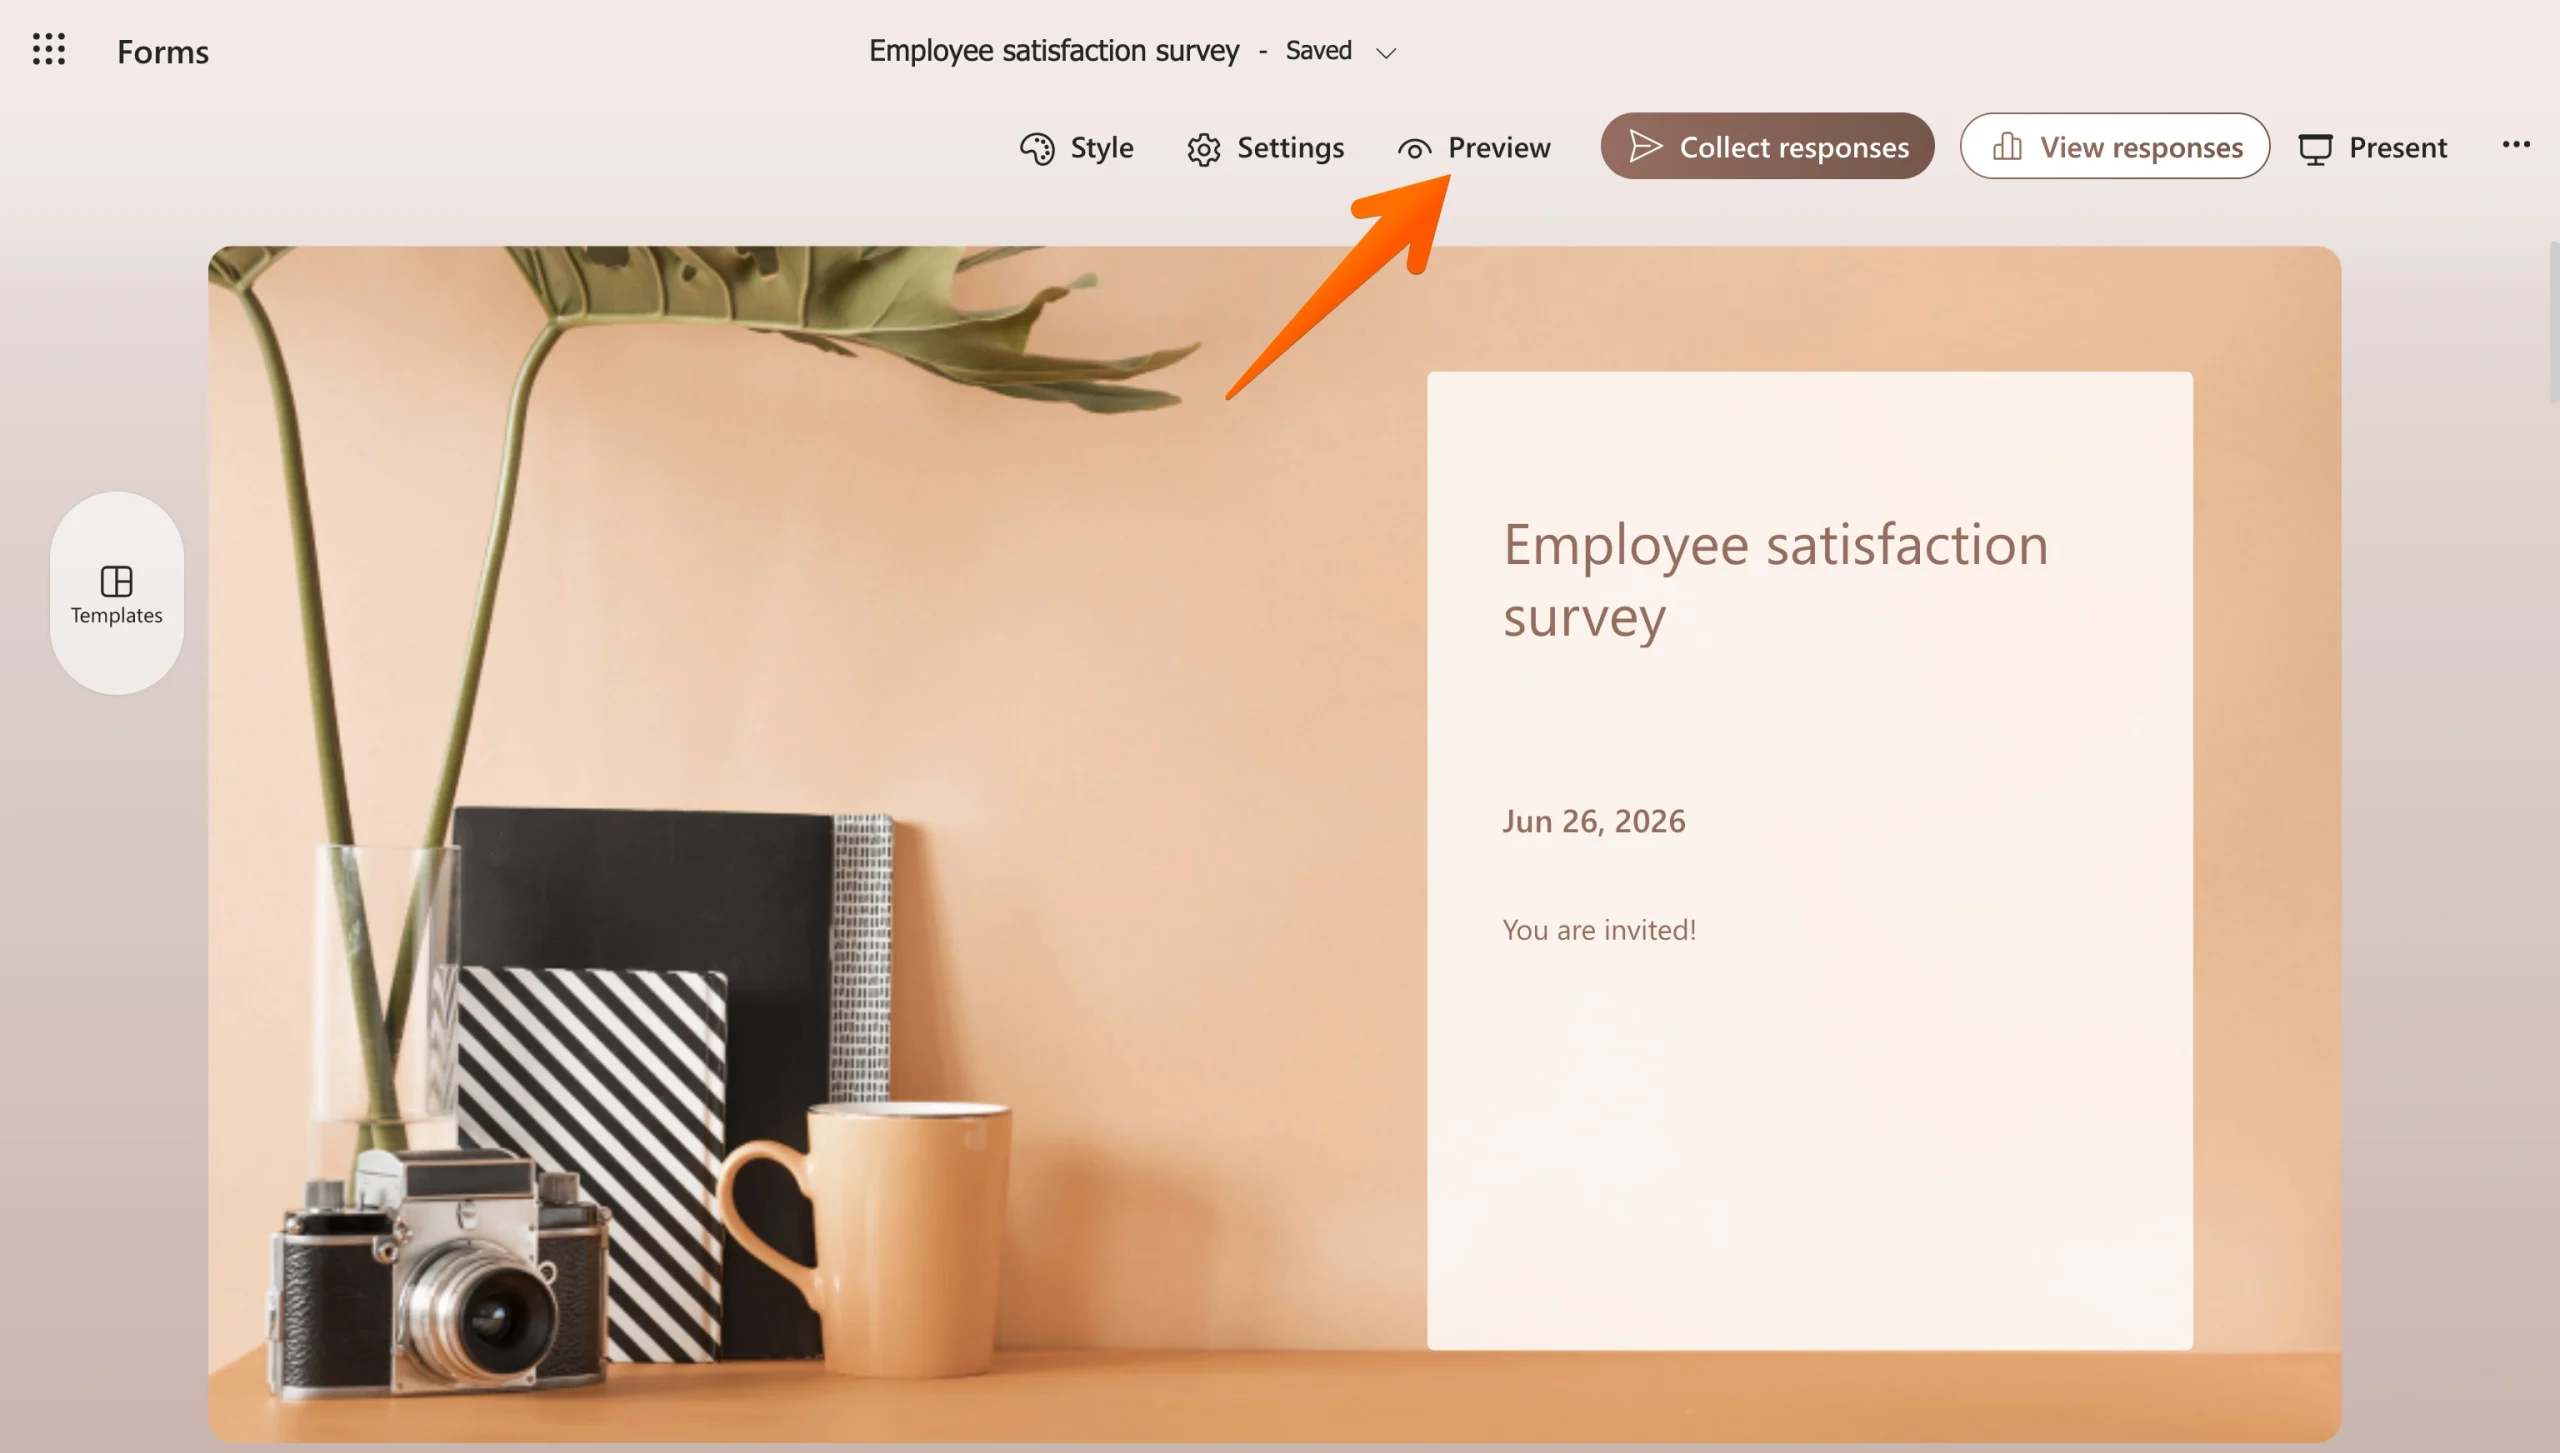
Use Preview mode to test each pathway and make sure they’re sending users where you want them to go.
Experience Jotform’s smart forms with conditional logic
Microsoft Forms gives you the ability to branch your documents and forms, which can make the experience more user-friendly and efficient. However, more advanced automation tools can accelerate your form-building process and create experiences that users will want to participate in. That’s where Jotform stands out.
Rather than simply directing users from one question to another, Jotform uses powerful if/then logic that allows you to create dynamic forms without writing code.

Show/hide fields
For instance, you can show or hide fields automatically using Jotform’s built-in logic. This feature keeps forms clean and easy to navigate by limiting what users see to relevant content. Instead of overwhelming respondents with dozens of questions, you can reveal additional fields based on their previous responses.
Update/calculate values
Jotform can automatically perform calculations using information entered into your form. This functionality is ideal for order forms, pricing estimators, and invoices where totals need to be updated in real time.
Conditional emails
One of the most useful features of Jotform is the conditional email setting. Different responses require different follow-up actions, and Jotform allows you to send customized emails to specific recipients based on how they complete a form. For example, you can route a sales inquiry to one team while sending a support request to another.
Custom thank-you pages
Jotform allows you to redirect users to different URLs or show unique thank-you messages based on their responses. This capability is especially useful for lead qualification or event registration — you’re demonstrating that you value users’ time and effort.
Answer piping
Jotform’s Smart Logic feature can even insert previous answers into future questions, creating a more personalized experience. Let’s say a user enters the name of their company early in the form. You can reference that answer later to create customized questions and messaging.
Finally, Jotform incorporates AI-powered form building to make complex workflows easier to create. Rather than manually configuring every condition, Jotform AI can help generate forms, suggest workflows, and streamline the setup process. It’s quickly becoming one of the most significant advances in form technology today. You can even set up conditions directly with Jotform AI, making the process faster and more intuitive than ever. Intelligent form building improves your ability to gather insights from your audience, which you can use for a wide variety of business activities.
Build faster with Jotform AIDescribe what you need, and let Jotform AI build it for you instantly.
Get Started Now
Best of all, Jotform is a no-code platform. You can build sophisticated conditional workflows through a visual interface without a single line of programming.
Migrate your Microsoft Forms to Jotform in seconds
Have you outgrown Microsoft Forms? Switching platforms doesn’t have to mean starting over. You can easily migrate your Microsoft Forms to Jotform and bring over your existing forms while gaining access to advanced conditional logic and powerful integrations.
Jotform makes the transition simple. Import your forms in minutes and start building smarter, more dynamic workflows right away. Migrate your Microsoft Forms to Jotform.
This article is for educators, SMB owners, marketers, HR teams, researchers, and operations teams evaluating SurveyPlanet but unsure whether they should stick with a simple free survey builder or switch to a tool with stronger analytics, branding, integrations, workflow automation, or research depth.





































































Send Comment:
1 Comment:
April 11, 2023
Is there a way to do this on Forms with Multiple answers selected questions