
Collecting payments with Microsoft Forms
- Generate your payment link from your payment processor of choice
- Create or open your Microsoft Form
- Select Add new to generate a new question
- Choose the Text option
- Title your question
- Click on the three horizontal dots
- In the subtitle, insert your payment link
- Once your link is set up, you can share your form
Digital forms are an accessible way for you to accept orders from your customers. However, depending on the form builder you use, you may have to take a few extra steps to be able to collect payments from them at the same time.
Microsoft Forms, one of the most popular online form builders, may not offer the ability to directly accept payments through a form, but there are ways to keep your process running smoothly. Here’s a breakdown of the two main methods you can use to accept payments with Microsoft Forms.

Migrate existing forms instantly
There’s no need to rebuild your online forms from scratch. Instead, migrate existing forms and submission data into your Jotform account in one click — so you can collect data without skipping a beat.
Your form can not be migrated.
Please ensure that your form URL is correct and that your form is set to “public” before attempting to migrate it again.
How to collect payments with Microsoft Forms
Although Microsoft Forms doesn’t process payments directly, there are still ways you can use this form builder to accept payments from your customers. There are two key methods to use Microsoft Forms for payment.
Link to your payment method
Adding a link in your Microsoft Form to your preferred payment method is a flexible and easy way to guide your users to complete a purchase. Since many digital payment methods provide custom links, this method is quick to implement.
However, there’s an issue with this method — it adds barriers between your customer and a completed payment. Customers have to leave your Microsoft Form to actually make the purchase on another page. This could lead to a higher percentage of user drop-offs, which would mean fewer completed payments for you.
If you choose to collect payments using a link, here are the steps to add your link to a Microsoft Form:
- Generate your payment link from your payment processor of choice.
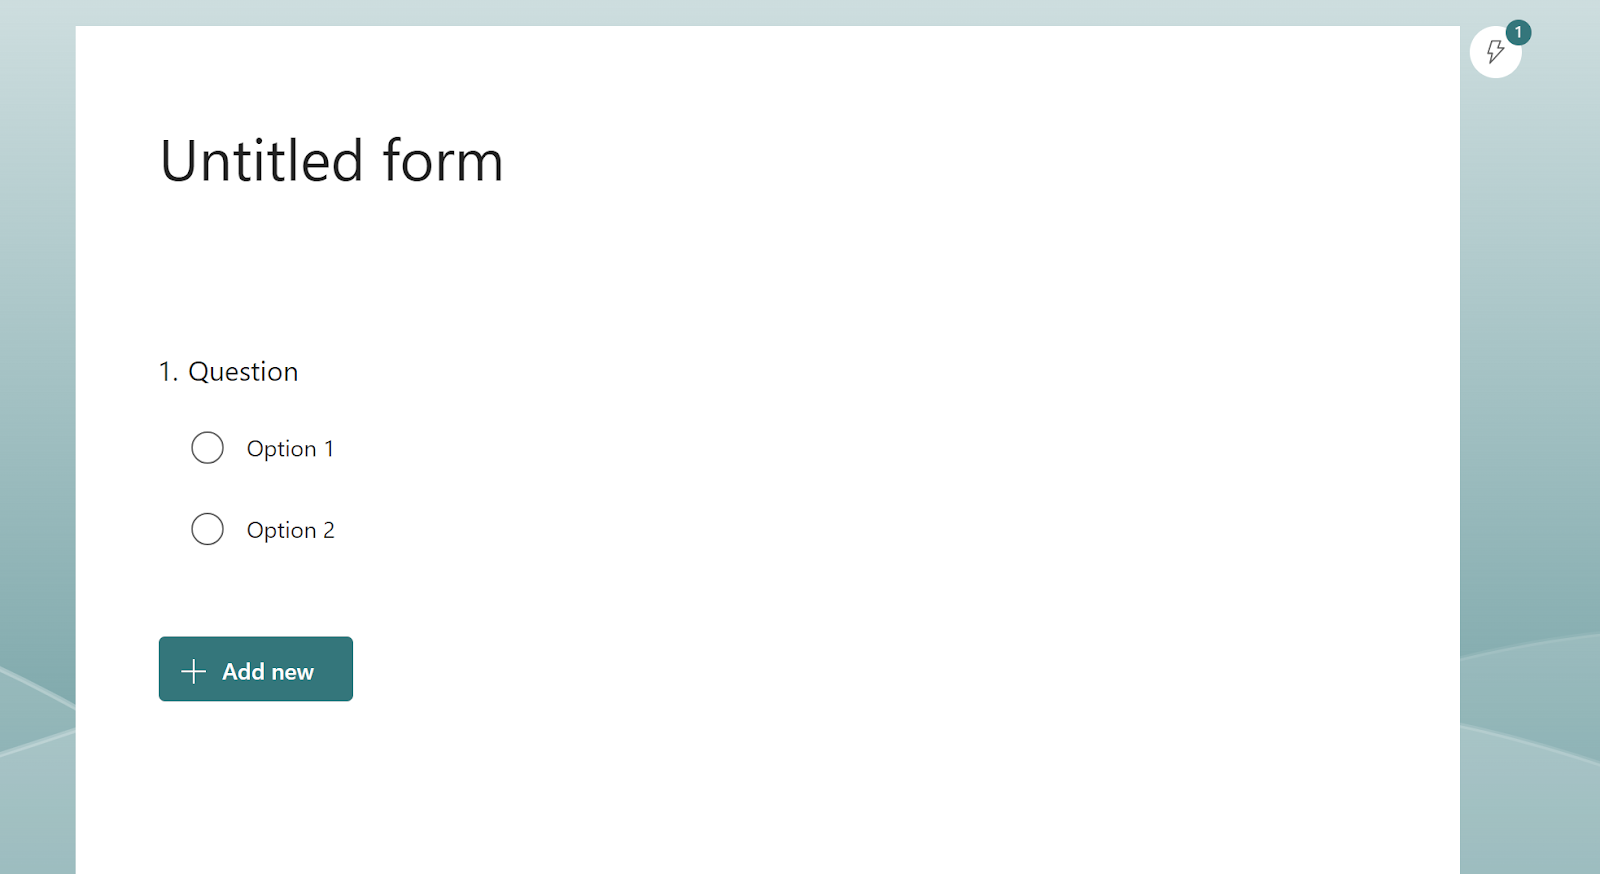
- Create or open your Microsoft Form.
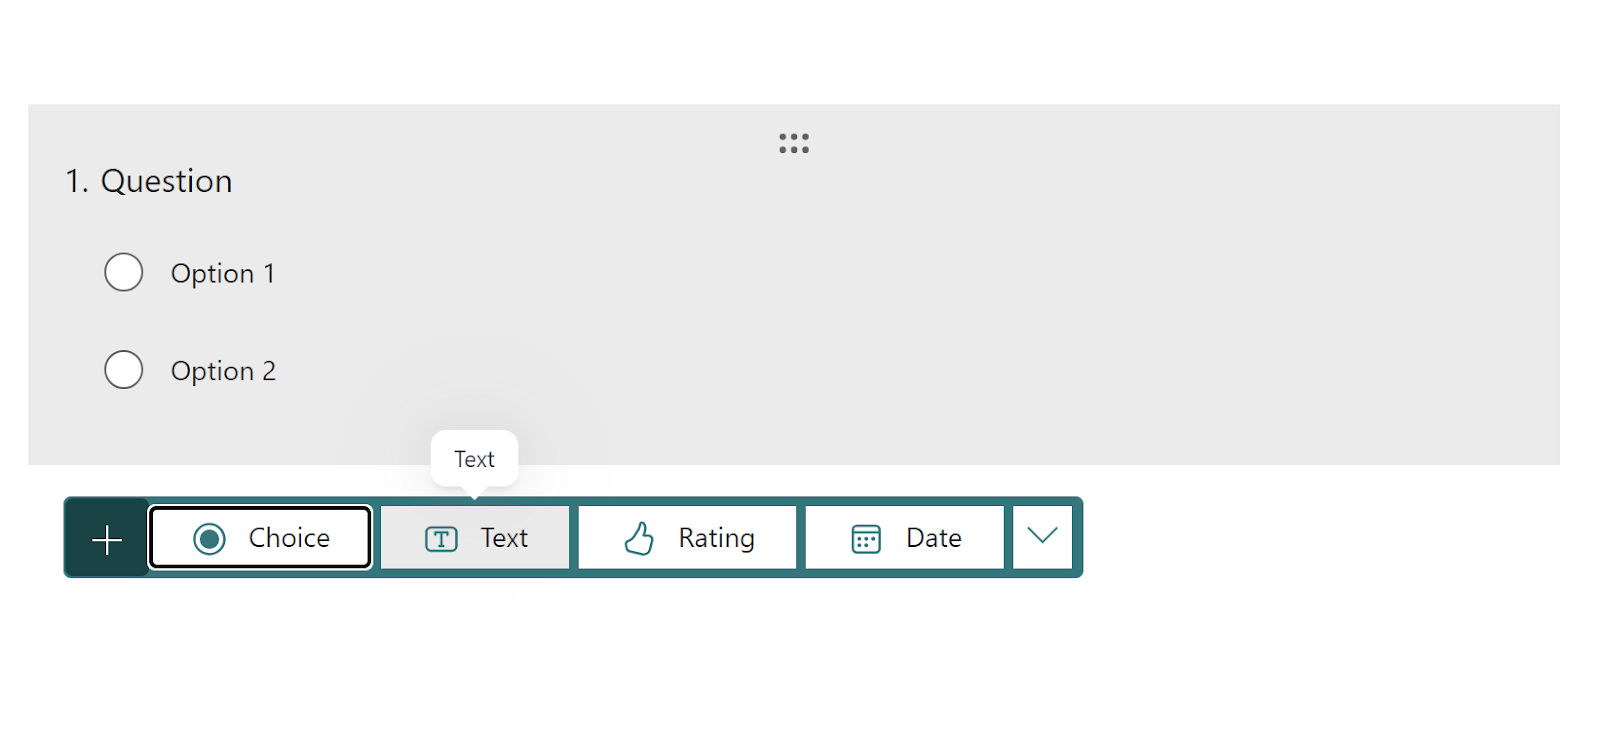
- Select Add new to generate a new question.

- Choose the Text option.

- Title your question (e.g. “Purchase” or “Payment link”).
- Click on the three horizontal dots in the right corner and select Subtitle.
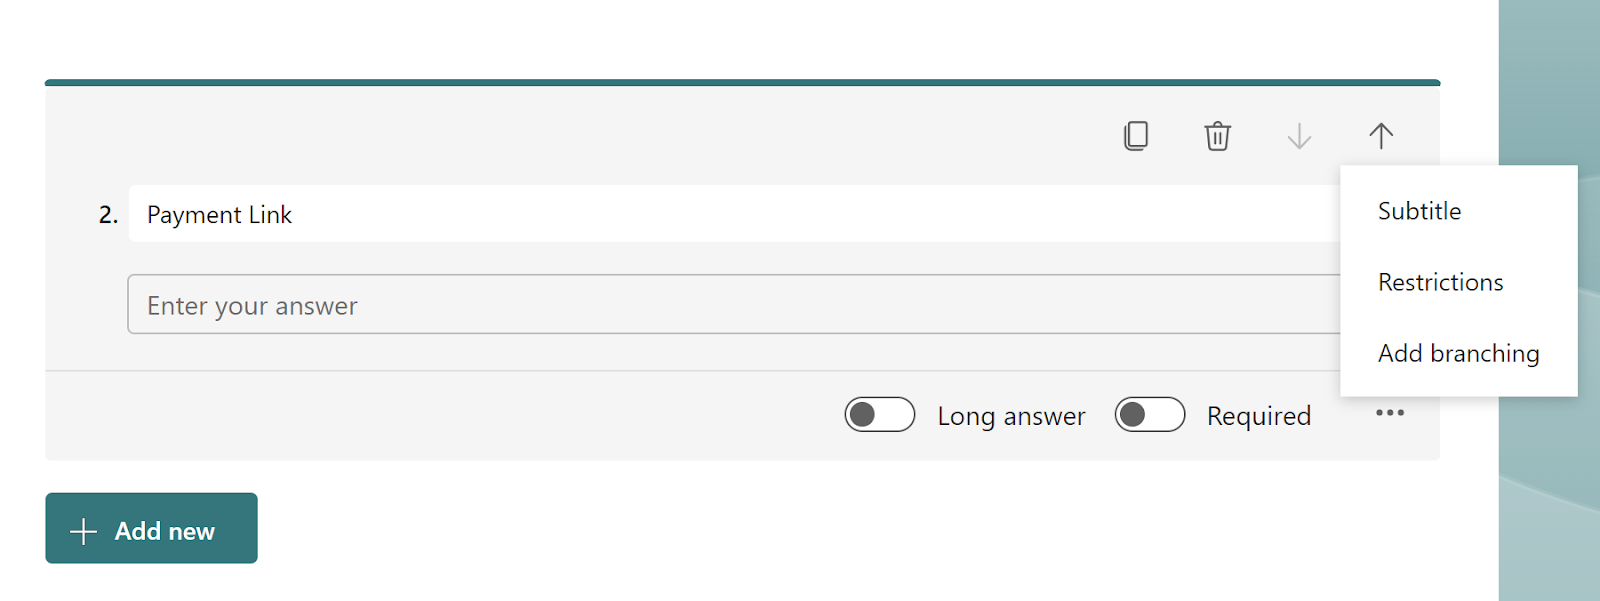
- In the subtitle, insert your payment link.

- Once your link is set up, you can share your form and begin collecting payments.
While this method requires very little setup, you do need to pay close attention to your responses to evaluate its effectiveness. If your payments don’t line up with your form opens or completions, you may be losing clients due to the inconvenience of the process.
Peer-to-peer payment
Another effective way to use your Microsoft Forms for payment collection is to leverage the flexibility of peer-to-peer payment methods like Venmo and Cash App. These mobile payment methods provide users with a custom QR code they can place anywhere, including on a Microsoft Form. Simply download an image of your QR code and add it to your form’s questions.
There’s a similar problem with this method, except it’s potentially even more inconvenient. Desktop users will have to switch to a mobile device to complete their transaction. And for users already on mobile, there’s no simple way to scan a code that’s already on their screen. This means you may lose users due to friction. It could also require you to create multiple versions of the same form optimized for both desktop and mobile.
If you choose this payment route, the methodology is similar to adding a link (with only a few steps that vary):
- Generate your payment link from your payment processor of choice.
- Create or open your chosen Microsoft Form.
- Select Add new to generate a new question.
- Choose the Text option.
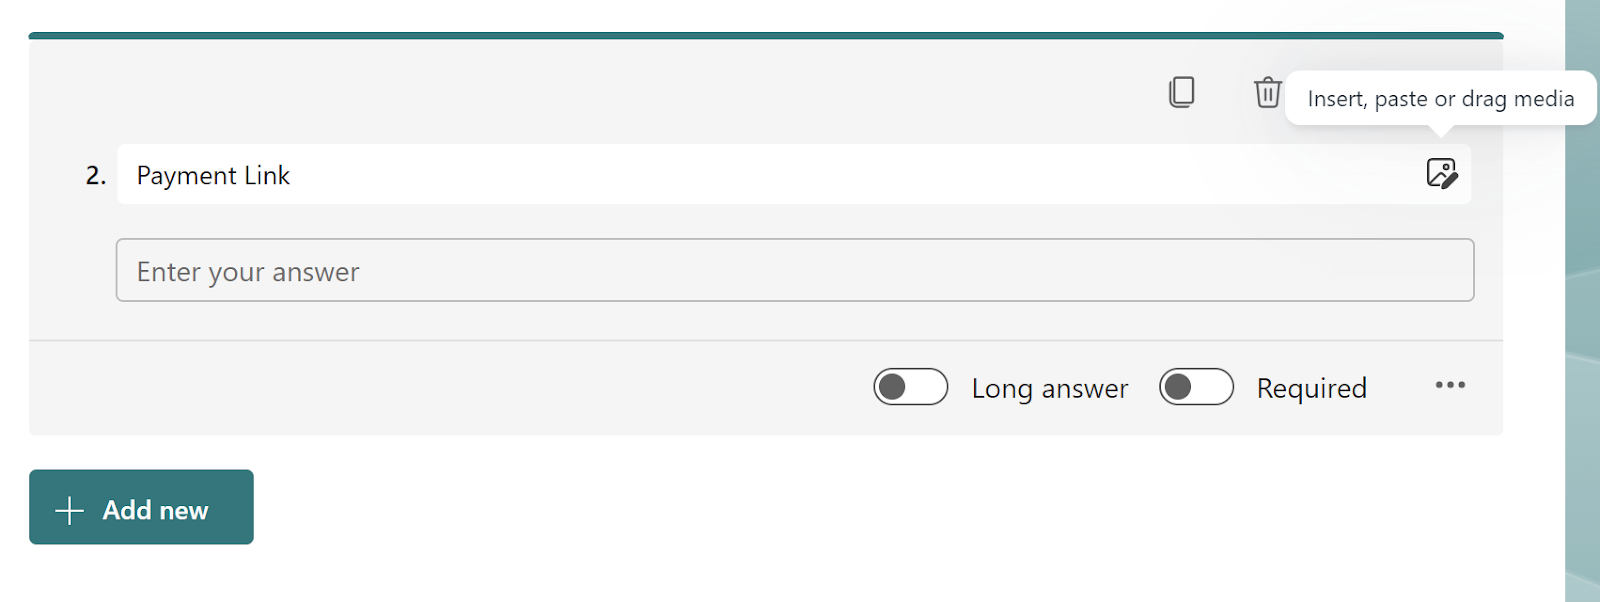
- Title your question, then select the Insert, paste, or drag media button on the right of the text box.
- Select Insert Image.

- Choose Upload from the image options menu to find and upload your QR code.
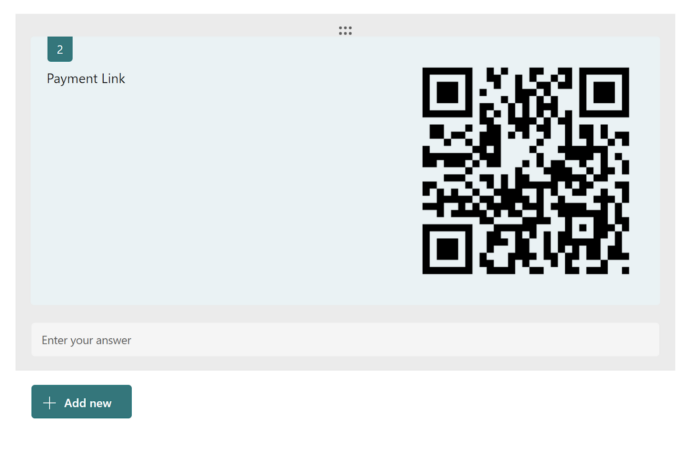
- Once your code has been added, you can share your form and begin collecting payments.
You can quickly collect payments from users wherever they’re using Microsoft Forms, but there are powerful alternatives that offer a simpler, more effective payment collection process.
What makes Jotform a powerful payment collection alternative
Even if it’s technically possible to use Microsoft Forms for payment collection, the available methods add friction to the user experience, and the platform doesn’t offer as many capabilities as some powerful form-building alternatives do. Jotform is one such alternative that can process payments inside a form — without the need to go to another page.
This in-form payment processing can reduce the potential for drop-offs, errors, and frustrated customers. More than 30 payment gateway integrations power Jotform’s payment processing, including common applications like PayPal, Apple Pay, Venmo, and more.
Not only does Jotform let you collect payments within your forms, but it also has a variety of other benefits. These include
- More than 20,000 form templates, including 100-plus payment forms
- Data organization and storage with Jotform Tables
- E-signature capabilities through Jotform Sign
- Professional reports on orders through Jotform Report Builder
With this suite of features, you can collect, track, and analyze your payments — all within one digital ecosystem — streamlining your payment process and saving your team time.
How to accept payments with Jotform
Using Jotform’s built-in payment processing, you can start accepting payments through your preferred gateway in no time. Here’s how to get started:
- Open the Form Builder.
- Once you’ve started your form, select the Add Form Element button.
- Open the Payments tab and select your choice of processor.
- After you’ve chosen a gateway, drag and drop it in your form.
- Link your payment account using the Payment Setting menu link in the question.
Now that your form is set up, you can collect payments from anyone who has the link to it. Share your form using social media or just a simple link, or embed it in your website.
While using Microsoft Forms for payment collection may be more complicated than expected, that doesn’t mean it’s impossible. Using your payment links to redirect users allows you to take advantage of Microsoft Forms’ convenient delivery method. However, if you’re looking to simplify your process and get more from your form, consider how an alternative like Jotform can streamline your payment process.
Photo by Tranmautritam


Send Comment: