

It may seem like people spend most of their time online scrolling through short-form videos, watching YouTube, or experimenting with the latest AI tools. There’s plenty of that, but people are also going online for something more lasting: learning new skills through online courses.
And the demand for those skills isn’t slowing down. According to the World Economic Forum’s Future of Jobs Report 2025, 59 out of every 100 workers are expected to need training by 2030. For anyone with useful knowledge to share, that creates plenty of room to teach.
Once you have an idea worth teaching, the next step is turning it into a course people can actually find, join, and complete. Here’s how to take it from topic selection to registration and payment.


1. Choose a course topic with clear demand
No matter whether you’re a grade school teacher or hobbyist, the first step to creating an online course is deciding on the topic you want to teach. Clearly, it should be an area in which you have certain expertise, knowledge, experience, or even passion. Do you have tech or software skills, or are you adept at programming, gardening, languages, drawing, cooking, car mechanics?
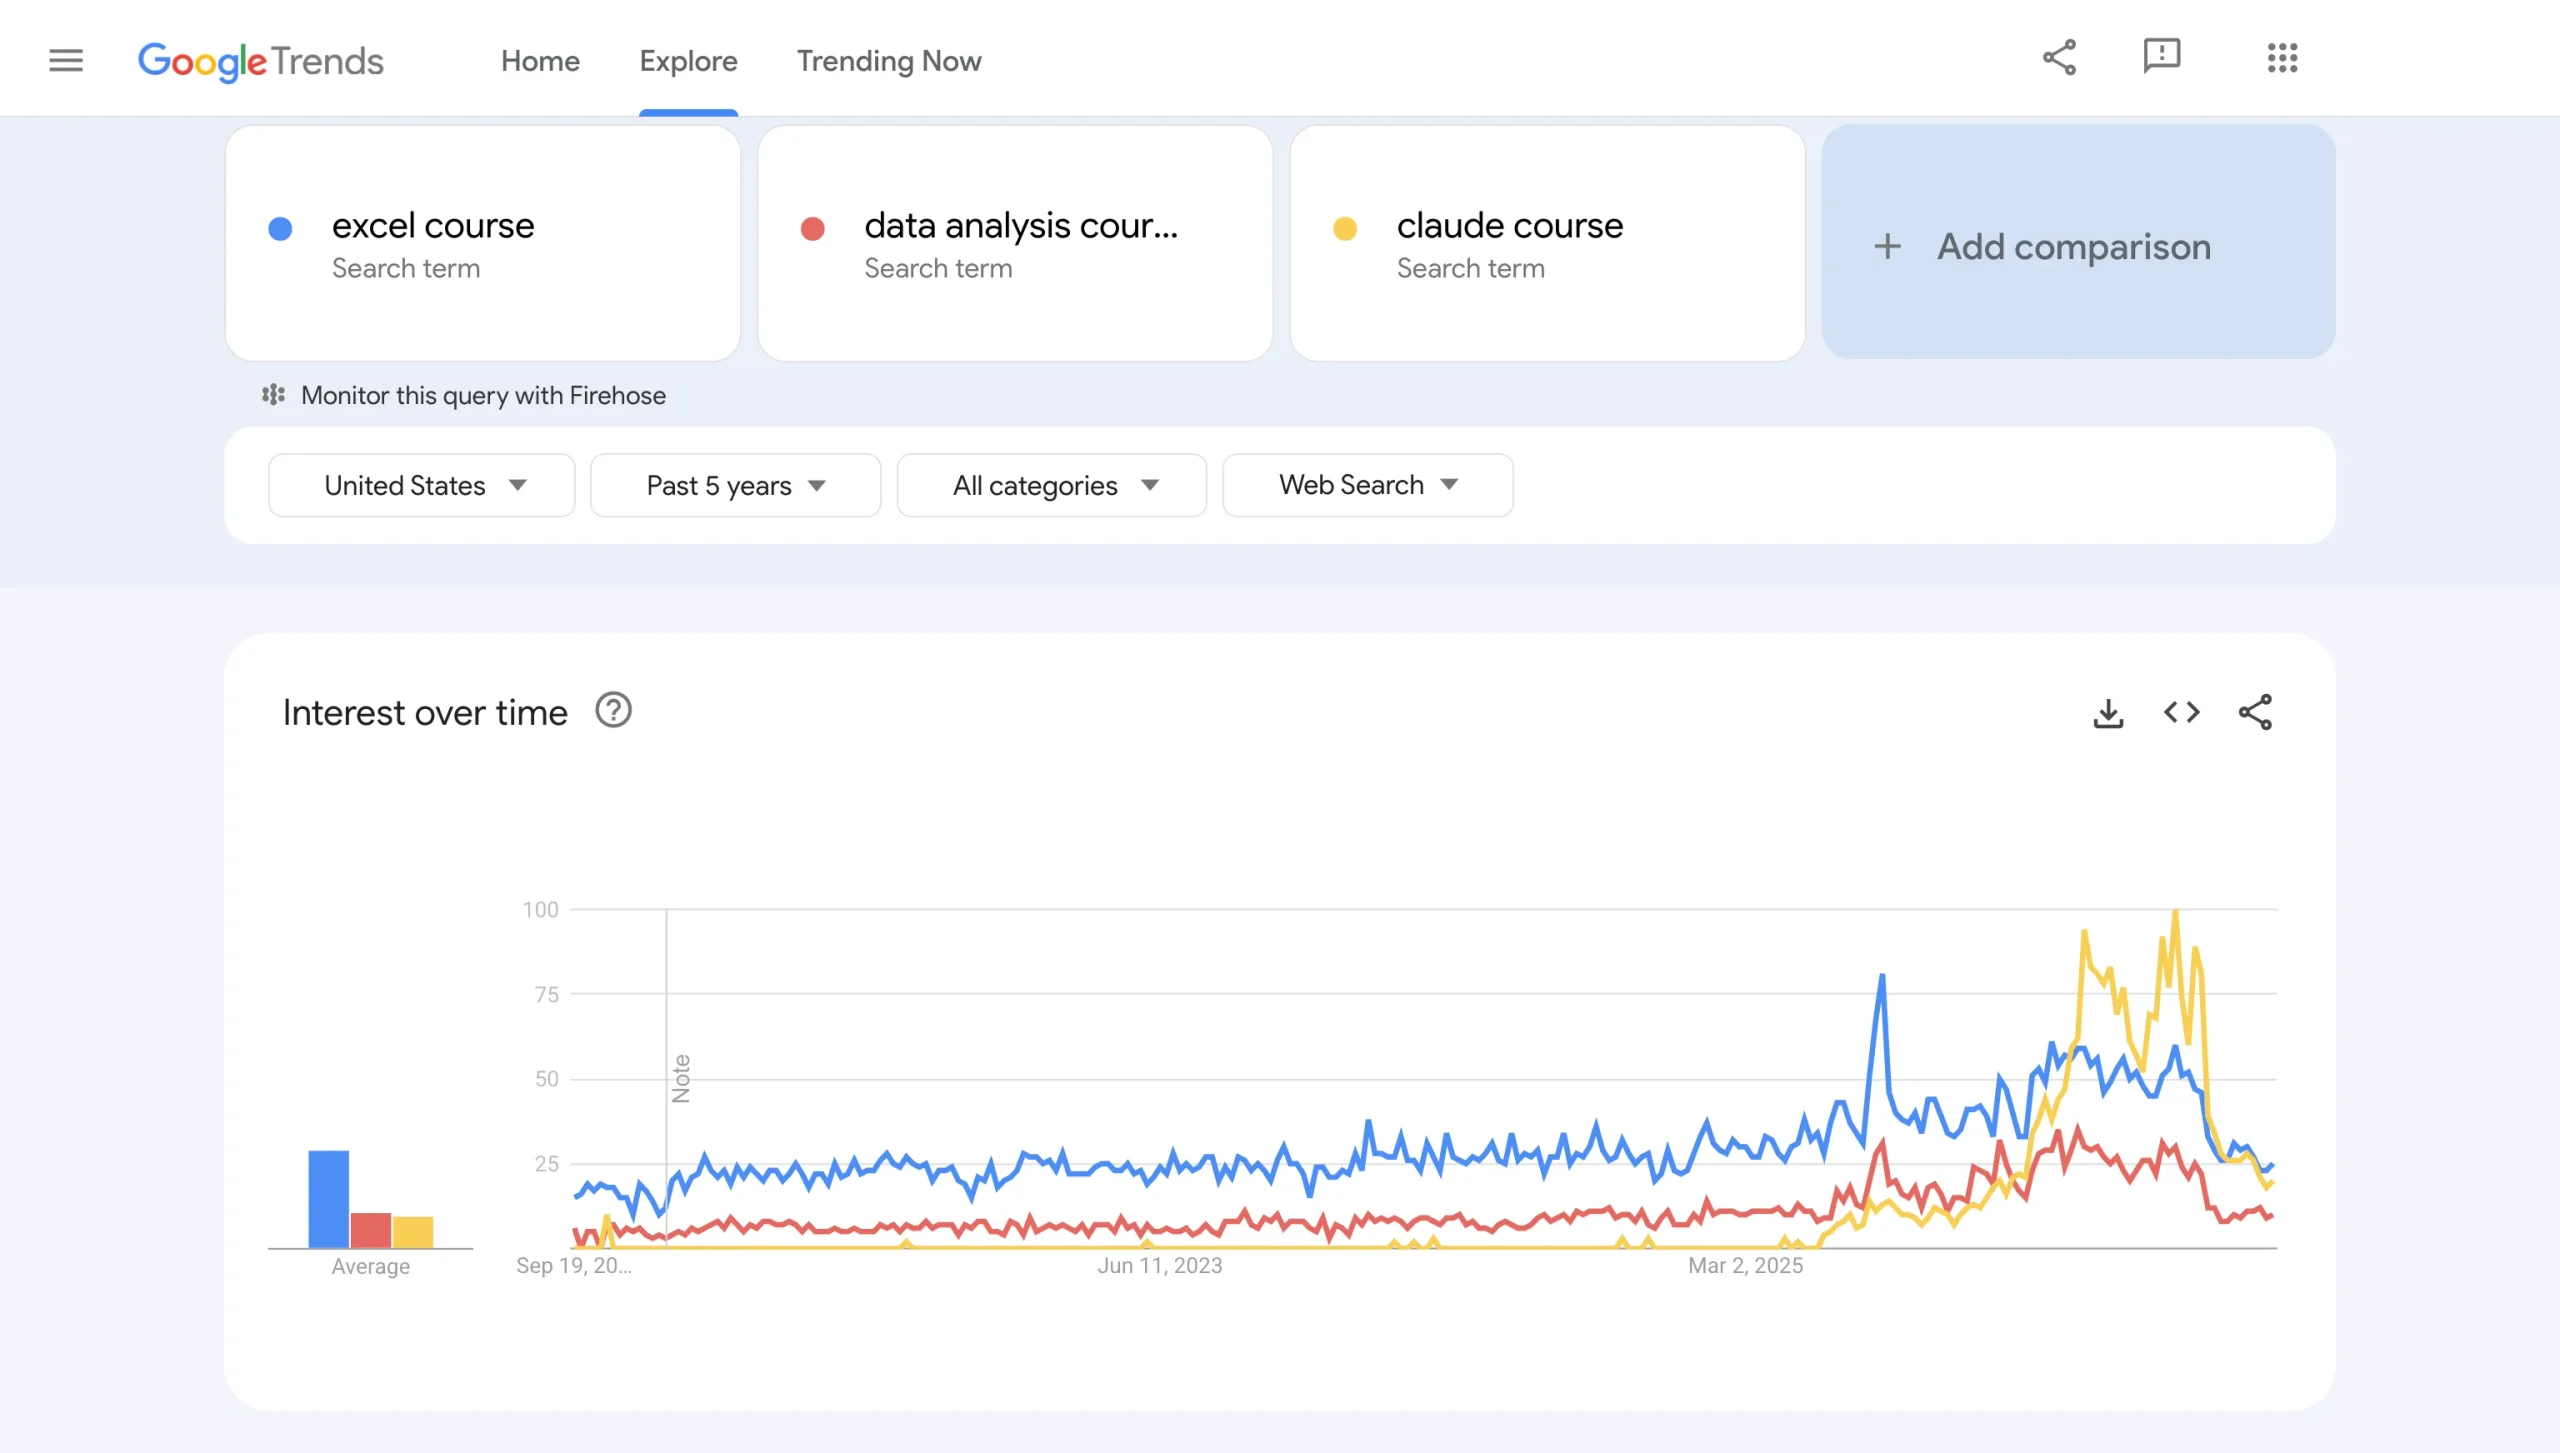
There’s no limit to what your course can cover. It’s just a matter of refining your topic and finding the right audience. If you’re deciding between a few ideas, Google Trends can help you compare search interest and see which topics are gaining attention.
2. Define your target students
Once you’ve pinned down the topic, you can start researching your audience.
If you’re a teacher and already have a student base, the best way to do this is by asking your students directly what they want to get out of the course. This is very easy to do with online questionnaires and survey templates.
If you don’t already have an enrolled audience, jump into online forums and social media groups where interested people are likely to hang out. Participate in discussions, ask for feedback, and find out what they would like to see in an online course. This will be an enormous help when you’re building the course structure and developing the content.
3. Pick the right platform for hosting and delivery
An online course requires a platform to host your videos and content, and you need to choose the right one for you. Most options fall into one of these types:
- Video hosting platforms are best if you want to share prerecorded lessons with minimal setup, and any of the popular video hosting platforms can work for a course.
- All-in-one course platforms, including Thinkific and Teachable, bring lessons, student access, and course management together in one place.
- Learning management systems (LMS) such as Canvas suit structured, multi-session courses and schools that need to track student progress.
- Live class and webinar tools work best for live sessions with real-time interaction, and Zoom is a popular choice.
- Online course marketplaces like Udemy help you reach an existing audience instead of building your own.
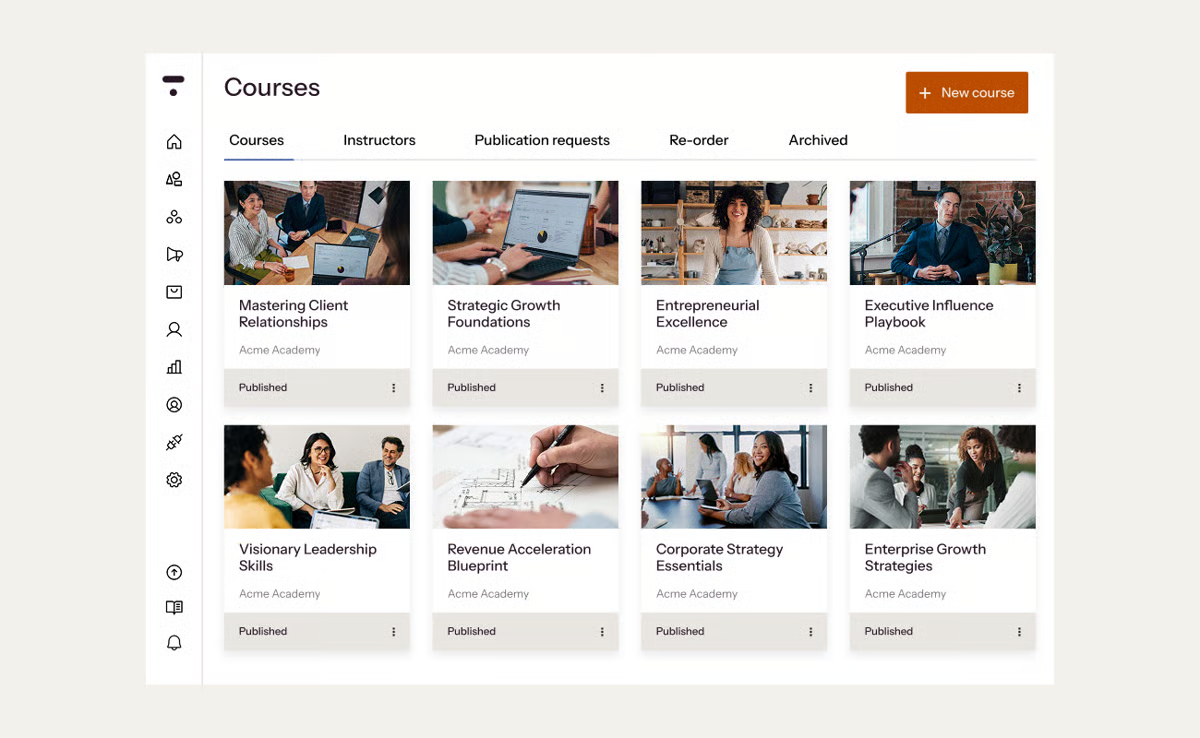
Most of these platforms include video analytics, so you can easily access important insights and data, such as attendance, views, and drop-off rates.
4. Build your course content
Strong course content starts with a clear plan. Before you record anything, decide what students should be able to do by the end of the course, then build each lesson around that goal.
Start by creating an outline of the course and write one learning objective for each lesson. Then answer a few planning questions:
- How many sessions will it include?
- What topics will you cover and in what order?
- Will the course be self-paced with prerecorded sessions, or live on a set schedule?
- What written material will accompany the videos?
Once the outline is ready, you can develop the course content. If you’re filming videos, you can either write scripts in advance or record live sessions from basic notes, depending on what you feel comfortable with. Keep each lesson focused on a single objective, and split longer topics into shorter videos so students can finish them easily. AI writing tools can help you draft outlines, scripts, or quiz questions, but review everything for accuracy and add your own examples.
You should also develop and produce accompanying course materials in advance, such as presentations, quizzes, and homework assignments. For presentations, Jotform Presentation Agents can turn your course materials into voice-narrated slides that guide students through each lesson, quiz, and assignment. A short quiz at the end of each lesson also helps students check their understanding against the lesson objective.
You can build online courses that are complex or multi-session with learning management software that includes a course authoring feature. Tools like these are part of a growing educational technology landscape that gives course creators more ways to teach and manage students online.
5. Create a course registration form
When the course is ready to go live, you need an easy way to gather registrations.
A digital course registration form streamlines the entire process for students, enabling them to register and attend the course completely online. It’s also a great way to organize your registration process and manage the audience data in an efficient and centralized way.
When customizing your course registration form, ask for more than the participant’s name and email address. It’s important to collect details like their date of birth, phone number, professional title or job (if applicable), other courses they have completed on the same or similar topics, and how they heard about your course.
This can help you adapt elements of the course to certain audiences, for example, making a Q&A session more focused on the needs of attendees. You can also use this information for future follow-up or marketing purposes.
To compare a list of registration software, you can check out our article on class registration software.
6. Set up payments for your online course
If you’re charging a course fee, it’s important to make it as easy as possible for the audience to register and pay, and that means providing a lot of payment options.
First, decide how you will price the course. The most common models are:
- One-time fee: Students pay once for full access to the course.
- Tiered pricing: Students choose between packages, such as the course alone or the course with live Q&A sessions and extra materials.
- Subscription: Students pay a recurring fee for ongoing access, which suits courses where you keep adding new lessons.
- Early-bird pricing: The first students get a discounted price before the course officially launches.
If you’re not sure what to charge, check what similar courses cost. An early-bird offer is also a low-risk way to see how your audience responds before you set the final price.
Once you have a price, you can choose from Jotform’s range of digital payment forms that integrate with more than 40 payment gateways, so no obstacles will stand in the way of course attendance.
Consider engaging potential participants with a “preview” video ad describing the course and what they will get from it. You can add a link in the video description to your signup and payment forms so that students can make the decision on the spot and complete their registration quickly.
Using a digital payment form isn’t just good for students. It also makes the administrative side more efficient and manageable. And that makes the online course a more profitable and worthwhile investment of your time and energy.
Manage your online course from registration to payment with Jotform
Creating the course content is only part of running an online course. You also need a reliable way to collect registrations, accept payments, organize student details, send confirmations, gather feedback, and keep the admin side manageable after launch.
Jotform gives you a no-code toolkit for handling those tasks:
- Use course registration forms to collect student details, course selections, prerequisites, and contact information.
- Accept course fees with payment forms and 40+ payment integrations.
- Keep registrations and student records organized in Jotform Tables.
- Send confirmations, reminders, and follow-ups with automated emails.
- Build a simple course hub or registration portal with Jotform Apps.
- Use Jotform Sign for waivers, consent forms, or participation agreements.
- Create surveys, quizzes, and homework forms to collect feedback and keep students engaged.
- If your school uses Canvas, connect Jotform with Canvas LMS so form submissions can create students and enroll them in courses.
Start with a course registration template, customize it for your course, and use Jotform to manage signups, payments, and student admin in one place.
This article is for educators, subject-matter experts, creators, and entrepreneurs who want to turn their knowledge into an online course and manage content, registration, payments, and students effectively.


































































































Send Comment: