

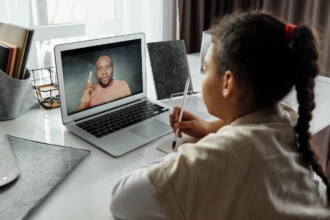
Just as classroom lectures are the primary teaching tool in traditional education, online lectures are a core form of educational technology in e-learning. Creating digital recordings of lectures is a great way for educators to supplement classroom instruction or to take a class totally online. Students can watch the lectures on the course website at any time — making learning more convenient and accessible.
But creating effective online lecture videos can be overwhelming and challenging, especially if you don’t know where to begin. Luckily, a variety of available tools and formats make it easy for anyone — on any budget — to get started. Learn how to create an online lecture by following this simple step-by-step process.
How to create an online lecture
- Choose your format
- Gather your tools
- Prepare to record
- Record and upload
1. Choose your format
Talking head video
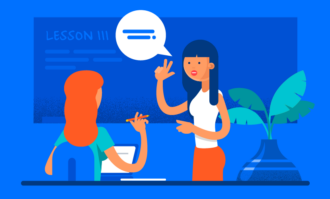
One of the most popular formats for online lectures is the “talking head” format, in which an expert lectures on a topic while looking into the camera. This type of video is very quick and easy to create, and it mimics an in-person lecture.
However, sometimes people find it difficult to follow a video consisting of only a talking head, so including a visual element will enhance your presentation. You can do this by either speaking in front of a green screen and adding visuals digitally in post-production or using a physical whiteboard or paper flip chart during your lecture.
Slideshow
Another common format that makes it easier to integrate visuals is the slideshow. Slideshows are ideal for topics with lots of specific information — such as dates, statistics, names, or terminology — as learners can follow along with the text. Slideshows are also easy to make with common presentation software, such as PowerPoint, Keynote for Mac, and Google Slides.
Of course, a slideshow on its own isn’t a lecture, so you need to add an audio recording of your commentary. You can easily do this with either a voiceover or by adding a small talking head video in the corner of the screen using the software mentioned below.
Screen sharing
For subjects that involve a step-by-step walkthrough or demonstration, like working out math or programming problems or teaching how to use specialized software (such as for graphic design, music production, or game development), screen sharing is usually the best option.
For these lectures, record your screen as you demonstrate and navigate the process or software you’re teaching. Just be sure to keep any personal or irrelevant information off your screen while recording.
Pro Tip
Want to make your online lectures more engaging? Try Jotform Presentation Agents to turn your slides into interactive, voice-narrated presentations. They’re perfect for guiding students through complex topics at their own pace, no editing or technical skills required.
2. Gather your tools
Camera and microphone
When taking the most basic approach, you can create an online lecture with just a laptop by using the built-in webcam and microphone to record. However, your lecture will look and sound a lot better if you use an external camera and microphone.
The problem with using your built-in laptop webcam is you don’t have any control over the placement of the camera. For optimal video quality, you can either mount an external webcam onto your computer using a clip or stand or place a DSLR camera (or even your smartphone) on a tripod in order to keep the camera stable.
When it comes to audio, investing in an external microphone will greatly improve your sound quality. Choosing one can be overwhelming — there’s a wide range of different types on the market. While we won’t go into much depth on microphones, here are some tips on choosing mics for an online lecture.
There are two types of professional microphones: condenser and dynamic. To record your lecture, you want a condenser microphone, as it limits background sounds.
If you plan on standing or moving around, a clip-on microphone you can attach to your shirt is a good option. If you’ll be sitting in one place (at your desk, for example), a shotgun microphone will likely produce the best sound quality. These specialize in picking up sound from one direction.
Software
If you plan on doing a slideshow or sharing your screen, you’ll need to use a screen capture software program such as Screencast-O-Matic, Camtasia, or ScreenFlow. These tools allow you to share and record your screen while talking through the topics. If you’re on a tight budget, there are also free software options with similar functionality — such as Ezvid for Windows and FlashBack Express — or you can use PowerPoint’s voiceover feature to record audio with your PowerPoint presentation.
For a simpler alternative to screen sharing on topics such as math, you can also use an interactive whiteboard app such as ShowMe (for iPad) or Explain Everything. These allow you to write problems on your tablet while recording an audio narration.
3. Prepare to record
Once you’re ready to record, create any slides or visuals, and then write out a script or outline of what you want to talk about.
If you’re recording video, make sure there’s no visible clutter behind you. Make eye contact with the camera at eye level, and ensure your face is softly lit from the front, such as from a desk lamp. Make sure there’s enough light, but minimize light coming from behind you (which can make you look like a shadow) or beneath you (which can make you look like you’re telling spooky stories around a campfire). Experiment until you find the right balance.
Audio is difficult to edit, so do your best to minimize any background sounds. Turn off anything that produces ambient noise (like loud clocks or air conditioning), close your windows to prevent noise from outside, and ask any roommates or family members to avoid making noise while you’re recording.
Before you record, do a test run to make sure all equipment is working correctly and the output from audio and video looks and sounds presentable.
Pro Tip
The best voice recording software for online lectures should make it easy to capture clear narration, reduce background noise, and export audio you can add to slides, screen recordings, or course videos.
4. Record and upload
When you record your lecture, record all the way through in one take (you can always edit out any mistakes later if you choose). Once you’re satisfied with the final product, upload the lecture into your learning management system or wherever it will be hosted online for your students to view.
So you’ve created your online lecture. But there’s one final step. The key to running a successful online class is to focus on continual improvement.
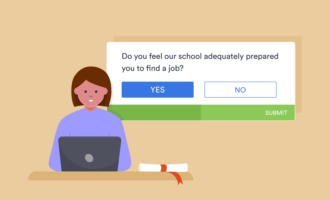
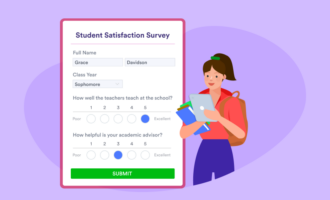
After they’ve watched your lecture, solicit feedback from your audience by using one of Jotform’s secure feedback forms. That way, you can discover what worked and what didn’t, and improve your next recording. When you’re ready to take your class to the next level, you can use Jotform to create quizzes or polls, and collect course registrations. It is also possible to use it as your best online lesson planner.


Send Comment: