
Adding a map to your WordPress website is a five-minute task. It helps build trust, reinforces your local SEO, and makes it easier to buy from you. But making sure it displays properly and has the features you need can take hours. And if you forget to account for mobile users, you might not realize the map is clipped on small screens.
This guide walks you through three options for adding maps to your WordPress site: a native iFrame, a map plug-in, and a free widget. We’ll also cover issues and trade-offs so you can decide which is best for you.

Three options for embedding a map in WordPress
| Method | API key required | Cost | Mobile-responsive | Multi-pin support | Setup time |
|---|---|---|---|---|---|
|
Native iFrame |
No |
Free |
No; fixed width/height |
No |
About 5 minutes |
|
WordPress plug-in |
Yes; free for 10,000 map loads/month |
Free for core features; paid for advanced features |
Depends on plug-in |
Yes; often paywalled |
About 15–25 minutes |
|
Jotform Google Maps Widget |
Yes; free for 10,000 map loads/month |
Free widget; includes advanced features |
Yes |
Yes; free |
About 15 minutes |
Option 1: Use a native Google Maps iFrame
The Google Maps iFrame option is the simplest and fastest way to get a map on your website. You look for your business on Google Maps, click Share, copy the code, and paste it onto a WordPress page. We provide a step-by-step walkthrough here so you can get it running quickly.
The simplicity ends up being a limitation in itself. You can’t customize the way the map looks, add multiple pins, or display additional information on top of the default view. You also have to experiment with map sizes and your WordPress page layouts to make sure it’s usable on mobile.
How to embed a Google Maps iFrame
Before you start, register your business in the Google Business Profile platform. This allows you to display your full information in Google Maps, including opening times, reviews, or your food menu. If you’re just pointing to an address that doesn’t belong to you or a landmark, skip to the first step.
Get the embed code from Google Maps
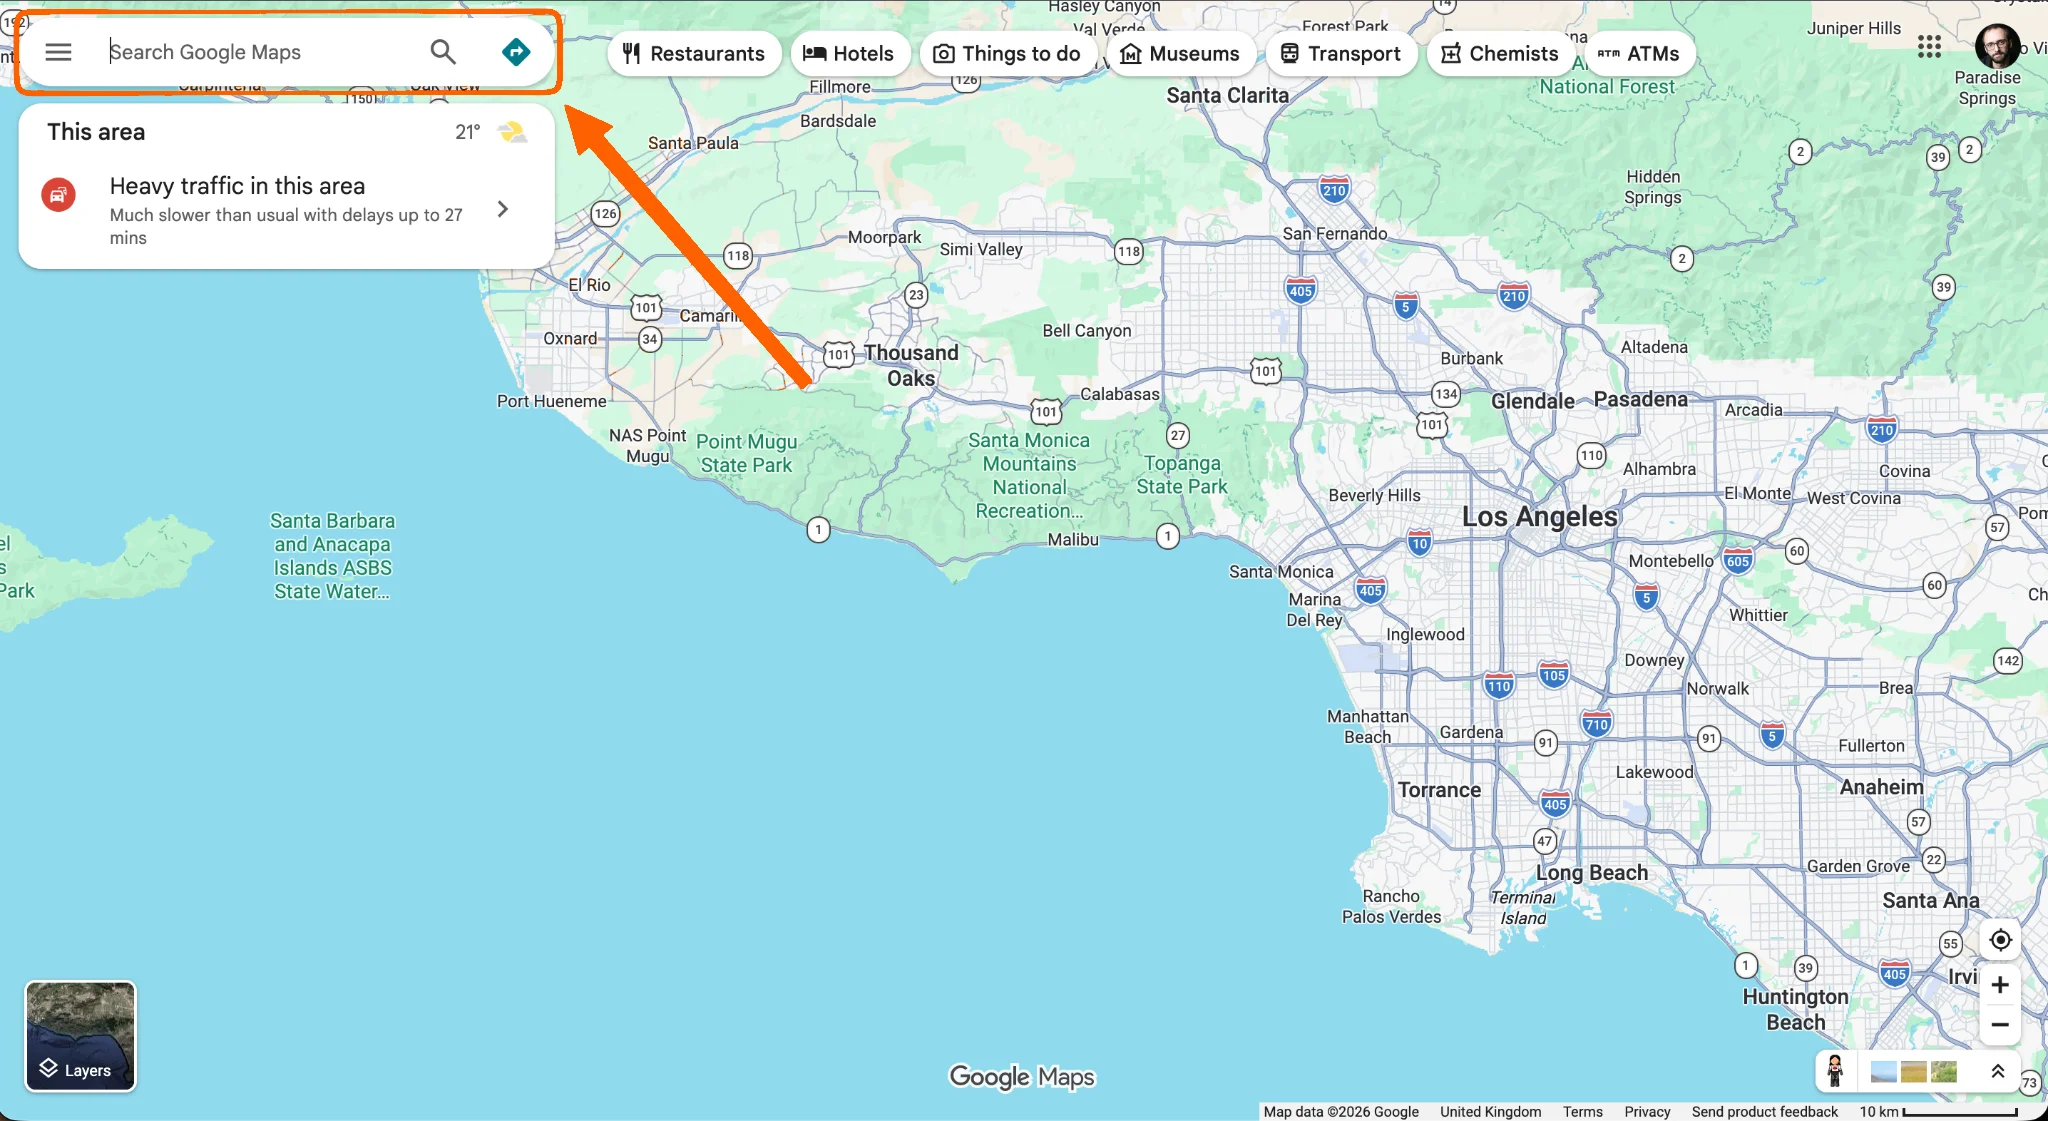
- Go to google.com/maps and search for your business name or address.
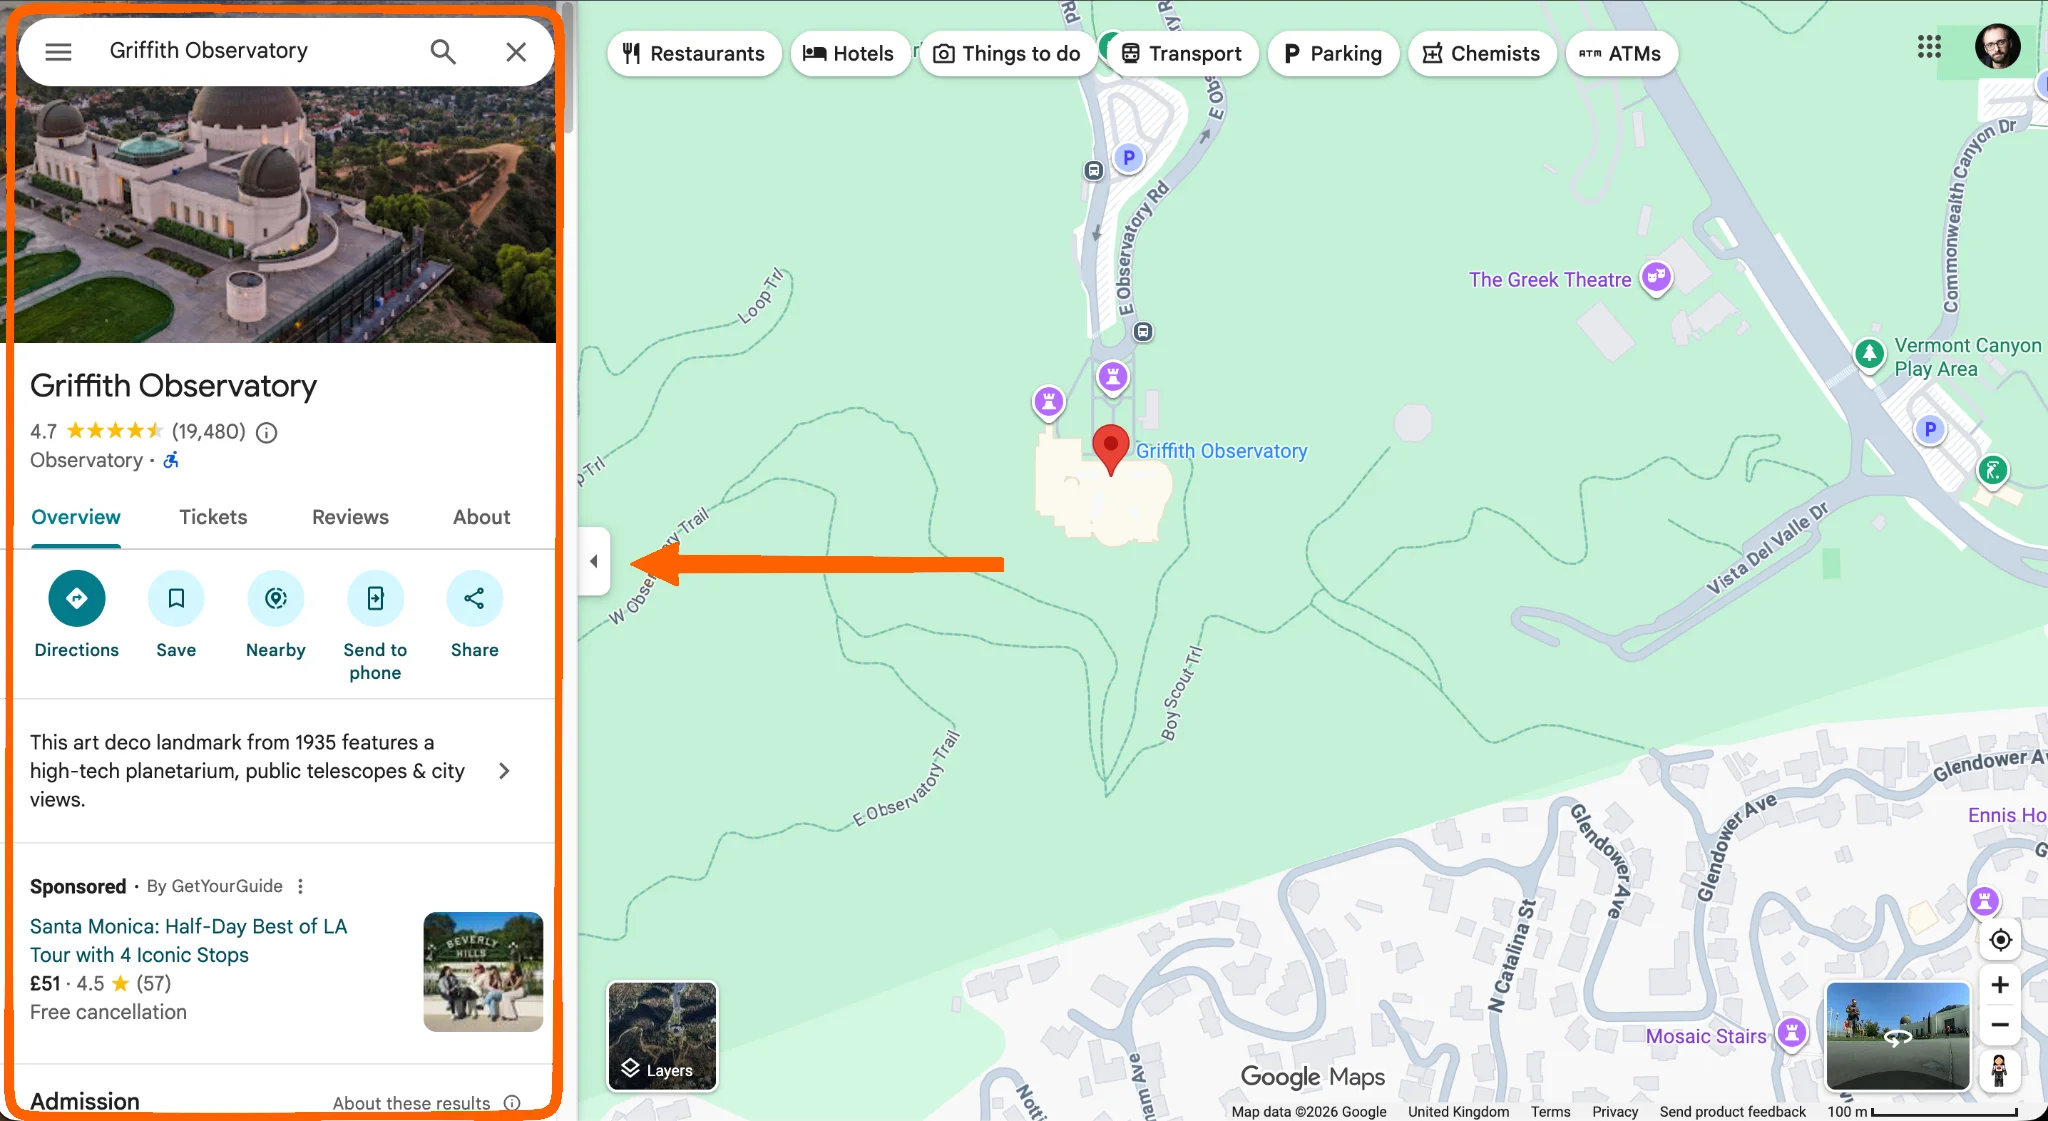
- Confirm that you selected the correct pin by inspecting the business details on the left side of the screen.
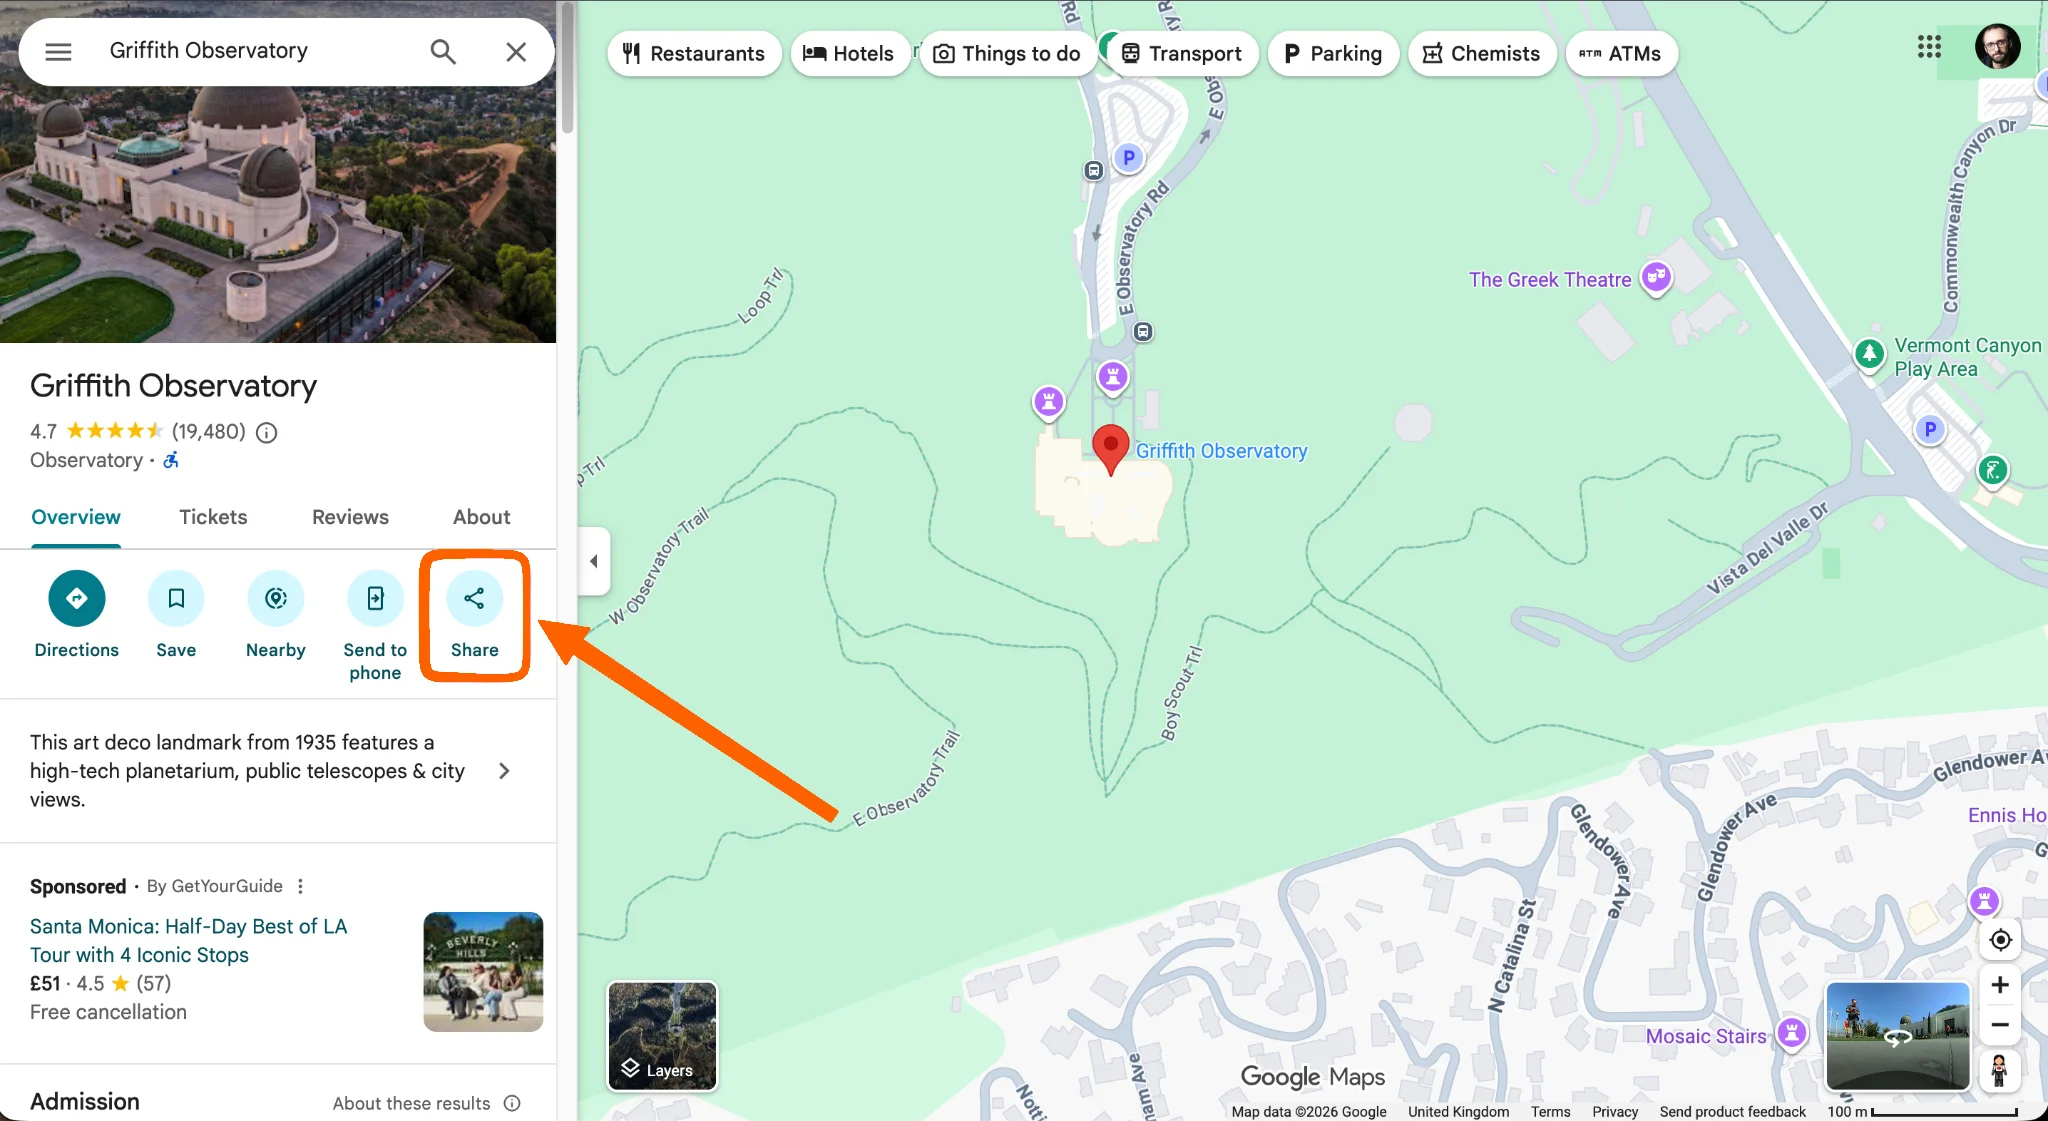
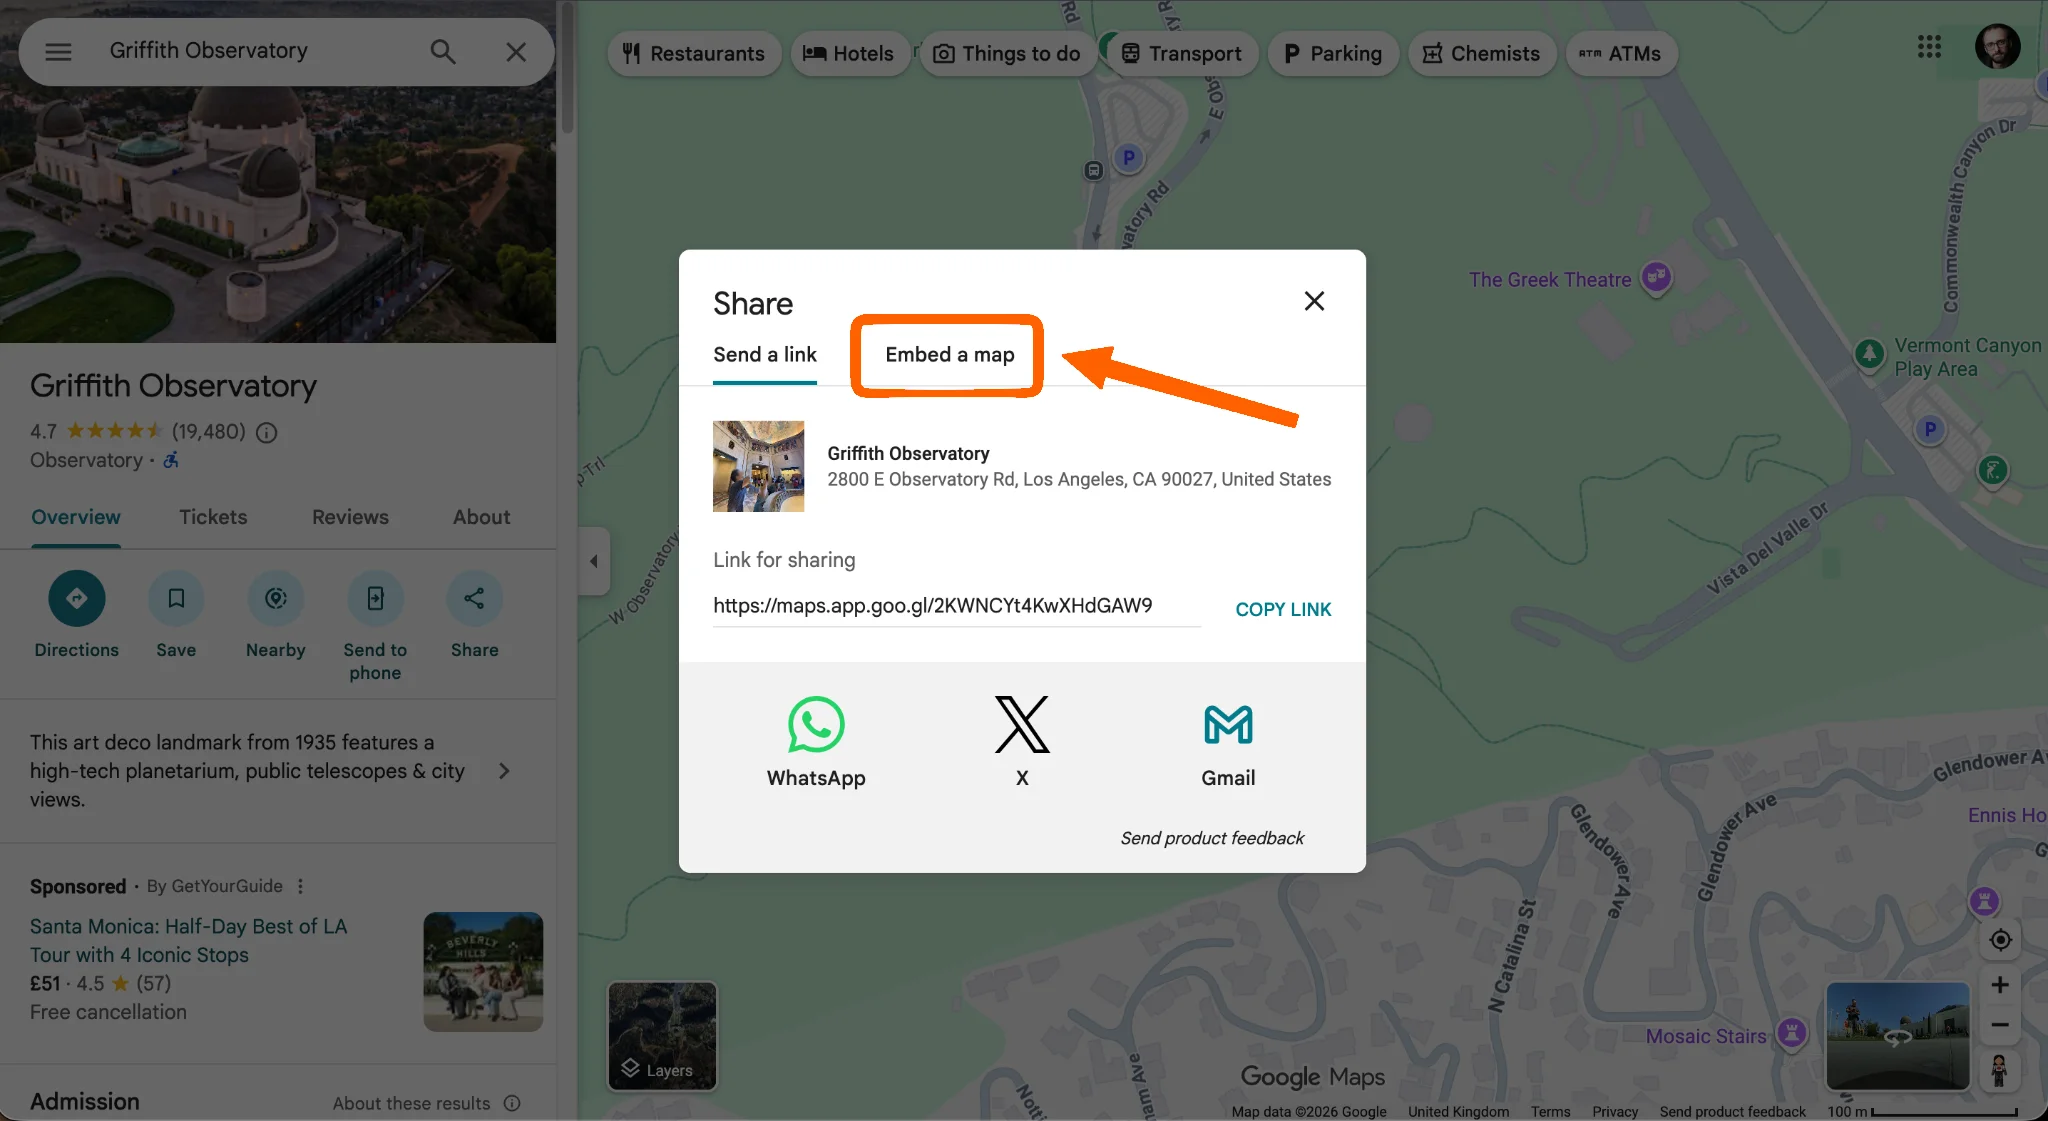
- Click Share.
- A popup appears on the screen. Click the Embed a Map tab.
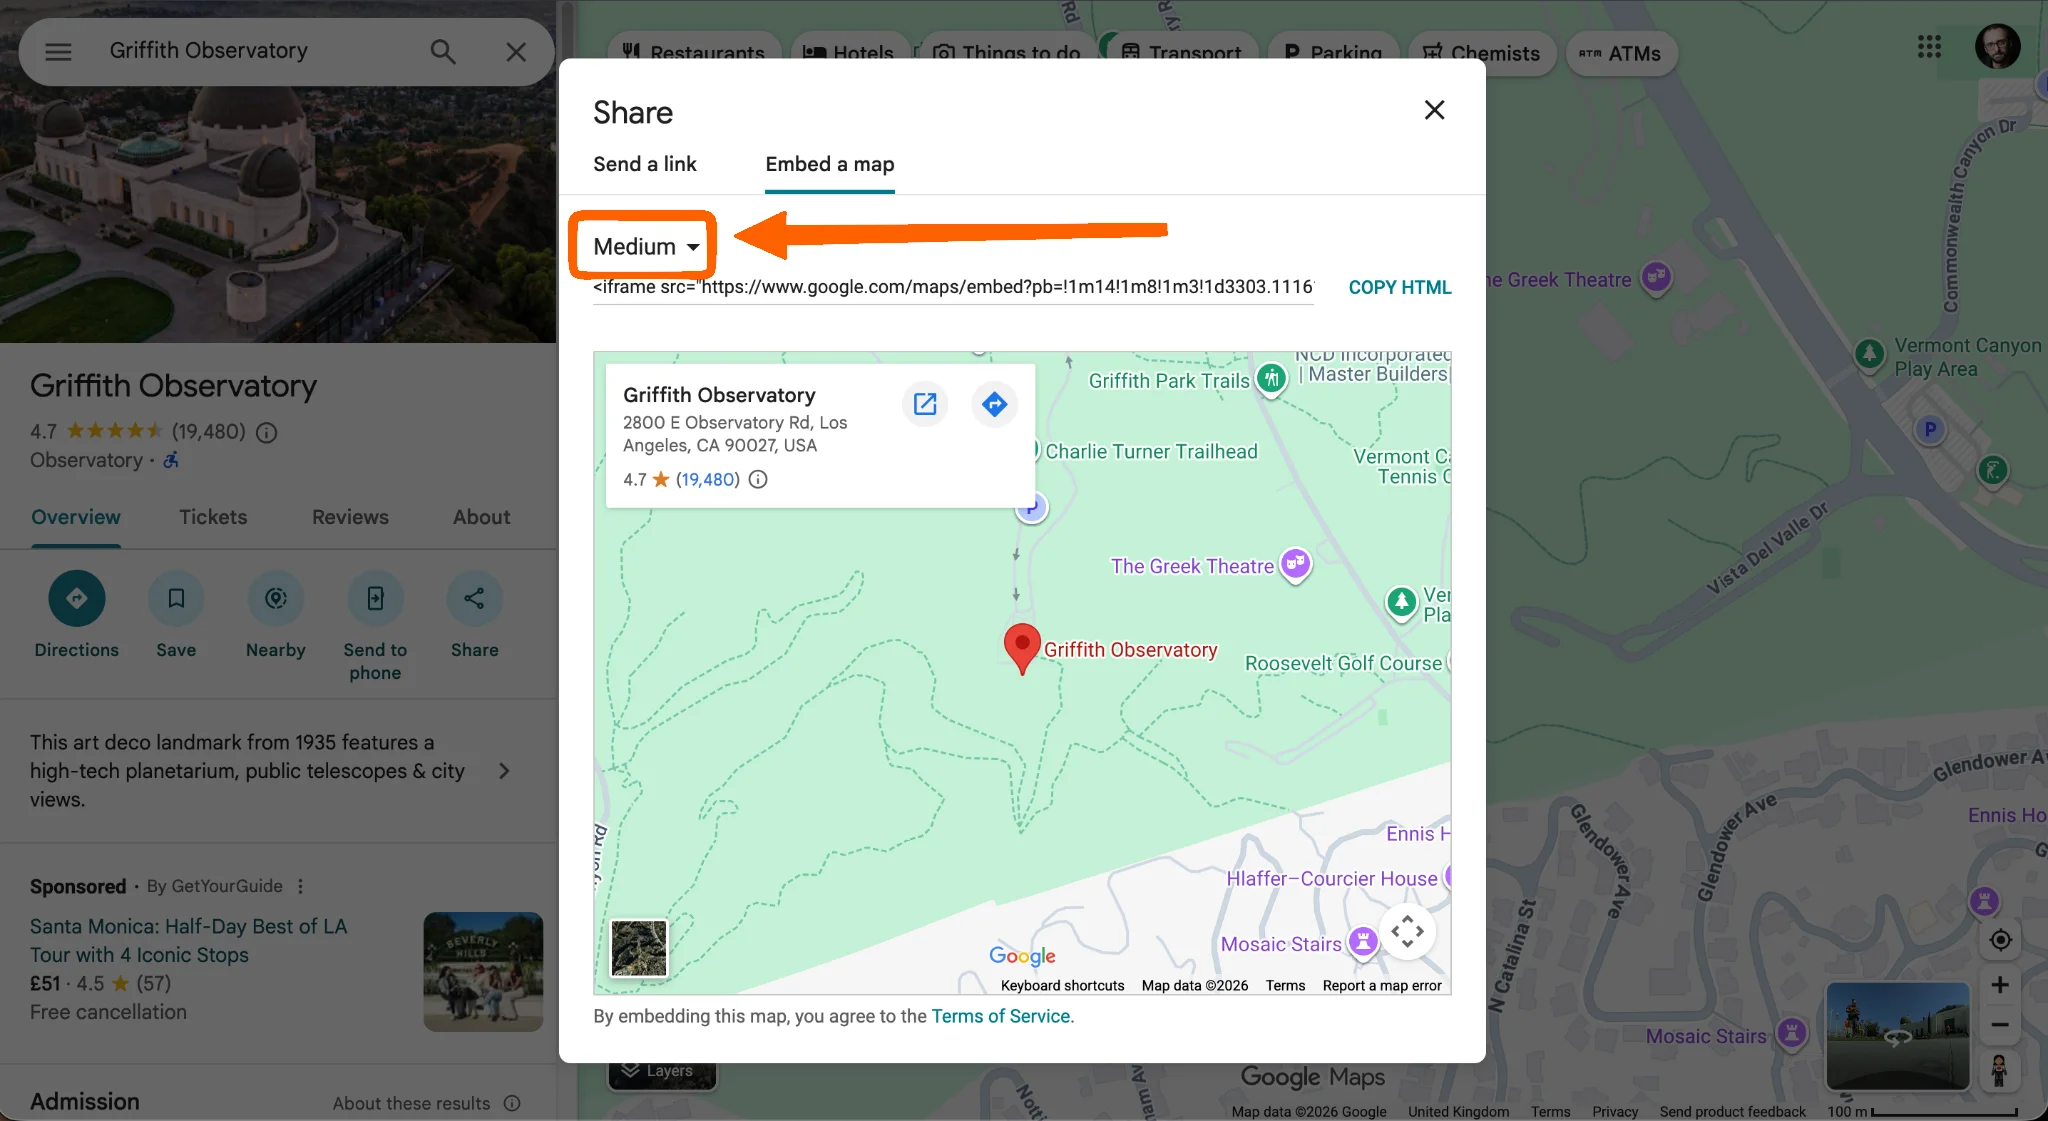
- A preview of what the map will look like on your website appears. It’s set to medium size by default; you can choose to display a small or large map, or even select a custom size by using the dropdown at the top left.
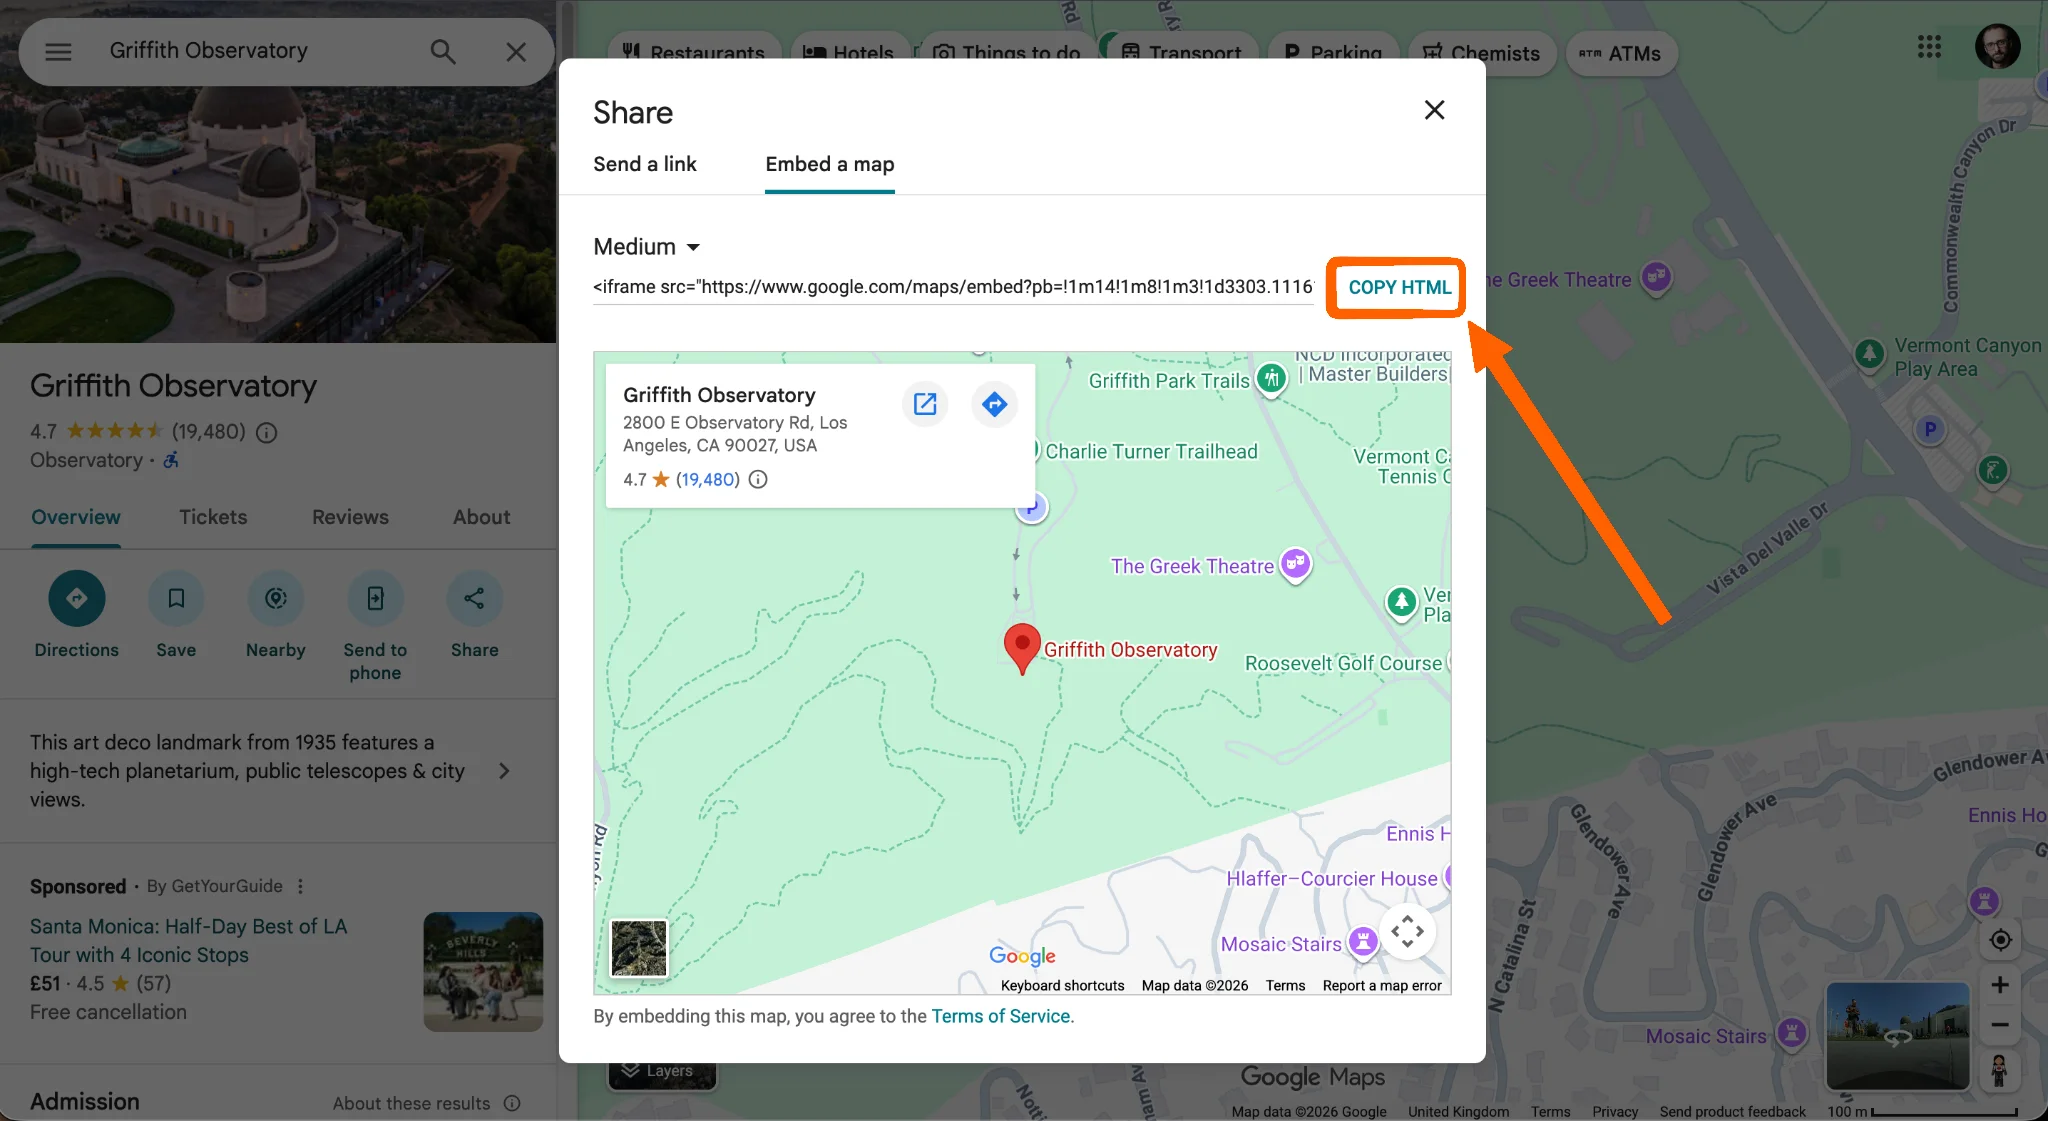
- After selecting the size, click Copy HTML. This copies the iFrame code snippet to the clipboard.
Embed it in WordPress (Block editor/Gutenberg)
- In WordPress, open the page or post where you want to place the map.
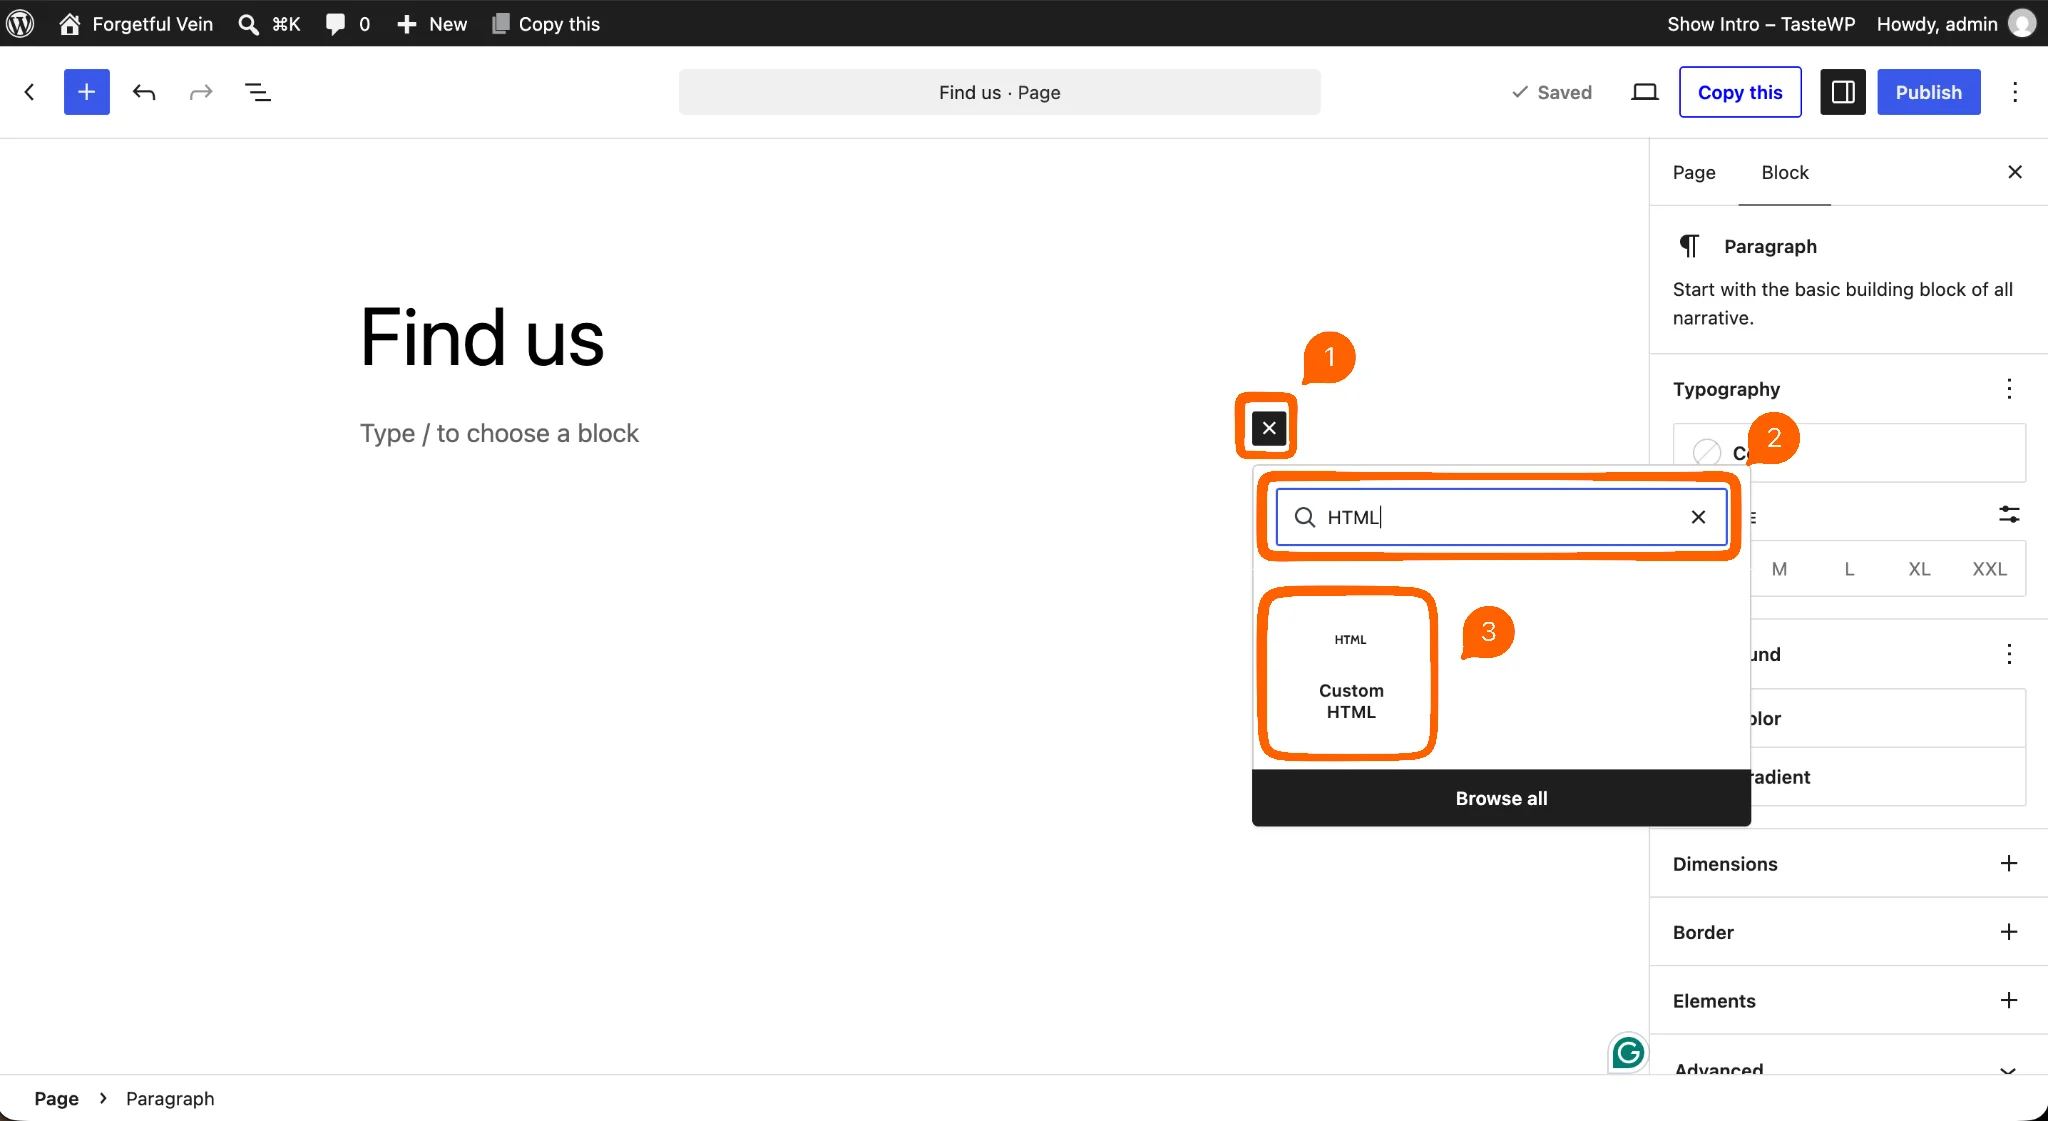
- Click the + block inserter icon, type HTML to filter, and click Custom HTML to add the block to the page.
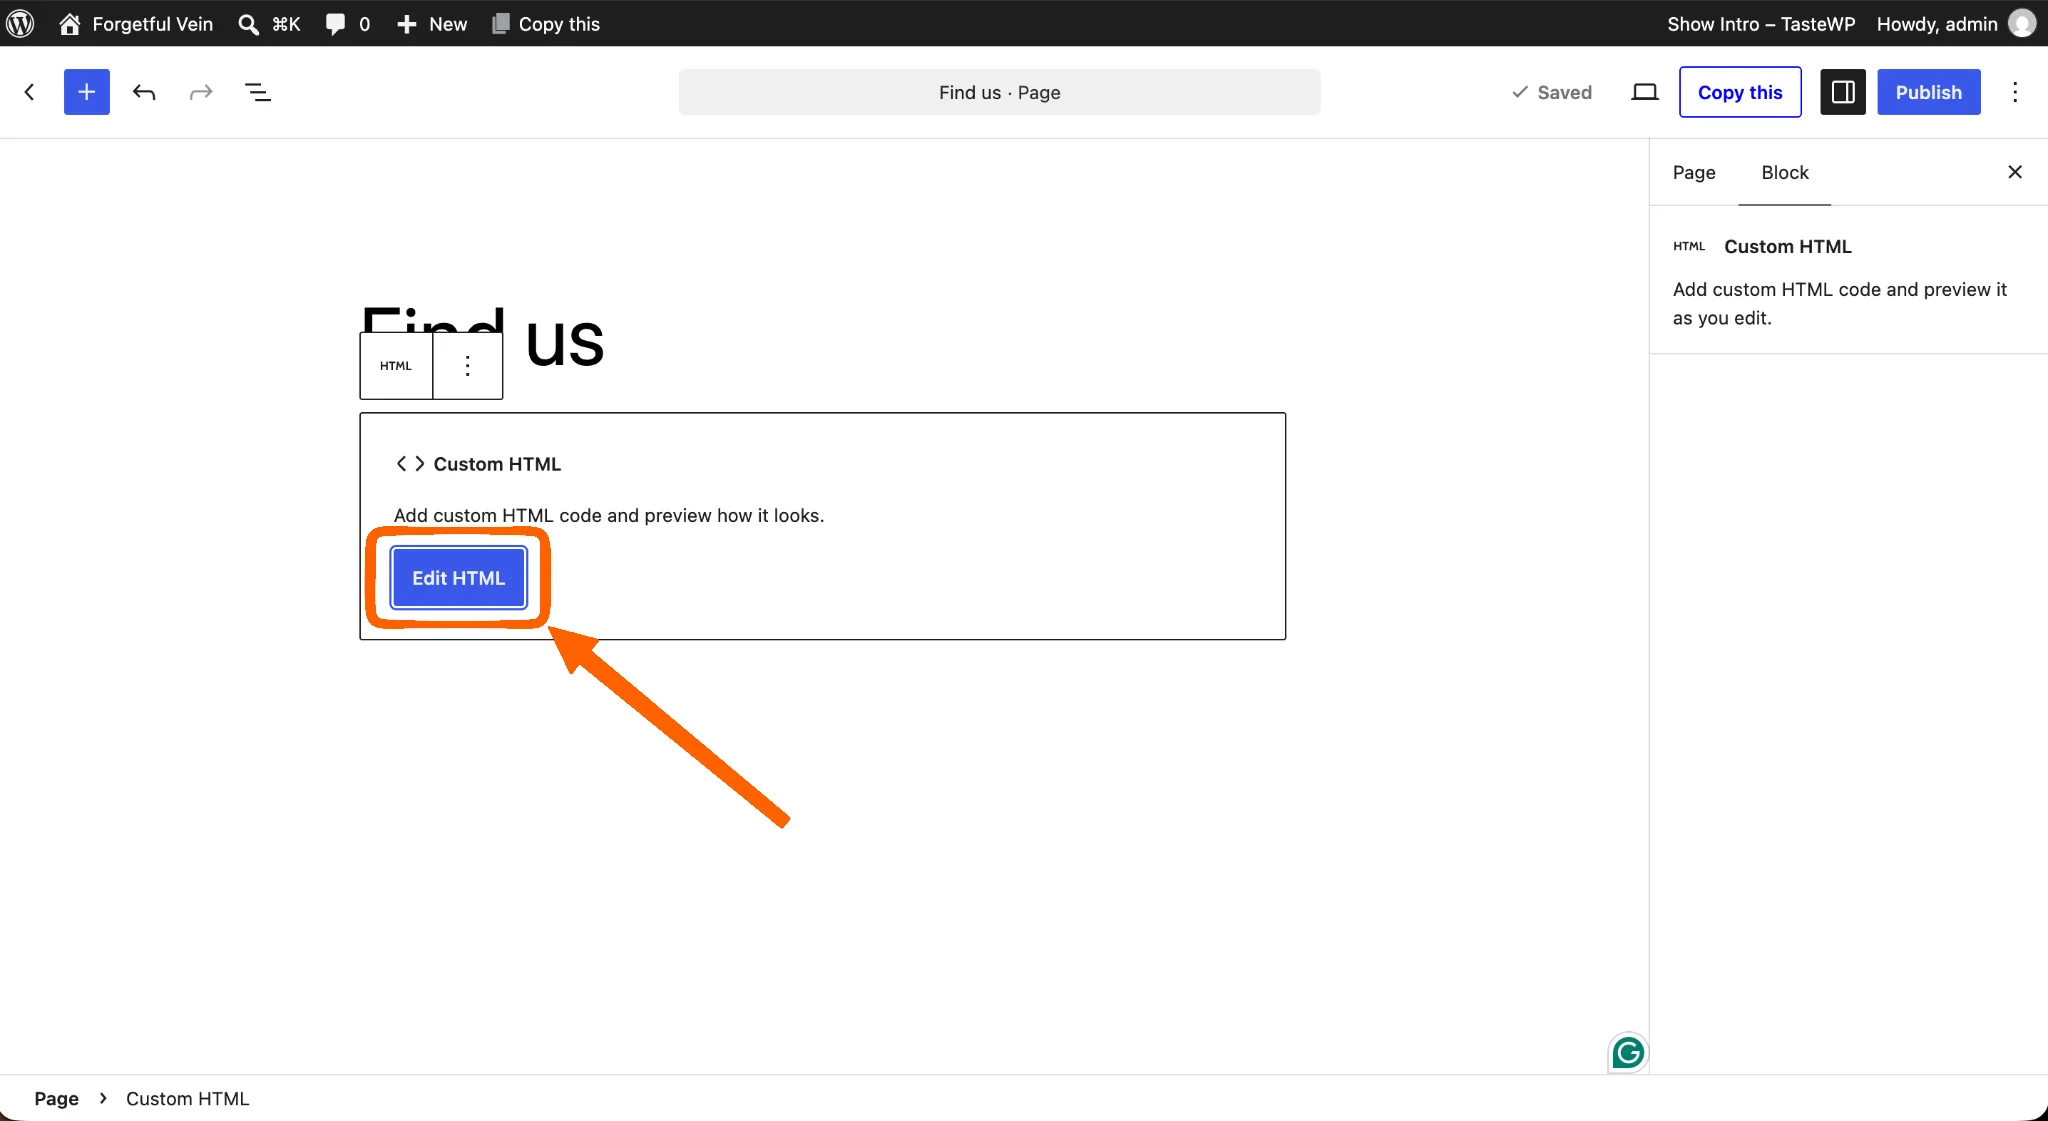
- In the new block, click Edit HTML.
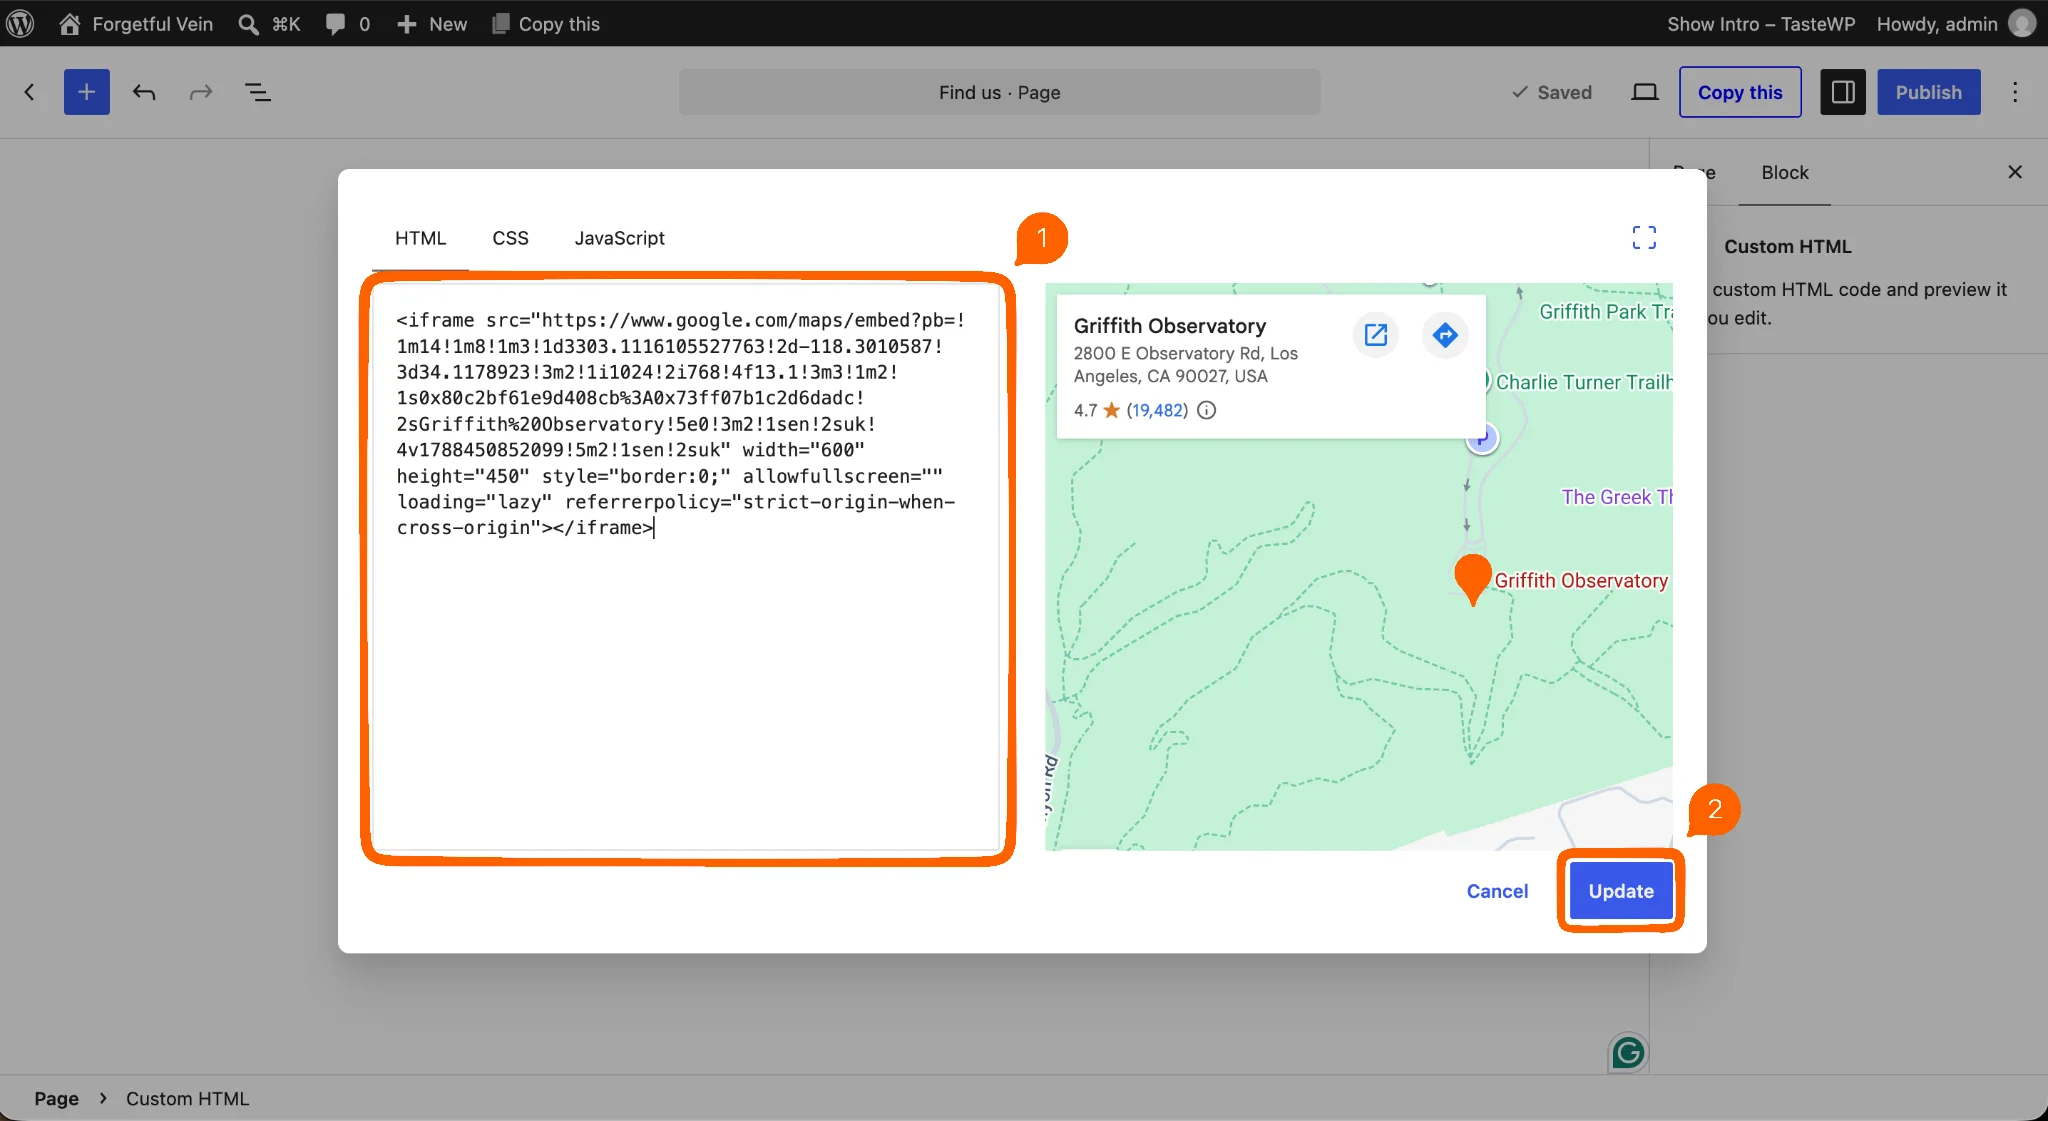
- Paste the iFrame code into the popup. The preview displays on the right side. Click Update to finish.
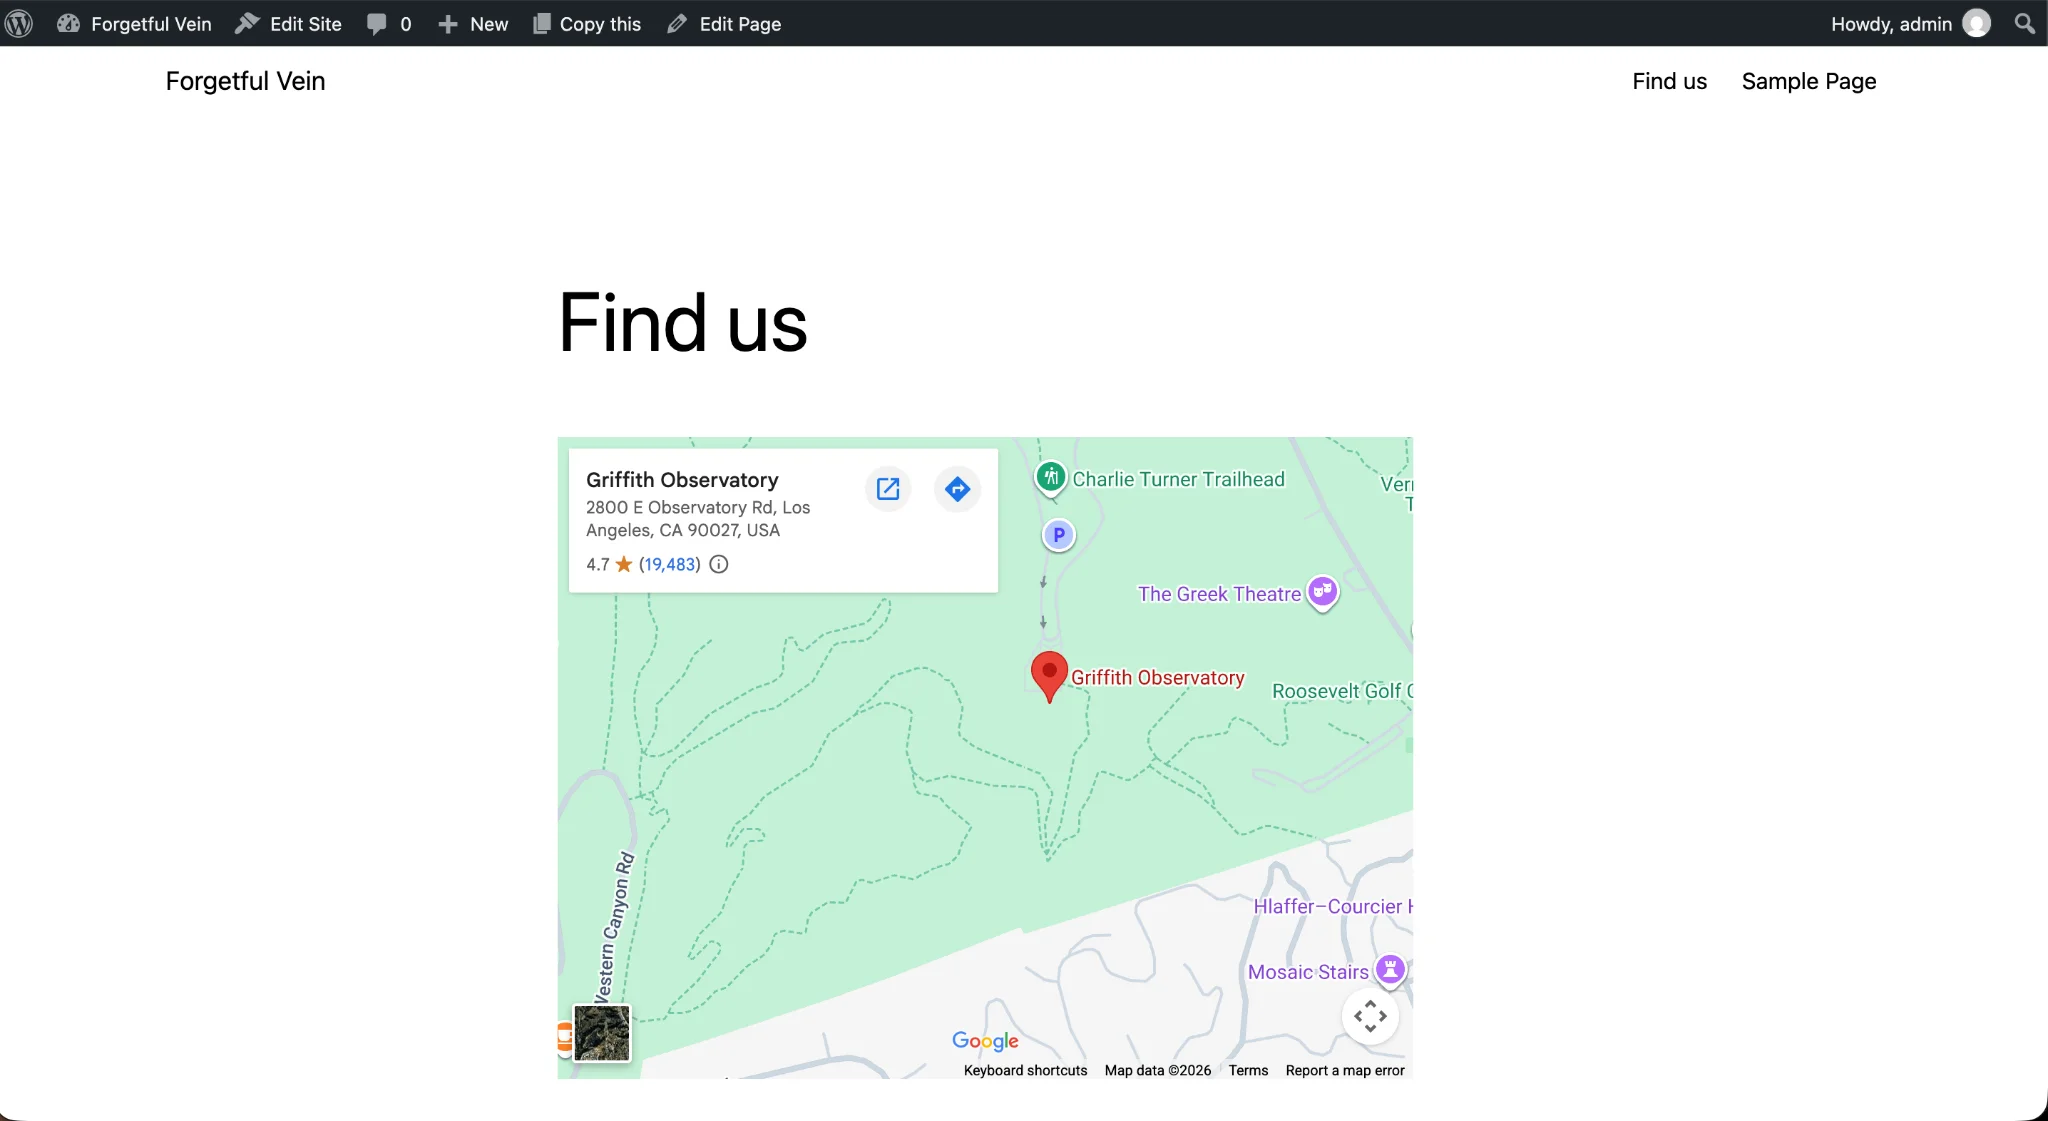
- The page now displays the embedded iFrame map. Click Publish or Save to make it live on your website, and view the page to see how it looks.
If this doesn’t match how you edit pages in WordPress, see how to add HTML using one of these editors:
Option 2: Install a dedicated WordPress map plug-in
Compared with the Option 1, a dedicated WordPress plug-in adds more customization and functionality. You install it on your site the same way you install any other plug-in, create and paste your Google Maps API key into the settings, and then add the map element to a page.
This option adds some complexity. Getting the Google Maps API key requires creating an account in Google Cloud Platform, setting up a billing account, and navigating a technical setup flow. Also, the map plug-ins work on a freemium basis, offering a decent free plan with basic features but gating the best capabilities behind a one-time license or an annual fee.
You’re adding to your plug-ins, so test your website’s speed after you finish the setup. If you’re hosting your site on a low-cost plan, too many plug-ins can slow everything down considerably, affecting user experience and potentially causing visitors to leave.
Making the map functional for mobile users depends on the plug-in and how you configure it. For instance, WP Go Maps recommends setting specific height and width values to avoid a cramped implementation.
How to set up a WordPress map plug-in
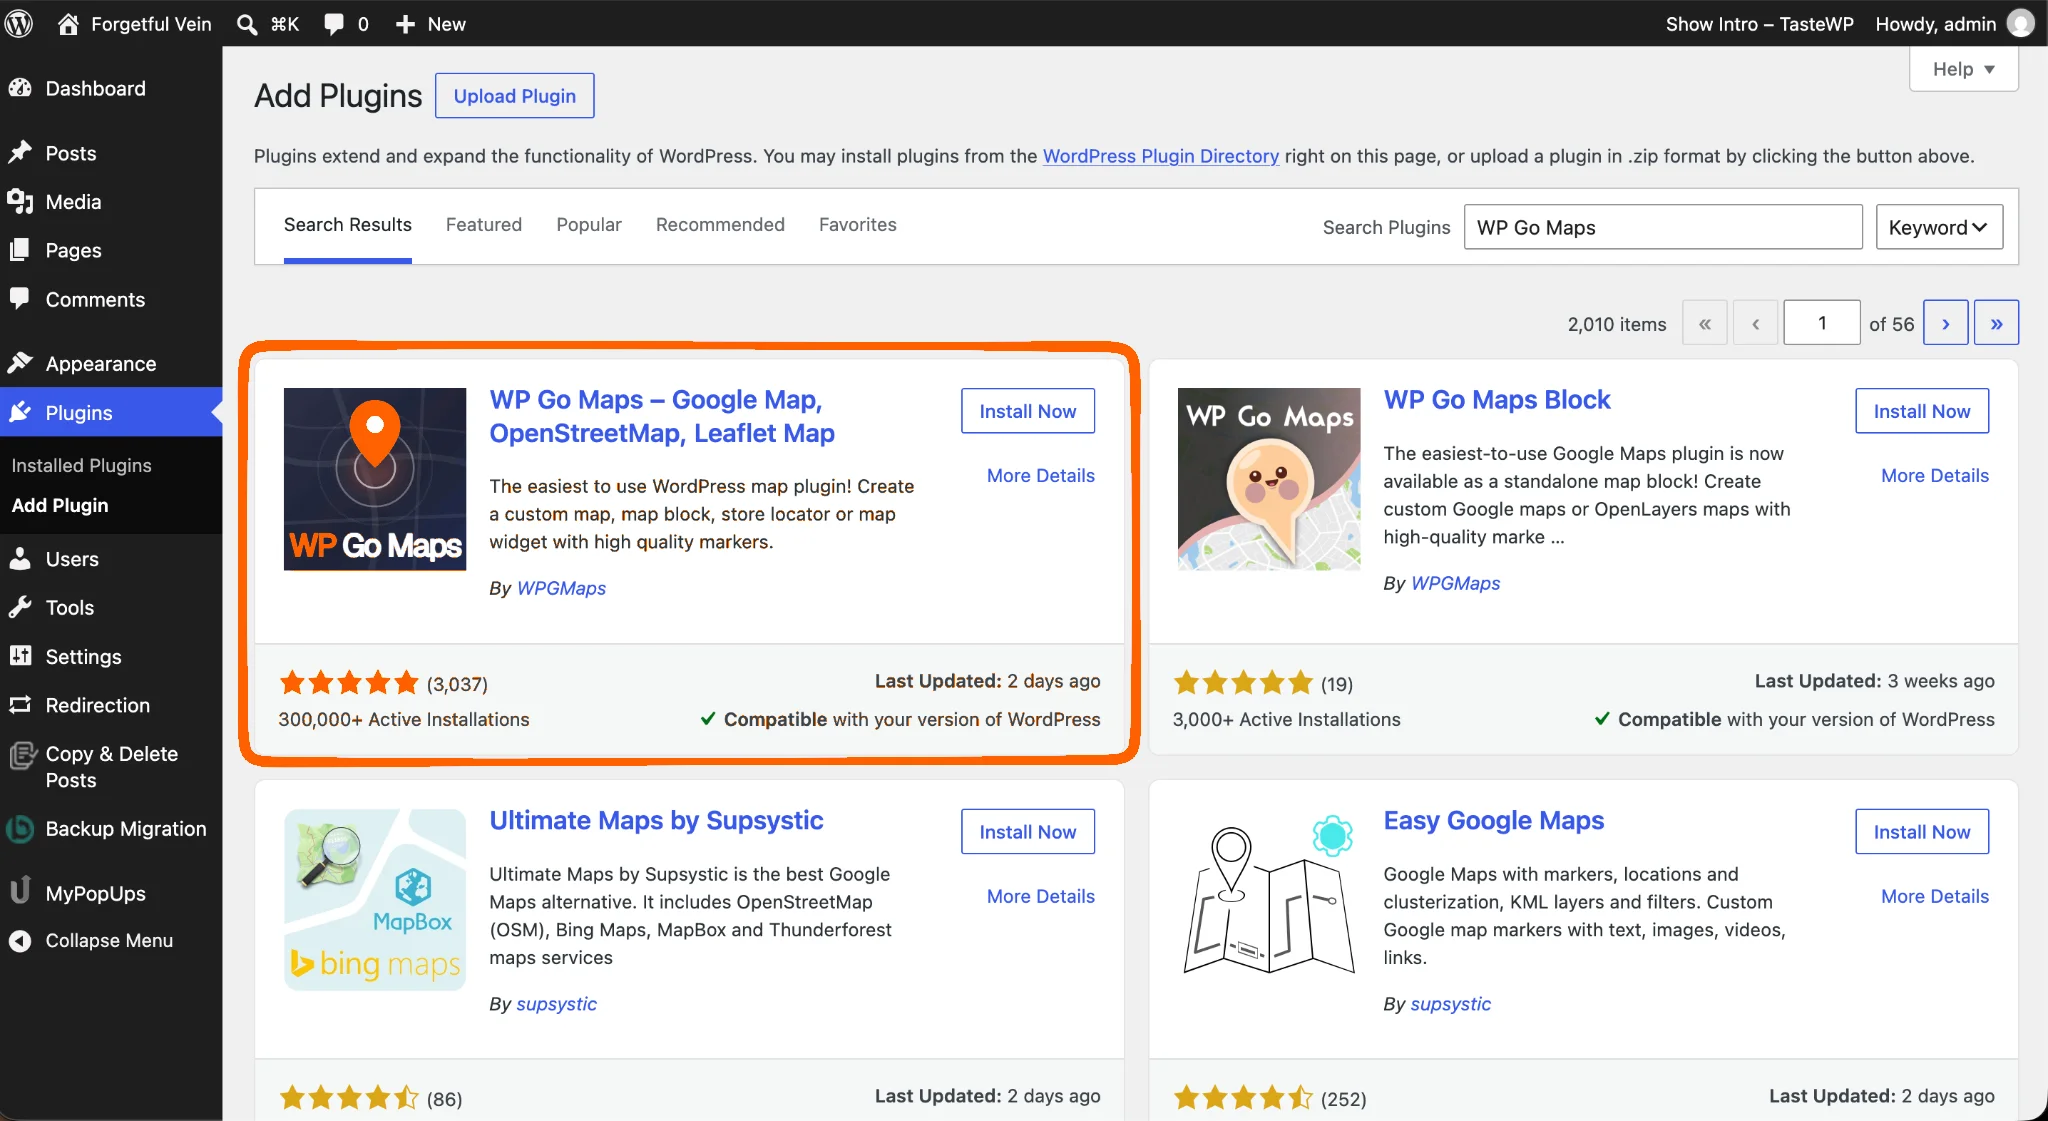
For this example, I’ll use one of the most popular Google Maps plug-ins for WordPress, WP Go Maps.
Set up WP Go Maps
- Install and activate WP Go Maps.
- Click Skip Introduction to finish setup.
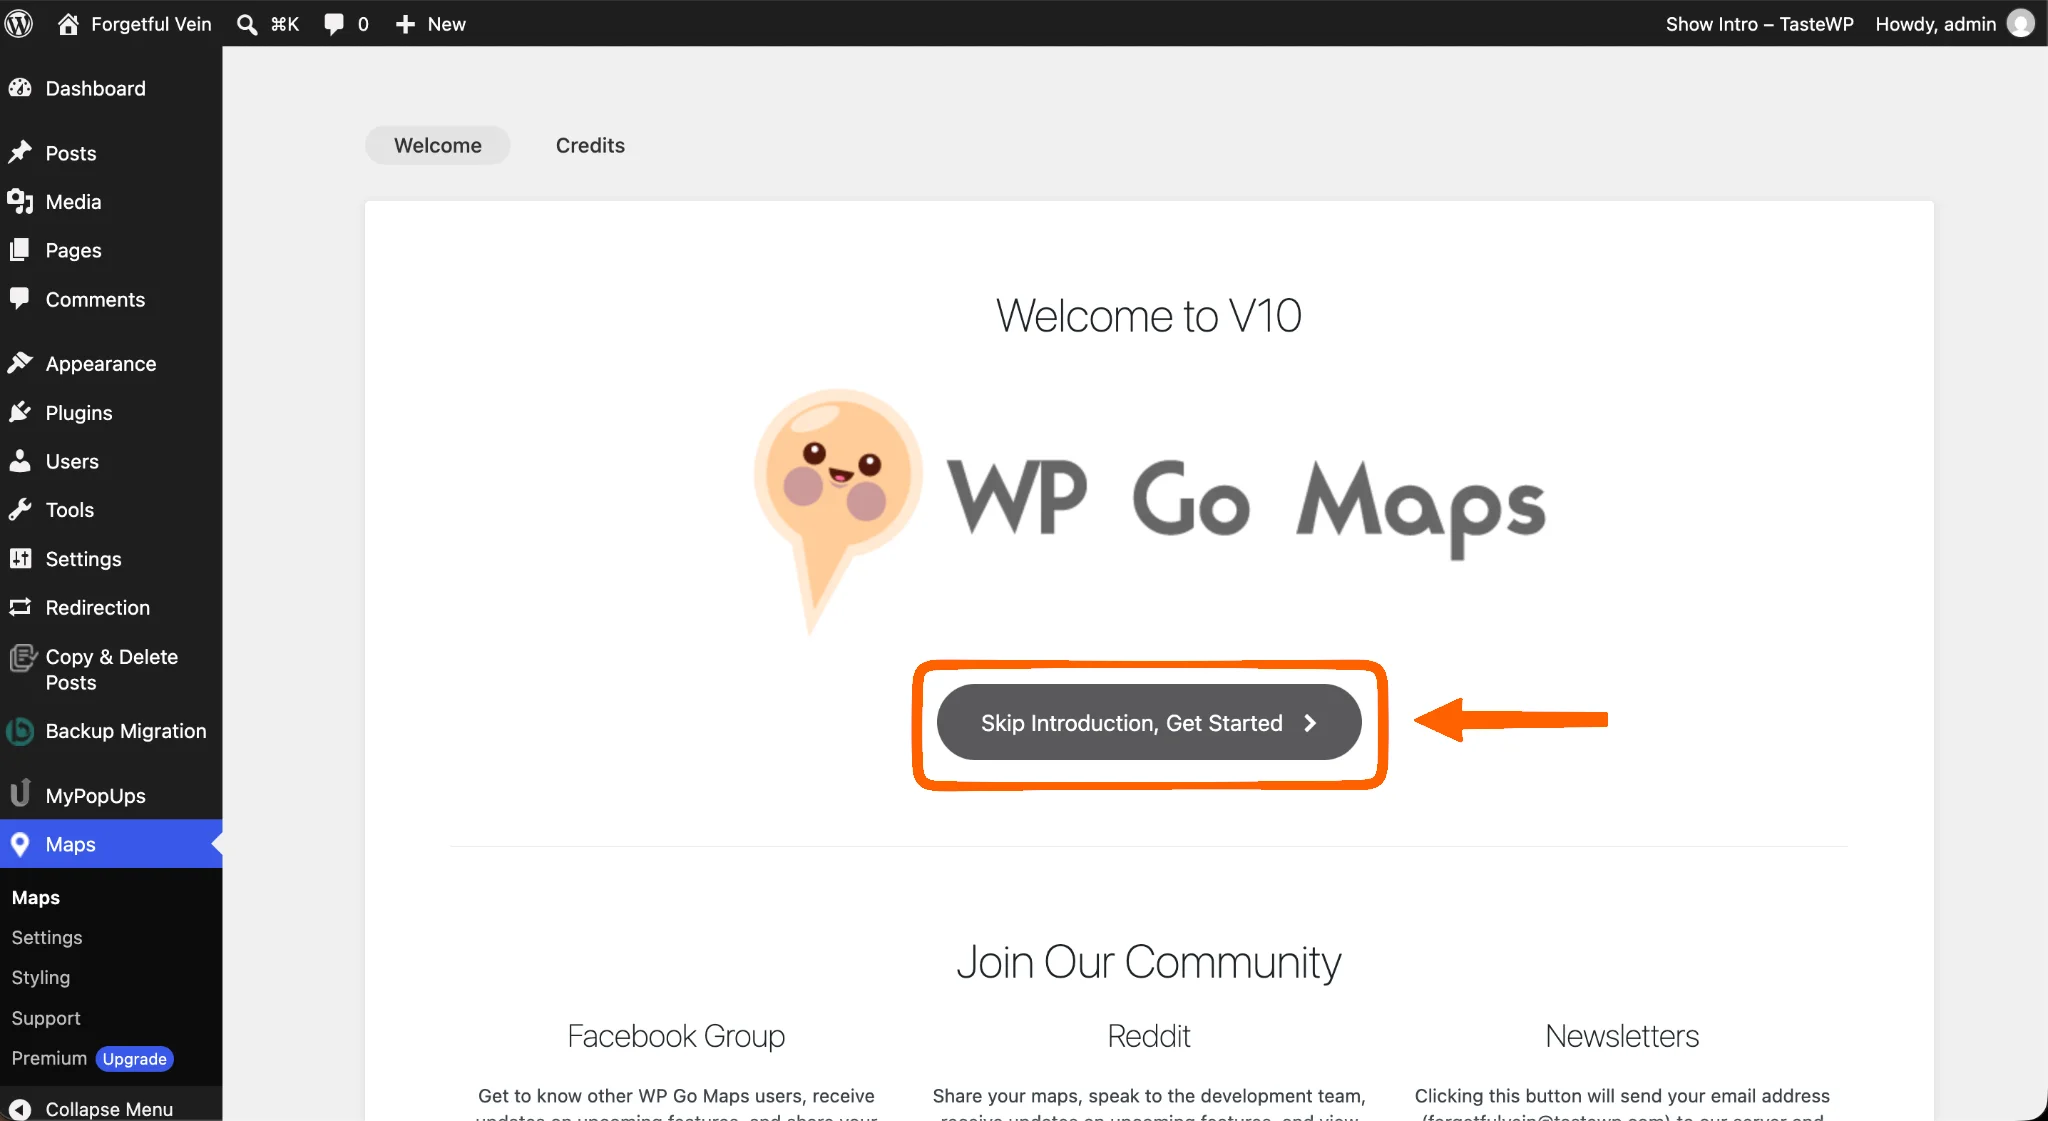
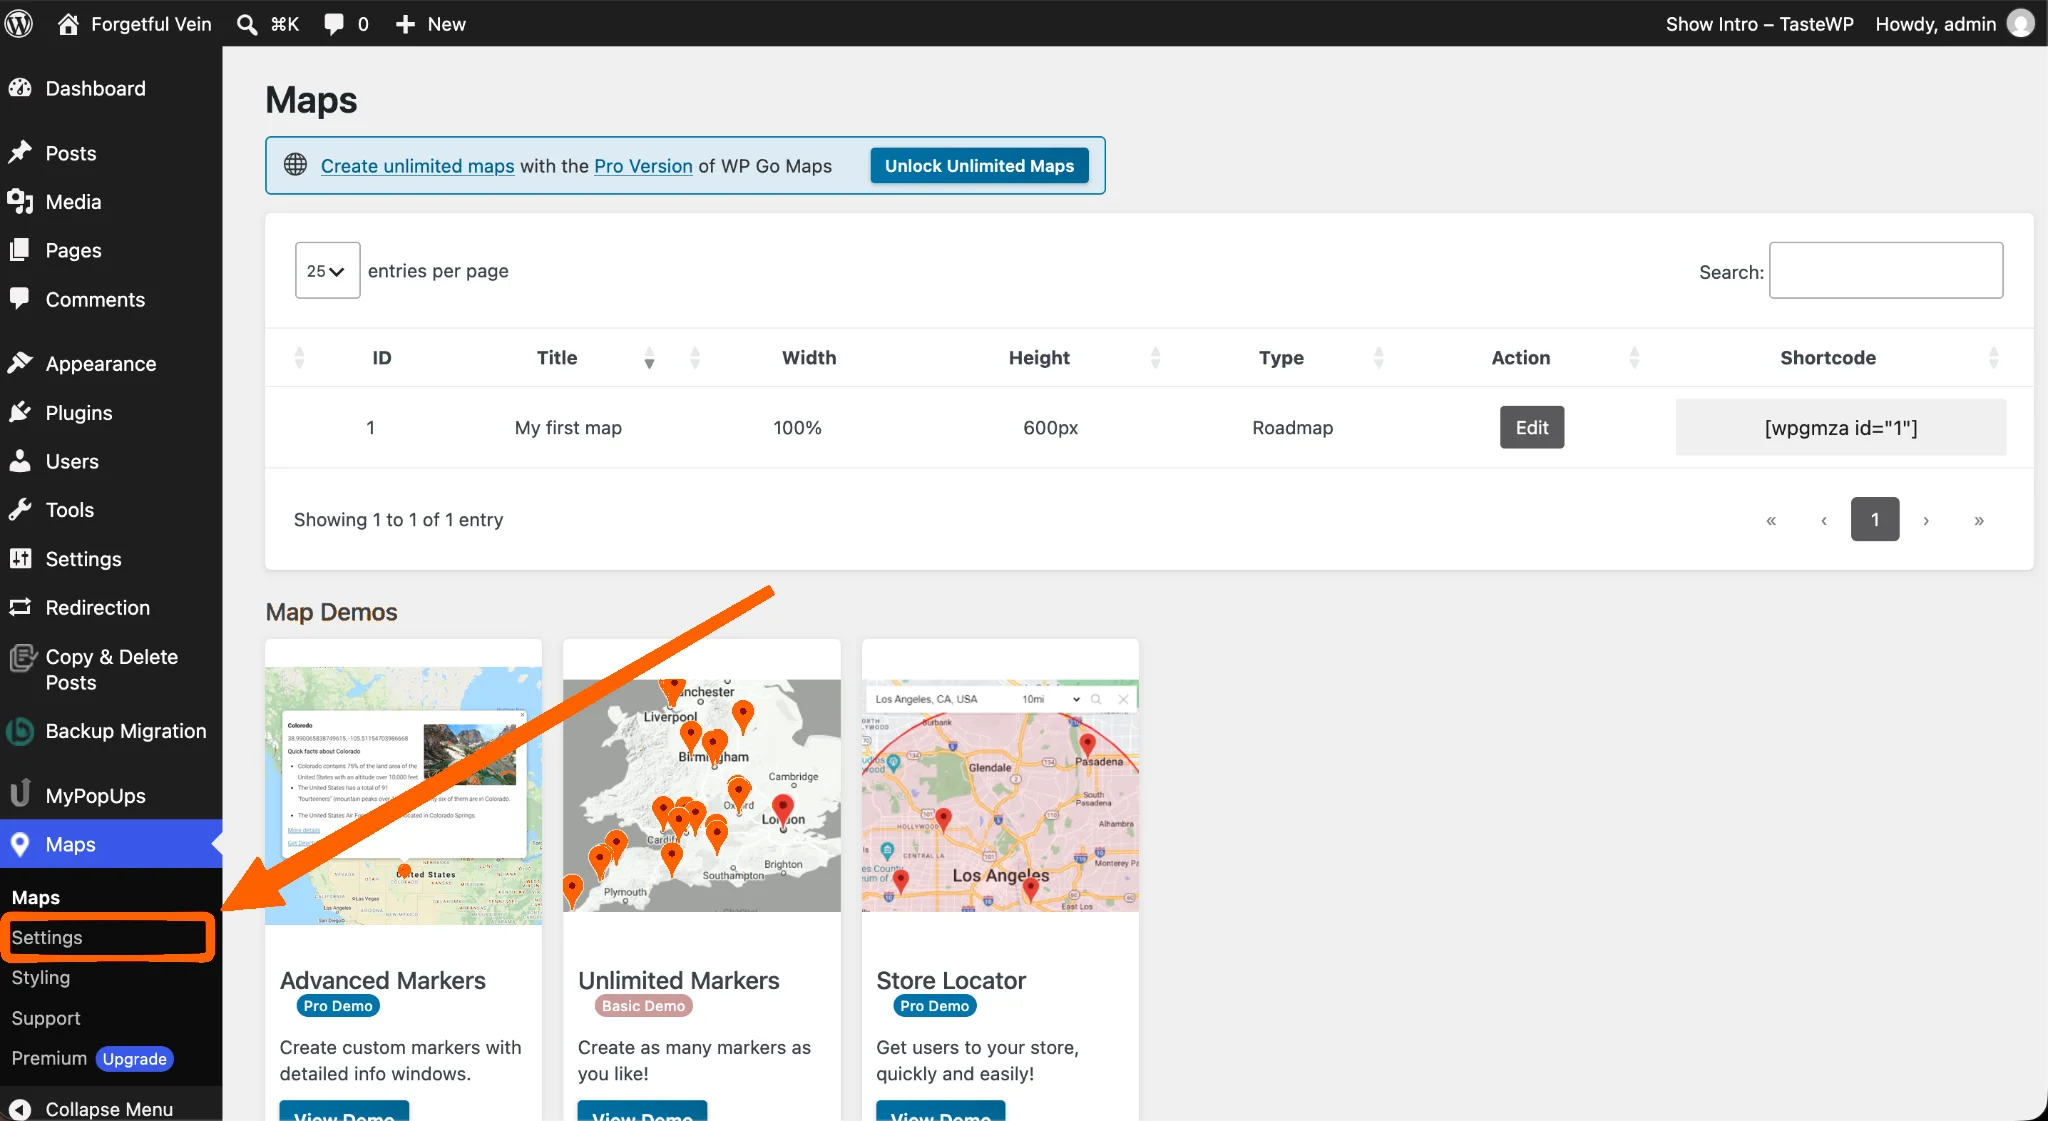
- Click Settings on the left-side menu.
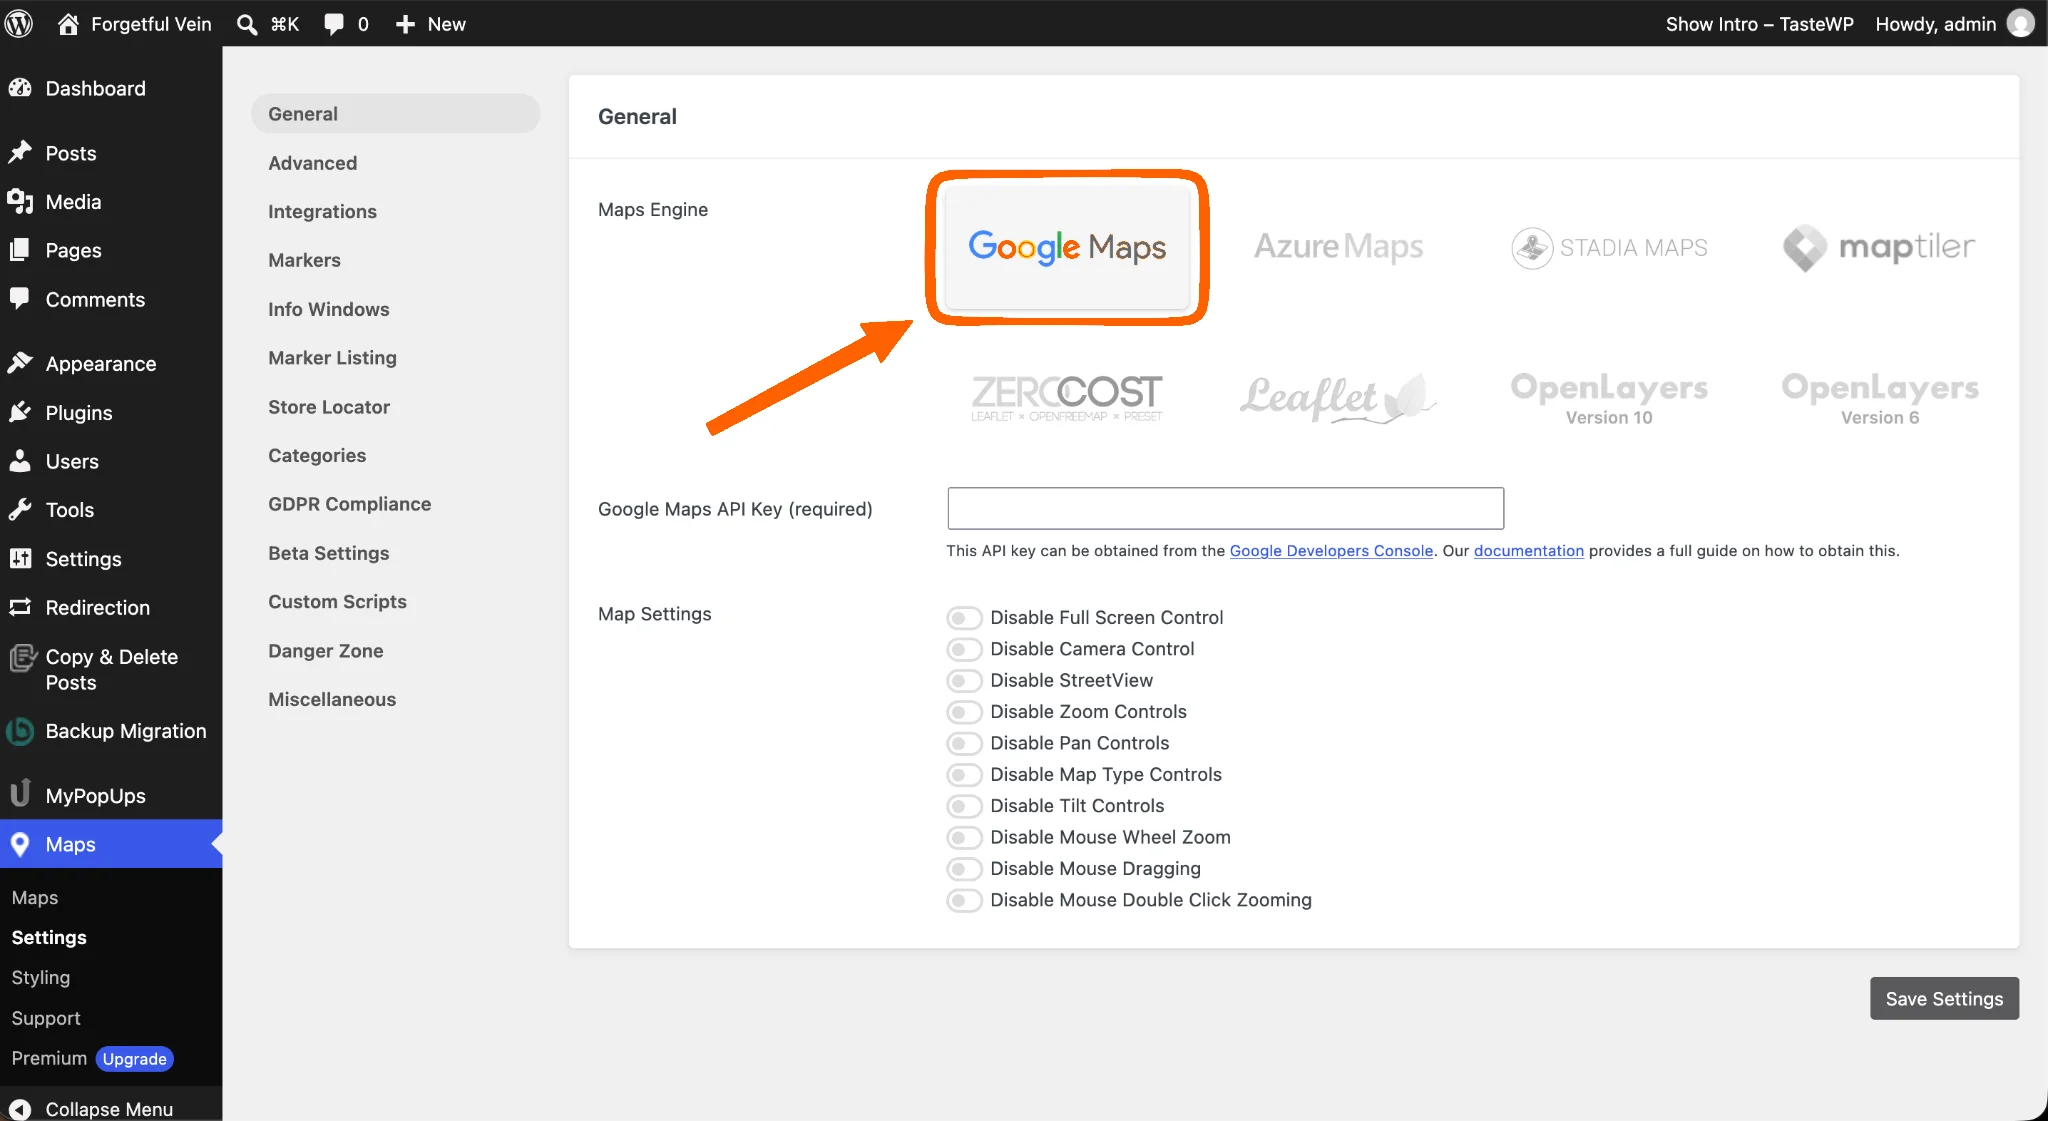
- In the General tab, select Google Maps as the map engine.
Get your Google Maps API key
To pull the map data from Google’s platform, you first need to register for an account to get your API key.
- Go to the Google Maps Platform website and create an account.
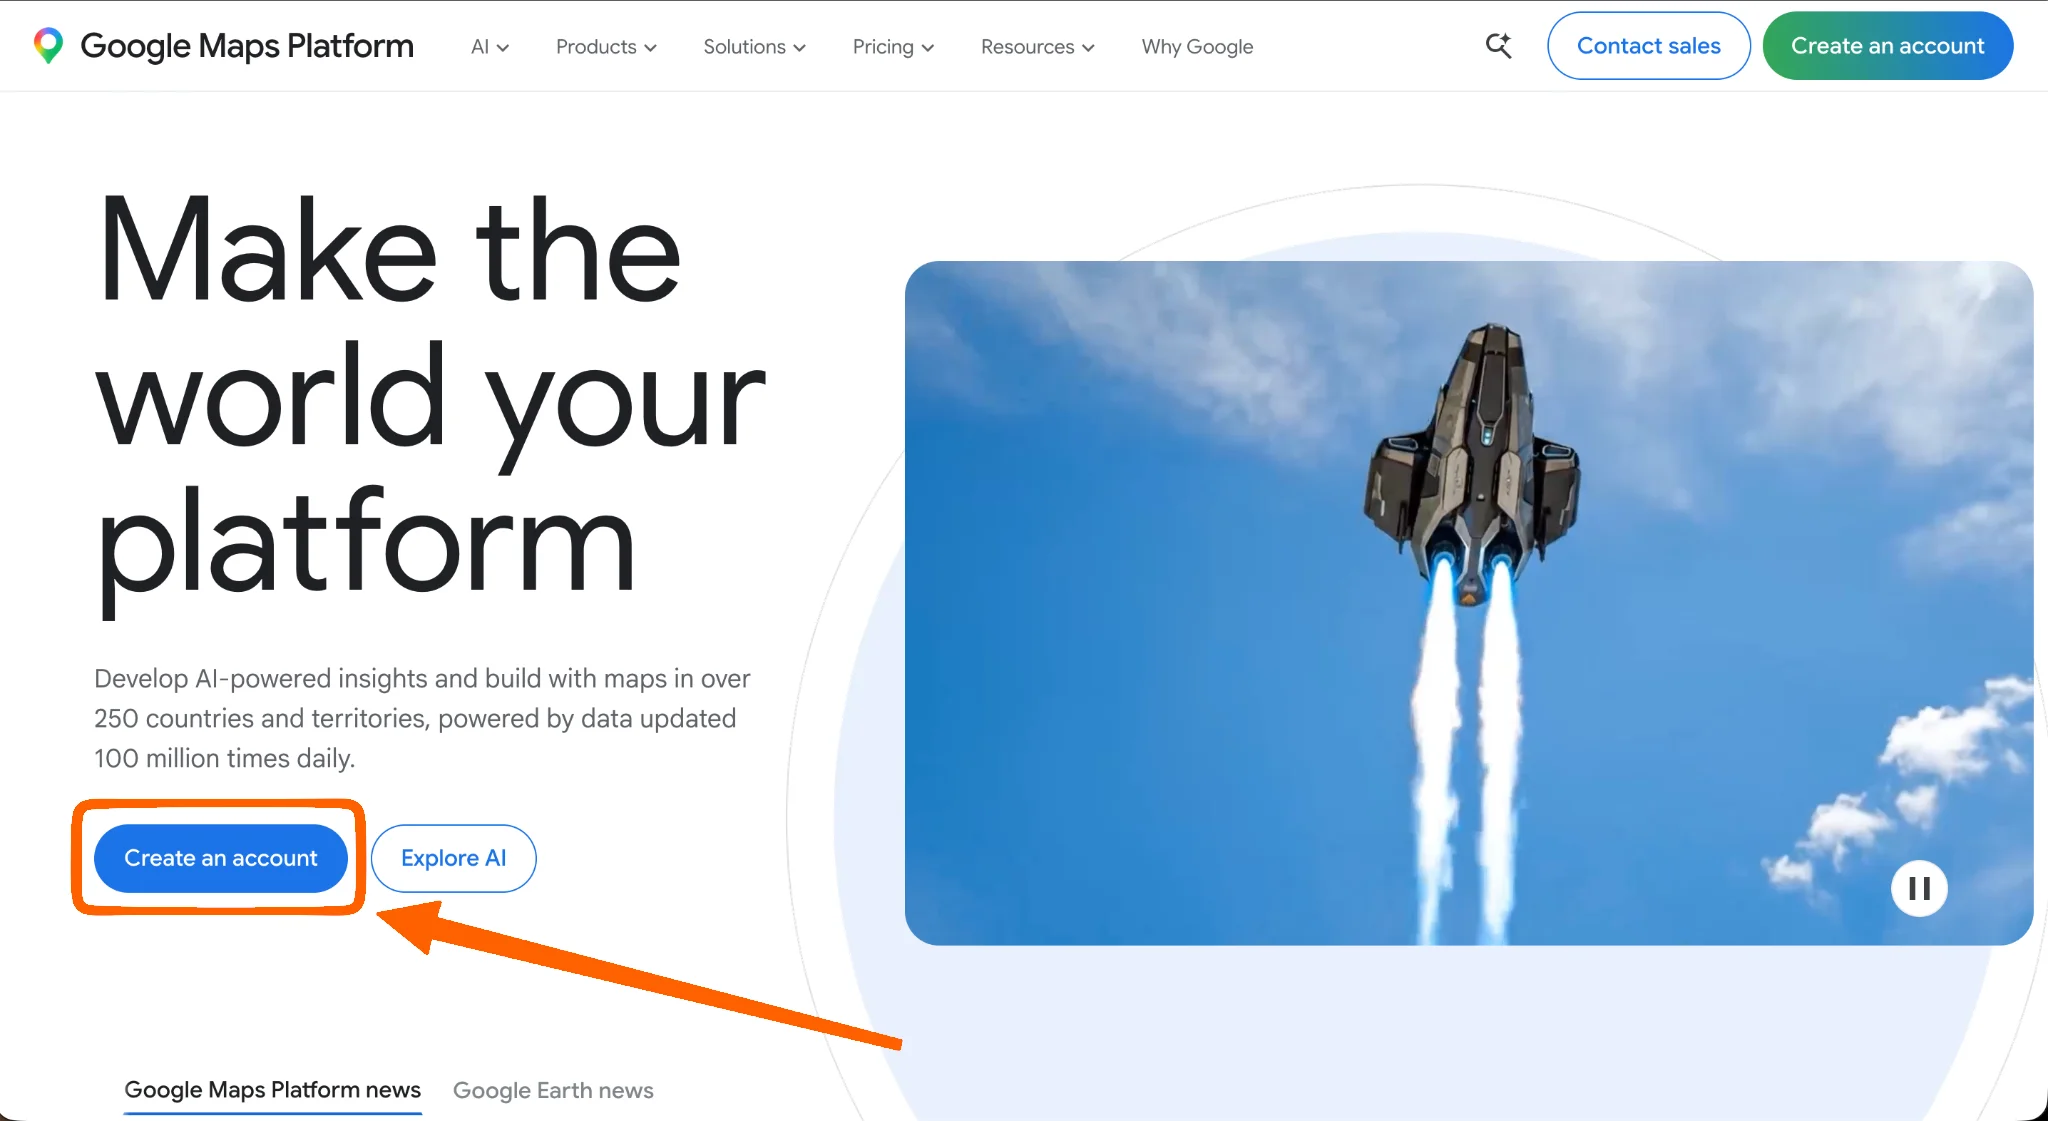
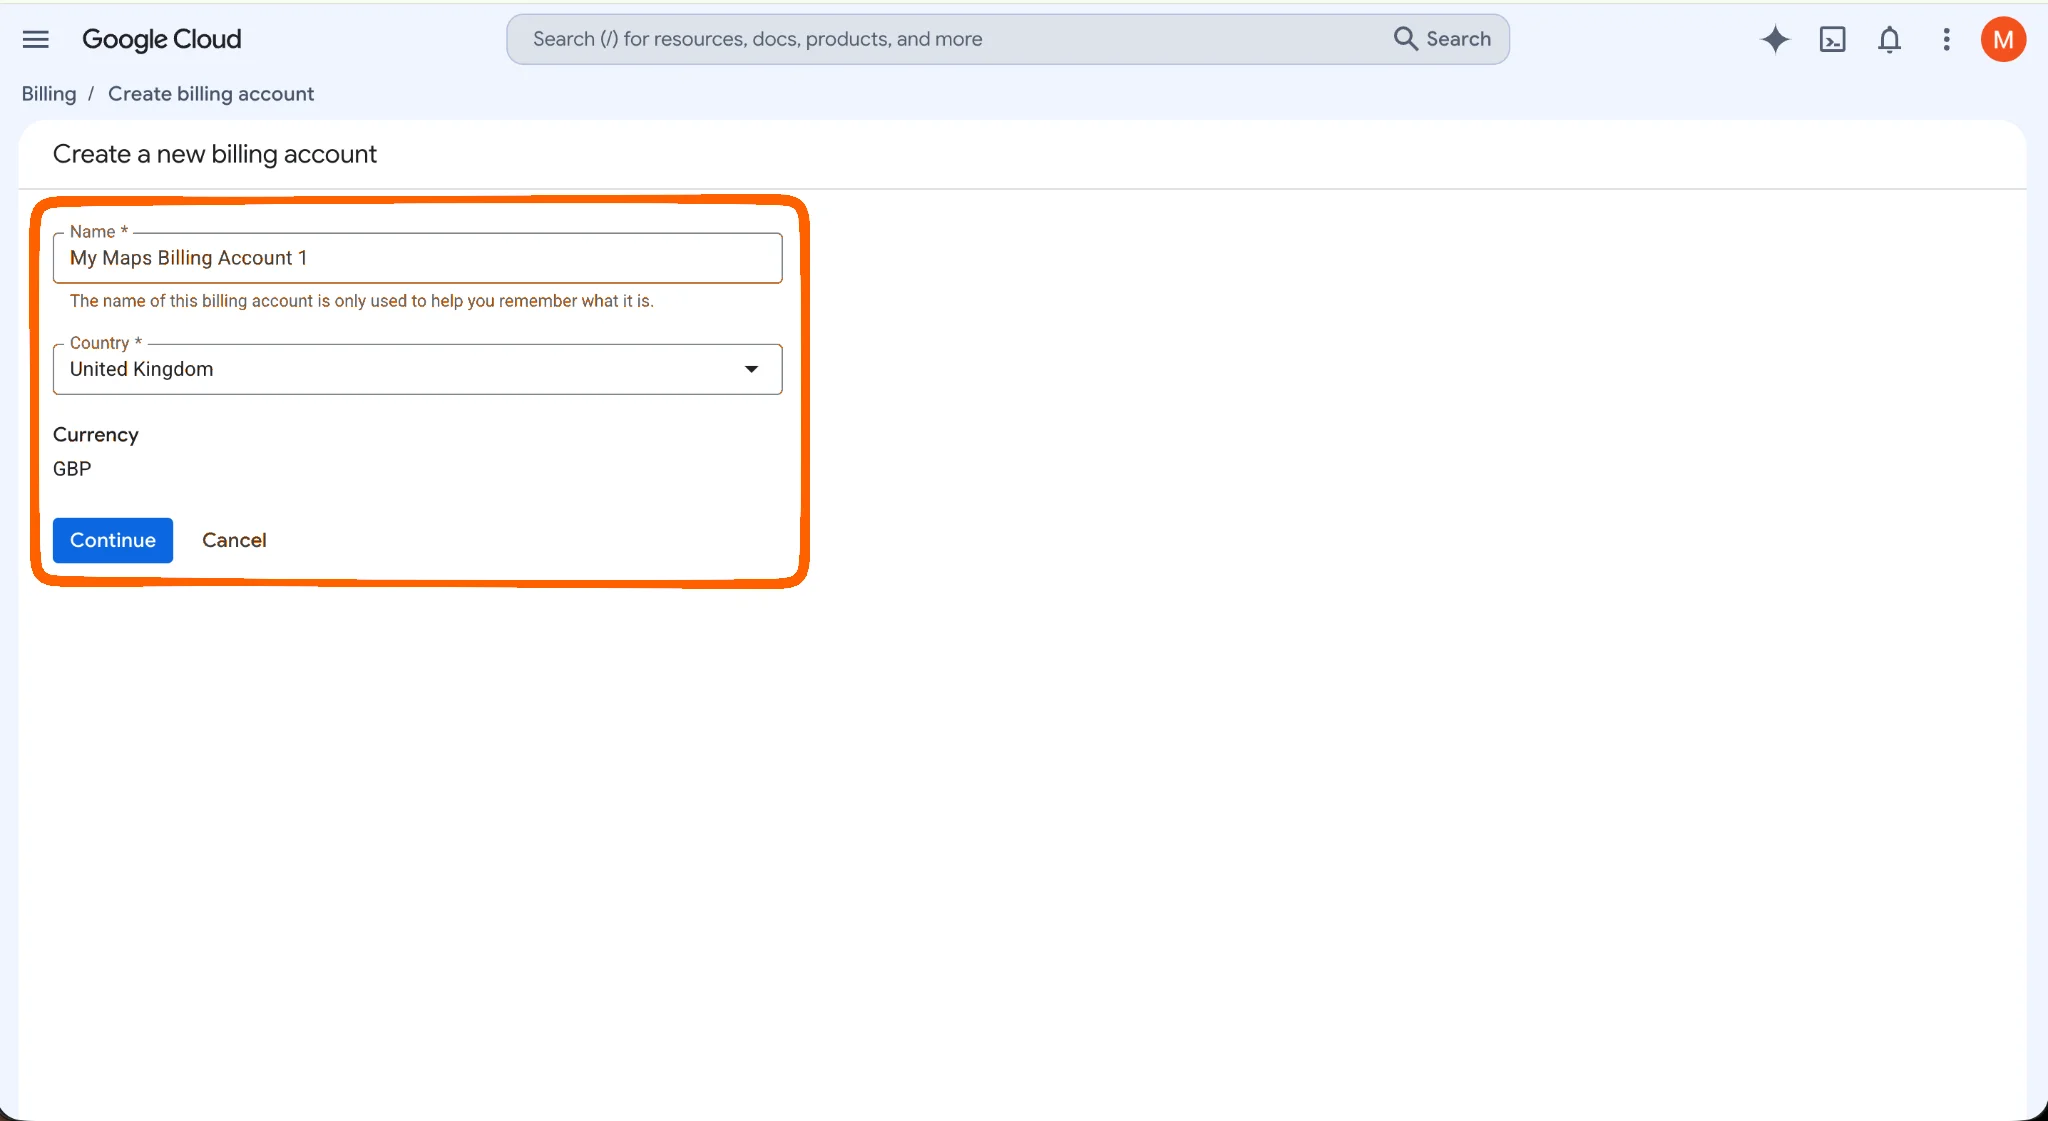
- You will be taken to a configuration flow in the Google Cloud Platform. Create a new billing account by setting a name, country, and currency.
- Add your contact information and payment method. When finished, click the Submit and Enable Billing button.
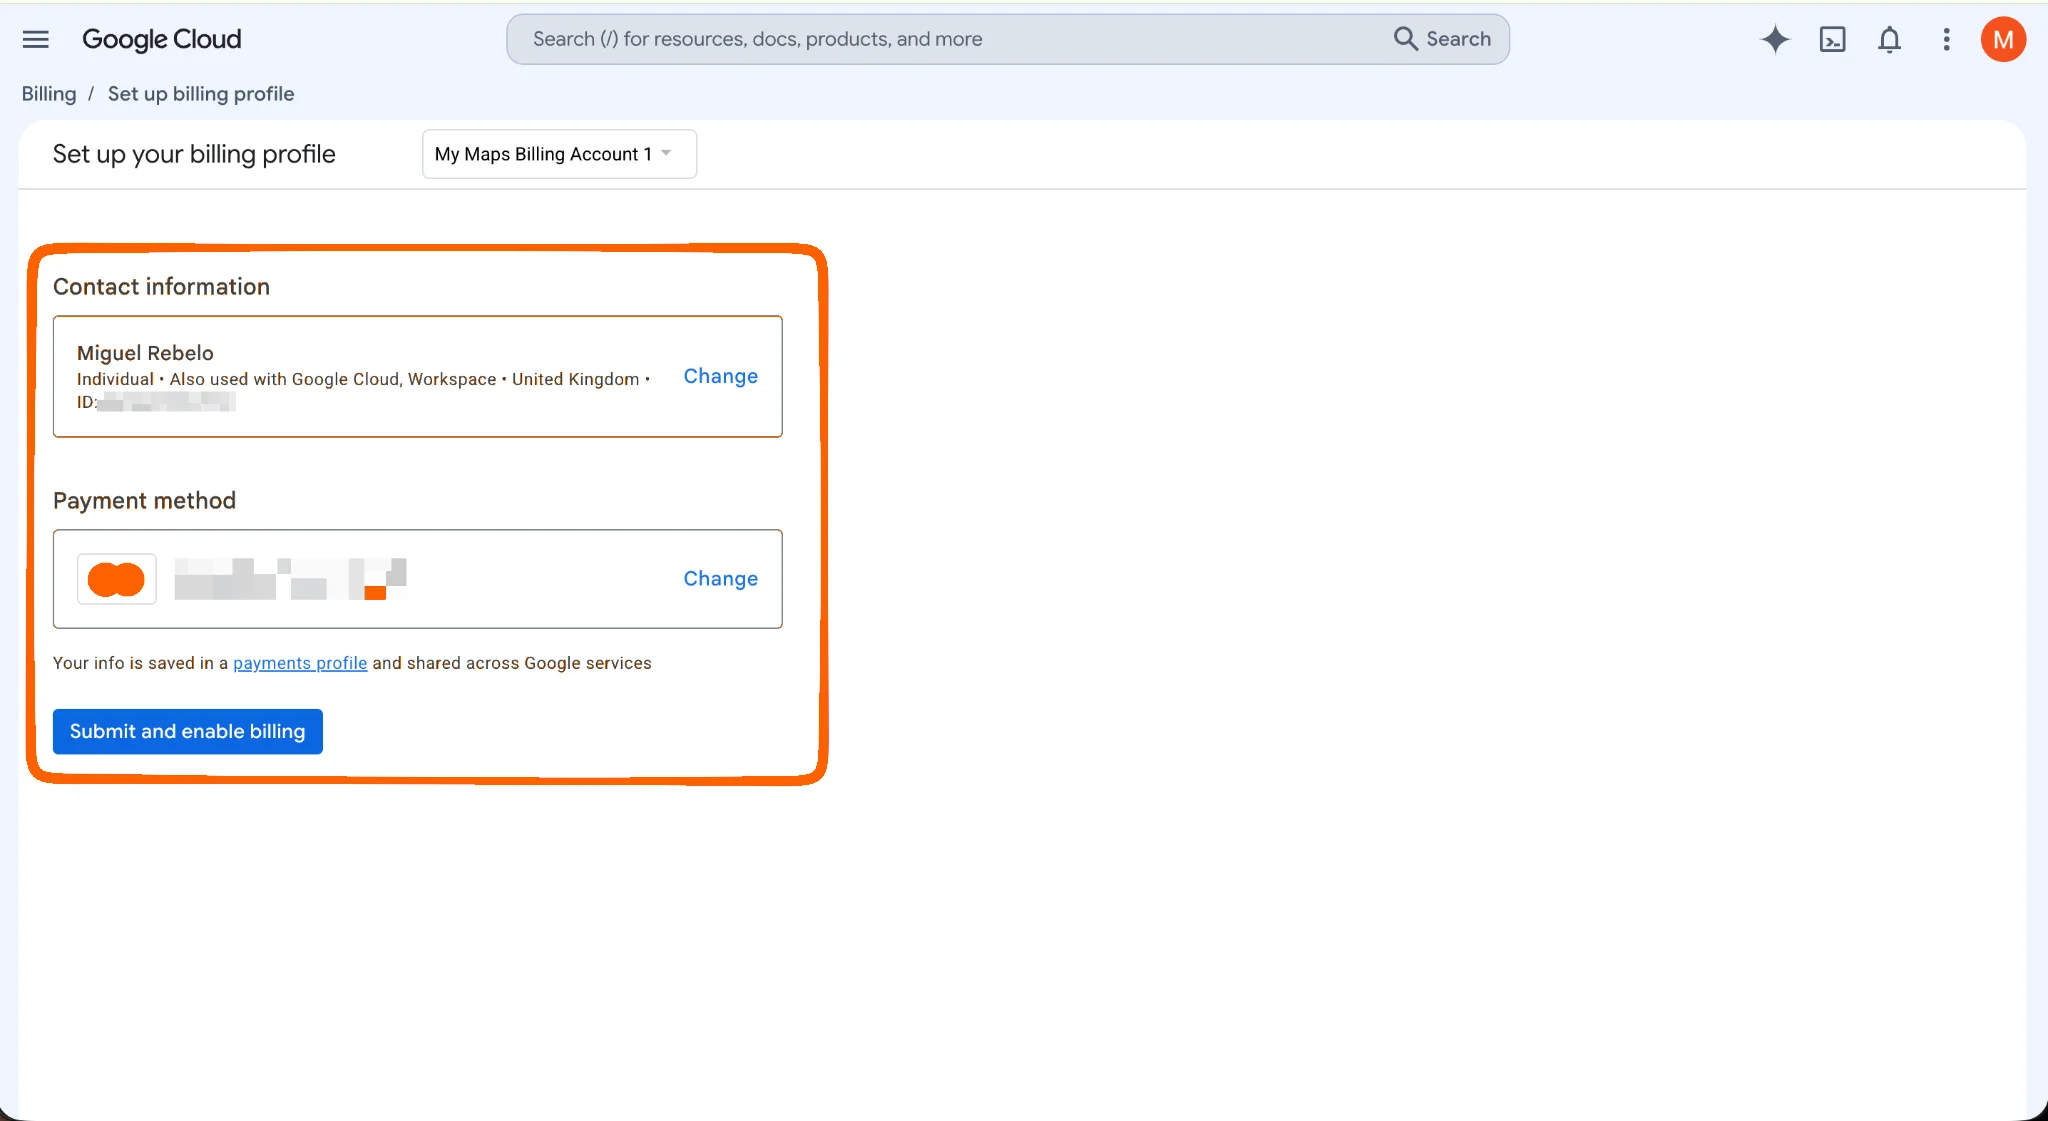
With this option, you get 10,000 free map loads per month; if you go beyond that, it’s $7 per 1,000. If you stay under the limit, your card is never charged, but the billing account is required either way. (In March 2025, Google replaced its old $200 monthly credit with a separate free allowance for each API; many older tutorials still cite this credit, but it no longer exists.)
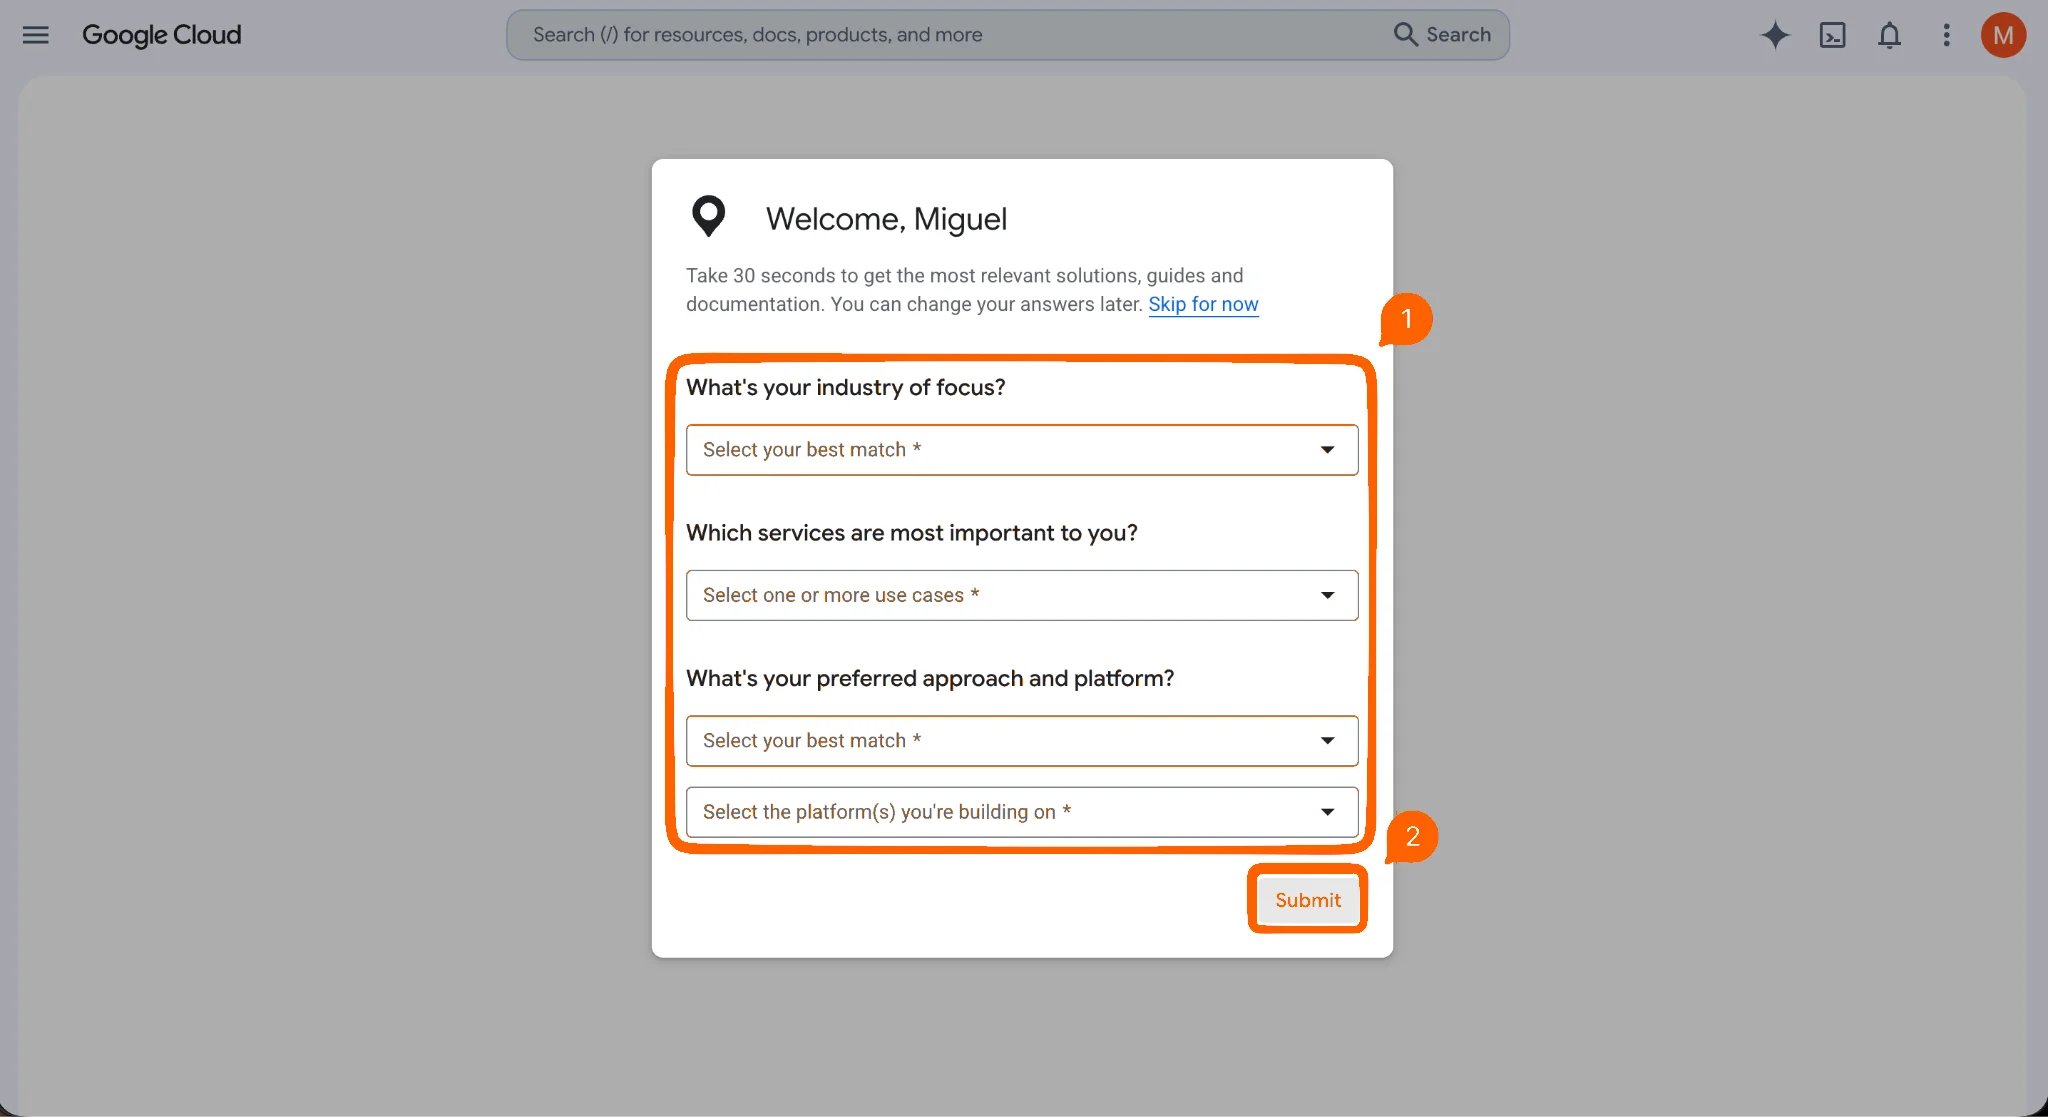
- Google will ask you a few questions about how you plan to use the Maps service. Answer them and click Submit.
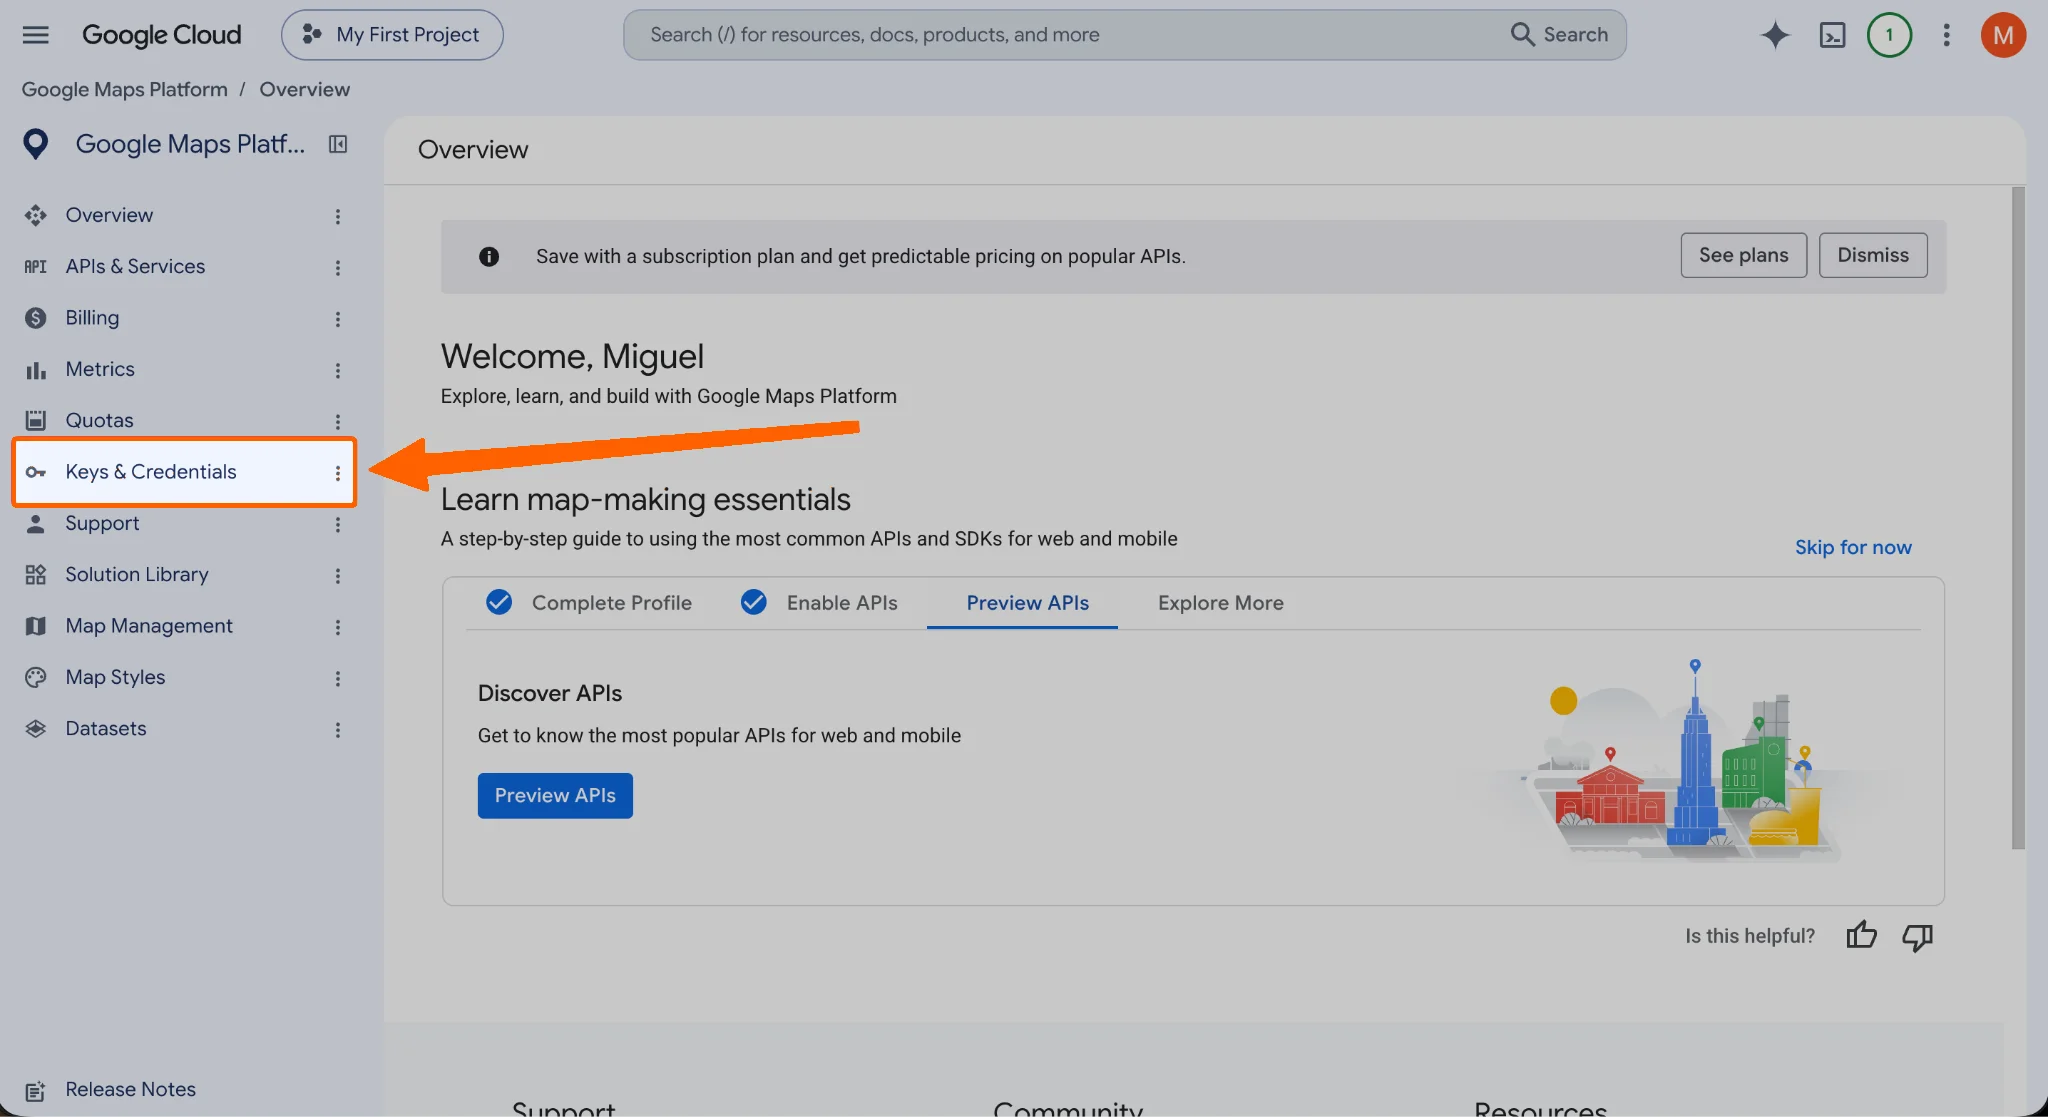
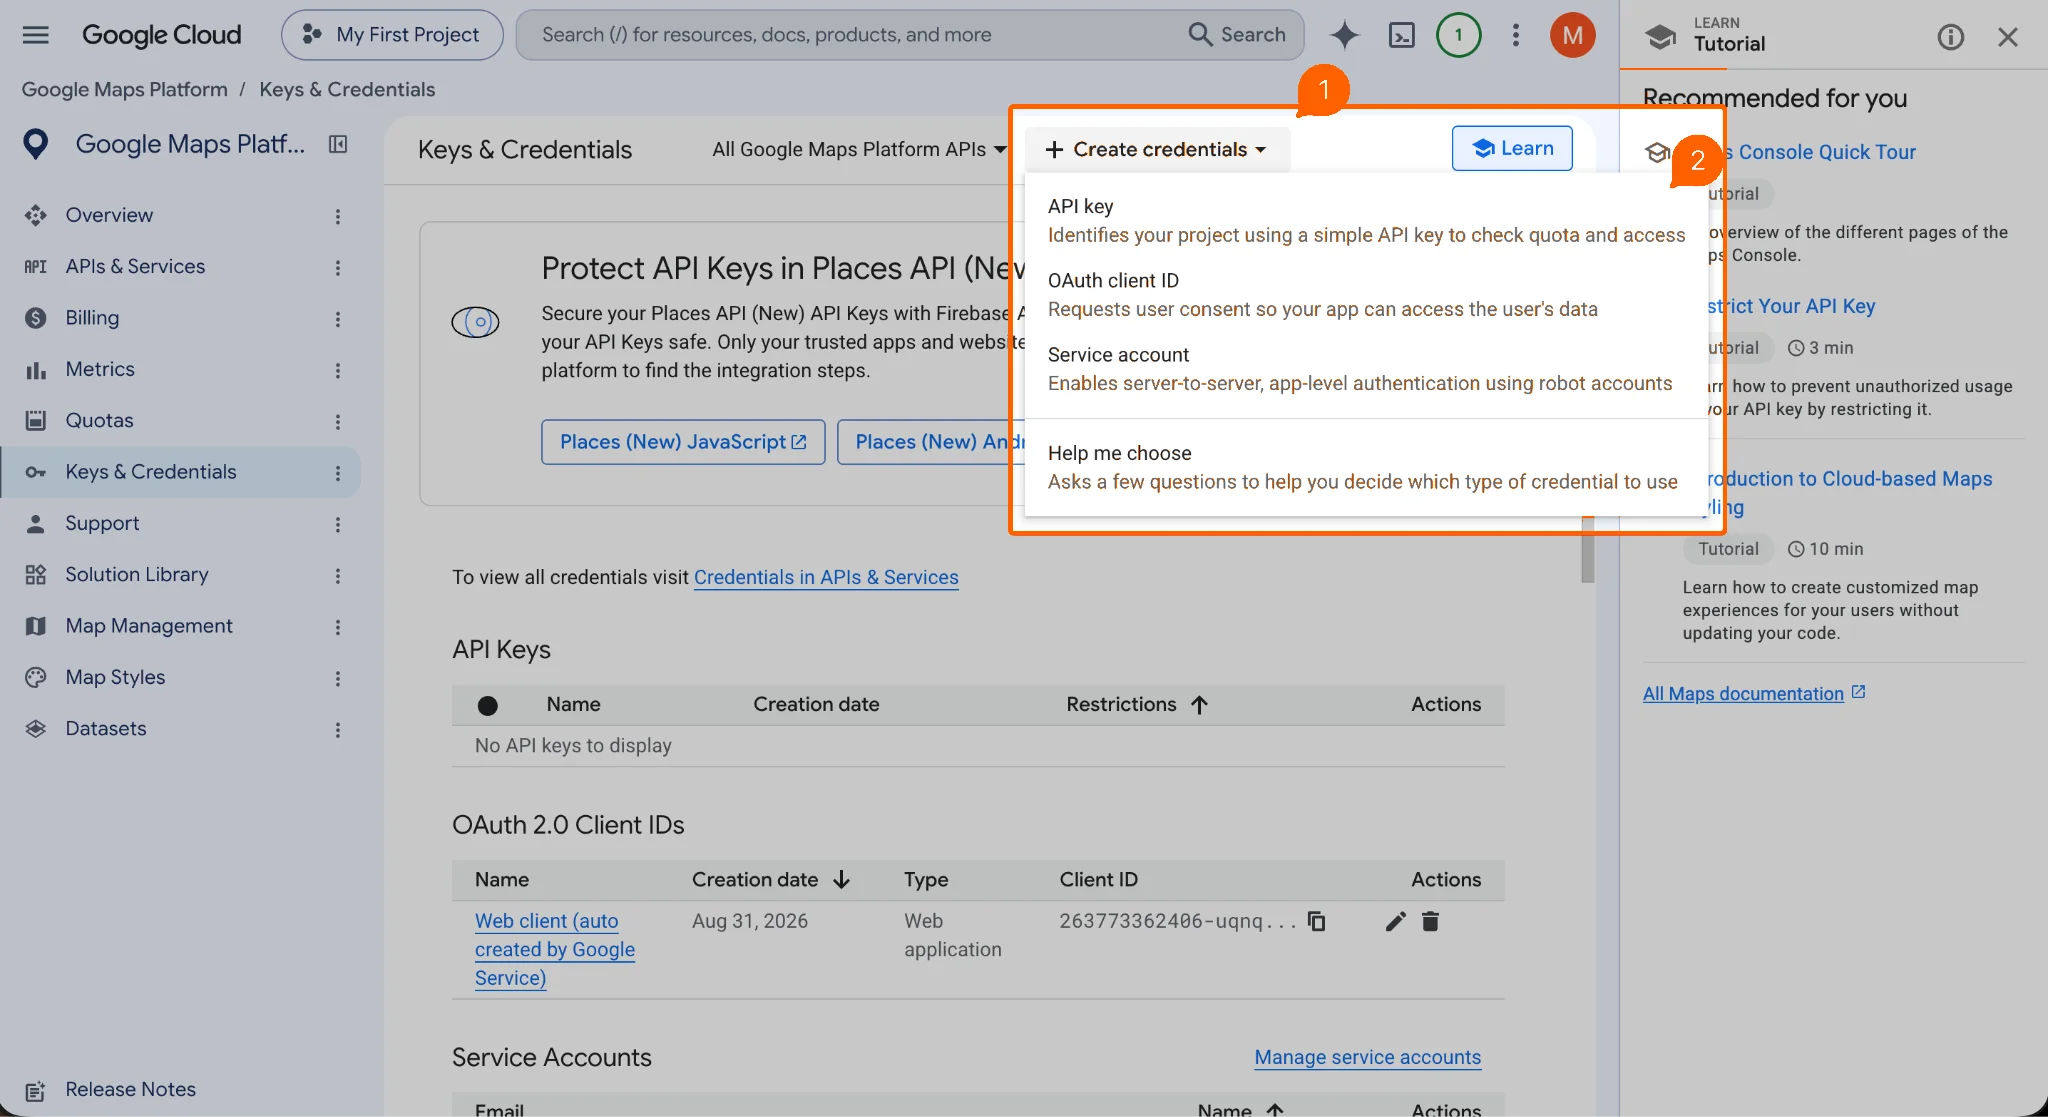
- Click Keys & Credentials on the left-side menu.
- Click the Create Credentials dropdown, followed by API Key.
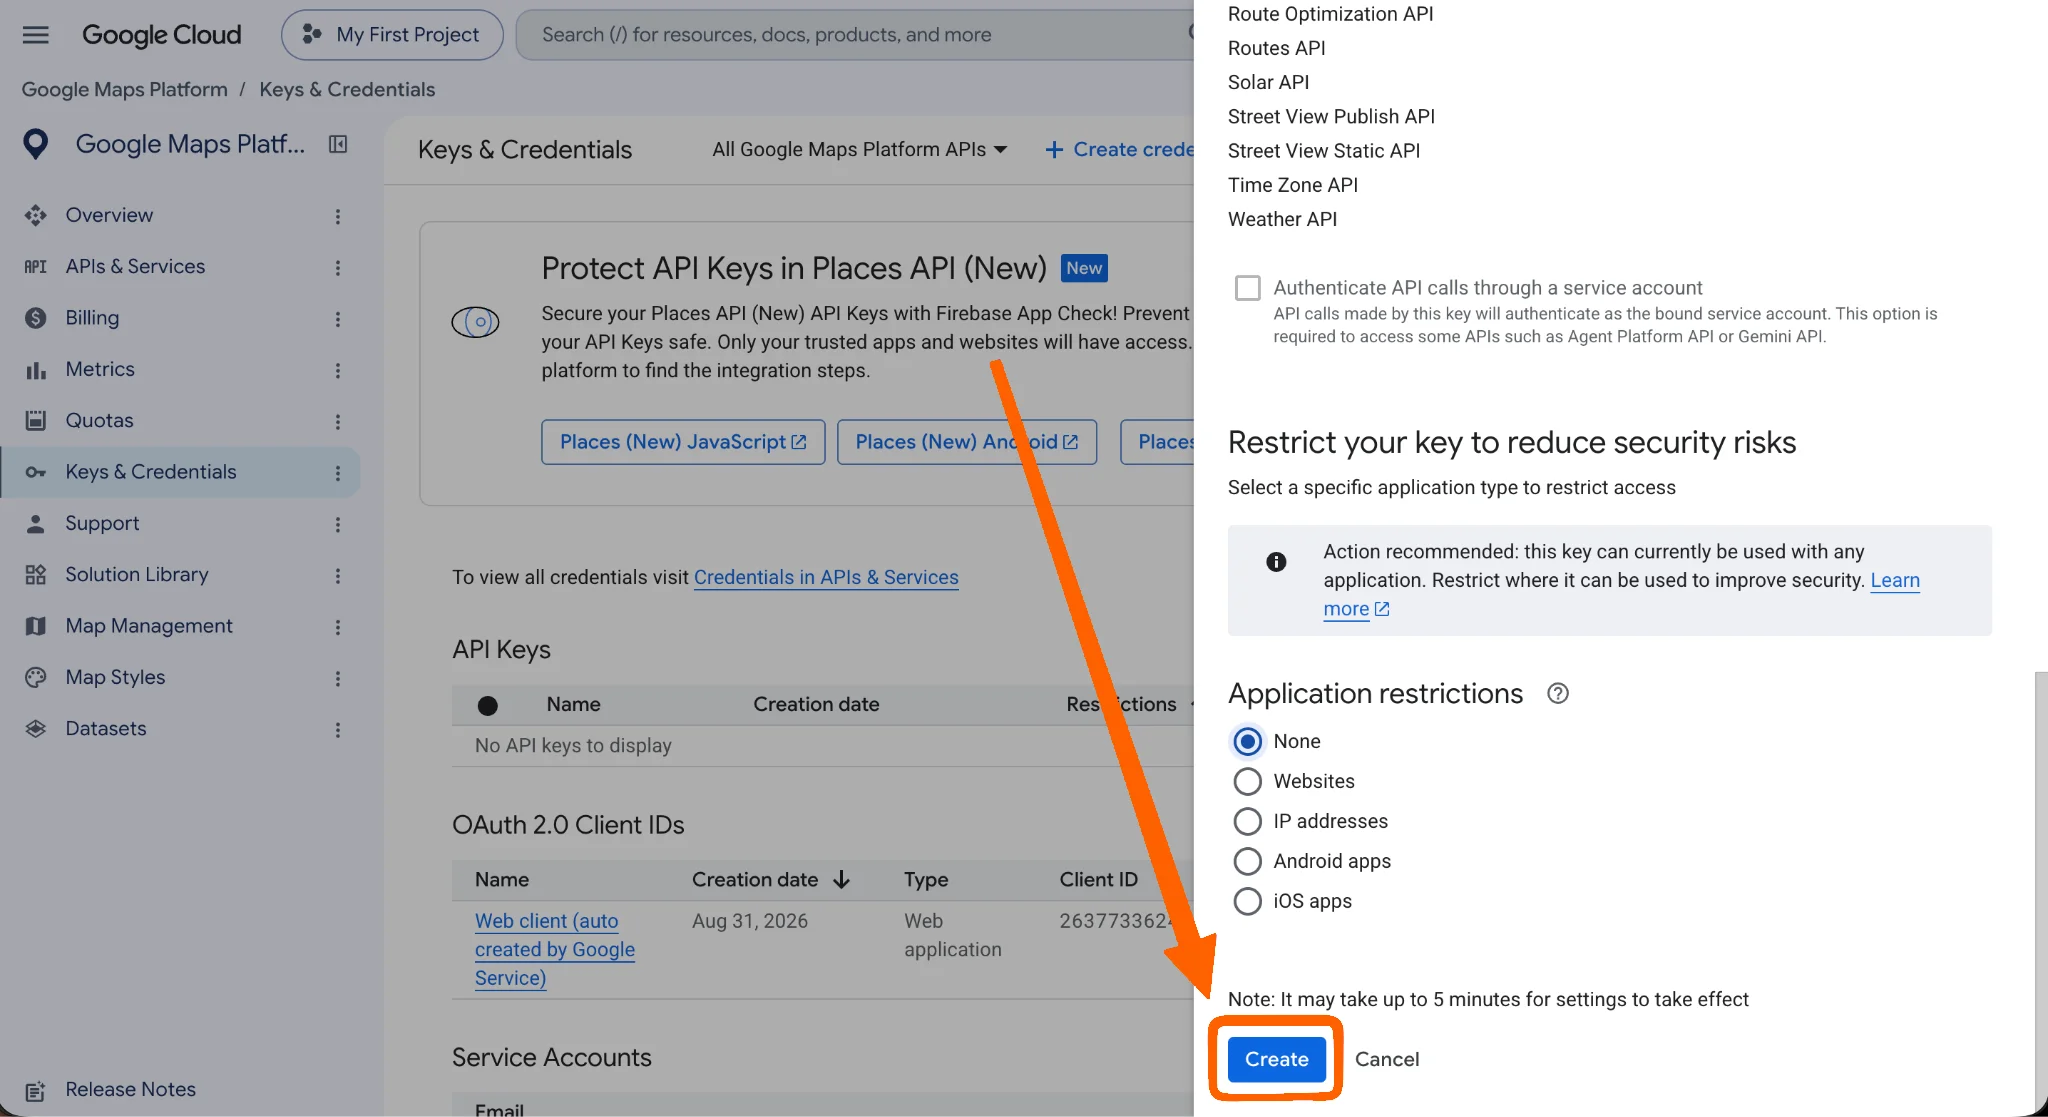
- On the modal that appears, you can set the name and permissions of your new API key. You don’t have to change these settings; scroll all the way down and click Create.
- Copy the API key.
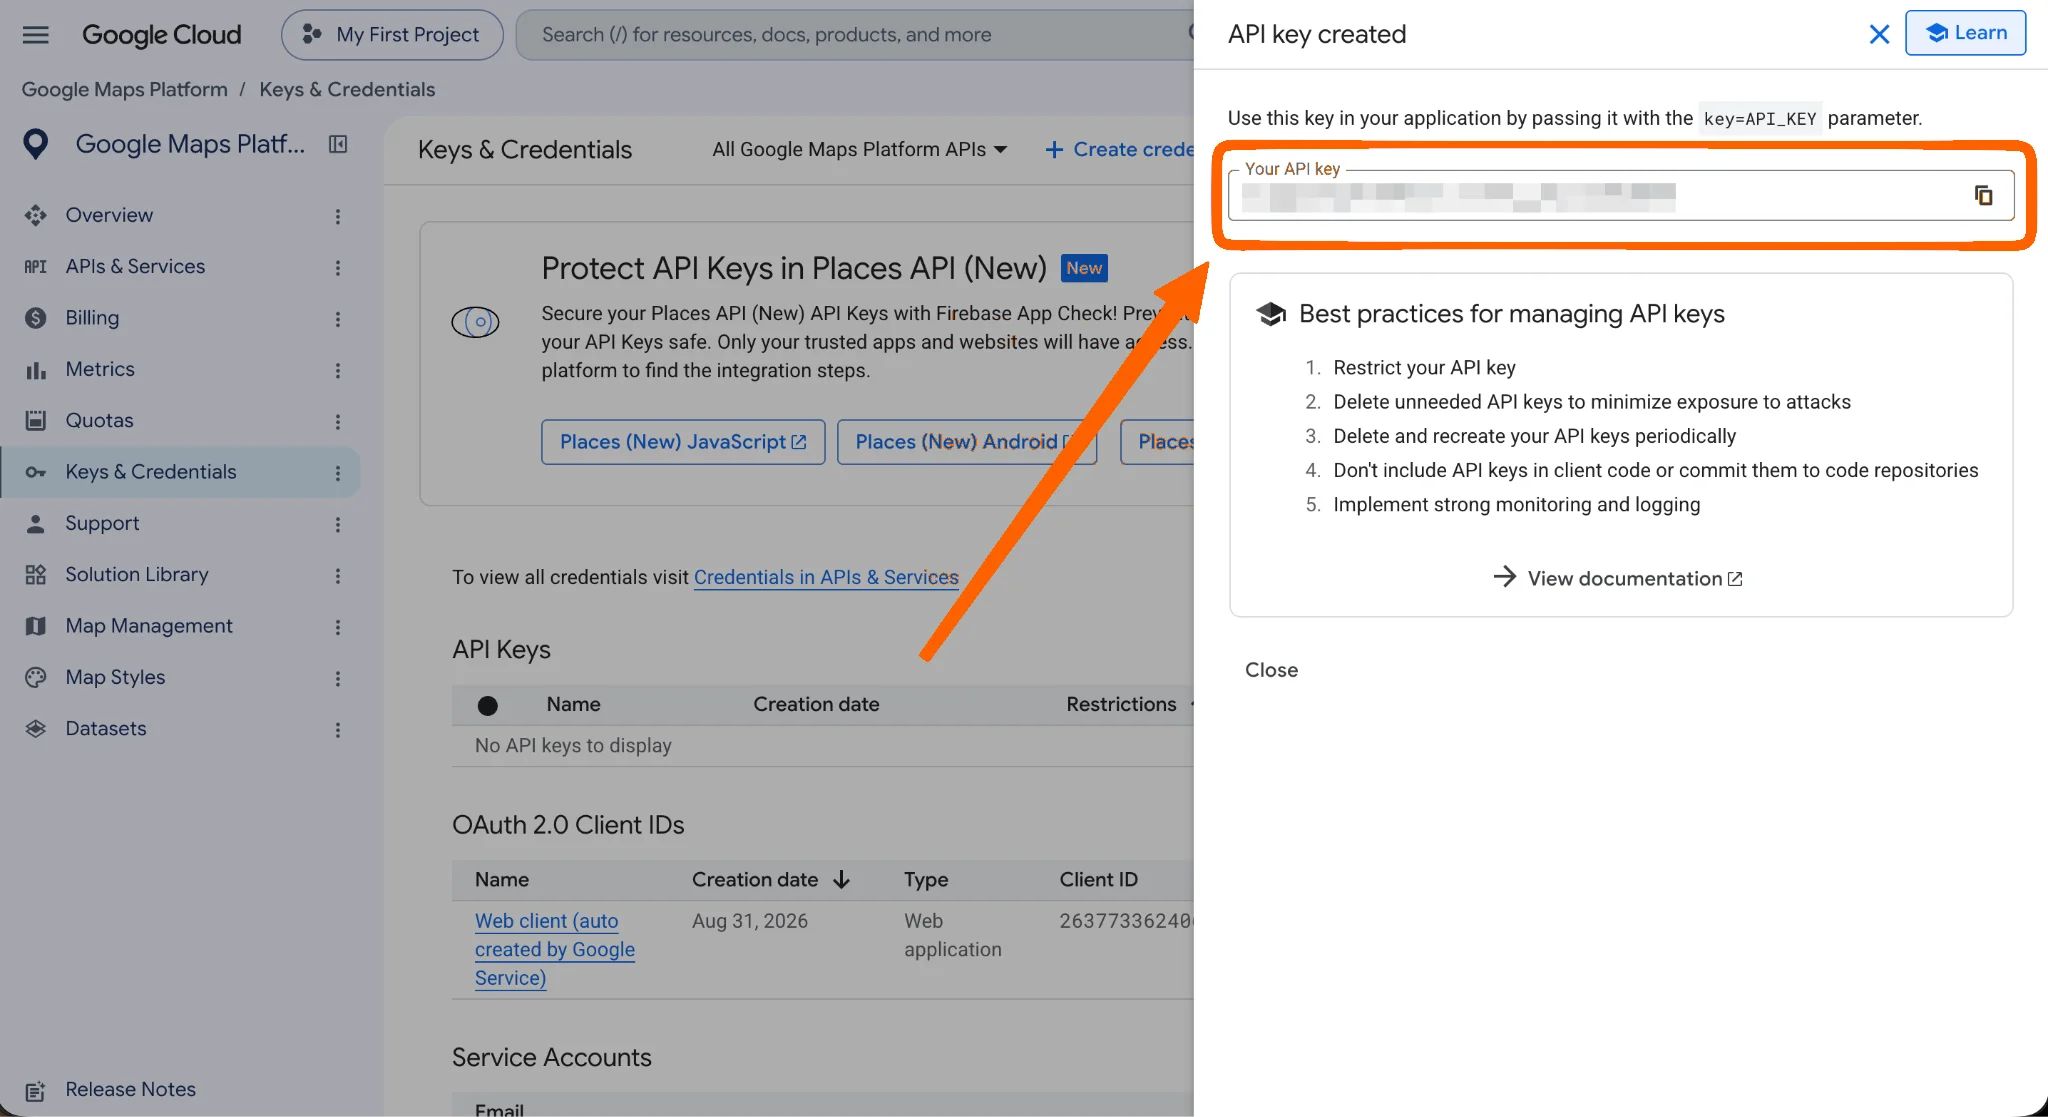
It’s important to restrict your key before your site goes live. An unrestricted key in your page’s source can be copied and used to run up your bill. Follow Google’s API key best practices to lock it to your domain.
Finish setting up the plug-in in WordPress
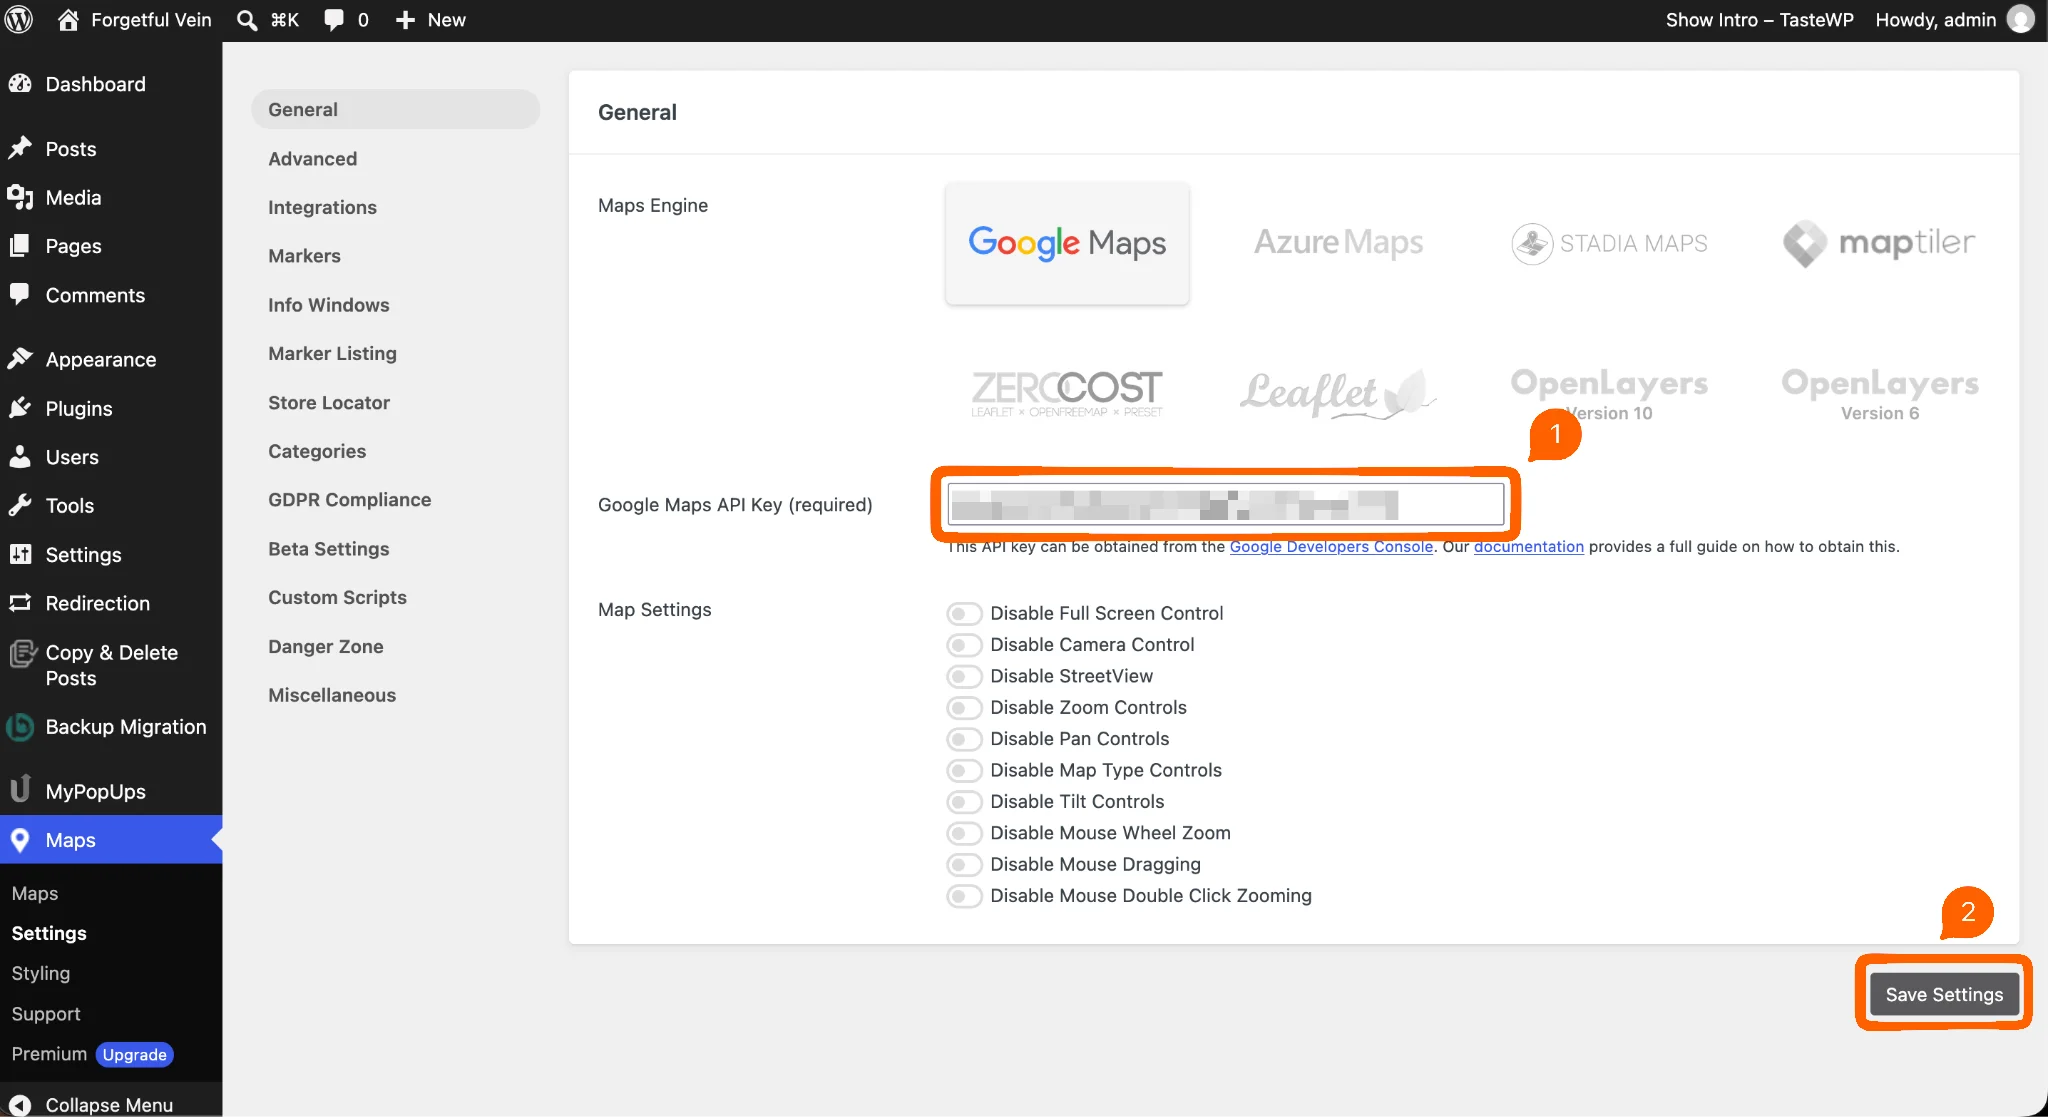
- Go back to the WP Go Maps plug-in settings page in your WordPress installation and paste the API key in the Google Maps API Key field. Click the Save Settings button after you do.
- Click Maps on the left-side menu.
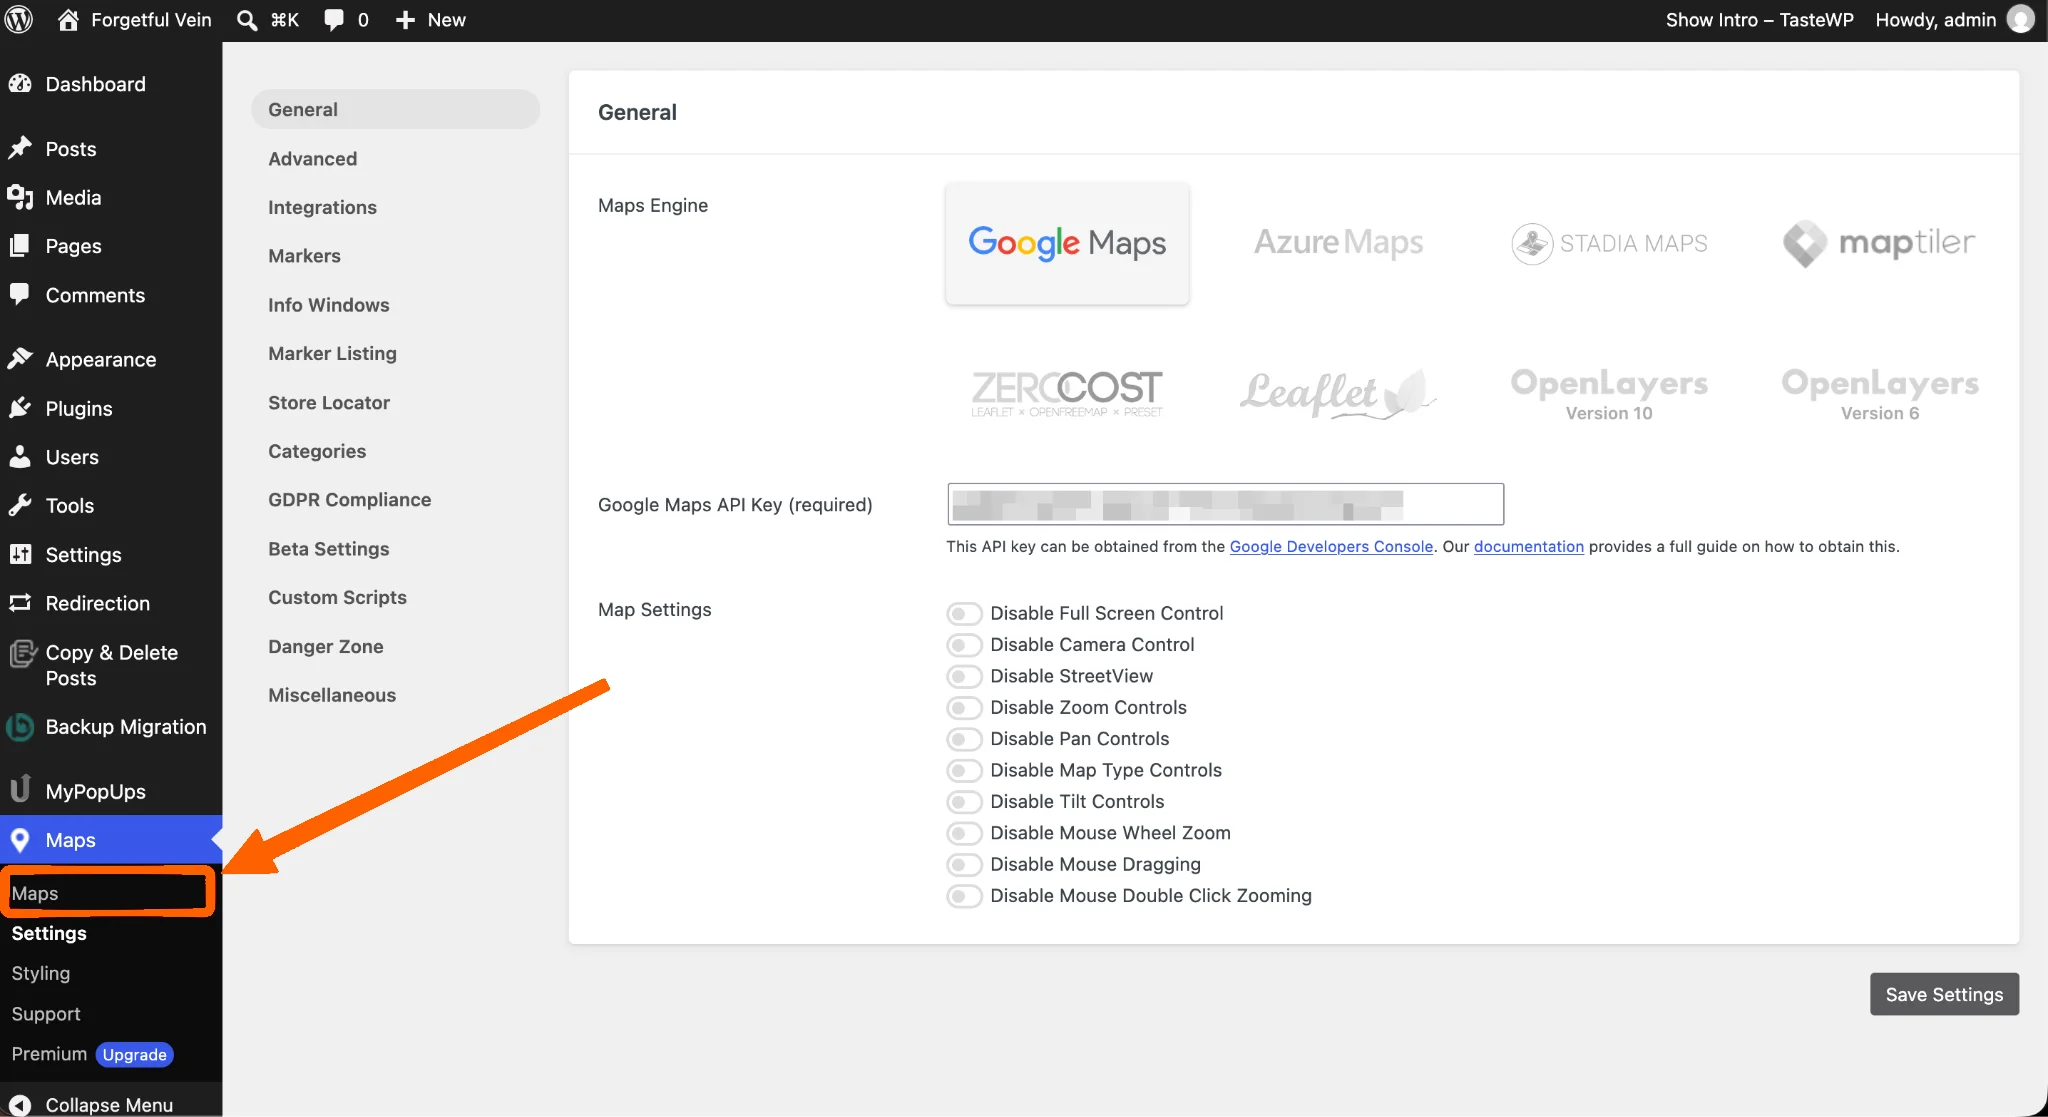
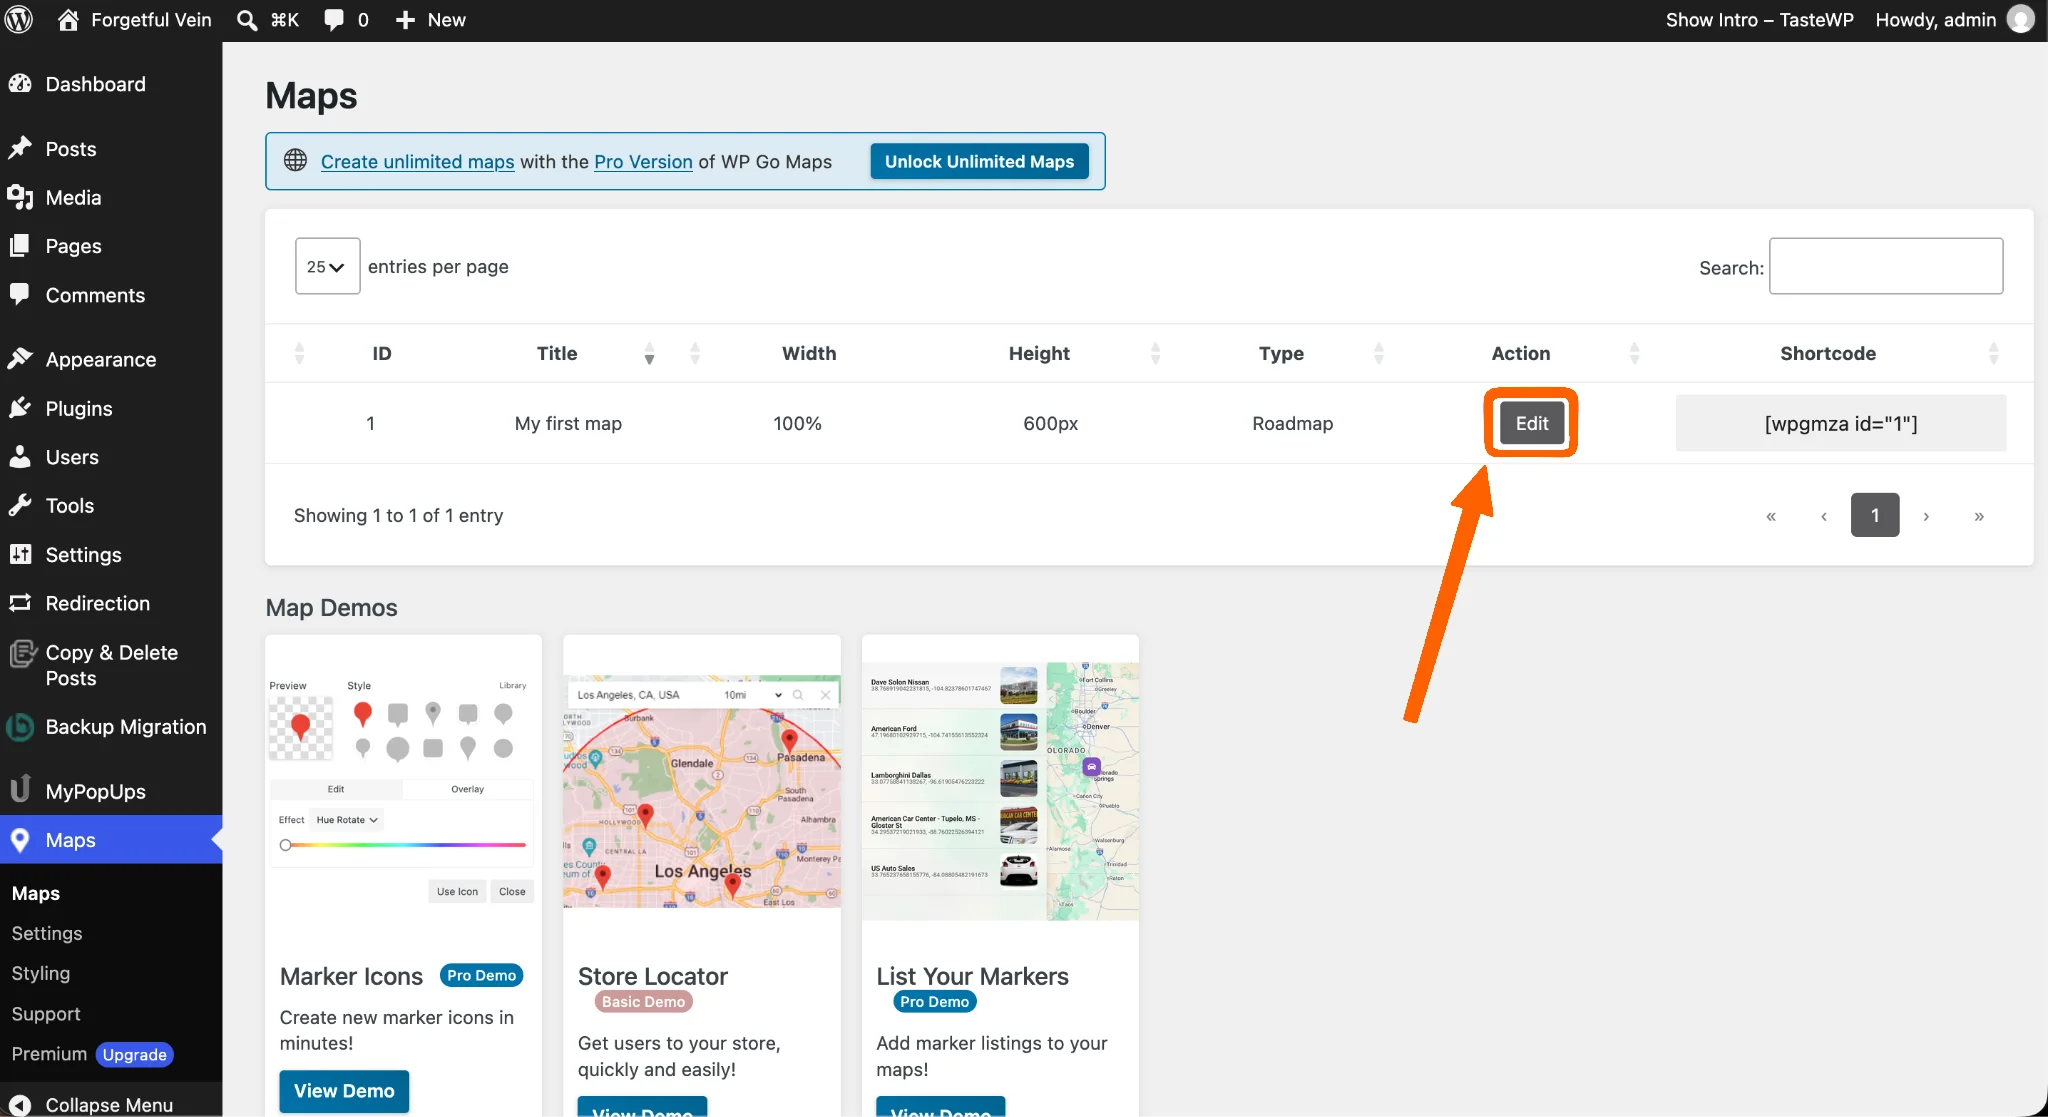
- The plug-in has already created the first map for you. Click the Edit button to see it.
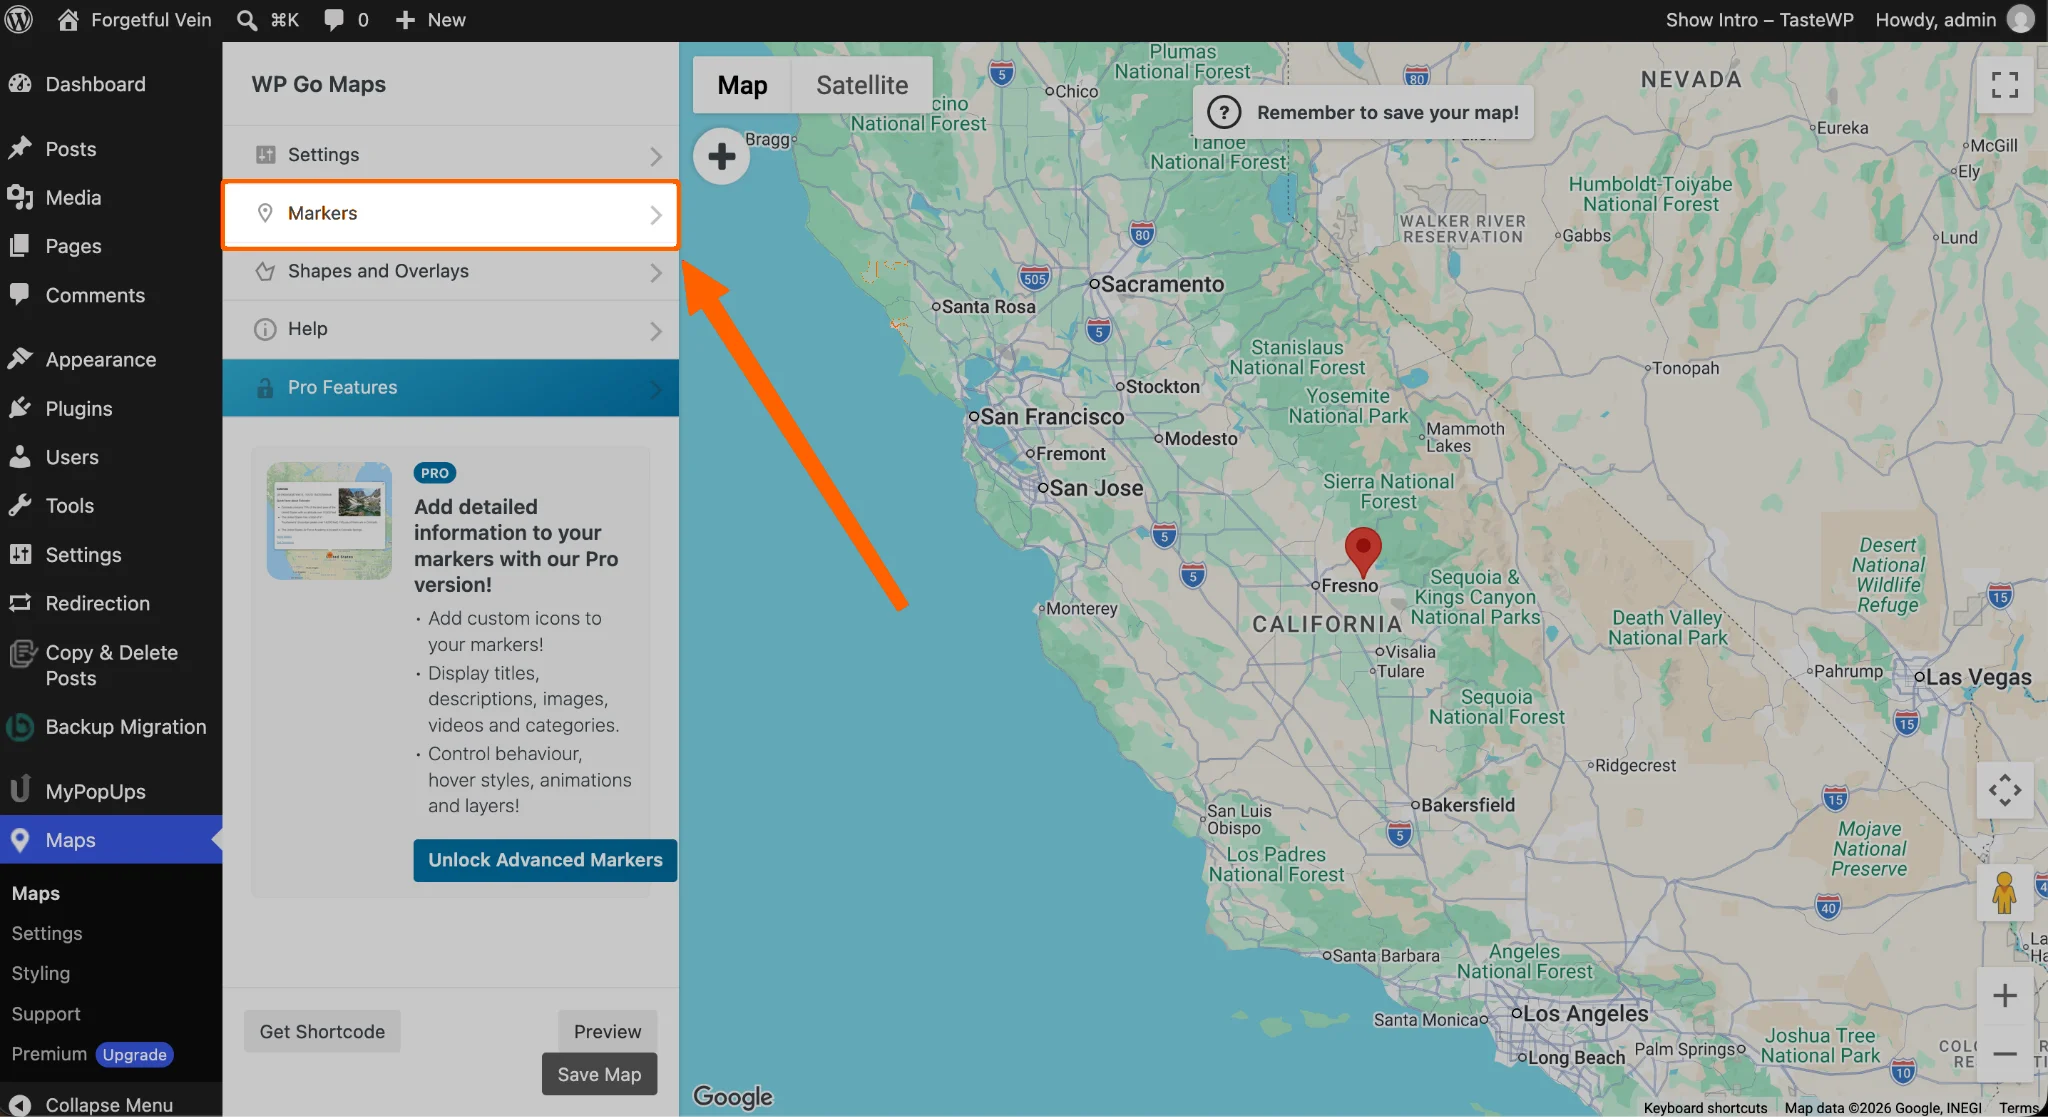
- This is where you configure how your map will display on your website. Click the Markers tab to start adding your business.
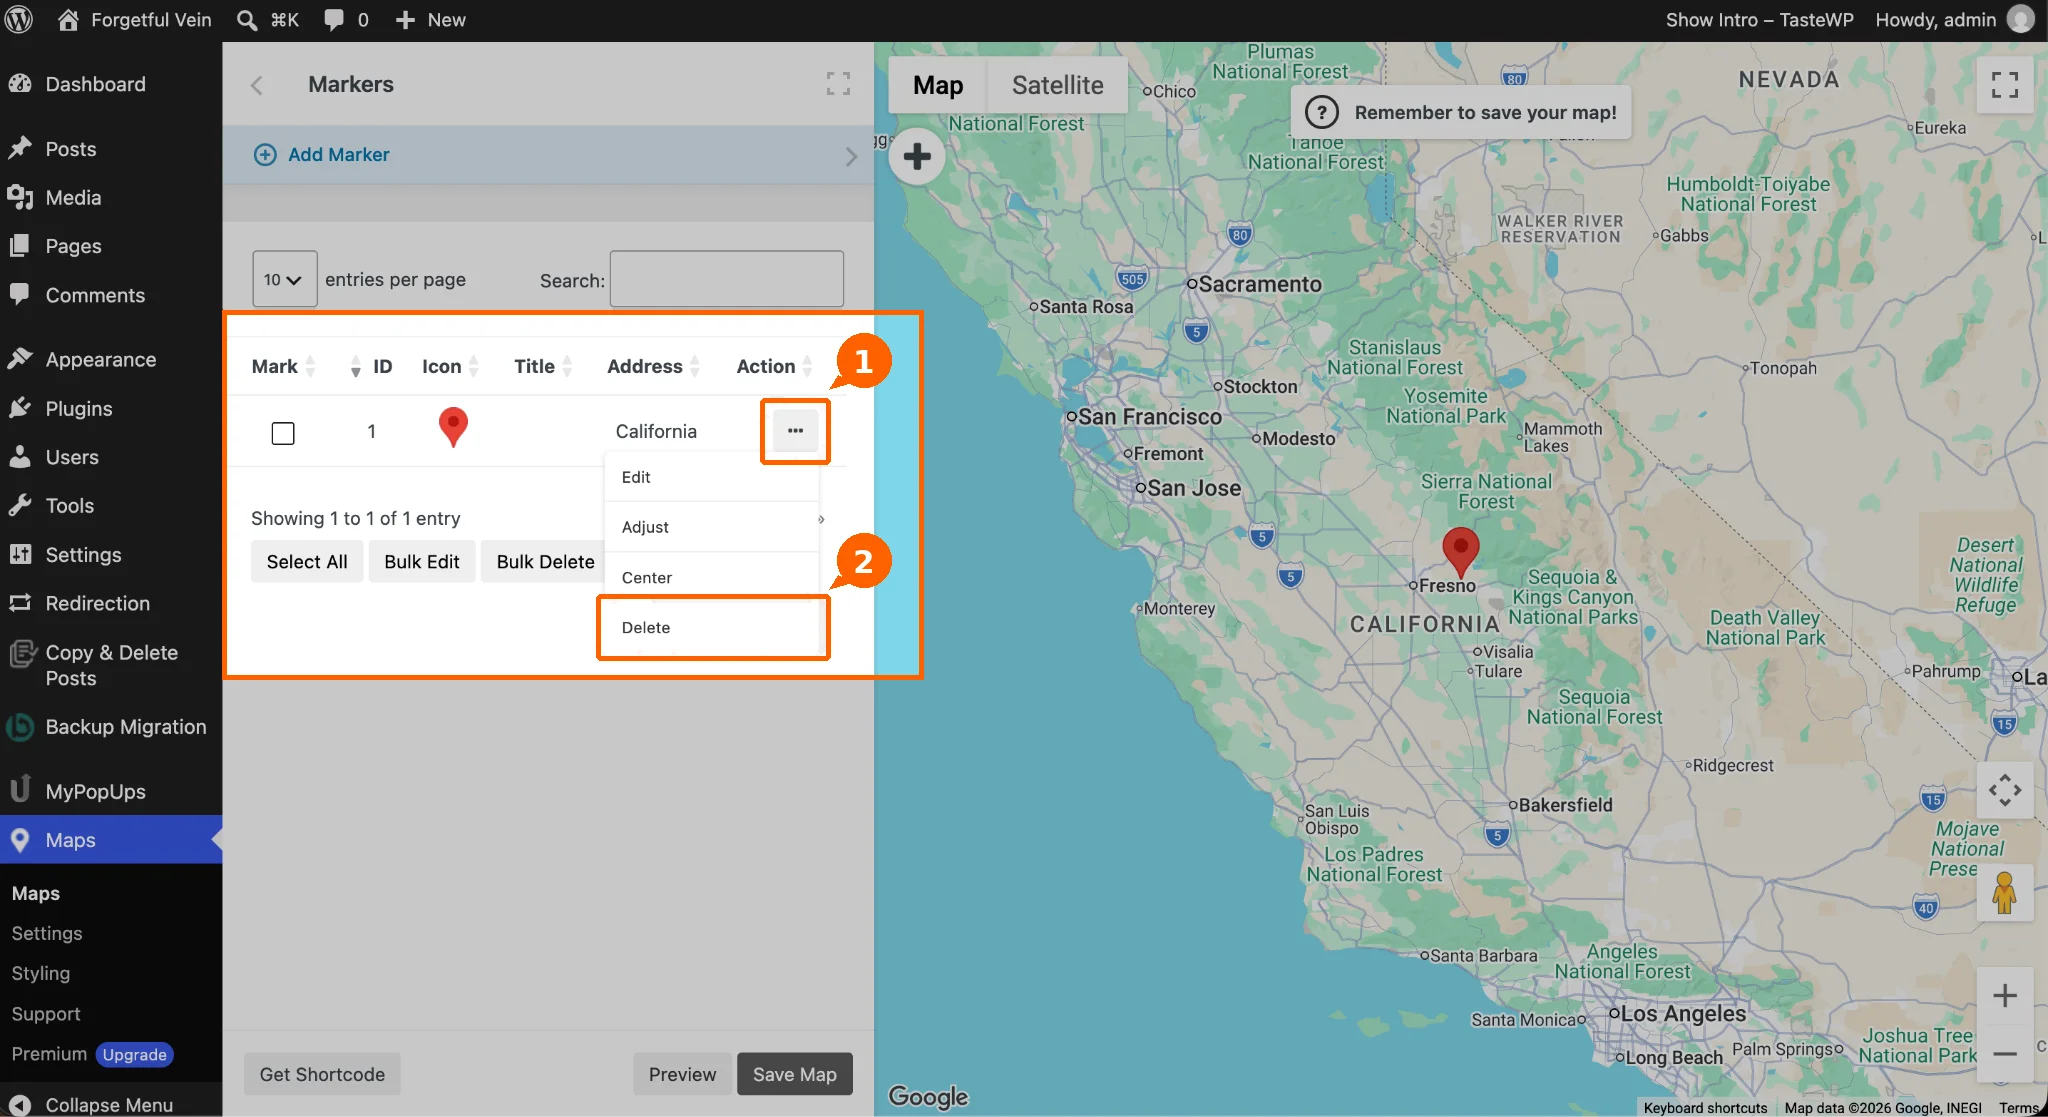
- Click the three-dot menu and delete the predetermined map marker.
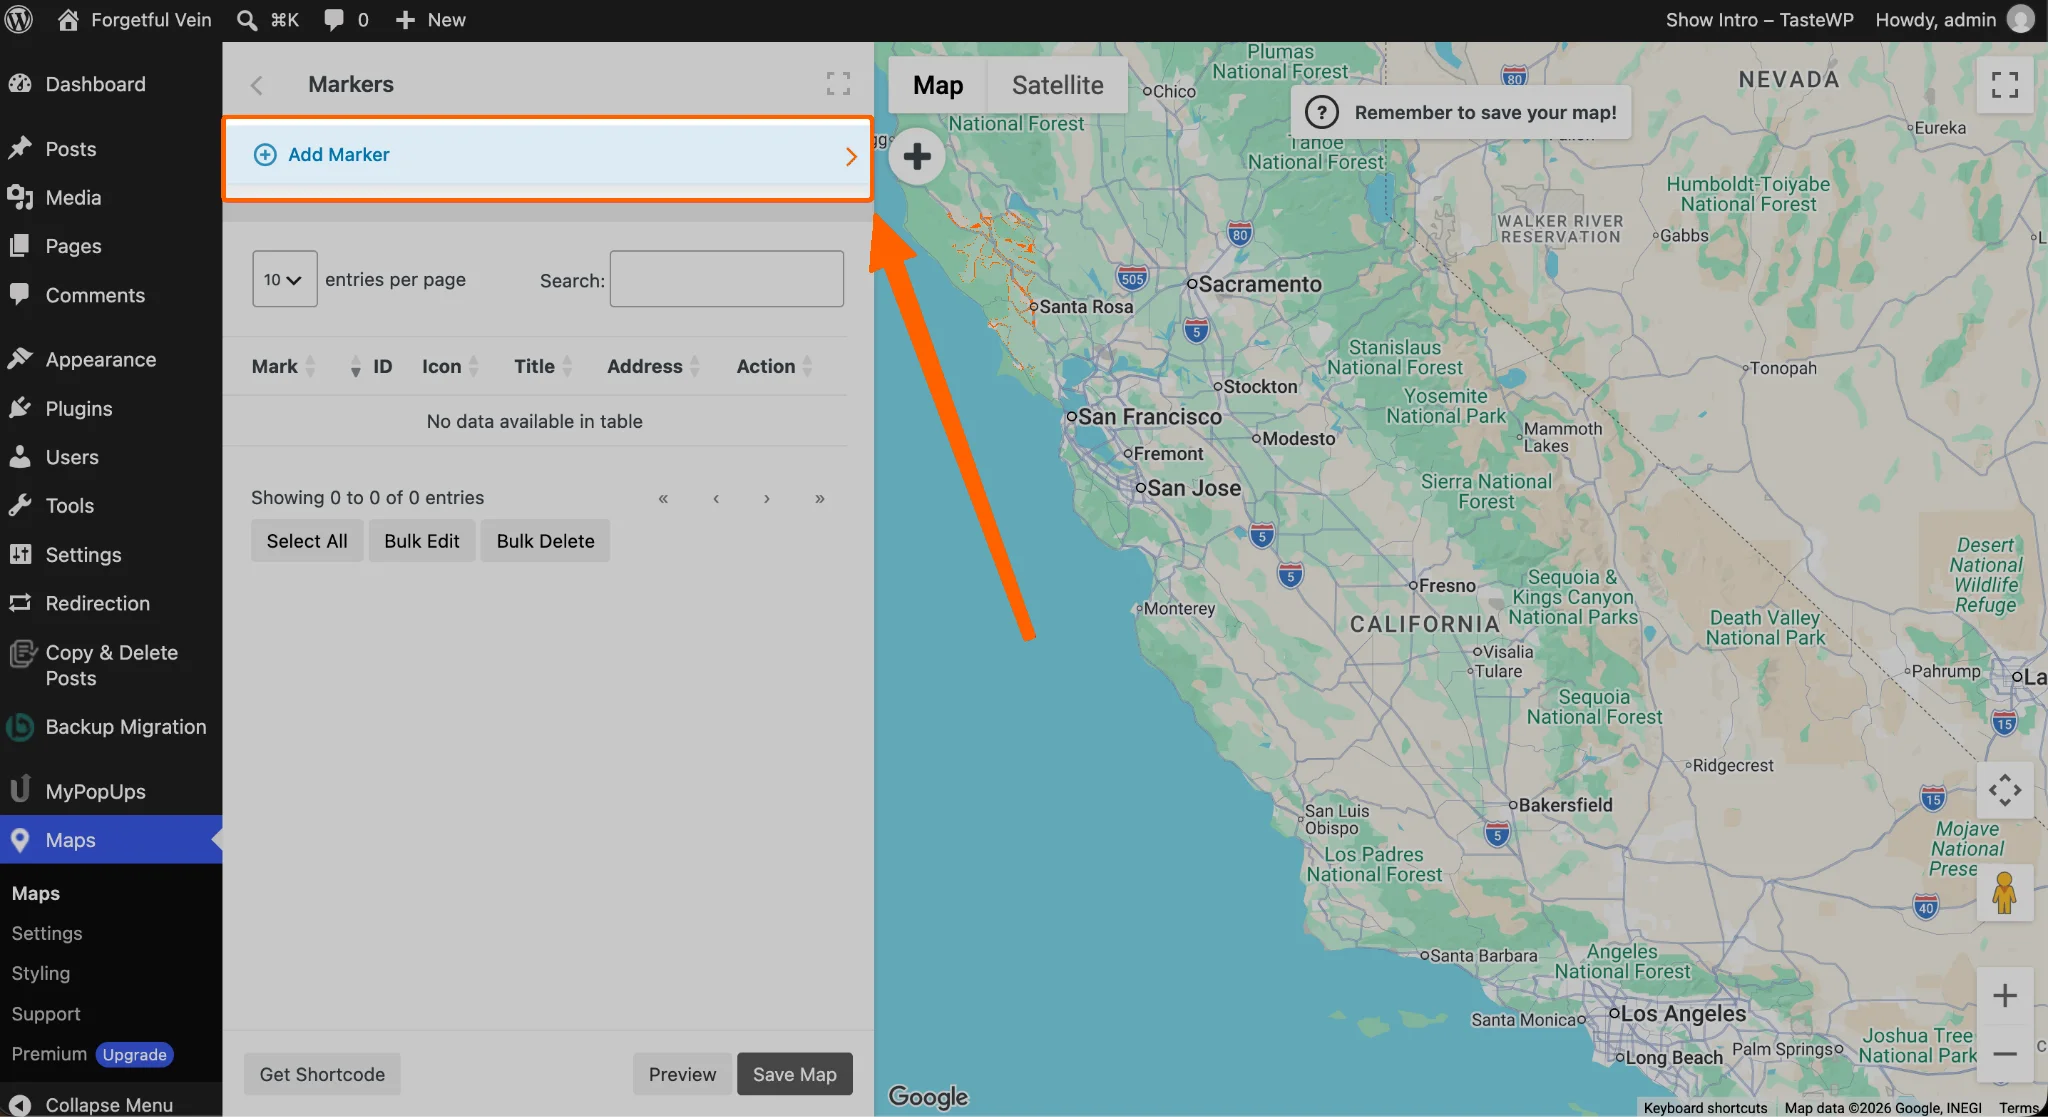
- Click Add Marker at the top.
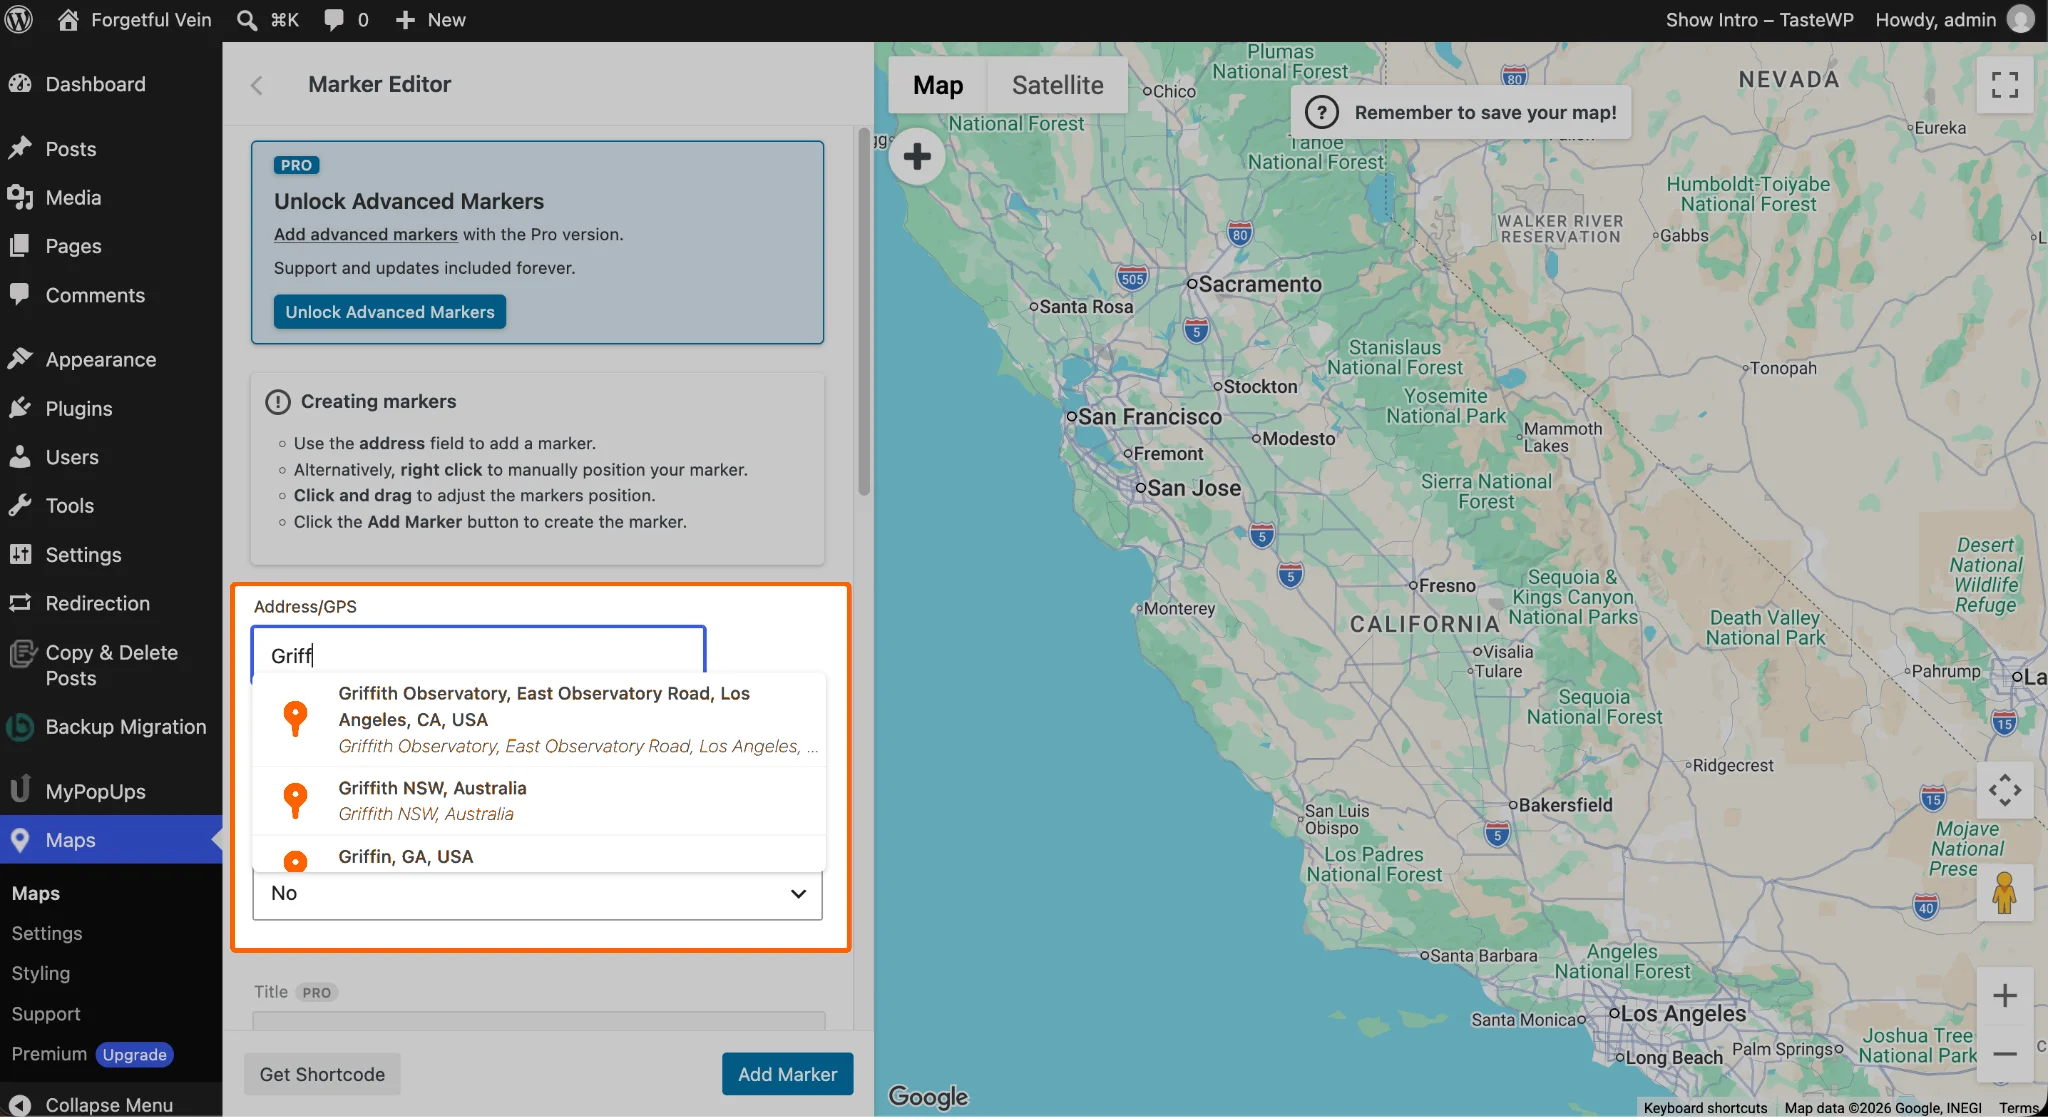
- Search for your business’s address and select it once it appears on the list.
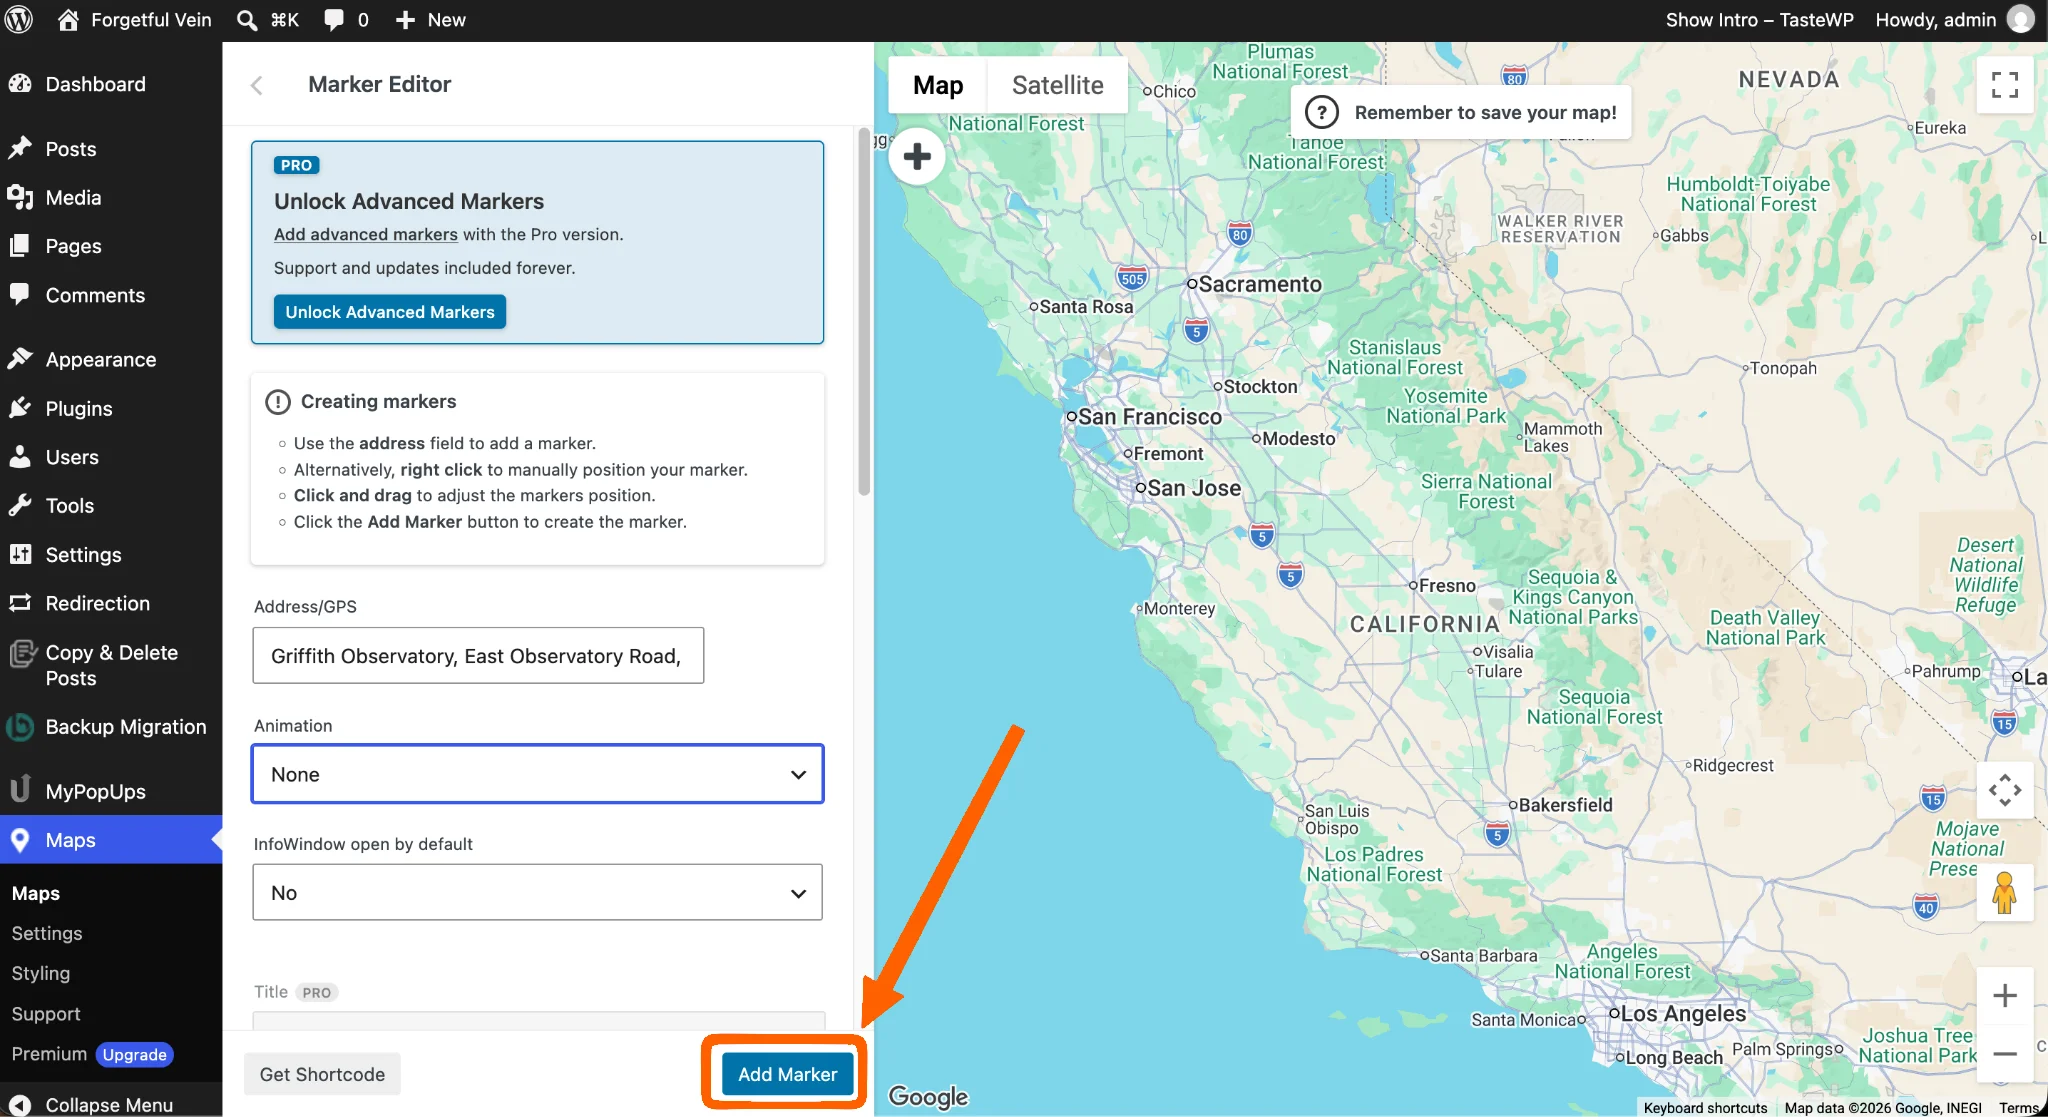
- Click the Add Marker button to finish.
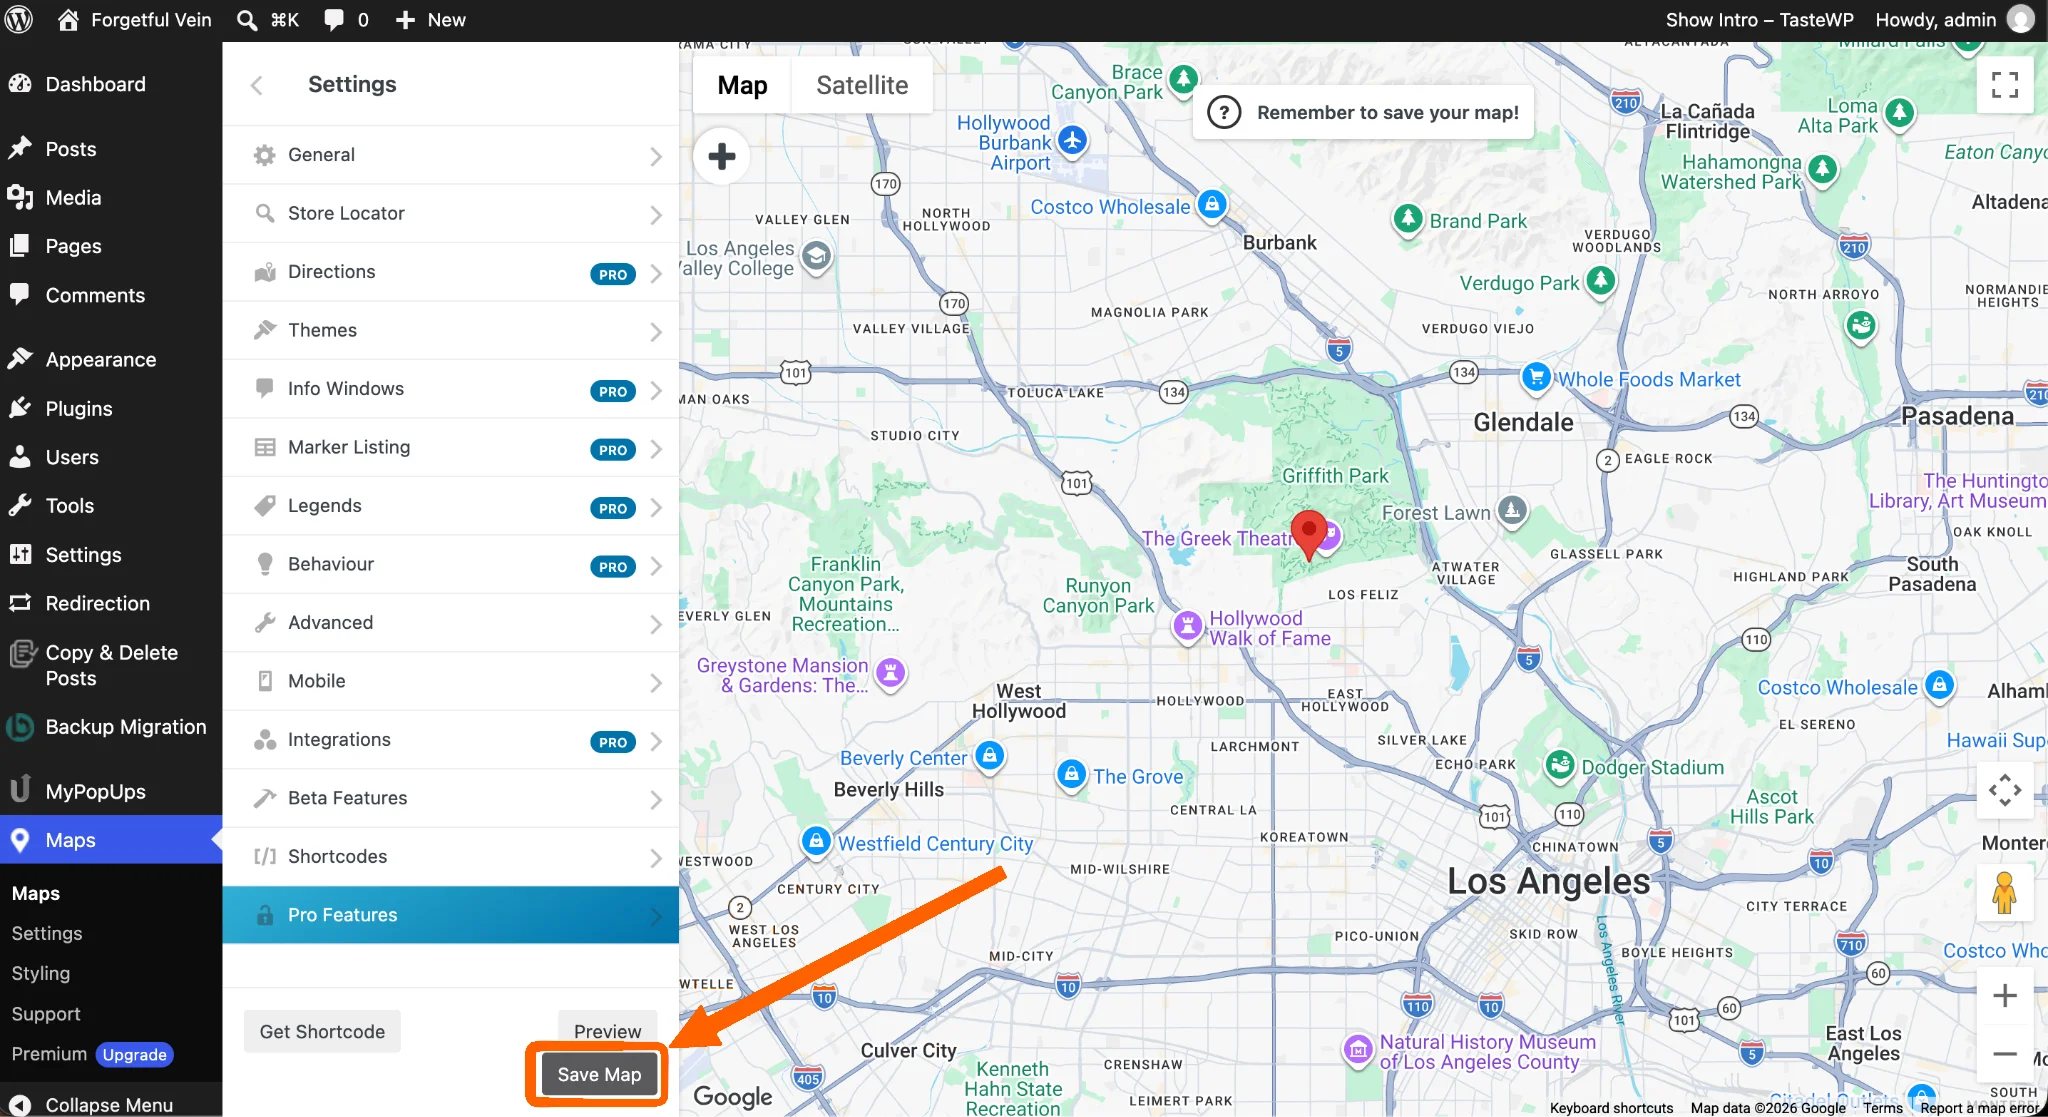
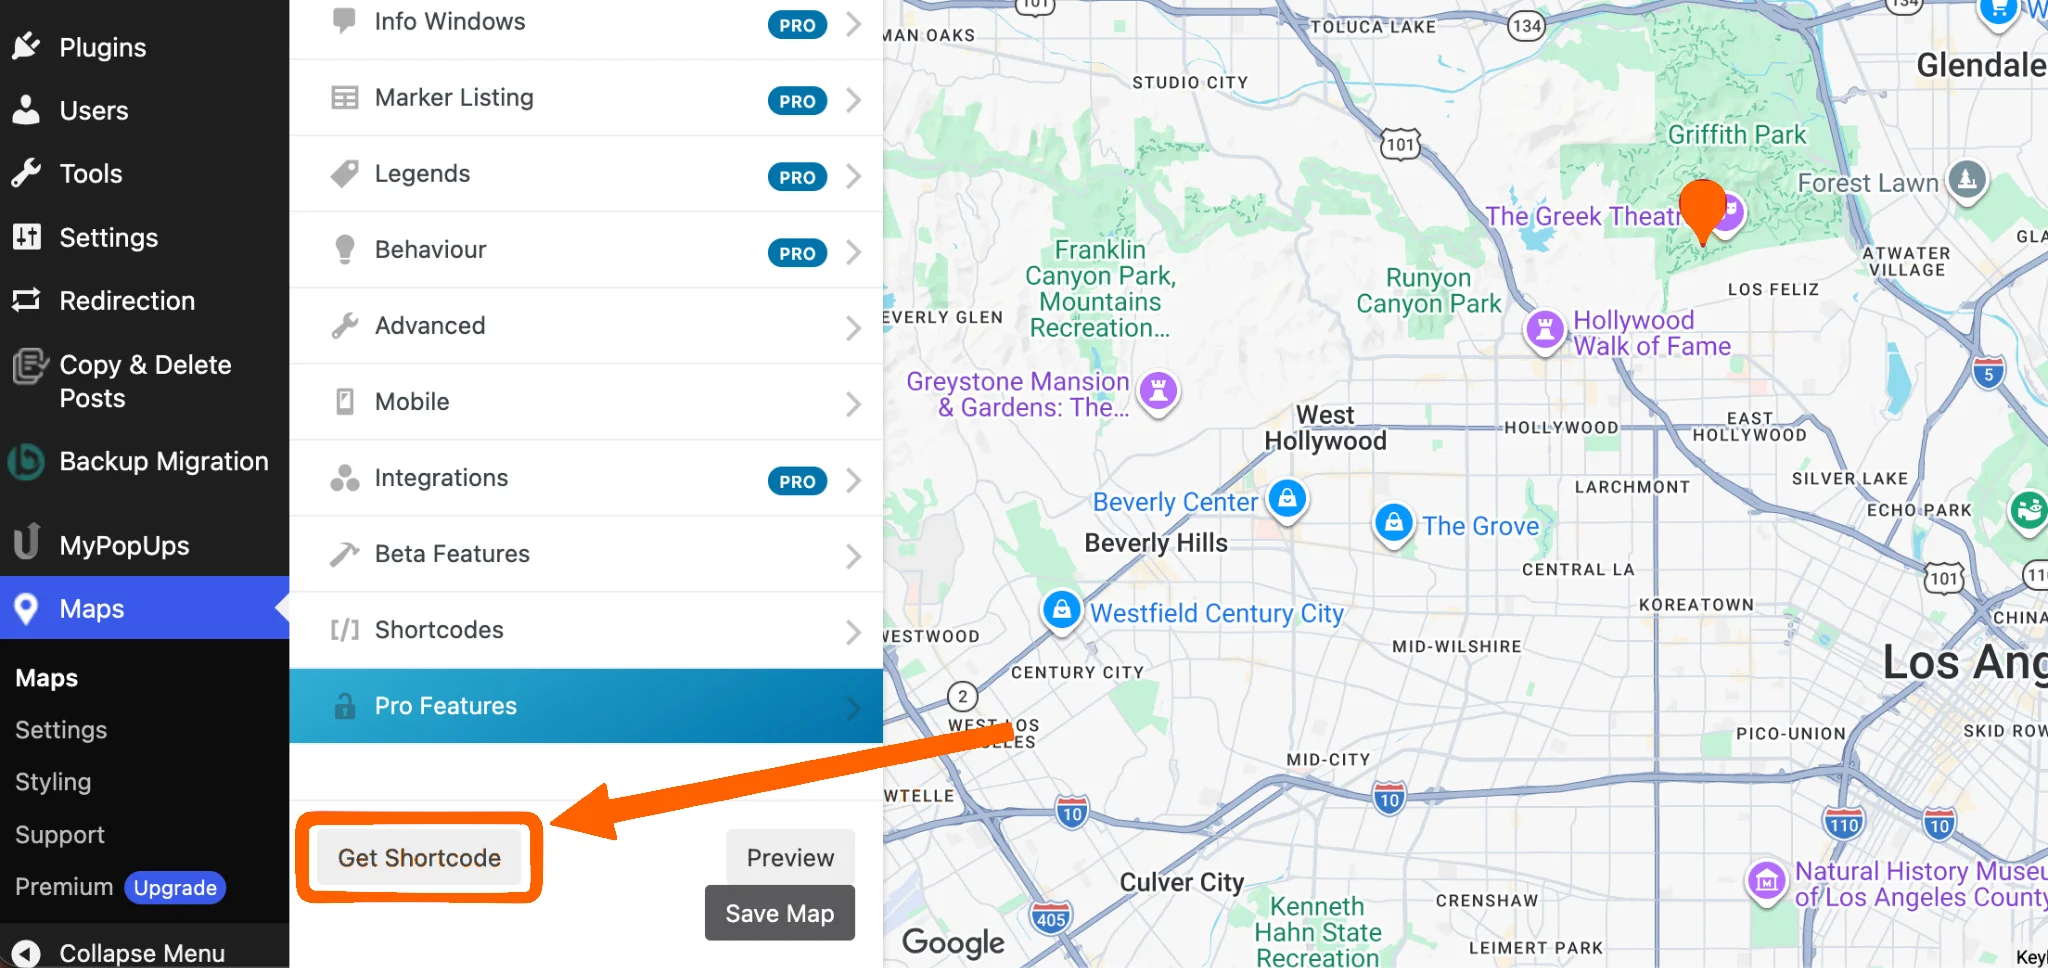
- Your business is now marked on the map. You can customize zoom level and other visual settings by going back and clicking the Settings button. Remember to click Save Map at the bottom of the screen when you finish.
- When you’re ready to place your map on a page on your website, click the Get Shortcode button at the bottom left. This will copy the shortcode onto your clipboard.
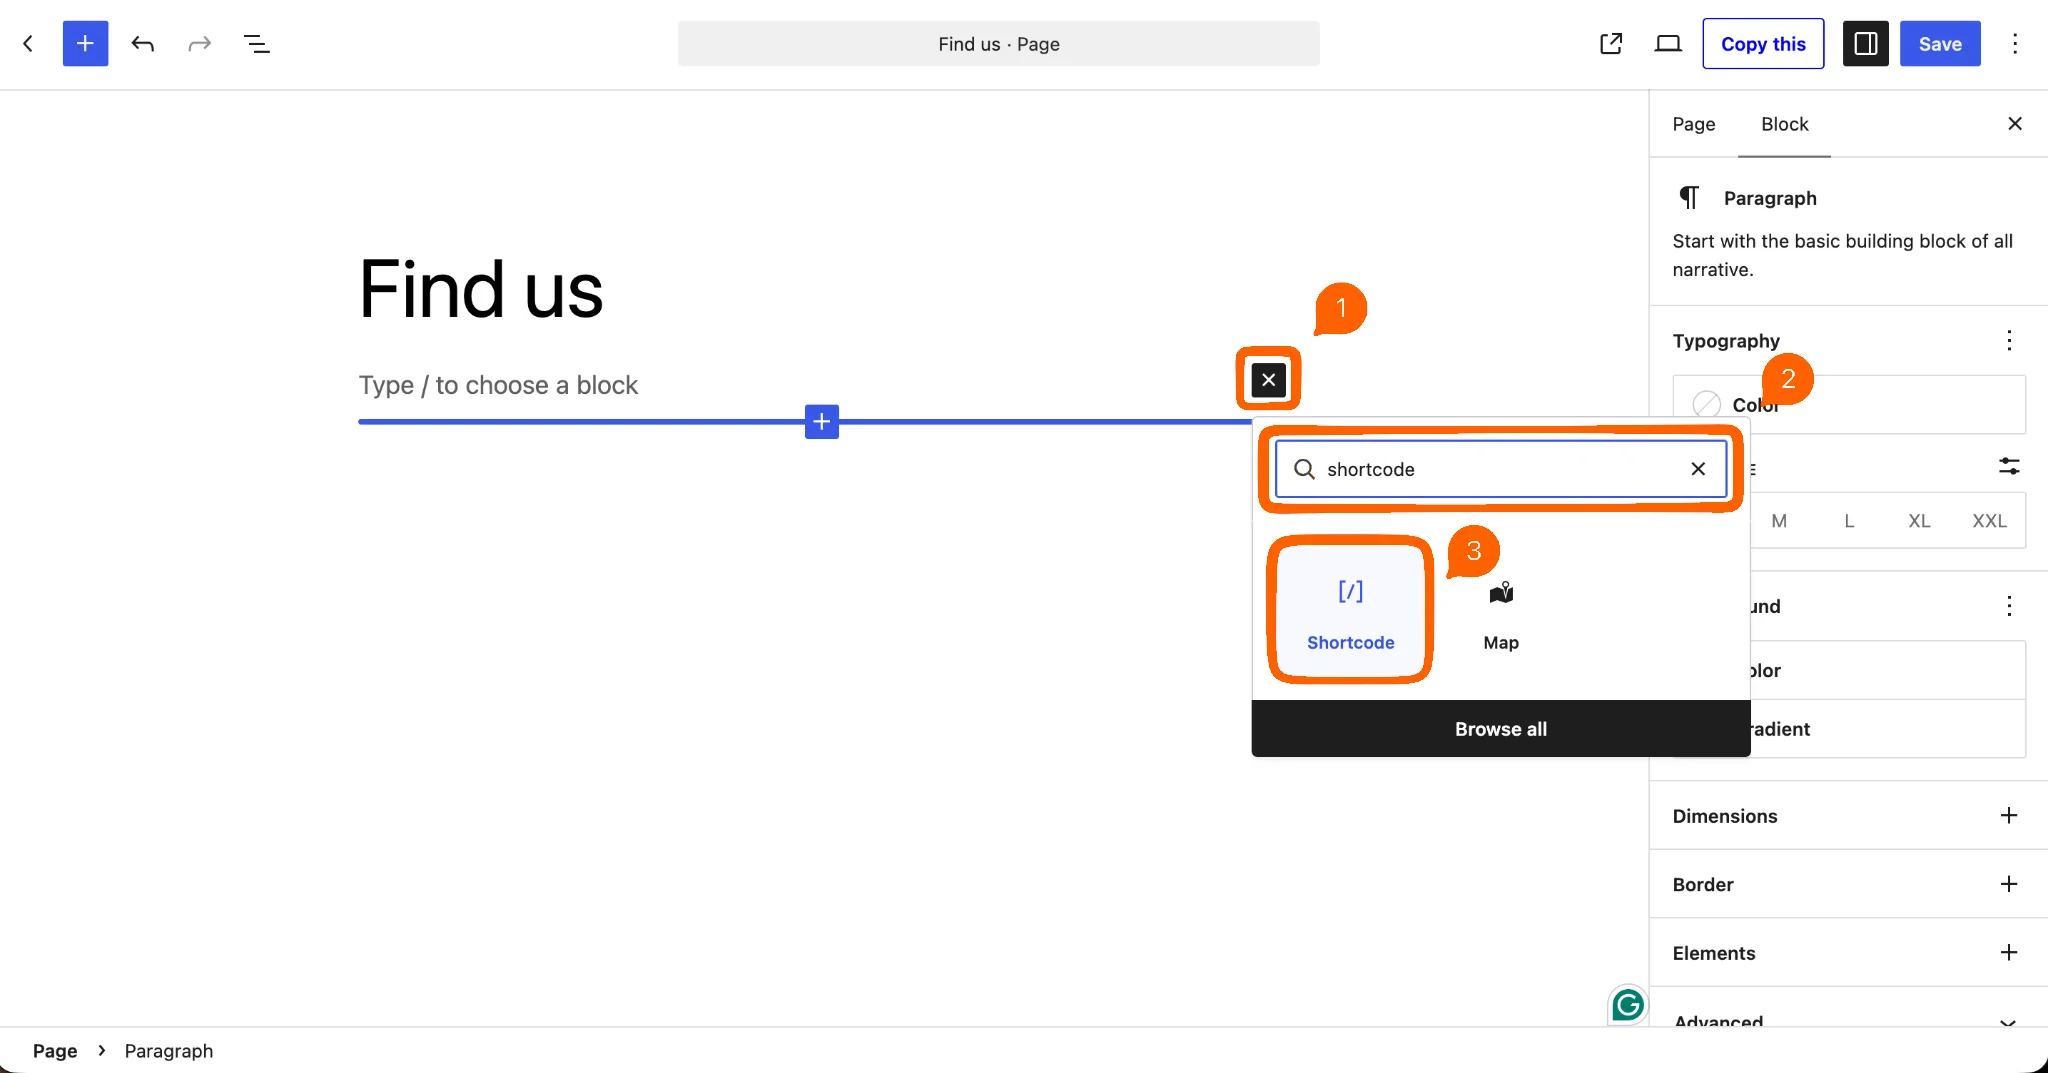
- Go to the page where you want to add your map, click to add a new block, and type Shortcode to filter the options. Click on it once it appears.
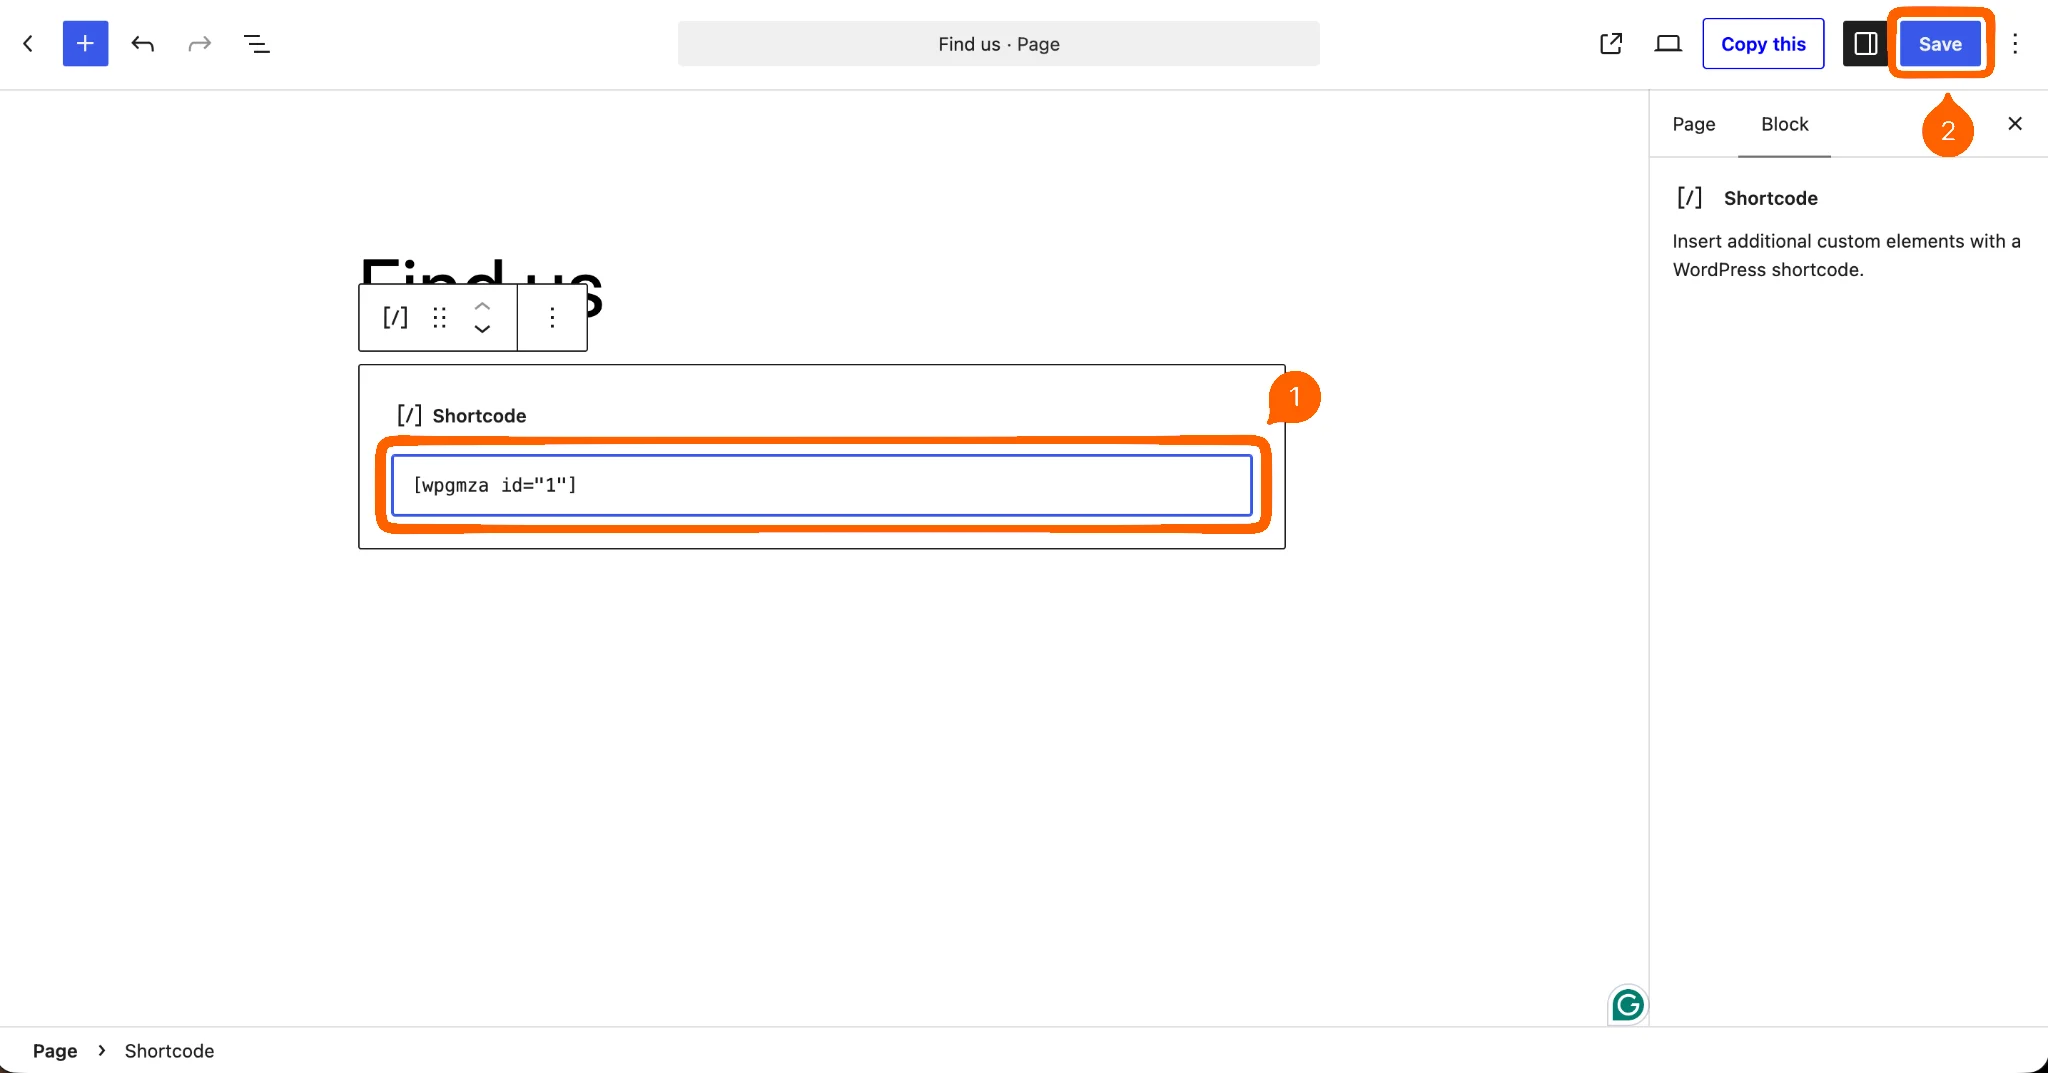
- Paste the shortcode into the input field and click Publish or Save.
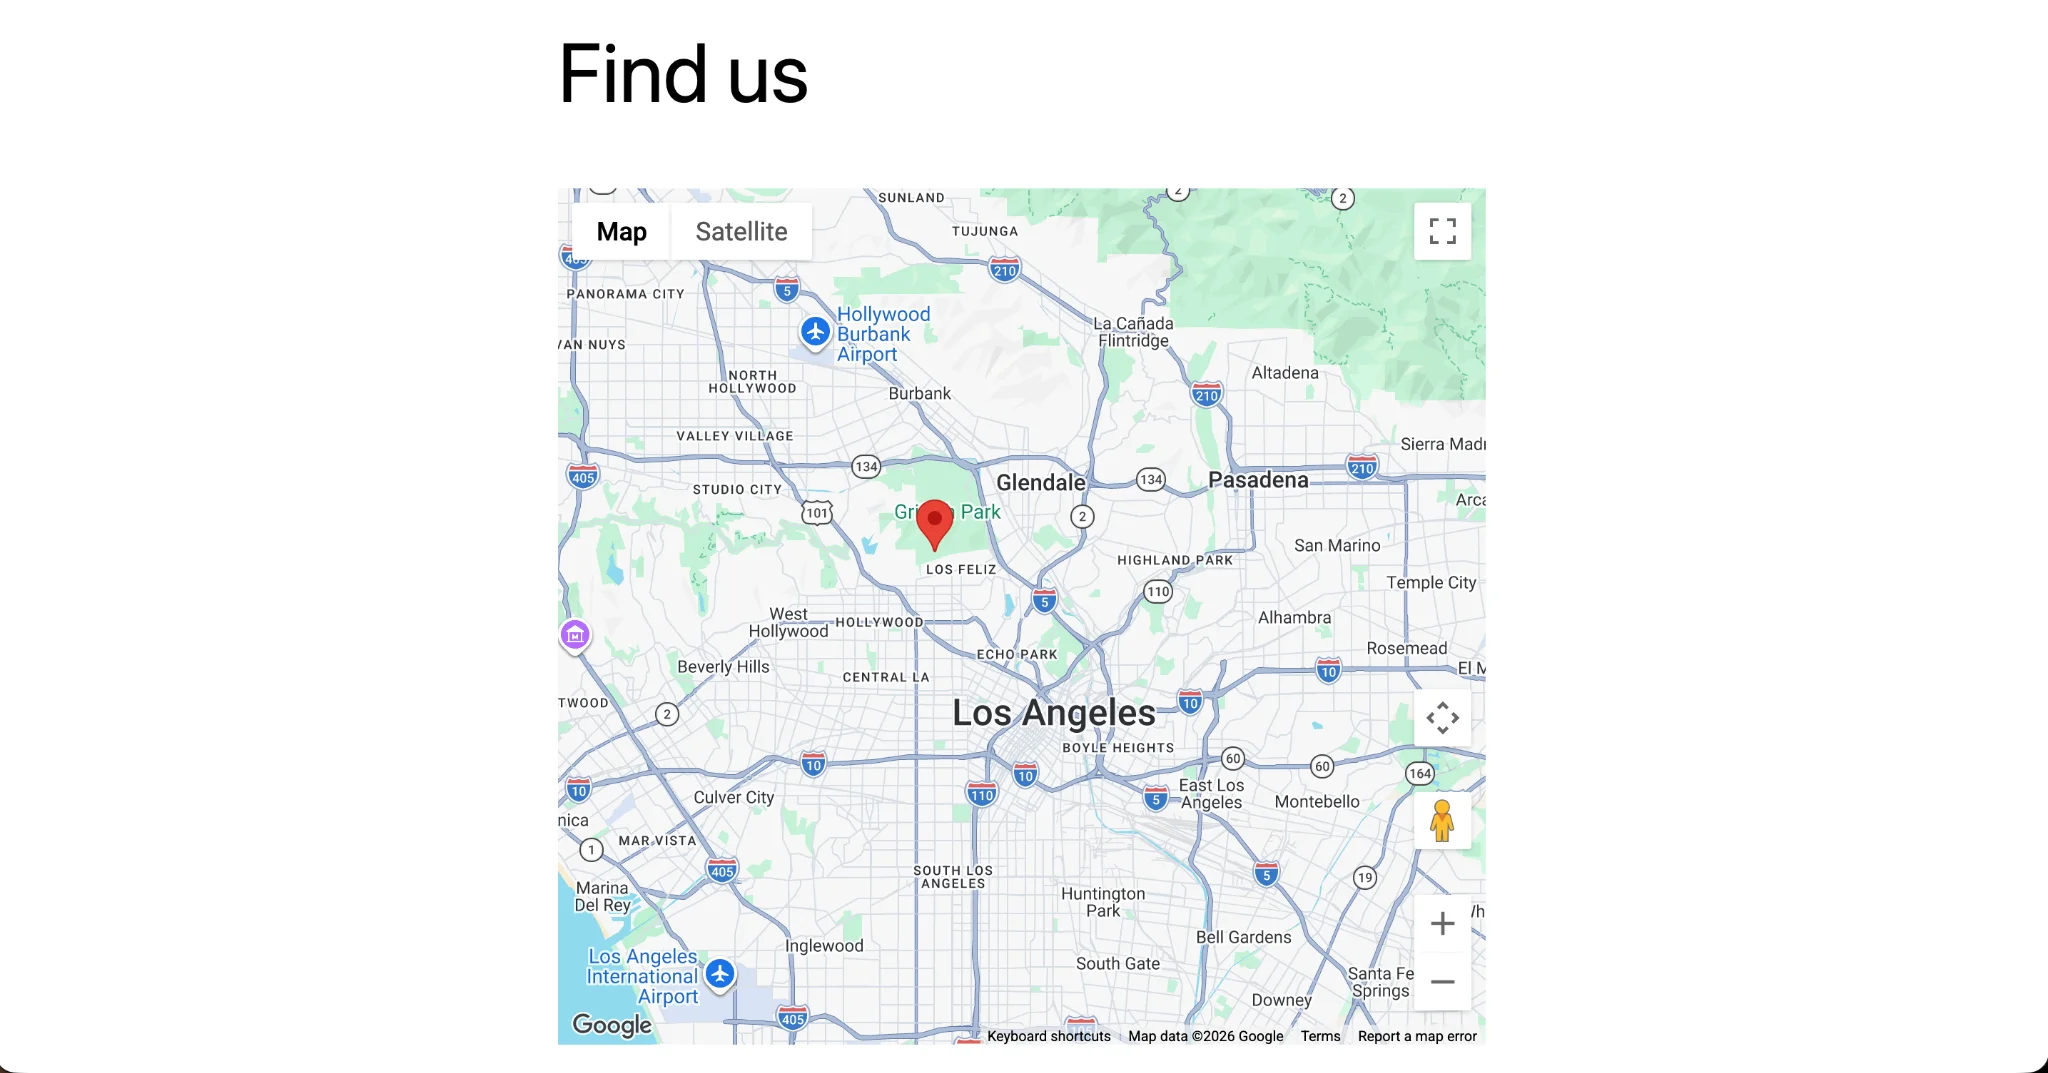
- When you visit the page, the map displays your marker with the settings you selected.
Option 3: Add a free, customizable Google Maps widget (recommended)
The Jotform Google Maps Widget is a free and fully customizable map that doesn’t require installing a plug-in or paying a license fee. With it, you can
- Add one or multiple locations that display on the same map.
- Choose the map view, including road map or satellite.
- Adapt to a light or dark theme, with corner radius control for boxes.
- Set the map’s size, layout, and zoom level.
Compared with native iFrames, it’s customizable, allows multiple pins on the same map, and is responsive out of the box. Compared with a plug-in, it doesn’t weigh down your website and doesn’t require a paid plan to unlock all its features.
Despite these advantages, the Jotform Google Maps Widget still requires a Google Maps API key. You’ll have to go through the setup steps and create a billing account with Google.
How to add the Jotform Google Maps Widget to your website
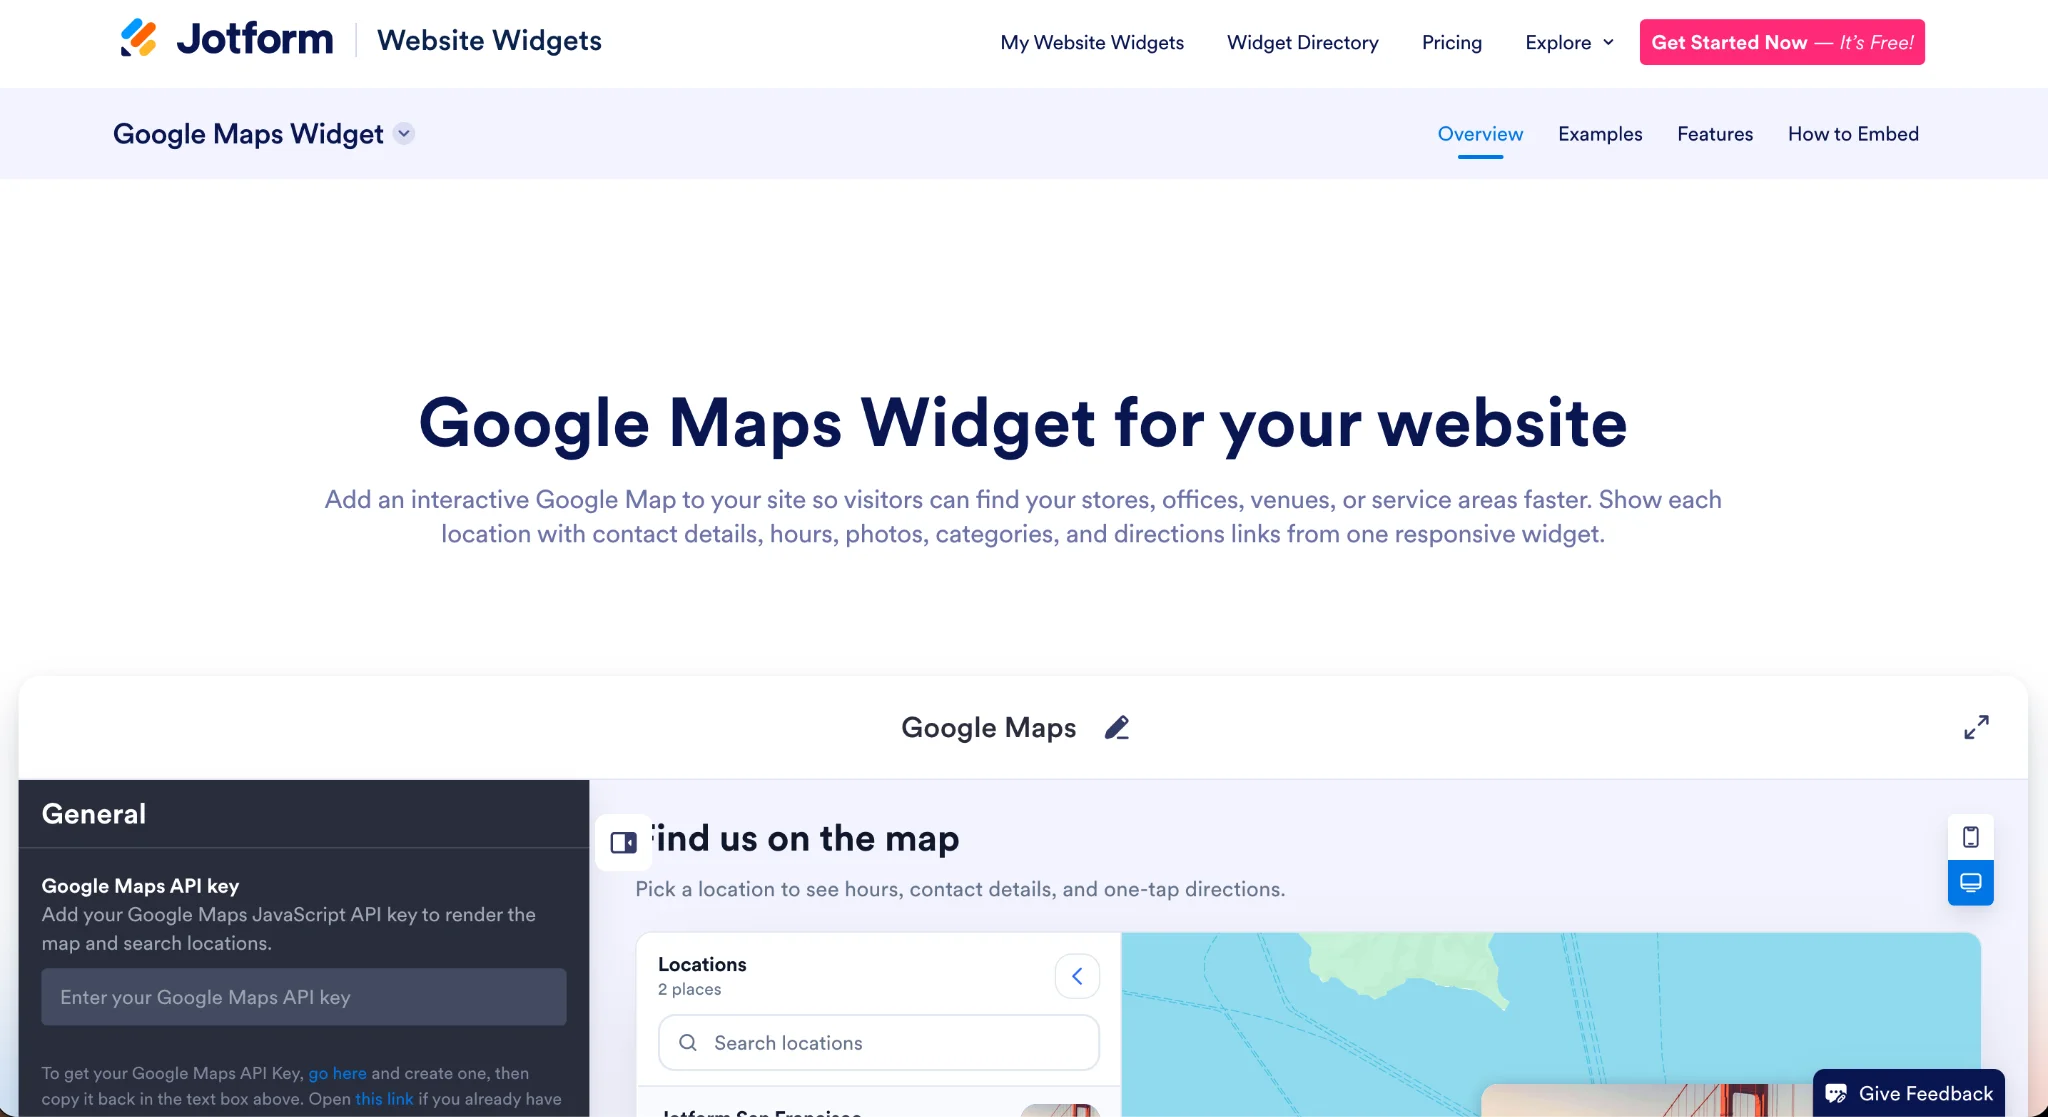
- Visit the Jotform Google Maps Widget page. In most cases, the configuration tool loads automatically; if it doesn’t, click Create New Website Widget to begin.
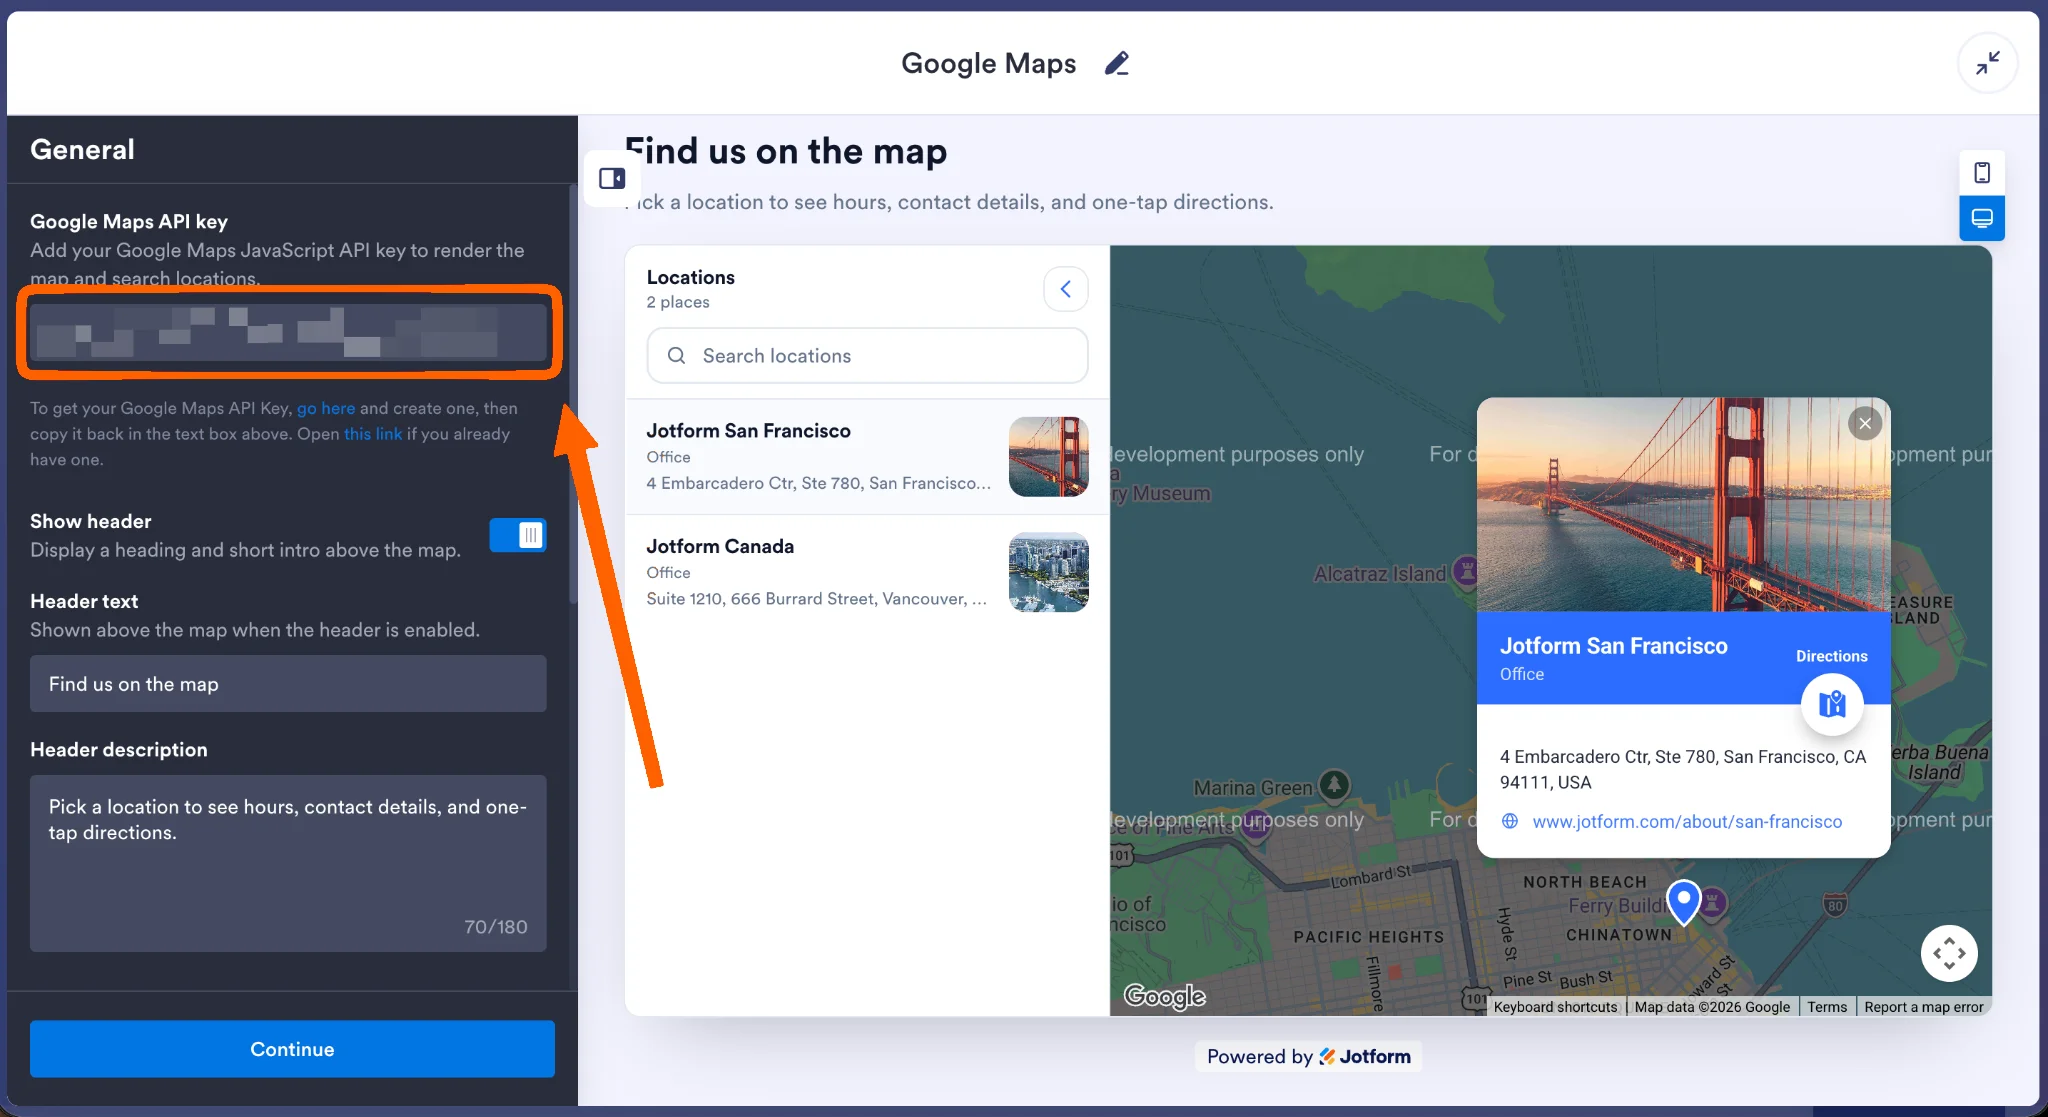
- Follow this guide on how to get your Google Maps API key. It covers all the steps detailed in Option 2, as well as how to restrict your key to keep it safe. (Remember that Google Maps allows 10,000 free map loads every month. Every 1,000 loads after that cost $7.) Once you finish, paste your Google Maps API key into the input field.
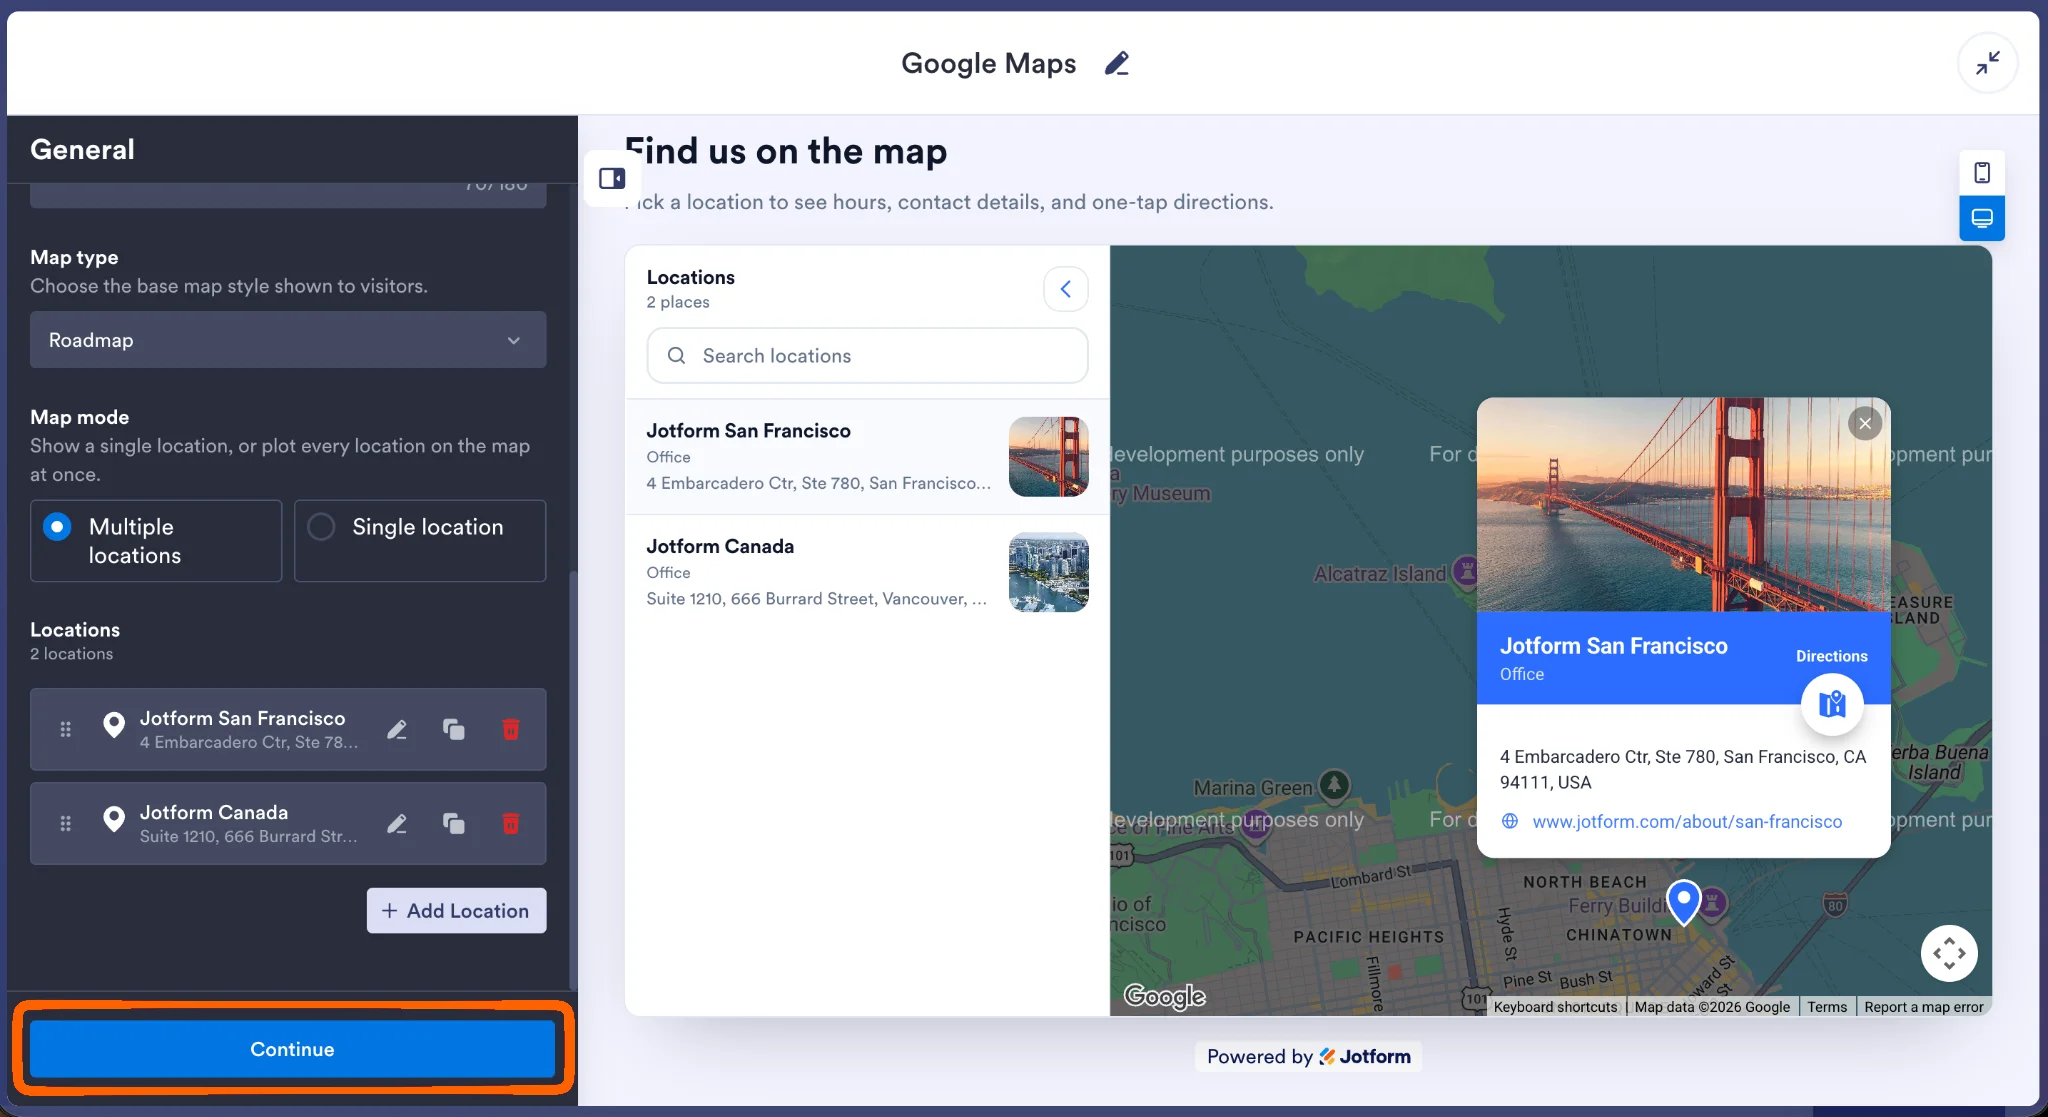
- Adjust the general settings to your liking. This includes how the map should look and how many locations you want to add to it. The screenshots here use Jotform’s San Francisco and Canada offices to show a multi-pin map, but you can add a single location or as many as you need. Click Continue when done.
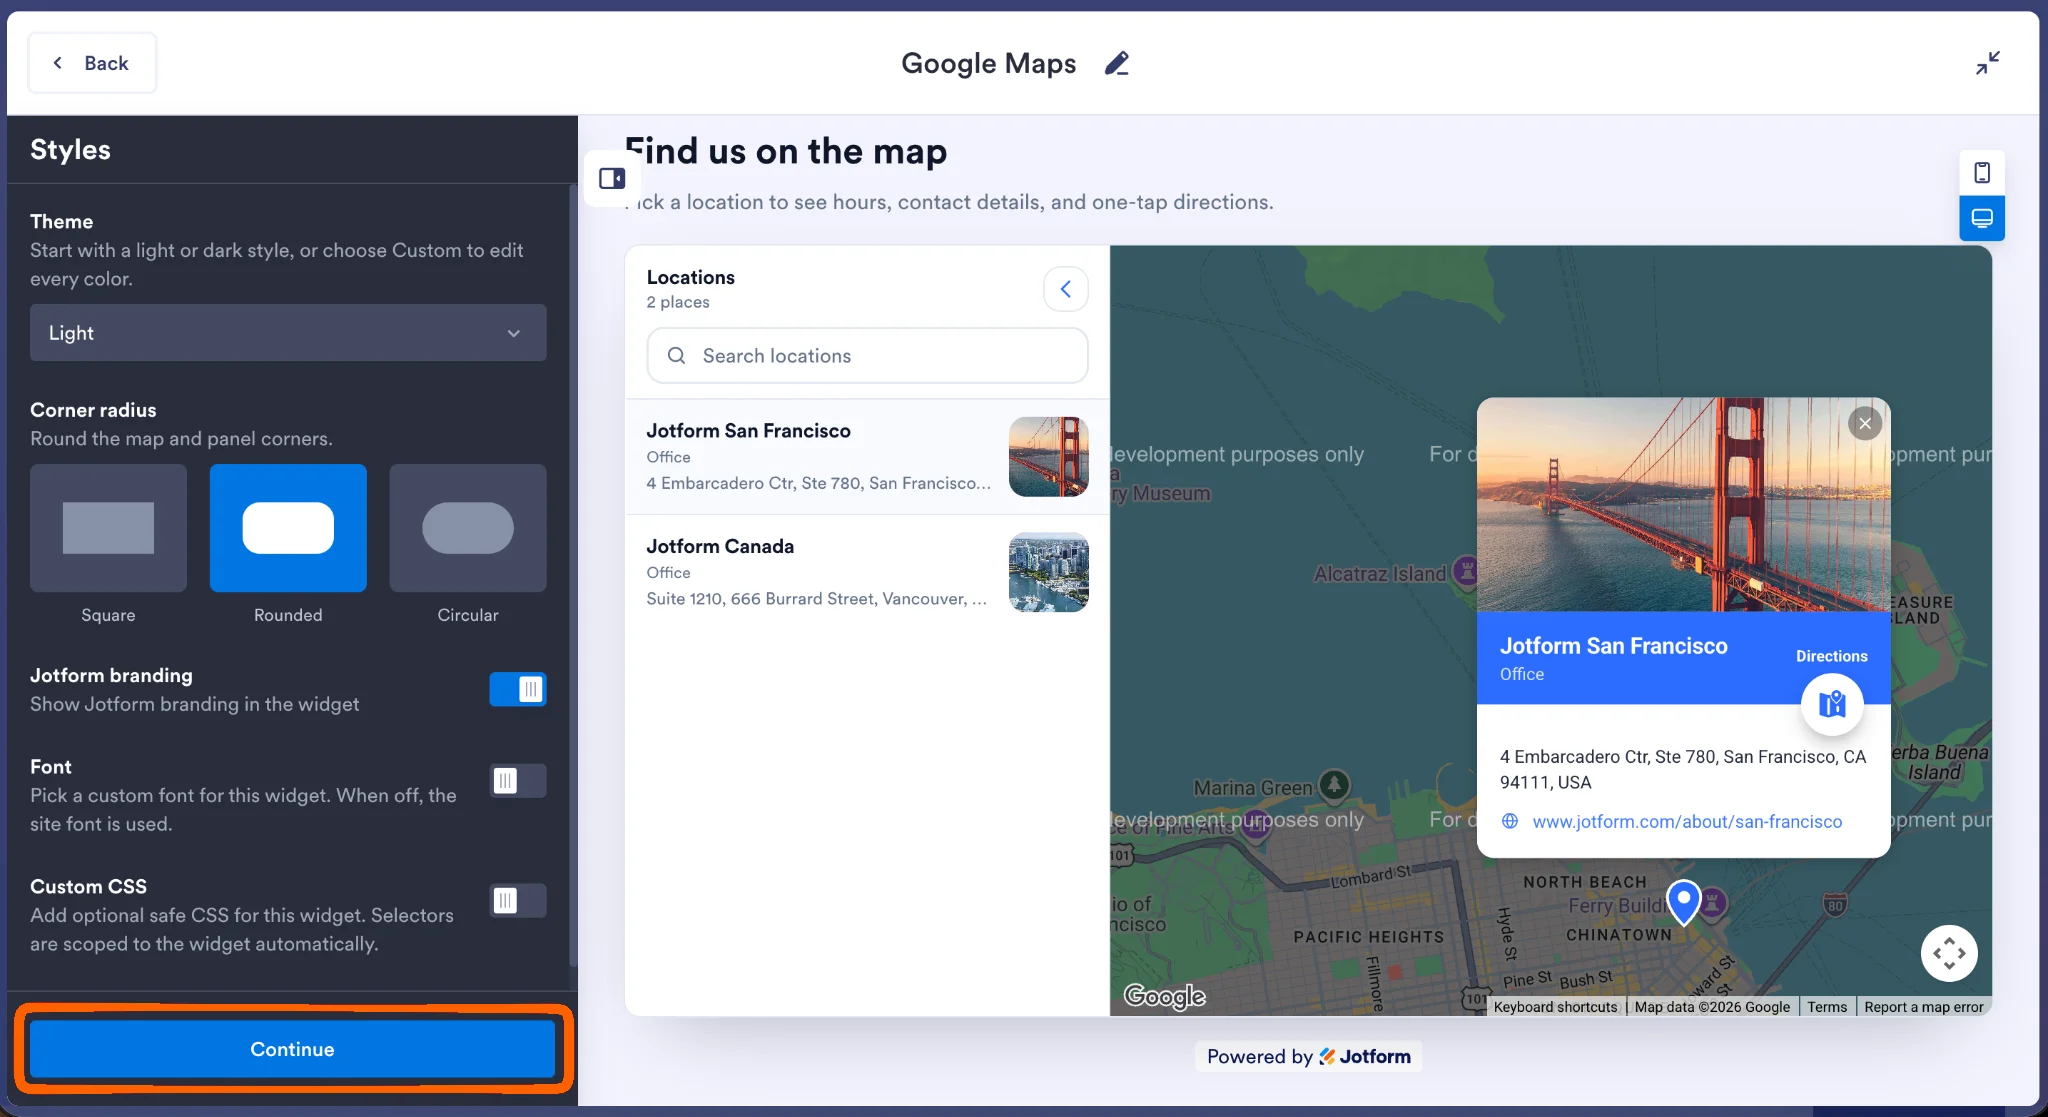
- Change style settings such as theme, font, or custom CSS. Click Continue when you’re done.
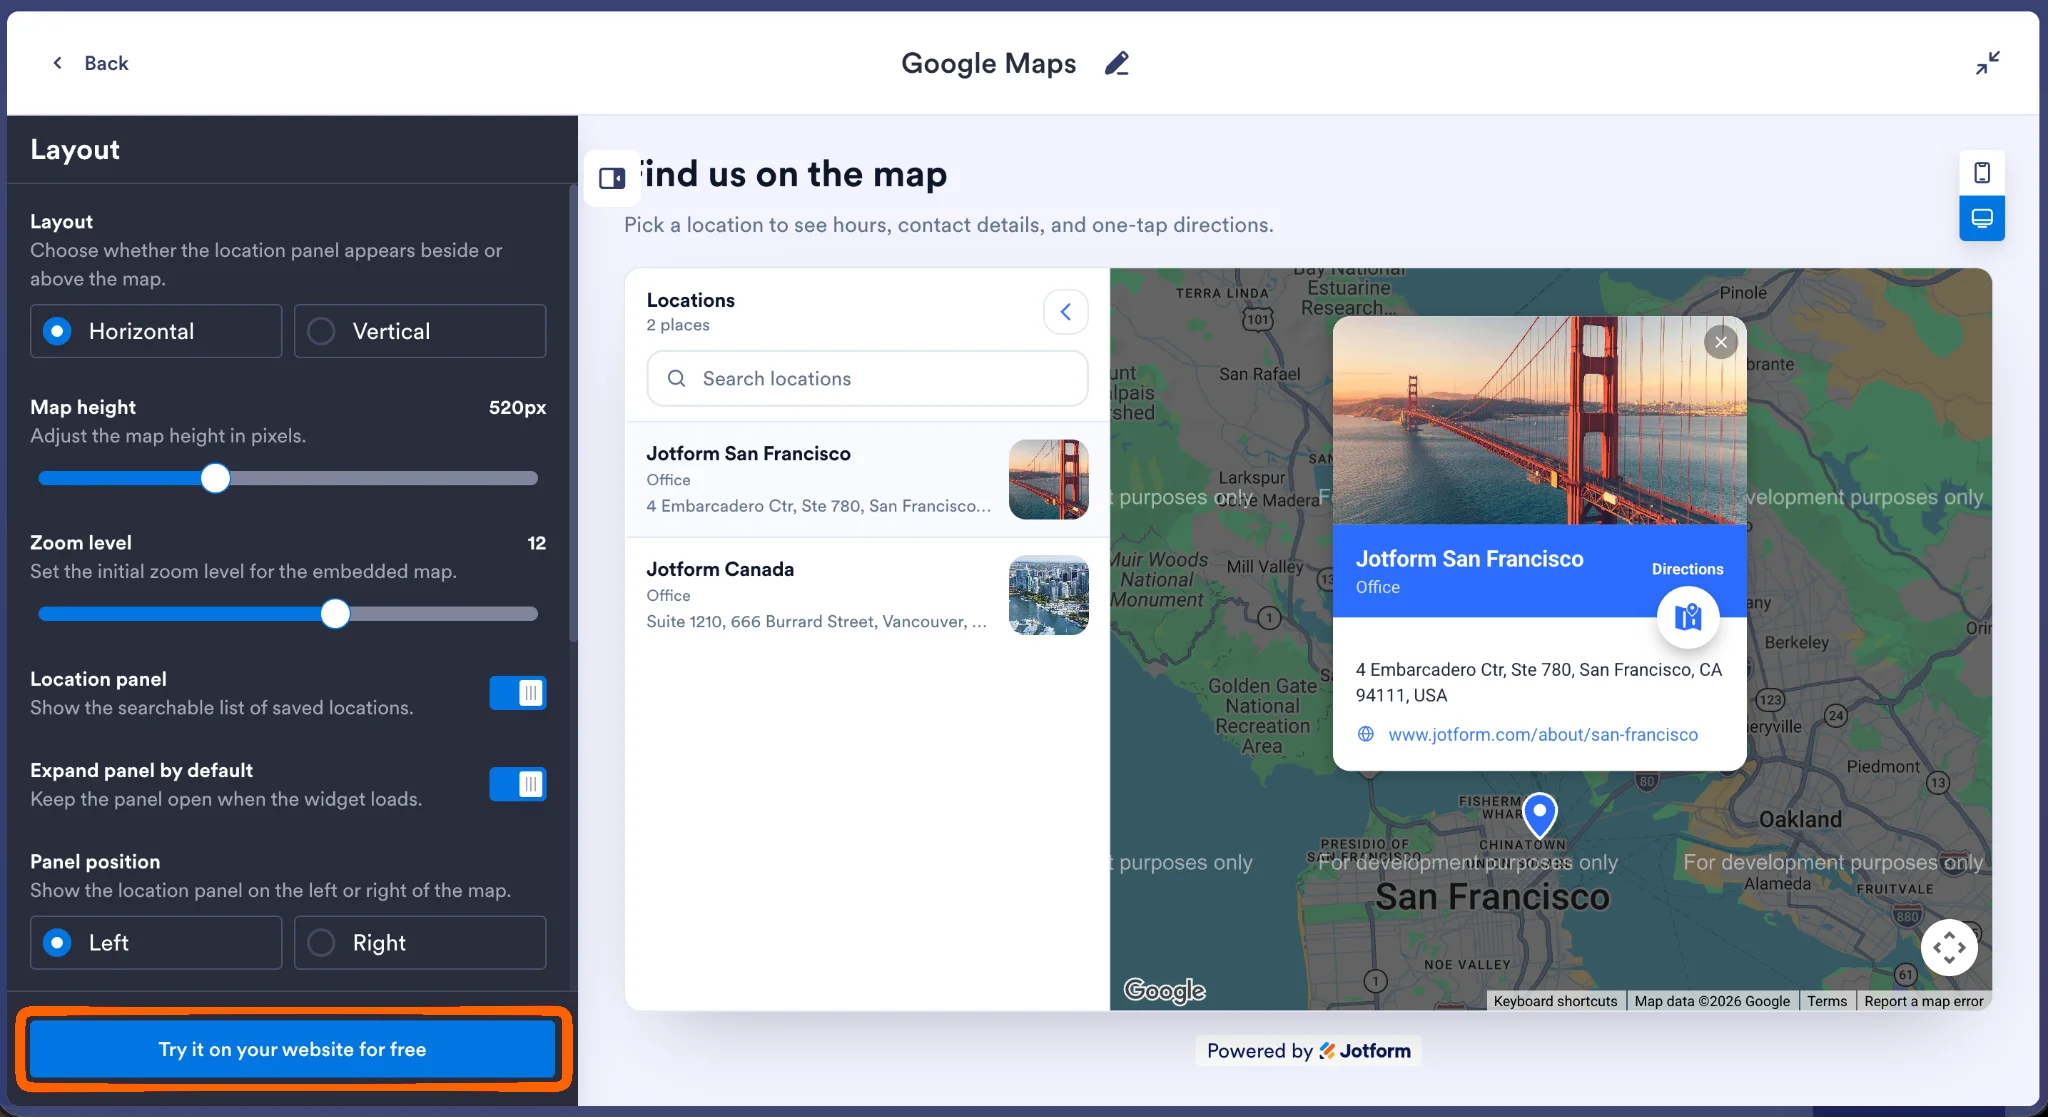
- Customize the layout and extra features in this final step. Click Try It on Your Website for Free when you’re ready.
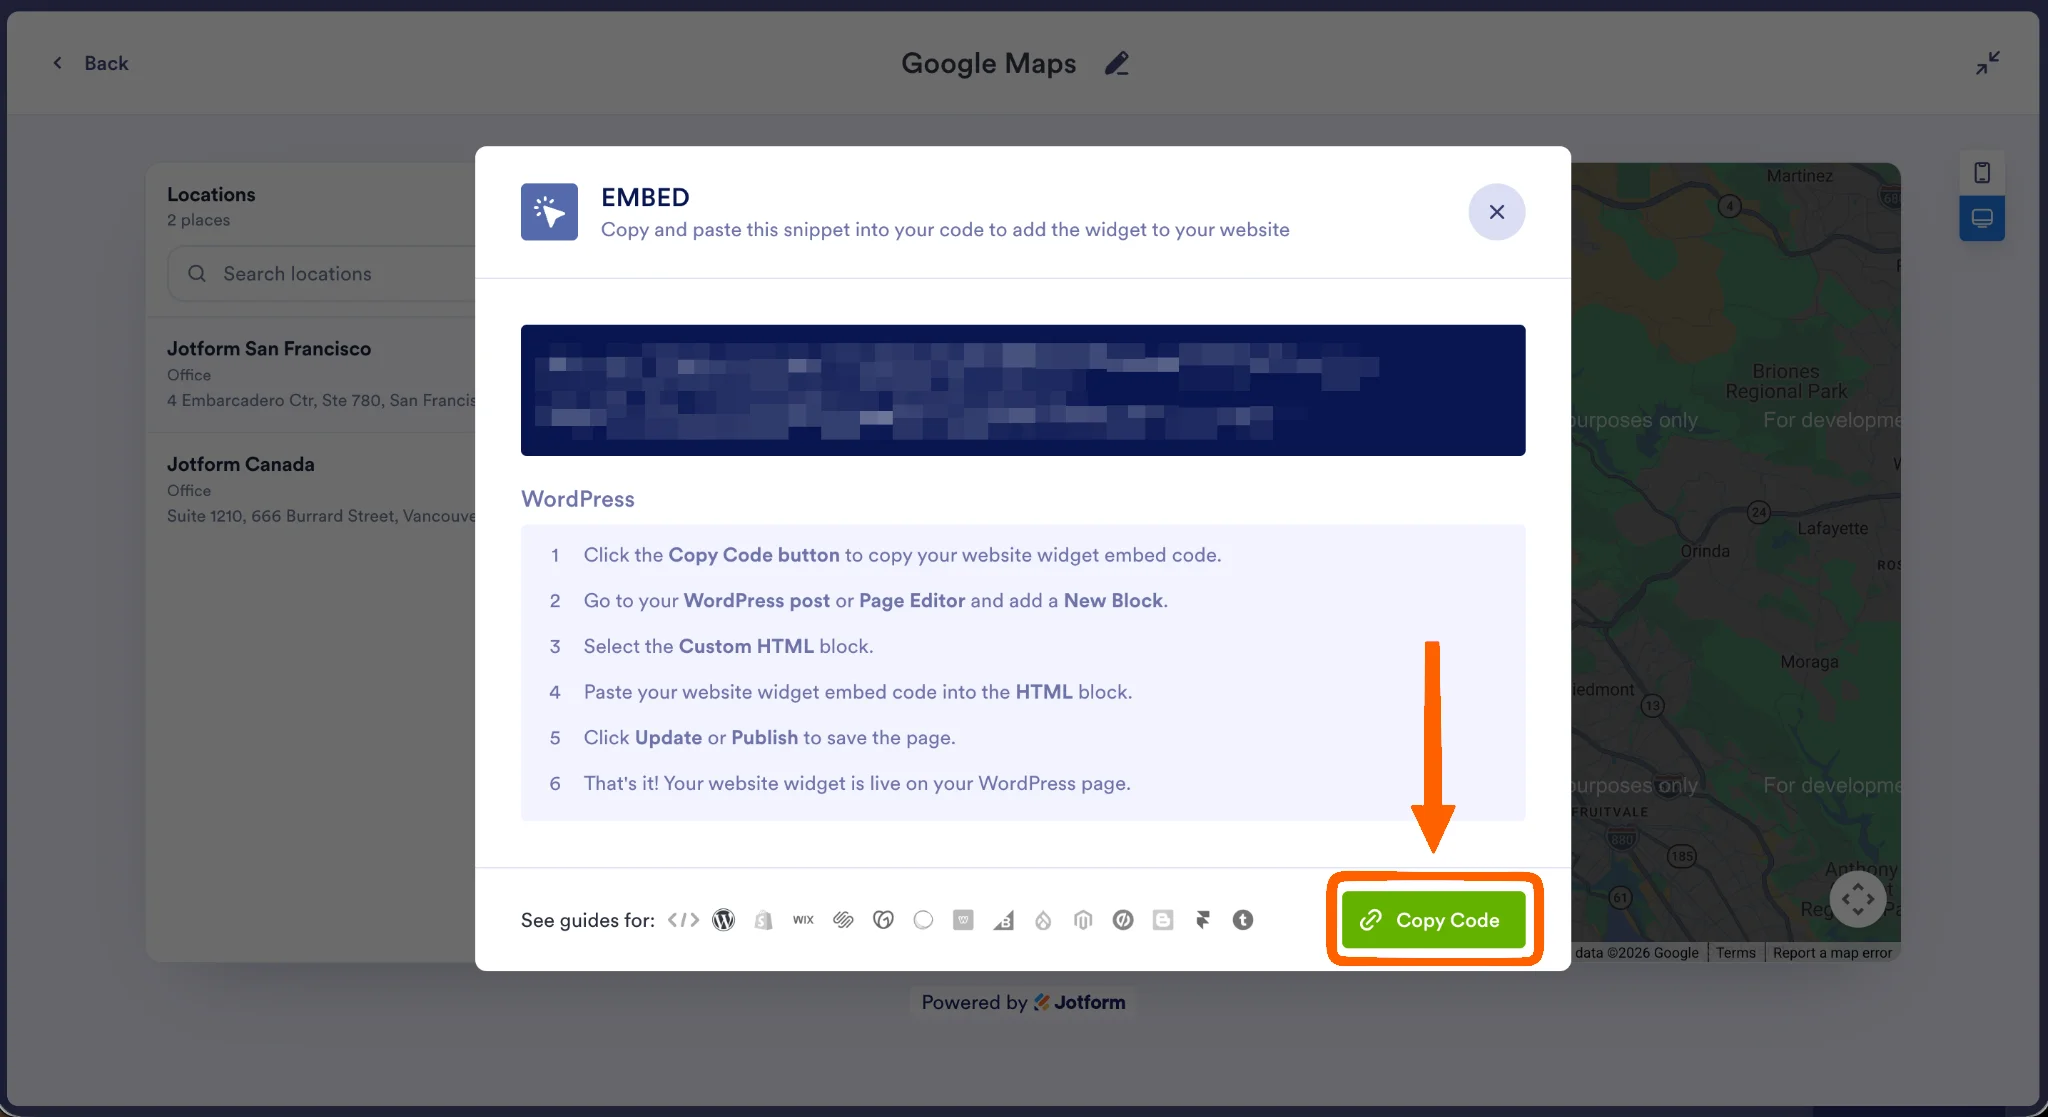
- Sign up for a free Jotform account or log in to an existing one. The embed code appears after you finish logging in. Click Copy Code.
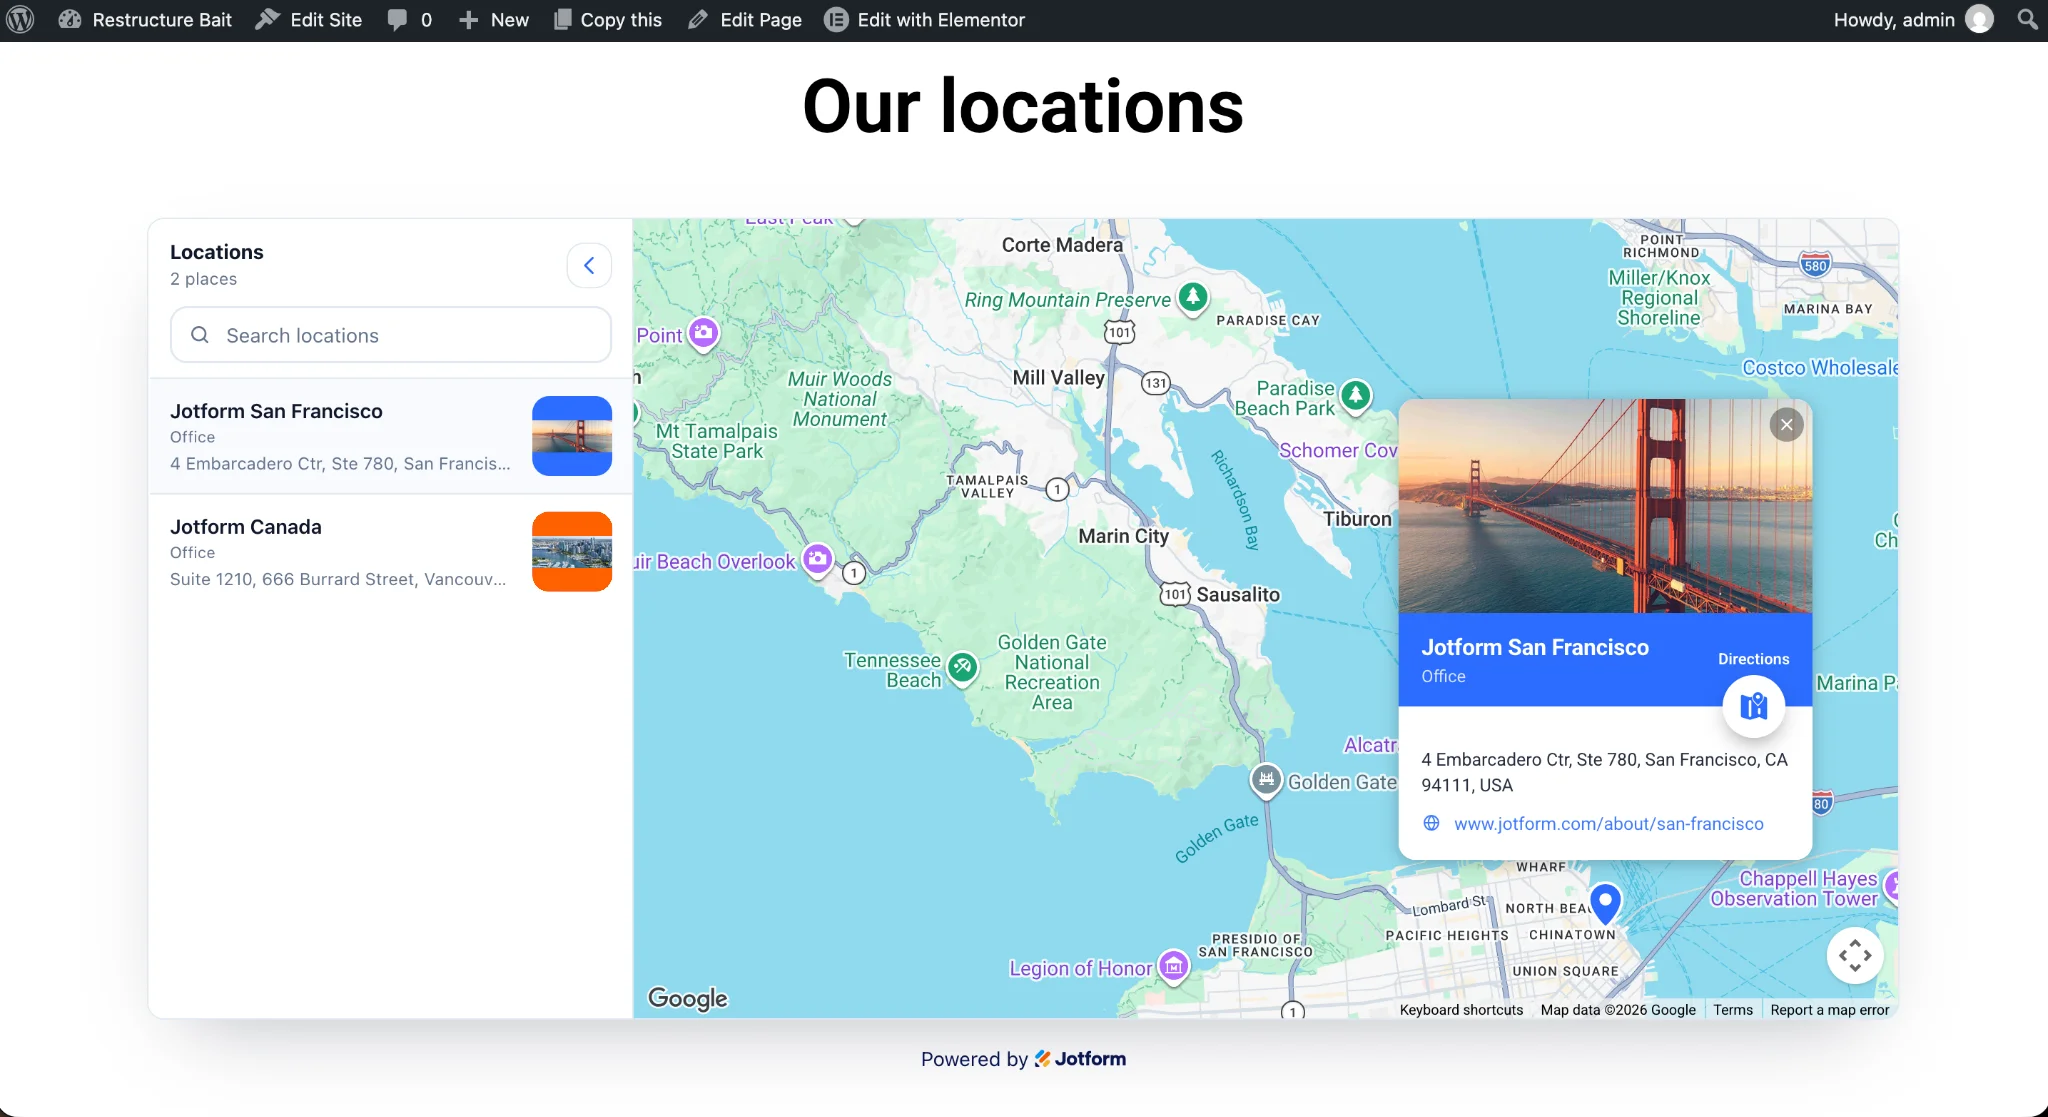
- Add the embed code to your page with a custom HTML block, following steps 7–11 from Option 1: Insert the block, paste the code, then click Publish or Save.
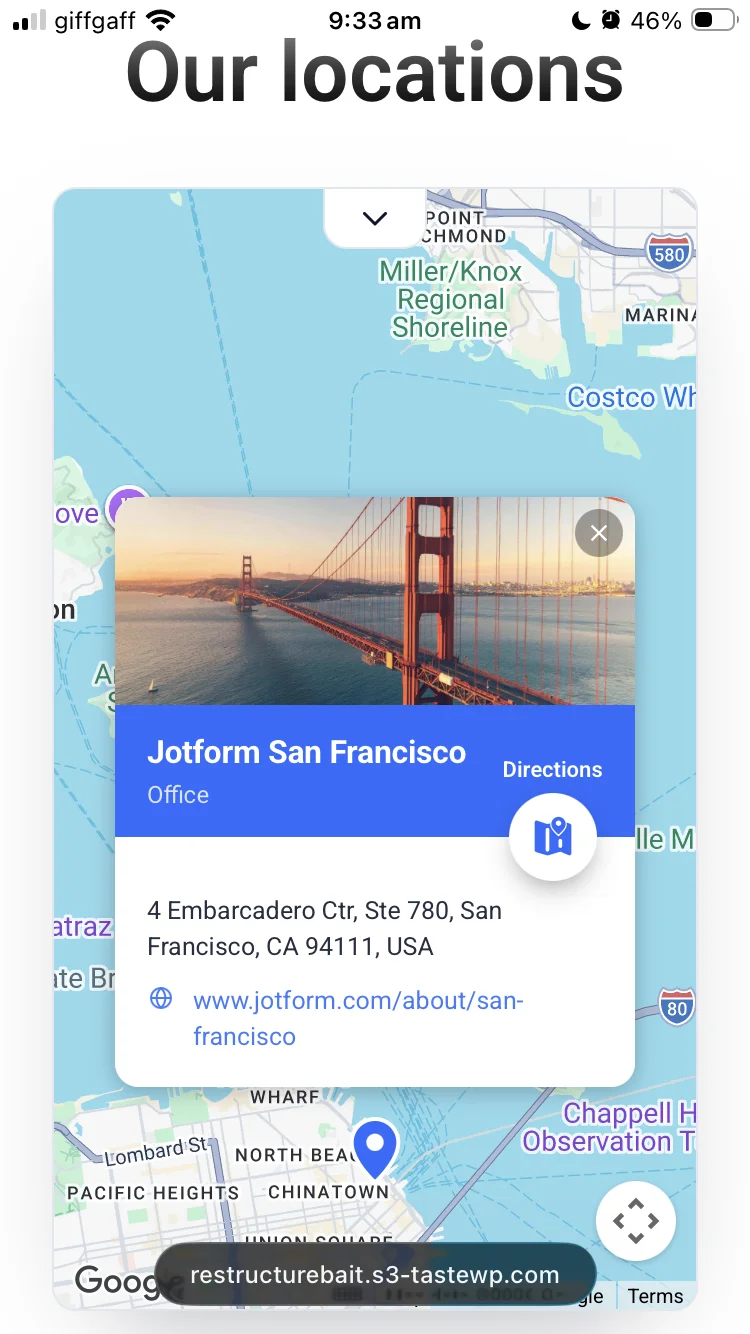
- Open the page on your phone. Unlike with the native iFrame in Option 1, the widget resizes to fit the screen on its own, so the map that got clipped on mobile there displays in full here.
Grow your WordPress site with smart, serverless widgets
Building smart features into your website usually means paying for new plug-ins or wrestling with code. Jotform helps you skip all that: Along with the Google Maps Widget, the Jotform website widgets directory offers over 150 free, no-code widgets, configurable by just pasting a simple HTML snippet on your website.
These options pair well with the Maps widget:
- Business Hours Widget: This widget shows opening hours, including a live open or closed status you can place next to your map, so visitors that find you on the map know instantly if you’re open. No API key required.
- Appointment Booking Widget: Add a booking feature to your website so people can schedule time with you. This widget supports adding availability, listing your service types with duration and pricing, and accepting reservations without needing an extra tool.
- FAQ Widget: This widget lists answers to frequent questions in a searchable accordion. Doing the same in WordPress is easy, but getting the polished experience this widget offers would mean dealing with code or installing yet another plug-in.
If you are on an entry-level WordPress hosting plan, plug-ins consume essential server resources, slowing down your website and delivering a poor user experience to your visitors. Jotform’s widgets run on Jotform’s infrastructure, so the load isn’t handled by your website. This frees up server resources, making your website faster and easier to use.
Looking to level up your WordPress site? Check out
- Our How to use WordPress guide to learn how to build a professional website without investing in a web design course
- Jotform’s WordPress integration, which streamlines your data collection with automation, payments, and advanced features in a single platform
FAQs
Yes, it can slow down your website. An interactive Google Map pulls a large amount of JavaScript, anywhere from 100 KB to 2 MB. In one independent test, a single embed cost 14 percent in page speed score, increasing the time until the website was ready to interact with by 6.5 seconds. To prevent slowdowns, load the map’s script only on the page that uses it, lazy-load the iFrame, or add a click-to-load placeholder image.
Yes, but not with the basic iFrame embed. For multiple markers, build a map in Google My Maps: Drop your pins, set it to public, copy the embed code, and paste it on your website. Even though you can drop as many as you want, you can’t style the map or add custom detail panels. If you want multiple pins and customization features, the Jotform Google Maps widget does the job (it just needs your Google Maps API key).
Yes. Many WordPress Google Maps plug-ins have usable free tiers that cover basic maps, although advanced features are usually reserved for the paid plan. If you prefer not to install a plug-in, the native Google Maps iFrame and Google My Maps are both free. The Jotform Google Maps widget is also free to use, adding customization and multi-pin maps that don’t increase server load, but it still requires a Google Maps API key.
This article is for WordPress site owners, local businesses, real estate agents, and event planners who want to compare ways to add an interactive, mobile-friendly map with embeds, plug-ins, or customizable widgets.





































































































Send Comment: