
If you’re a Microsoft 365 user who needs to collect data through SharePoint, you have a few options. SharePoint doesn’t have its own form builder, but Microsoft 365 has a few different ways you can create forms: Microsoft Lists, Power Apps, and Microsoft Forms. Here, we’ll break down the ideal use case for each method and show you how to create a form in SharePoint step-by-step.
And if you’re looking for a more powerful option that can send form submissions to SharePoint automatically, we’ll introduce you to Jotform, a leading form builder that integrates with Microsoft 365 tools.
Method 1: Create a SharePoint form with Microsoft Lists
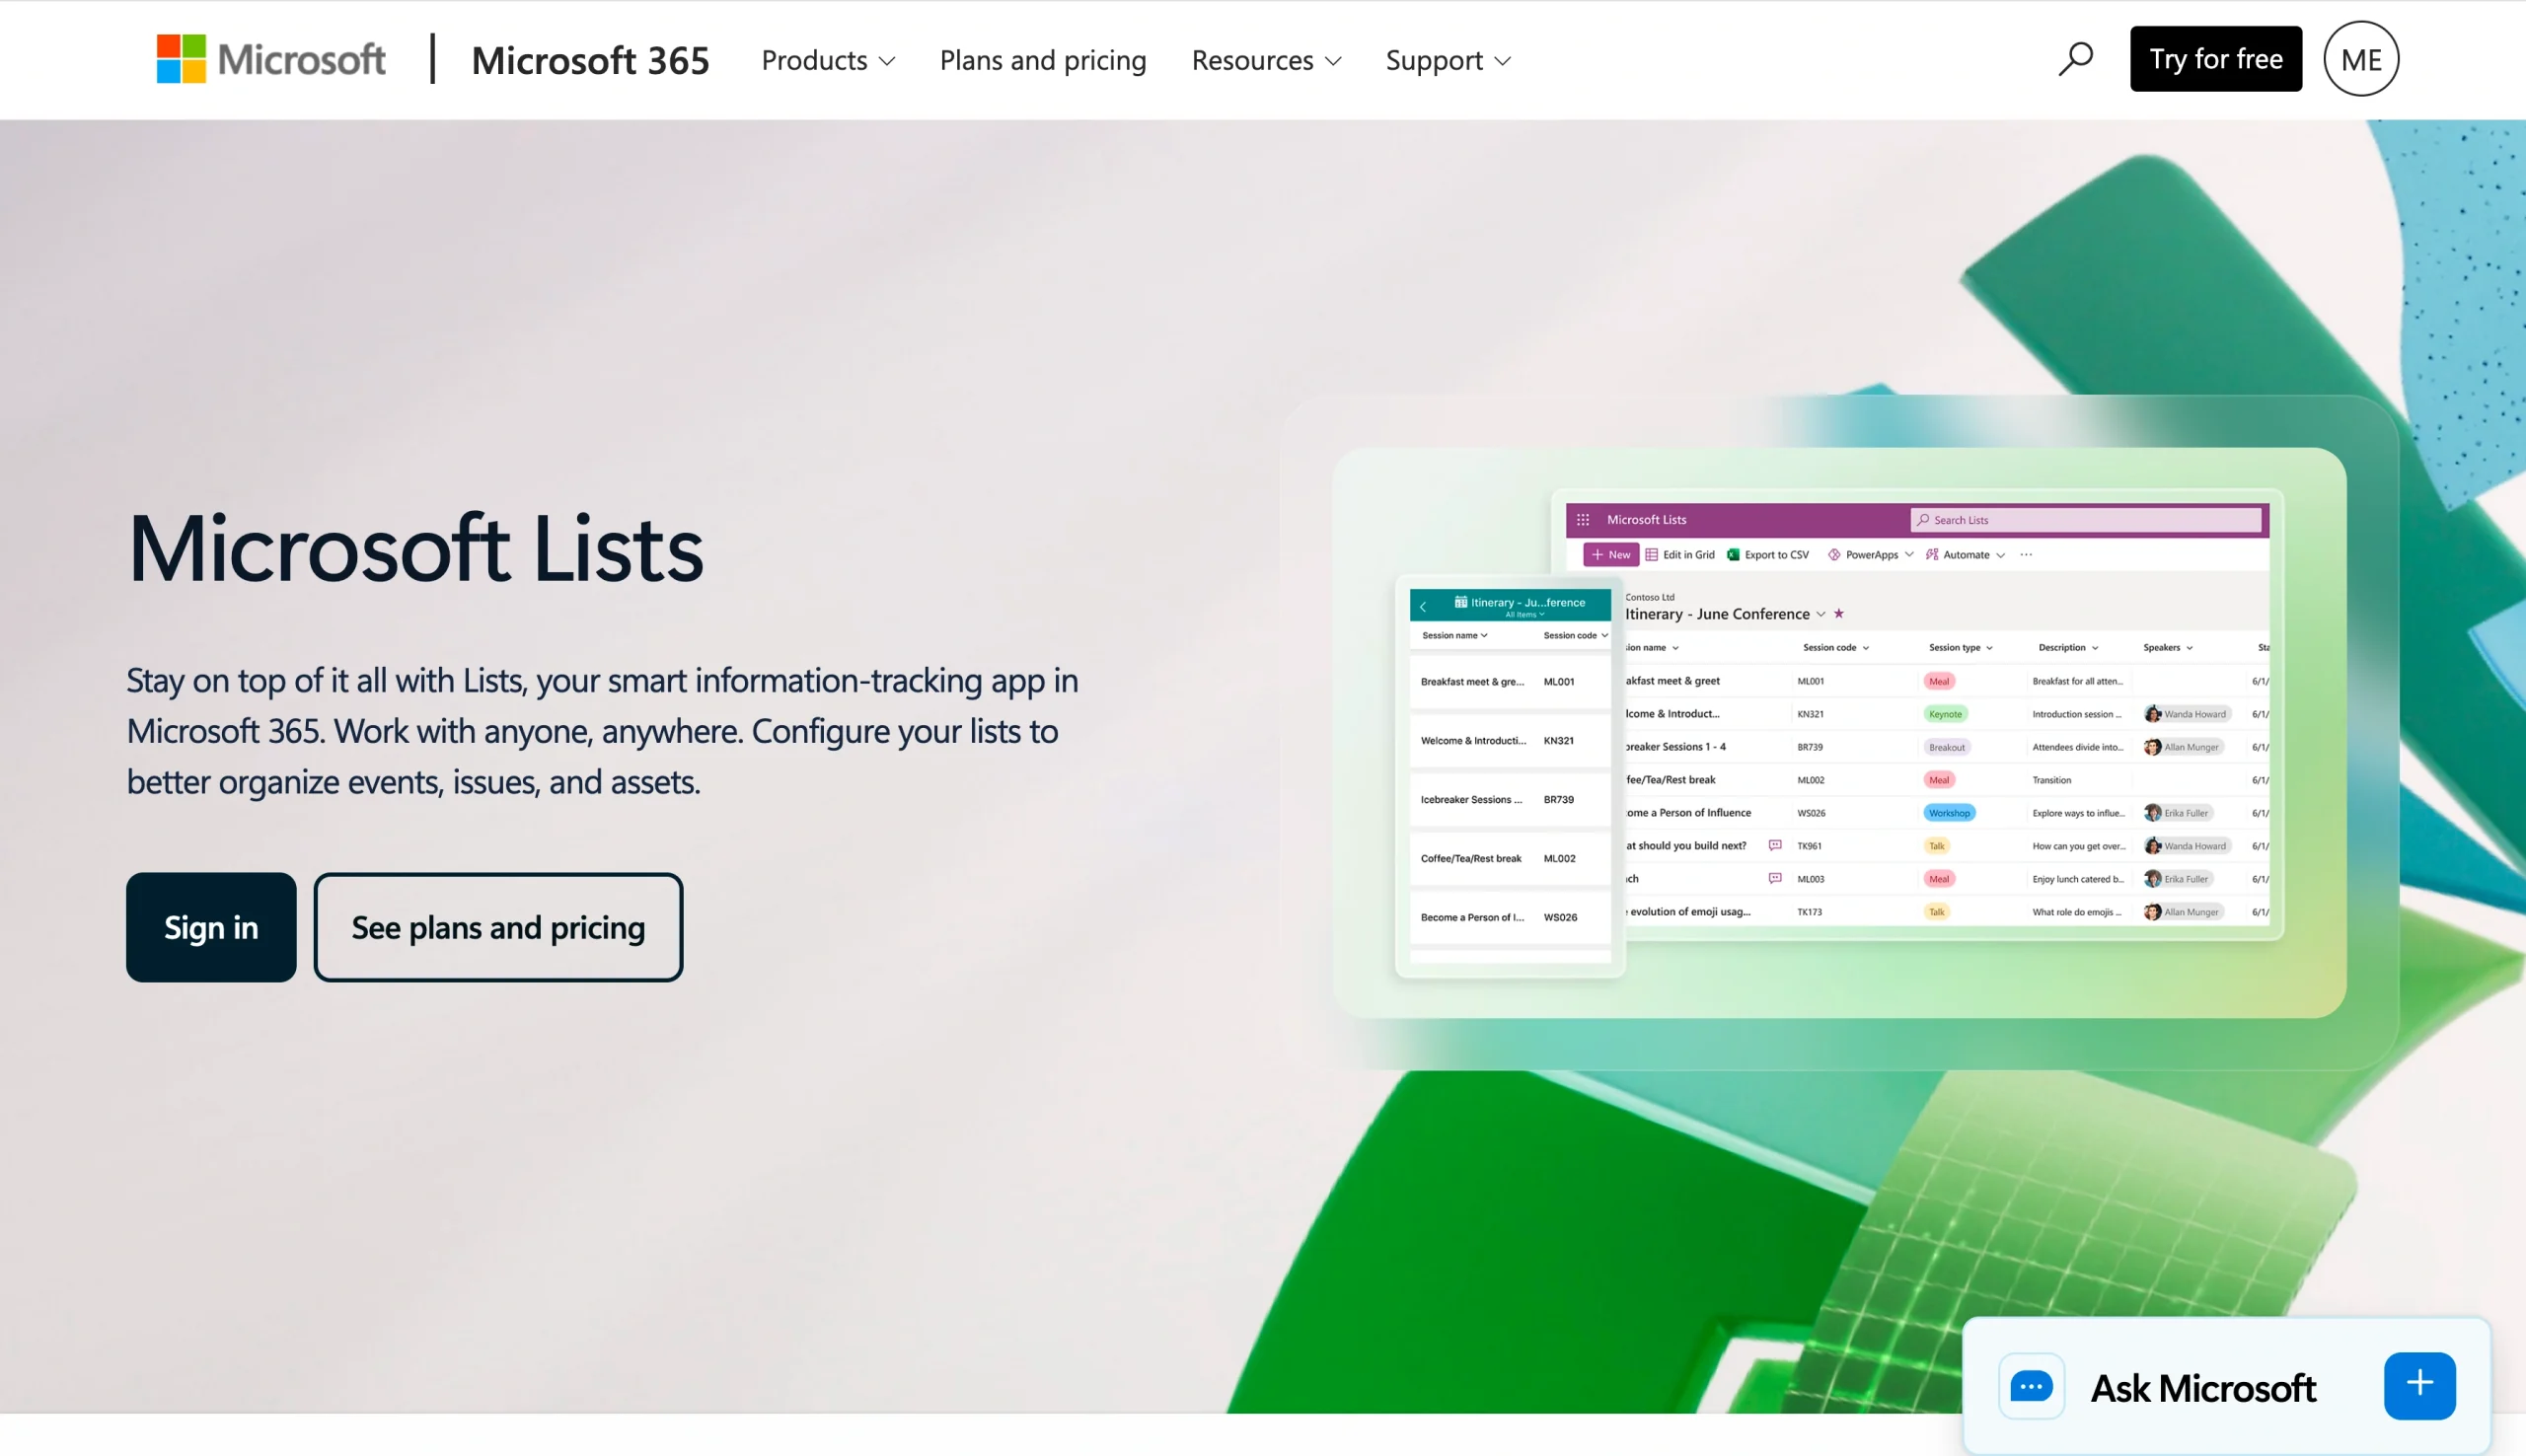
Microsoft Lists, a no-code alternative to spreadsheets for database and document management, enables users to create forms in SharePoint that are ideal for data collection within your organization.
While you can’t use these SharePoint List forms to collect responses from external users or the public, the forms are a good web-based option that works well on mobile and desktop and doesn’t require any technical knowledge.
Here’s how to use a Microsoft Lists form in SharePoint:
- From your SharePoint homepage or contents page, click +New.
- Select List.
- From the Create a list page, select from the following choices, depending on your needs:
- Blank list: Starts a new list
- From existing list: Creates a list based on data from an existing list
- From Excel: Creates a list based on an Excel spreadsheet
- From CSV: Creates a list based on a CSV file
- Templates: Creates a list using an existing template
- Type in a name and description for the list.
- Select Show in site navigation to display the list on your SharePoint site.
- Click Create. You have now created a SharePoint List form.
Pro Tip
If you’re busy with data management workflows, you may want to look beyond Microsoft Lists. There are several alternatives that offer additional functionality for tracking and organizing data, including Jotform Tables.
Method 2: Build a custom SharePoint form with Power Apps
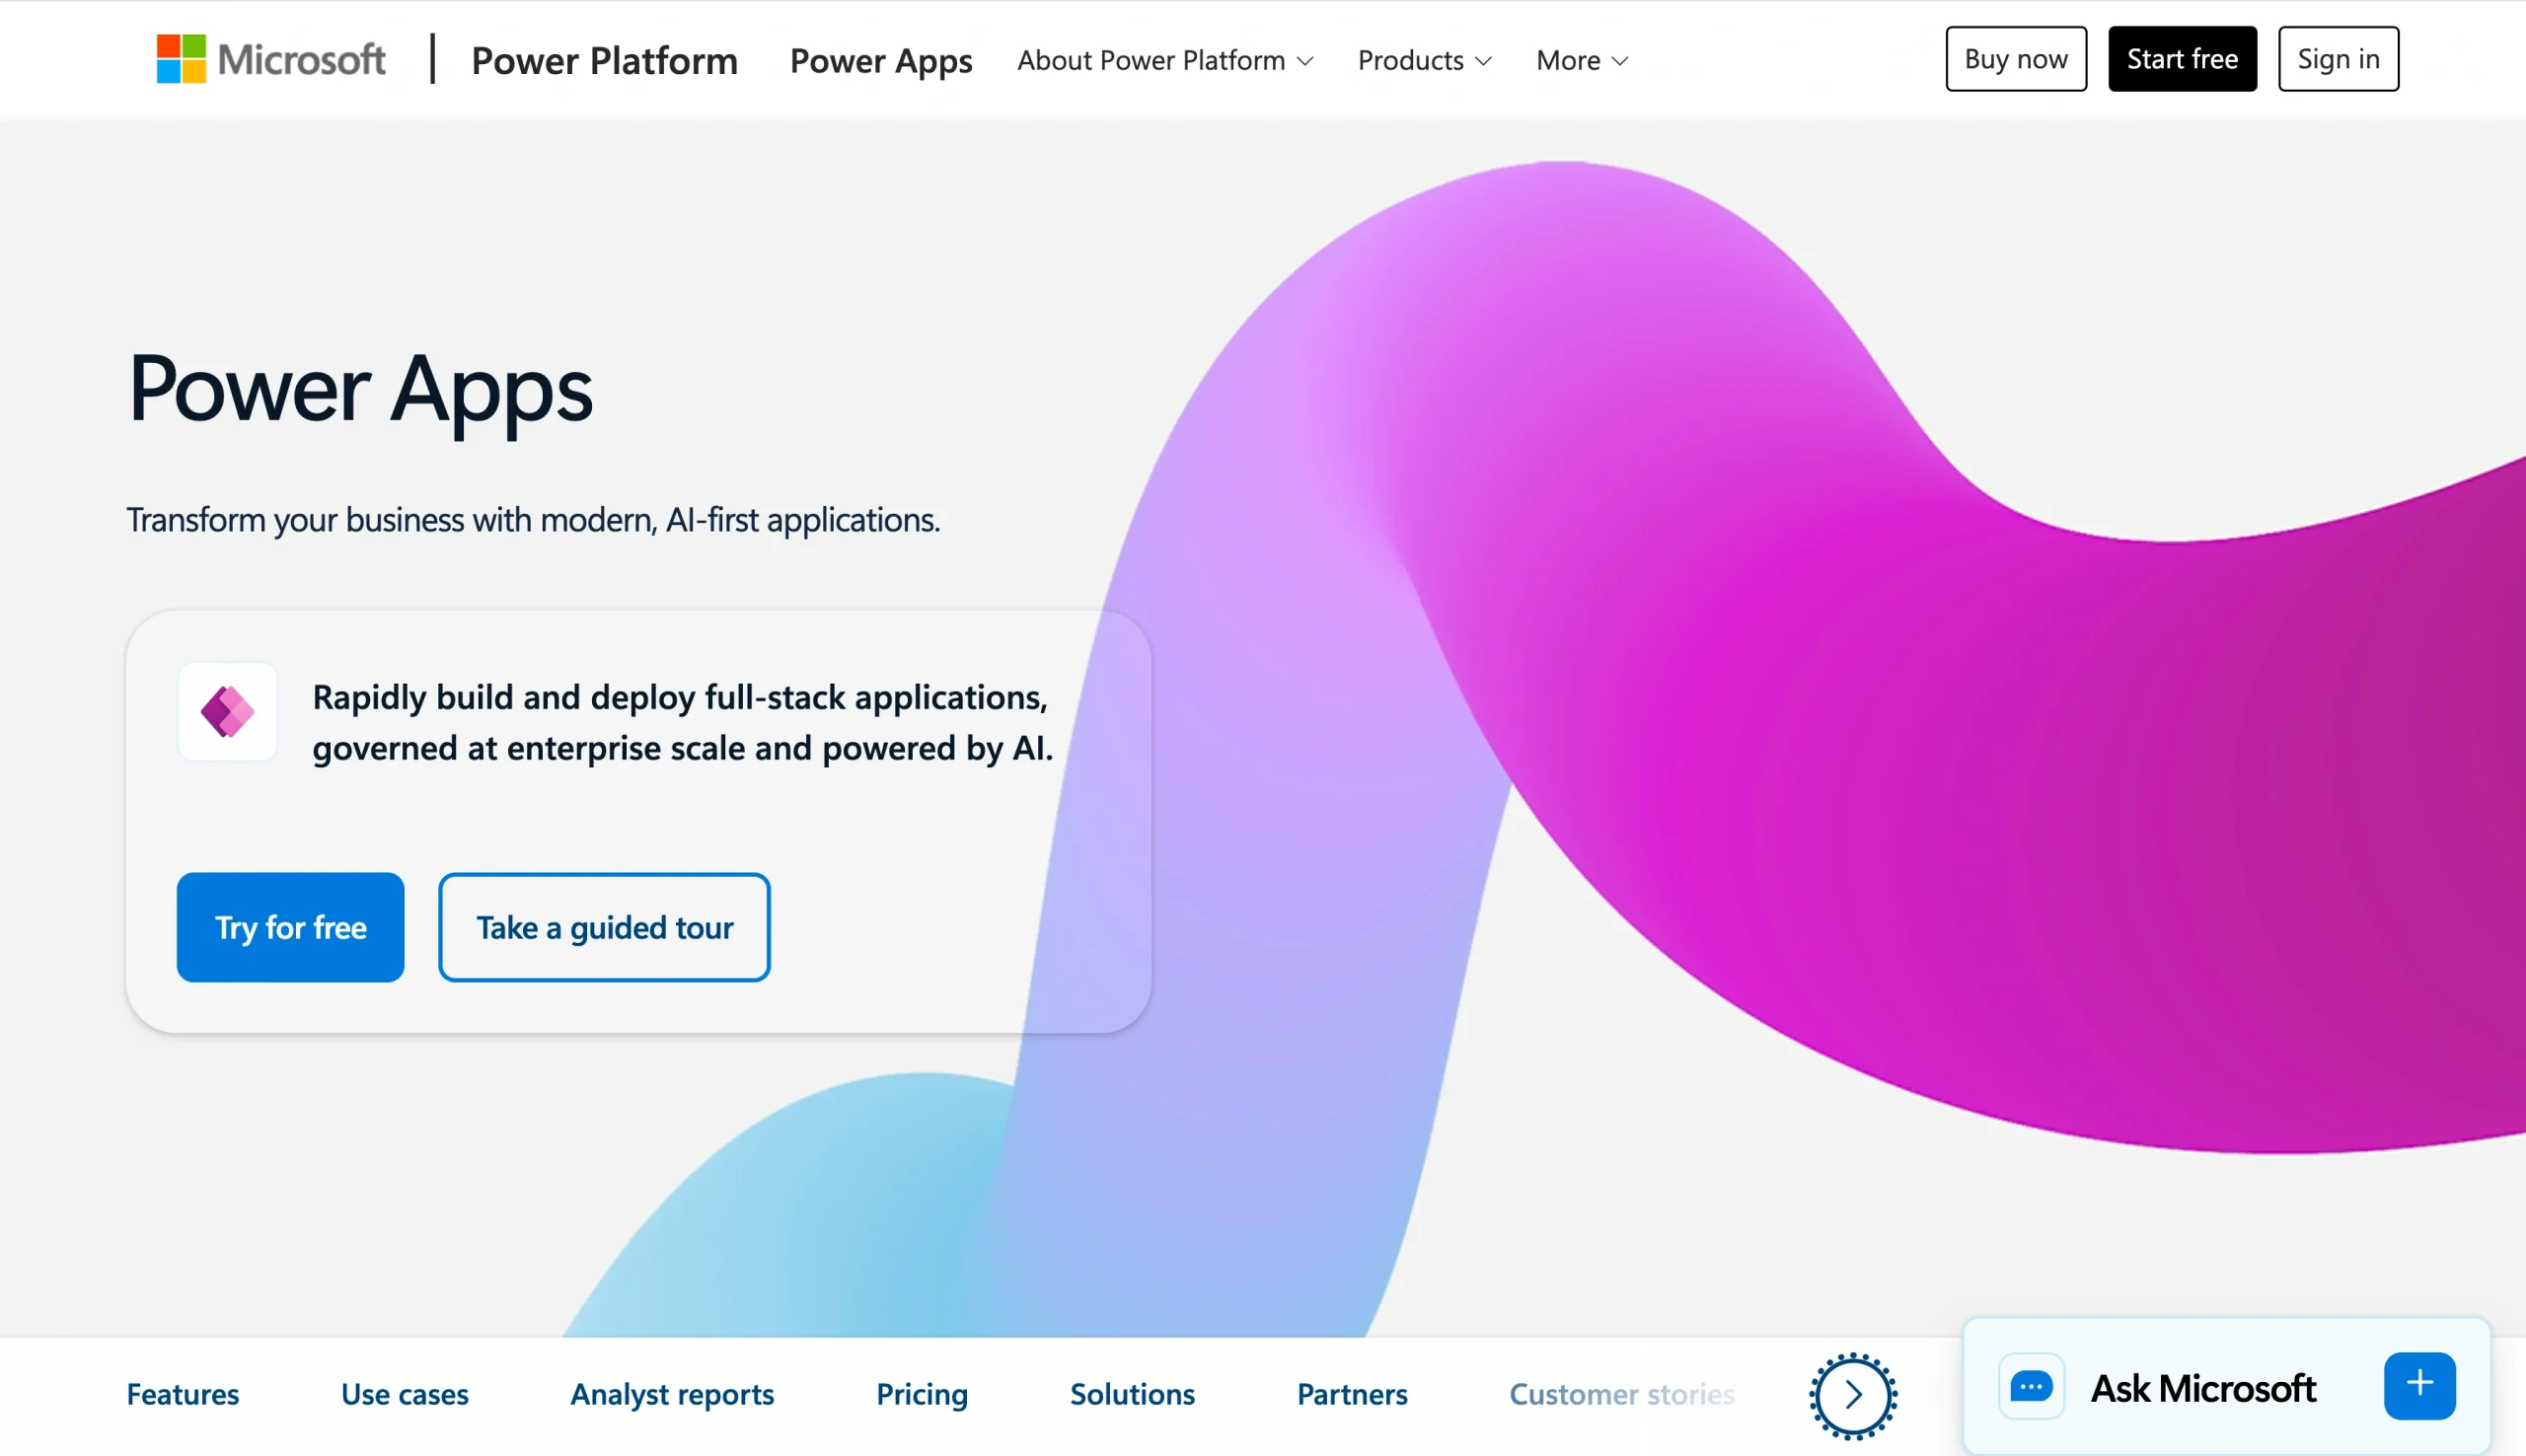
Another way to create a form in SharePoint is to use Microsoft Power Apps, which is a low- or no-code development tool that helps users build custom business applications. A SharePoint Power Apps form is a good choice if you need conditional logic, such as showing a text box only when a user selects a specific option in the form.
Power Apps requires more setup than Microsoft Lists, but it provides full control over the form’s layout, logic, and behavior. Here’s how to use the SharePoint form builder with Power Apps:
- On your SharePoint site, go to the Projects list. (You will need to have lists and libraries already set up.)
- Click Integrate > Power Apps > Customize forms.
- The Power Apps studio will appear and will create a new form. From here, you can
- Add, remove, or rearrange fields: From the Fields menu, you can reorder fields on your form. You can also drag and drop fields into the form.
- Change form layout: Change the orientation of your form from Portrait to Landscape from Settings > Display.
- Add conditional logic: You can use formulas on the data card properties to show or hide specific fields based on other field selections.
- When you’re done customizing the form, click Back to SharePoint.
- Click Save and Publish.
Microsoft Power Apps forms are tied to SharePoint lists, so all responses are stored in the list automatically.
Pro Tip
Not all Microsoft 365 plans include Power Apps, so make sure it’s part of your plan before using this method of creating SharePoint forms.
Method 3: Embed a Microsoft Form in SharePoint
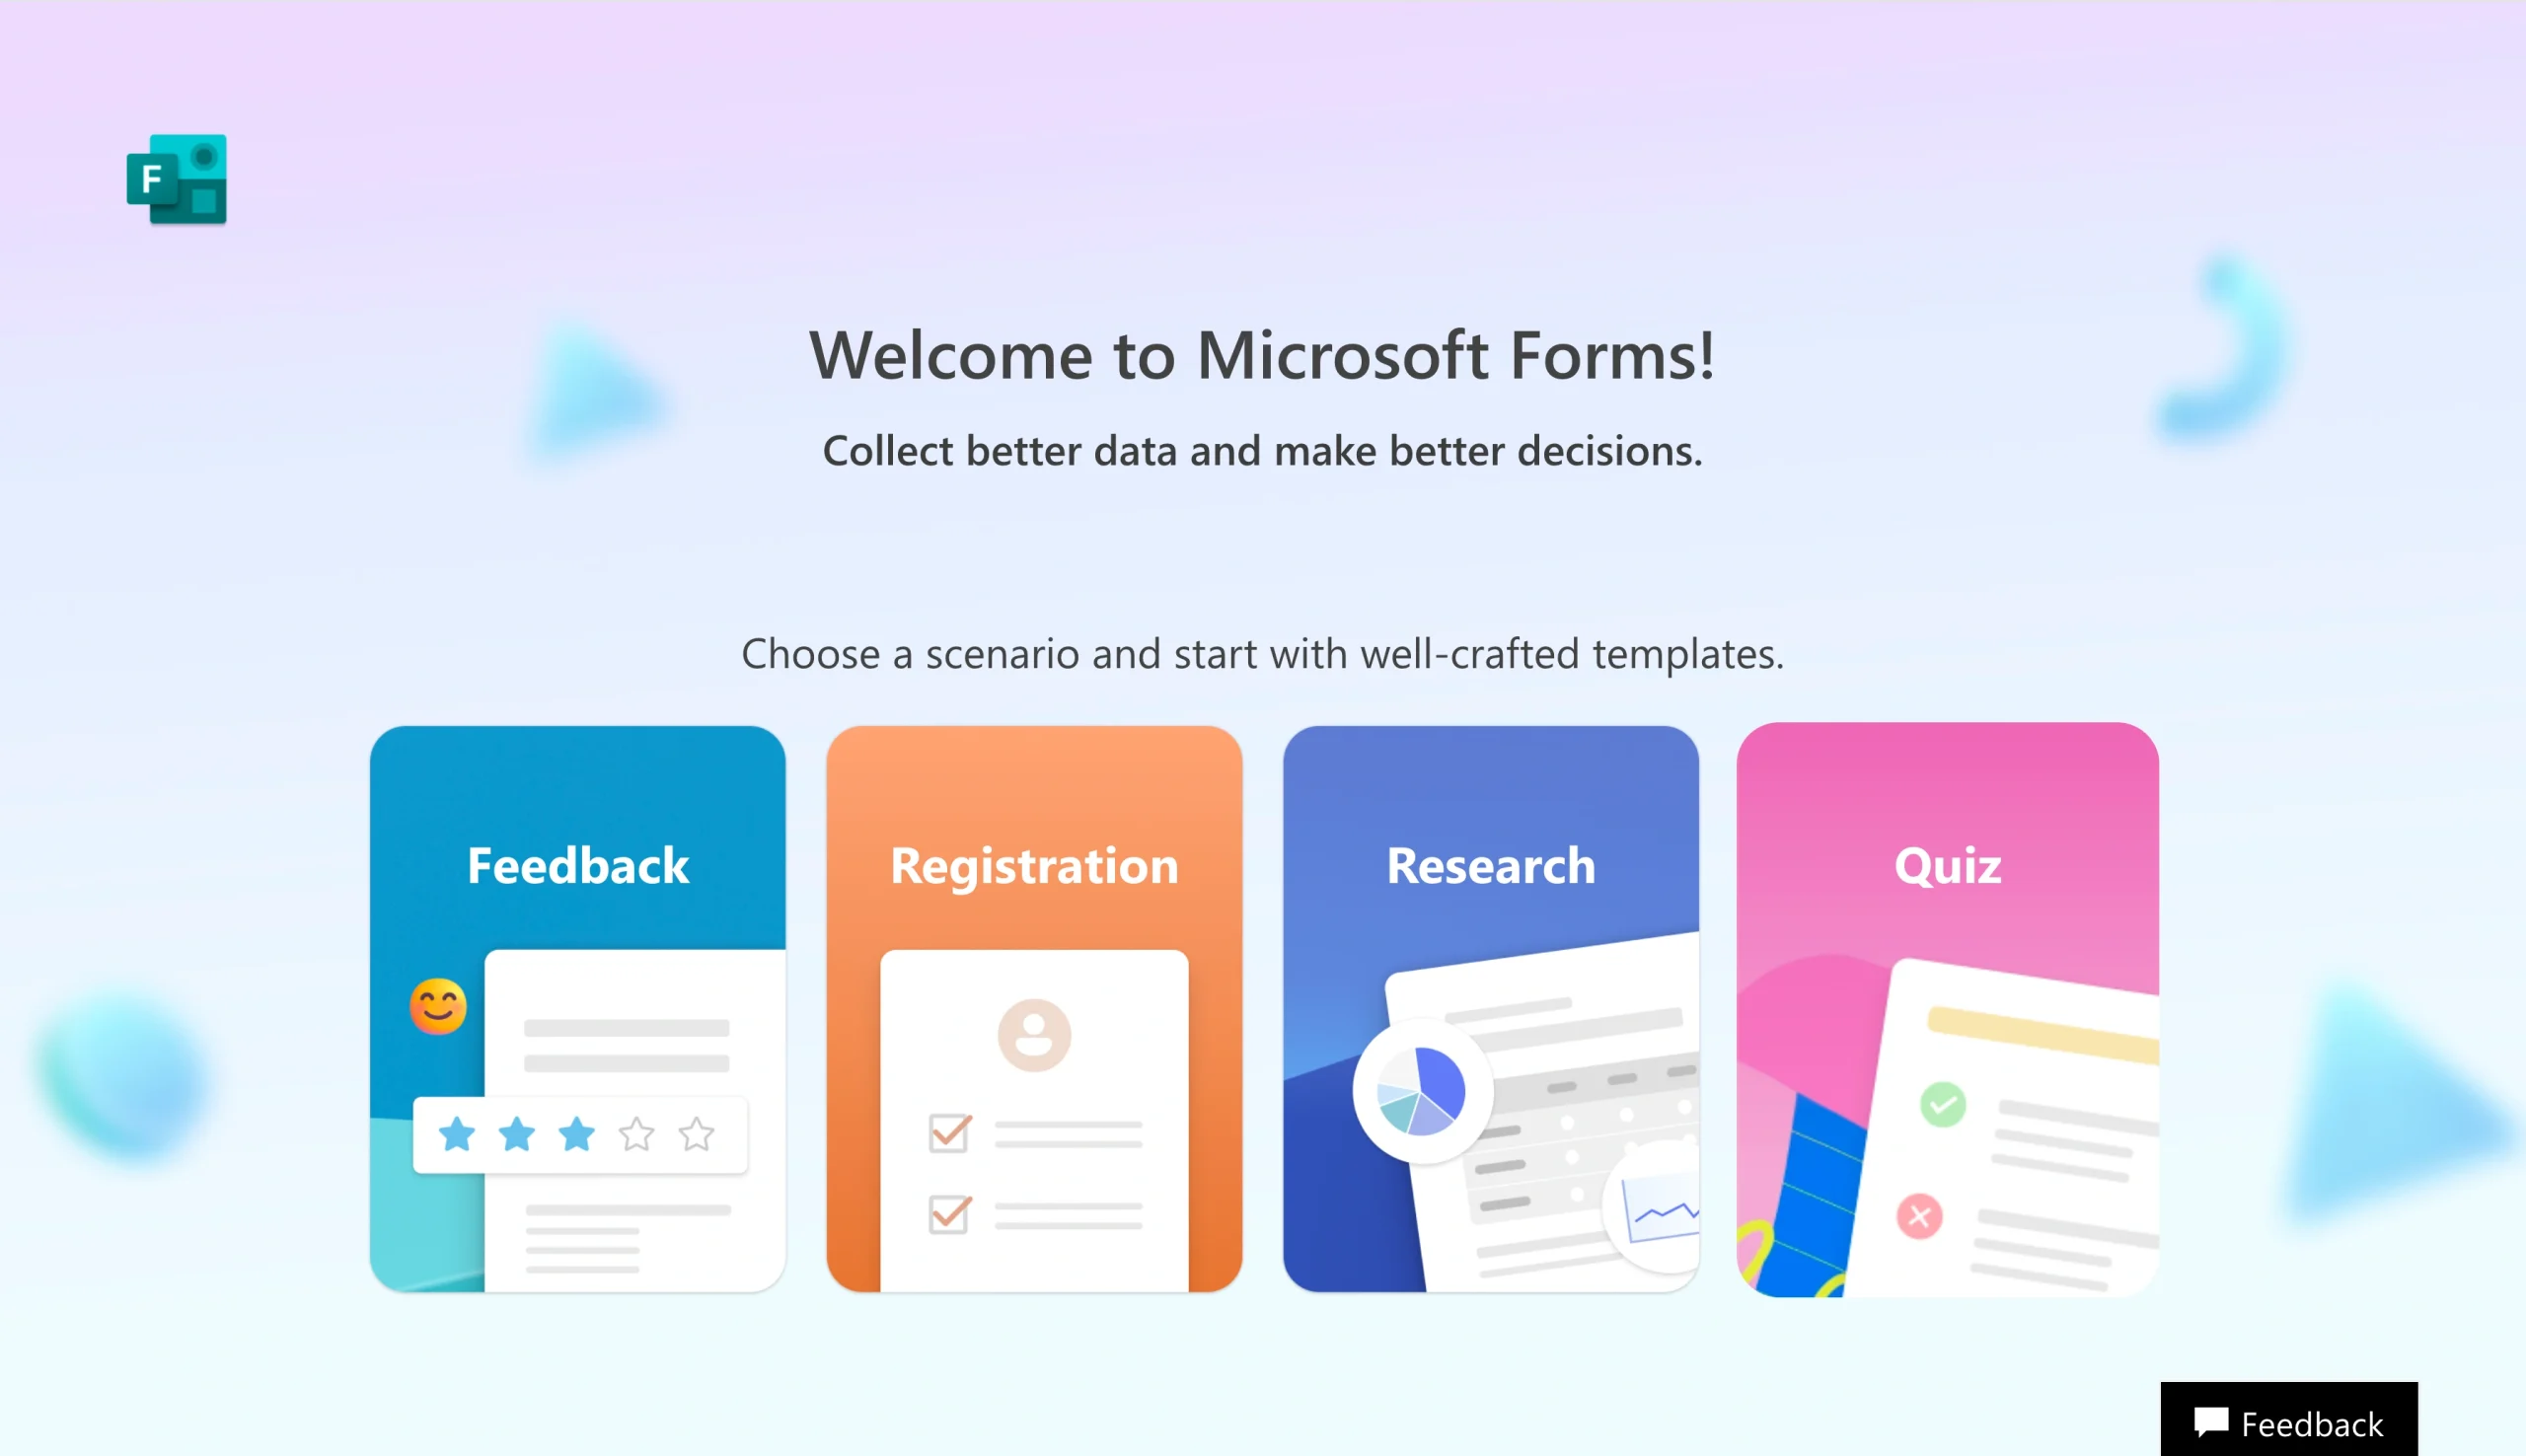
Microsoft Forms is a basic form builder that is part of the Microsoft 365 ecosystem. If you want to collect responses from people outside your organization, such as for a public survey, event registration, or customer feedback form, Microsoft Forms is your best bet.
Here’s how to create a Microsoft Form in SharePoint:
- In SharePoint, select Edit at the top right.
- Click the Toolbox icon on the right.
- Select See all web parts.
- Select Microsoft Forms from the list of web parts.
- Select Add new form.
- Provide a title for the form.
- Click Create.
- Build your Microsoft Form by adding the necessary fields.
- Once your form is complete, go back to the SharePoint in Microsoft 365 page. Select Collect responses. Then click OK.
You can directly embed Microsoft Forms into your SharePoint page so that it appears native to the site. However, although the form is displayed on SharePoint, responses are collected within Microsoft Forms, not in SharePoint itself.
Want your form responses to land directly in SharePoint, without any manual file management or workarounds? Migrate your existing Microsoft Forms to Jotform, a popular Microsoft Forms alternative that sends form responses directly into SharePoint.

Migrate existing forms instantly
There’s no need to rebuild your online forms from scratch. Instead, migrate existing forms and submission data into your Jotform account in one click — so you can collect data without skipping a beat.
Your form can not be migrated.
Please ensure that your form URL is correct and that your form is set to “public” before attempting to migrate it again.
Jotform sends form submissions to SharePoint automatically
There are a few ways to create SharePoint forms, but for most users, none of the options are ideal: Microsoft Lists doesn’t offer much customization, Power Apps requires licensing, and Microsoft Forms doesn’t actually store data in SharePoint.
Enter Jotform, a free, no-code form builder with a native Microsoft SharePoint integration.
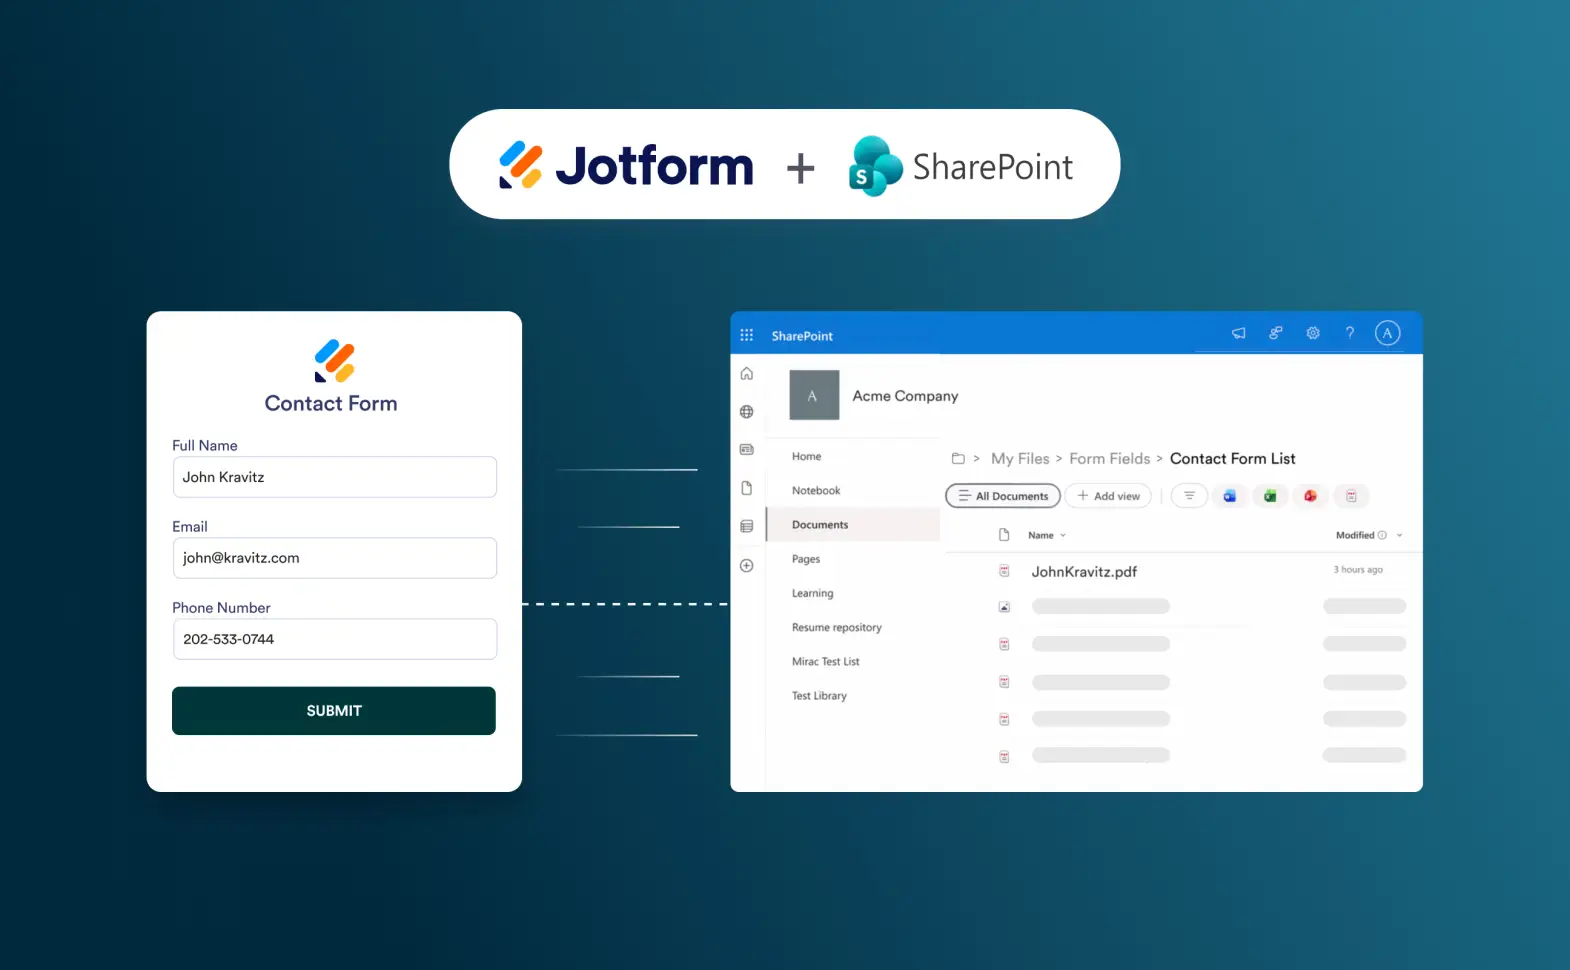
Taking a different approach from other form builders, Jotform automatically sends form submissions into selected SharePoint folders upon receipt. No manual organizing is required; it’s an ideal use for one of the best record management software apps around.
With Jotform, you can
- Upload form submission PDFs to SharePoint automatically
- Send uploaded files from the form to specific SharePoint folders
- Organize submission files into subfolders for easy storage and collaboration
If your team uses SharePoint as its central document management hub, you can build the form in Jotform, connect it to SharePoint, and store data within SharePoint. When you use Jotform, every submission, along with its attachments and a PDF record, lands exactly where you want it to in SharePoint, organized and easily accessible.
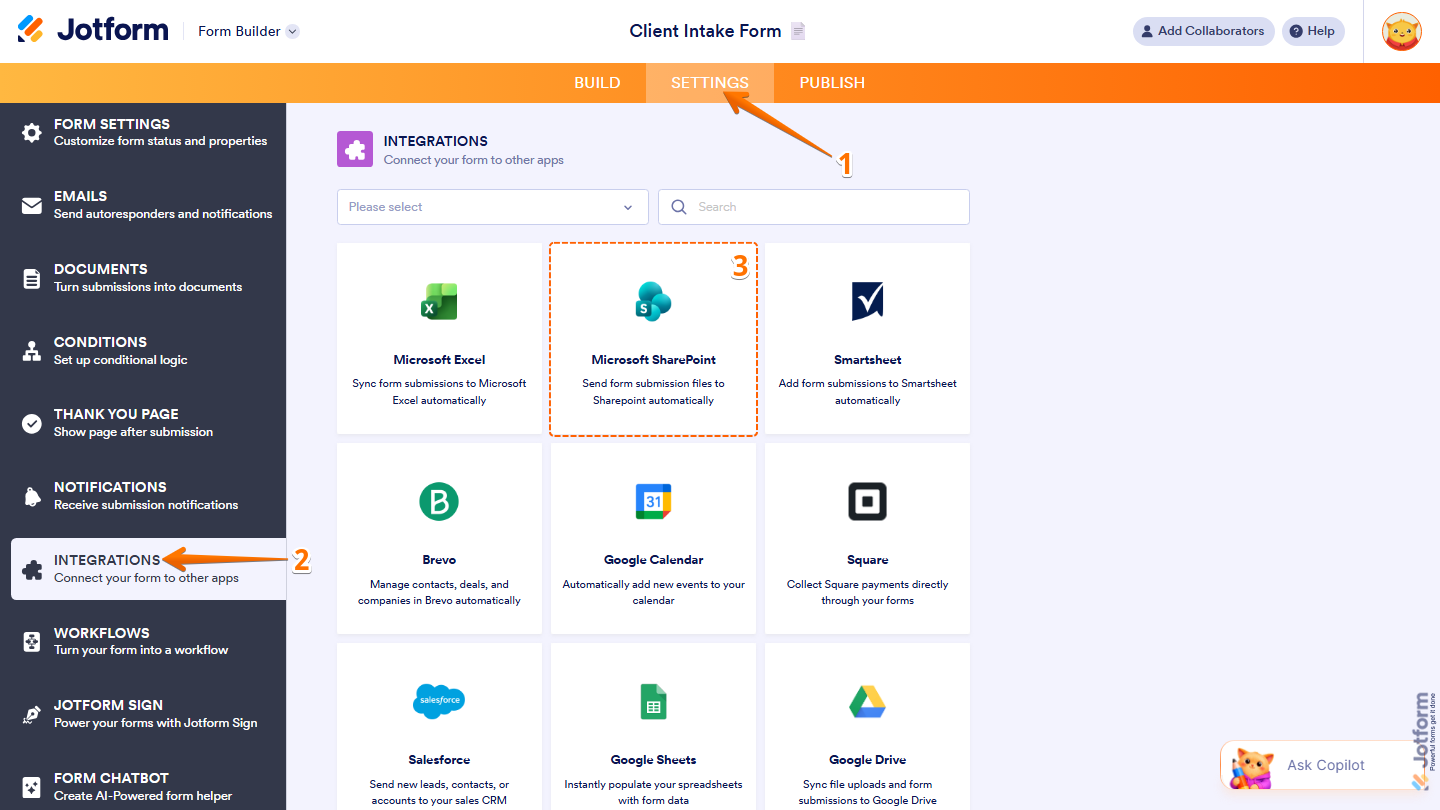
Here’s how to integrate Jotform with SharePoint:
- In the Jotform Form Builder, click Settings.
- Click Integrations.
- Search for and click on Microsoft SharePoint.
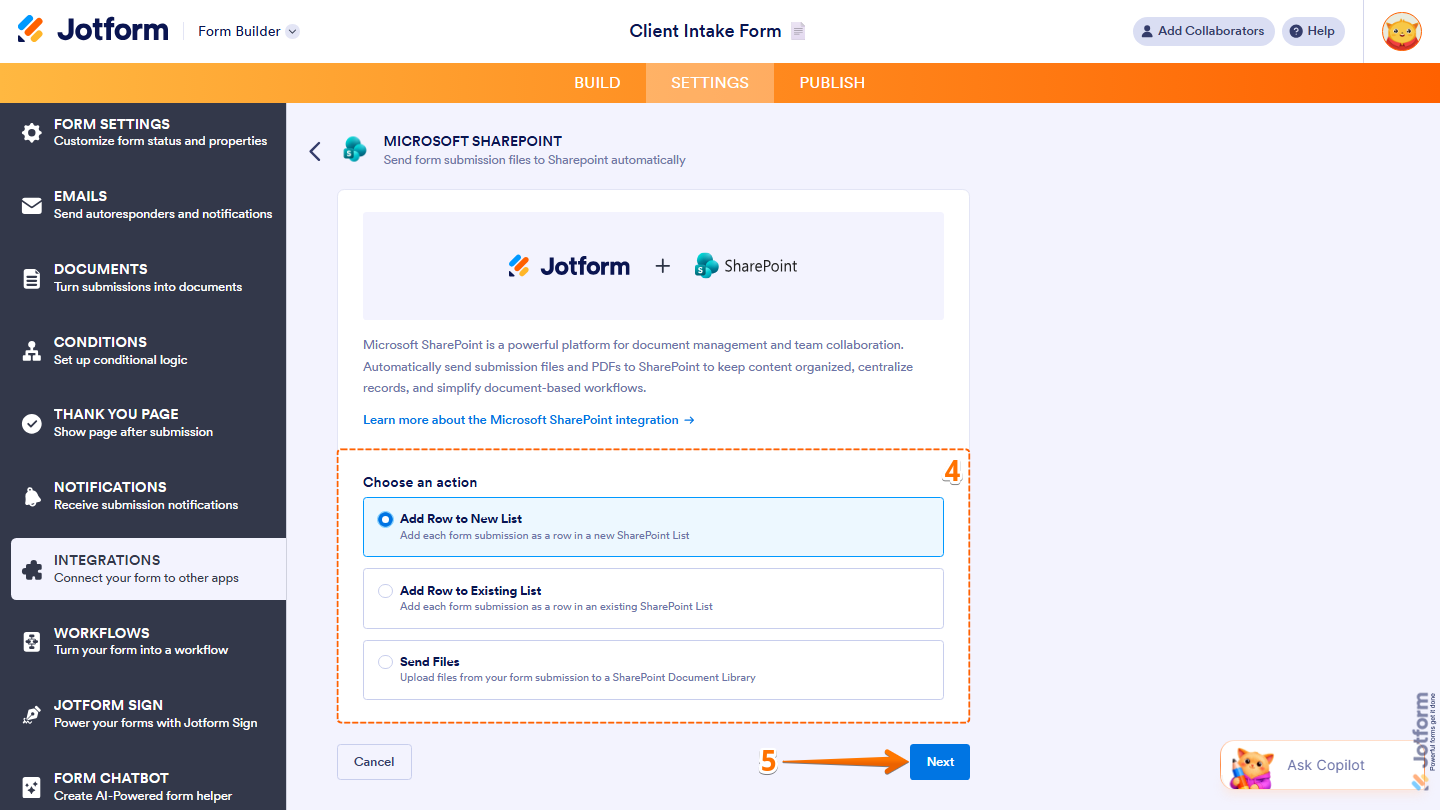
- Under Choose an action, make your selection from the following options:
- Add Row to New List: Adds each form submission as a row in a new SharePoint List
- Add Row to Existing List: Adds each form submission as a row in an existing SharePoint List
- Send Files: Uploads files in your form submissions to a SharePoint Document Library
- Click Next.
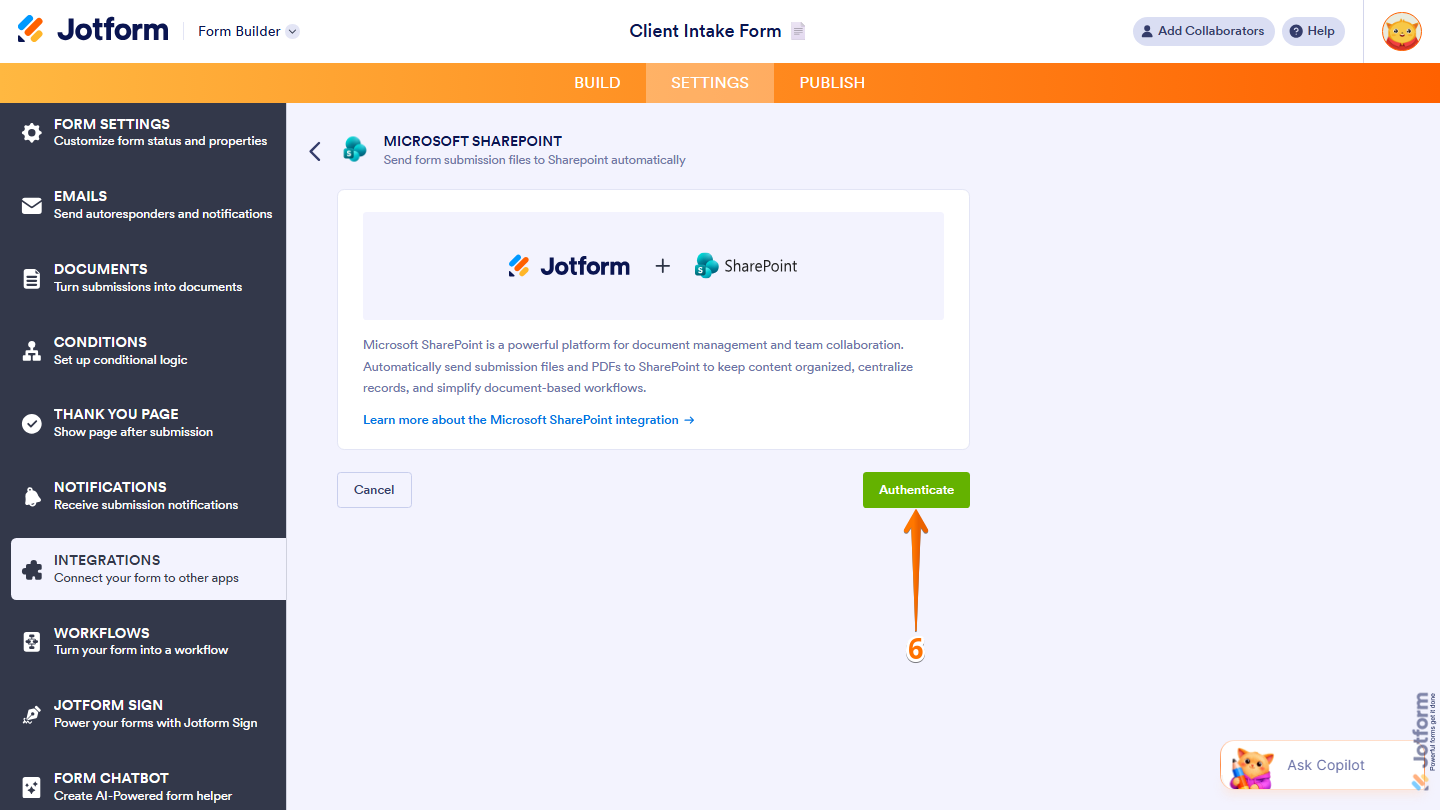
- Click Authenticate. Log in to your Microsoft SharePoint account.
Your Jotform form is now connected to SharePoint. You can finalize the settings for the action you selected in step 4 to complete the integration; we’ve got step-by-step instructions on that here. And it’s as simple as that!
For SharePoint users, using Jotform for form building makes sense. It’s an excellent way to organize all your collected data and make it accessible in your document management system. Jotform comes with over 20,000 ready-made form templates for quick form creation, so you don’t have to create any forms from scratch.
Jotform also integrates with more than 150 other tools, including Microsoft Excel, OneDrive, and Teams, so you can route form data exactly where you need it to go across the entire Microsoft 365 workflow. And if you need to automatically route submissions for approval, notify people of submissions, and automate follow-up actions, Jotform Workflows provides those functionalities too.
To get to know Jotform a little better, start here: The Ultimate Guide to the Form Builder.
Which SharePoint form method is right for you?
If you want to create SharePoint online forms, you have several options, including Microsoft Lists, Power Apps, and Microsoft Forms. However, if you want to make sure your form data is properly stored and organized within SharePoint, then none of the SharePoint form builder options will work because of their limitations, which include poor file management, limited external access, and licensing requirements.
Jotform bridges the gap with its Jotform SharePoint integration, offering a streamlined form-building experience. It sends form submissions, PDFs, and file uploads directly into SharePoint folders, keeping everything organized. Explore Jotform today, browse the 20,000-plus form templates, and see how easy it is to connect to SharePoint in minutes.
FAQs for how to create a form in SharePoint
Yes, you can use a Microsoft Forms web part in SharePoint to create a form for external users. Note that the form responses will be stored in Microsoft Forms, not SharePoint.
You can use Microsoft Power Apps to create a custom form in SharePoint. Another solution is to use a dedicated form builder like Jotform and integrate your form with SharePoint.
Microsoft Forms is a form builder that is part of the Microsoft 365 ecosystem. SharePoint doesn’t have a specific form builder, but you can use Microsoft Lists in SharePoint to create forms.


Send Comment: