
We’re still celebrating the recent debut of Jotform for Salesforce. But with Jotform, there’s always more to come.
Today we’re excited to tell you about our newest enhancement to your Jotform for Salesforce workflow — Salesforce form templates. Accessible within your Salesforce workspace, just like all of Jotform’s automation tools, these templates automatically match Salesforce objects with your form fields, creating Salesforce forms that fuel powerful workflows in just a few clicks.
If you missed our Jotform for Salesforce announcement, here’s a brief recap:
- The app automatically integrates Jotform forms with Salesforce objects, eliminating platform switching.
- Because Jotform’s industry-leading automation features are accessible within Salesforce, workflow creation is even easier.
- Automated data integration between customer-facing forms and your Salesforce database ensures accuracy that also saves time.
- Jotform’s app aligns with Salesforce’s security standards, offering industry-leading form and CRM data security.
And now, Jotform offers 150 Salesforce form templates. Expect that number to increase as we continue expanding the capabilities of Jotform for Salesforce.
Pro Tip
Turn conversations into actionable Salesforce data with Jotform Salesforce Agent, an AI chatbot that records insights, updates objects, and keeps your CRM organized automatically.
How to use Salesforce form templates
Step one to using Jotform’s Salesforce form templates is to log into your Salesforce account. If you’ve yet to try Jotform for Salesforce, creating a Salesforce account is easy, and it’s free to try.
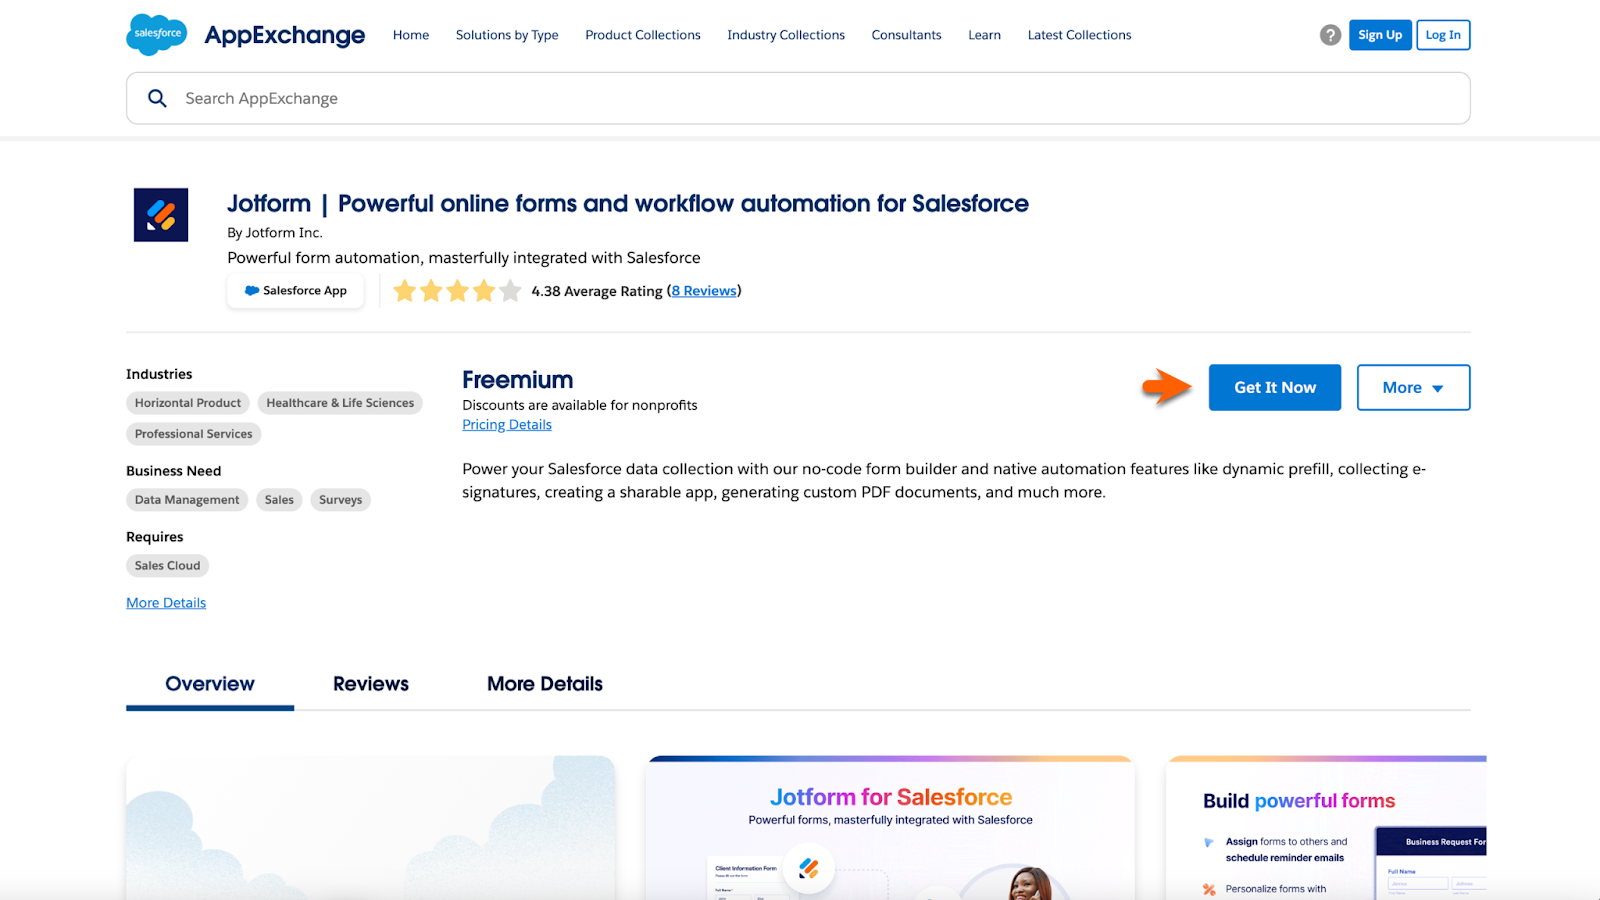
Go to Jotform for Salesforce in the Salesforce AppExchange, and click the Get It Now button to install Jotform.
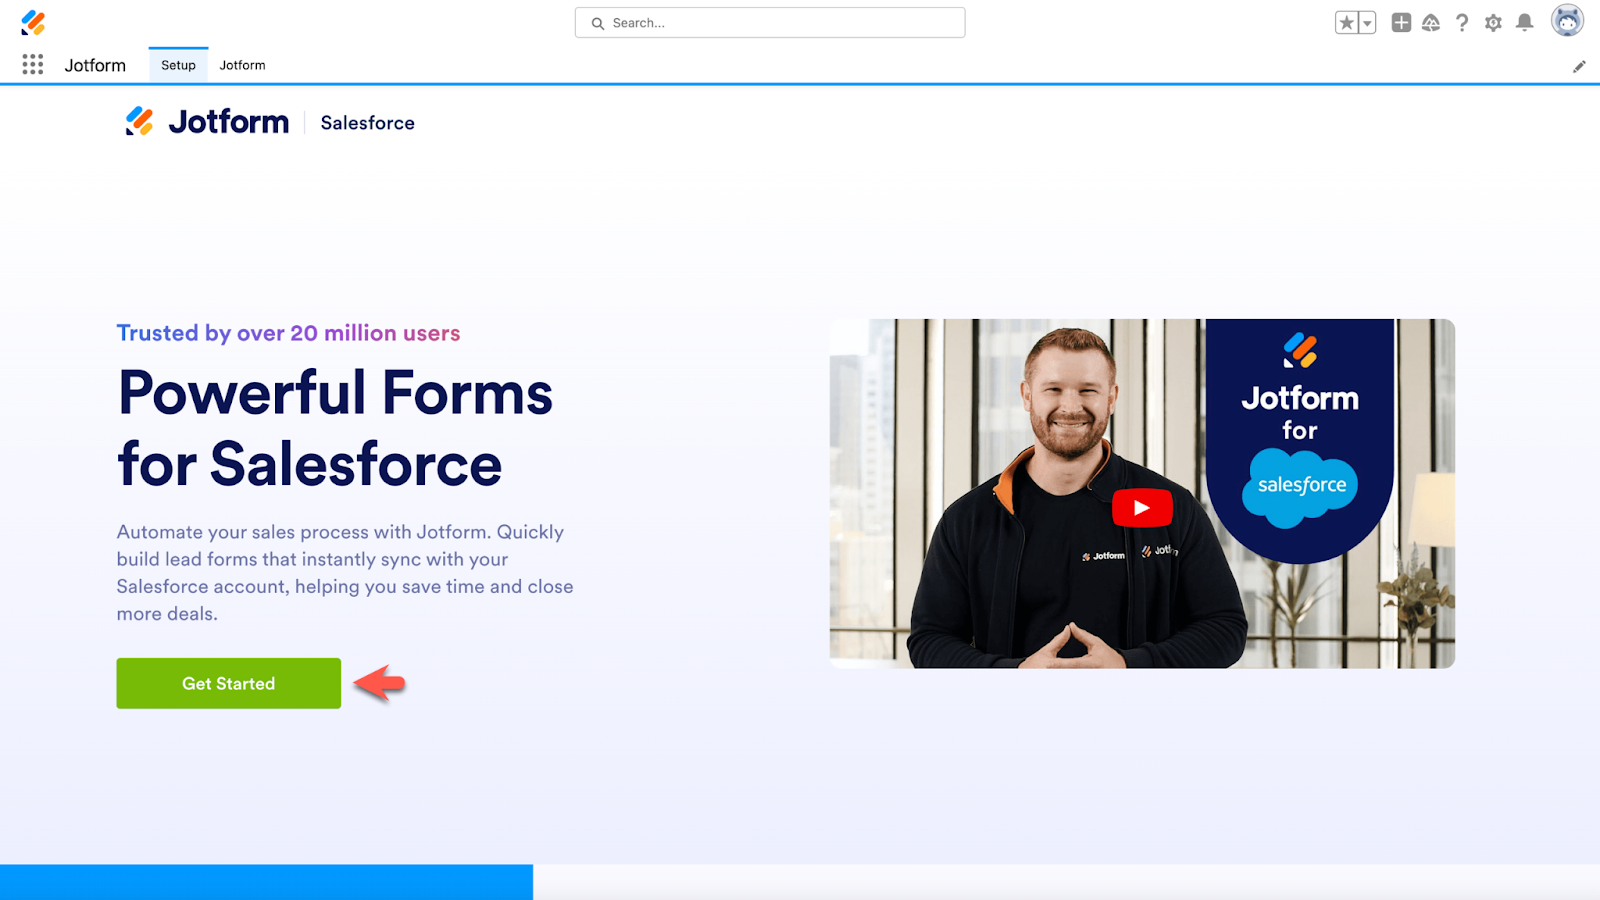
Once you’ve downloaded Jotform from the AppExchange, sign into your Jotform account with the Get Started button.
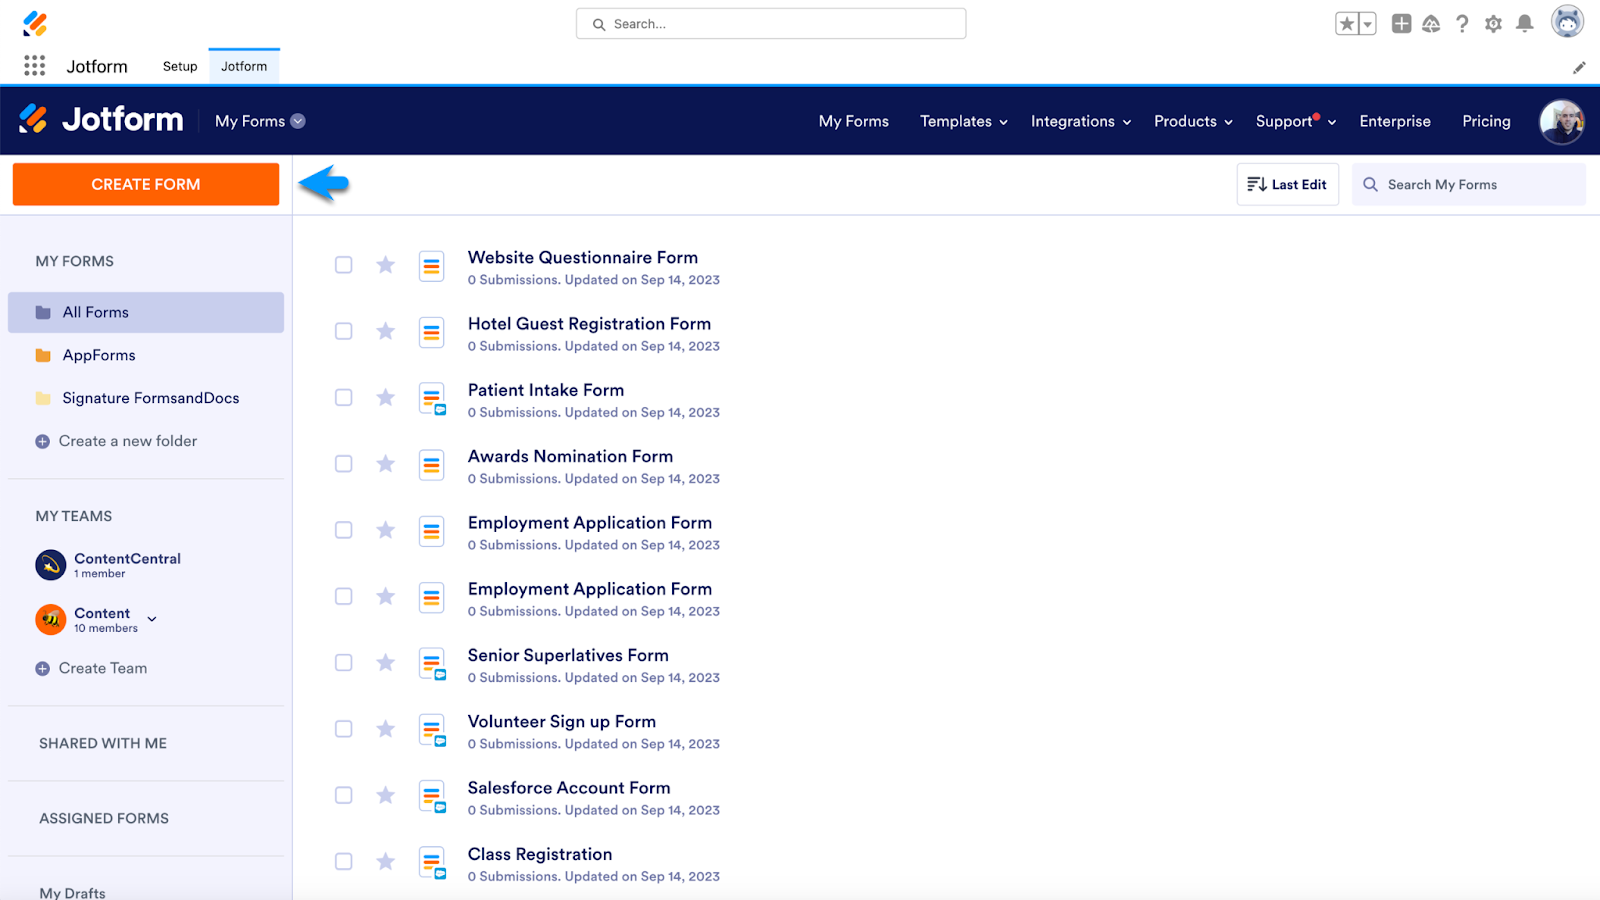
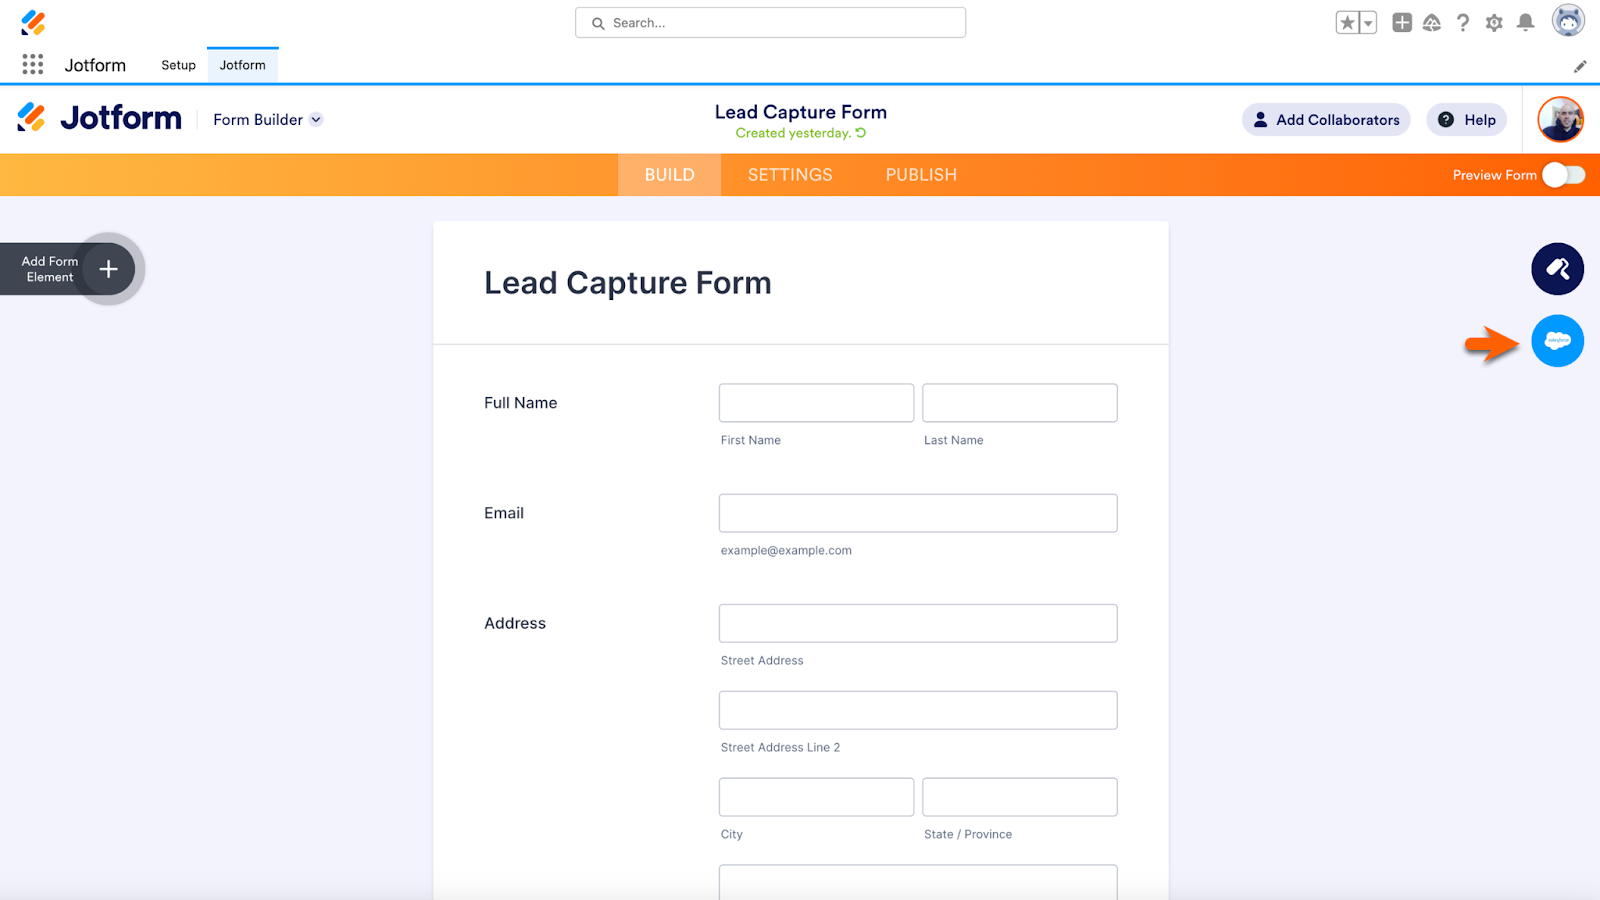
The Jotform for Salesforce workspace is nearly identical to the Jotform user interface. The Create Form button opens a variety of form building options.
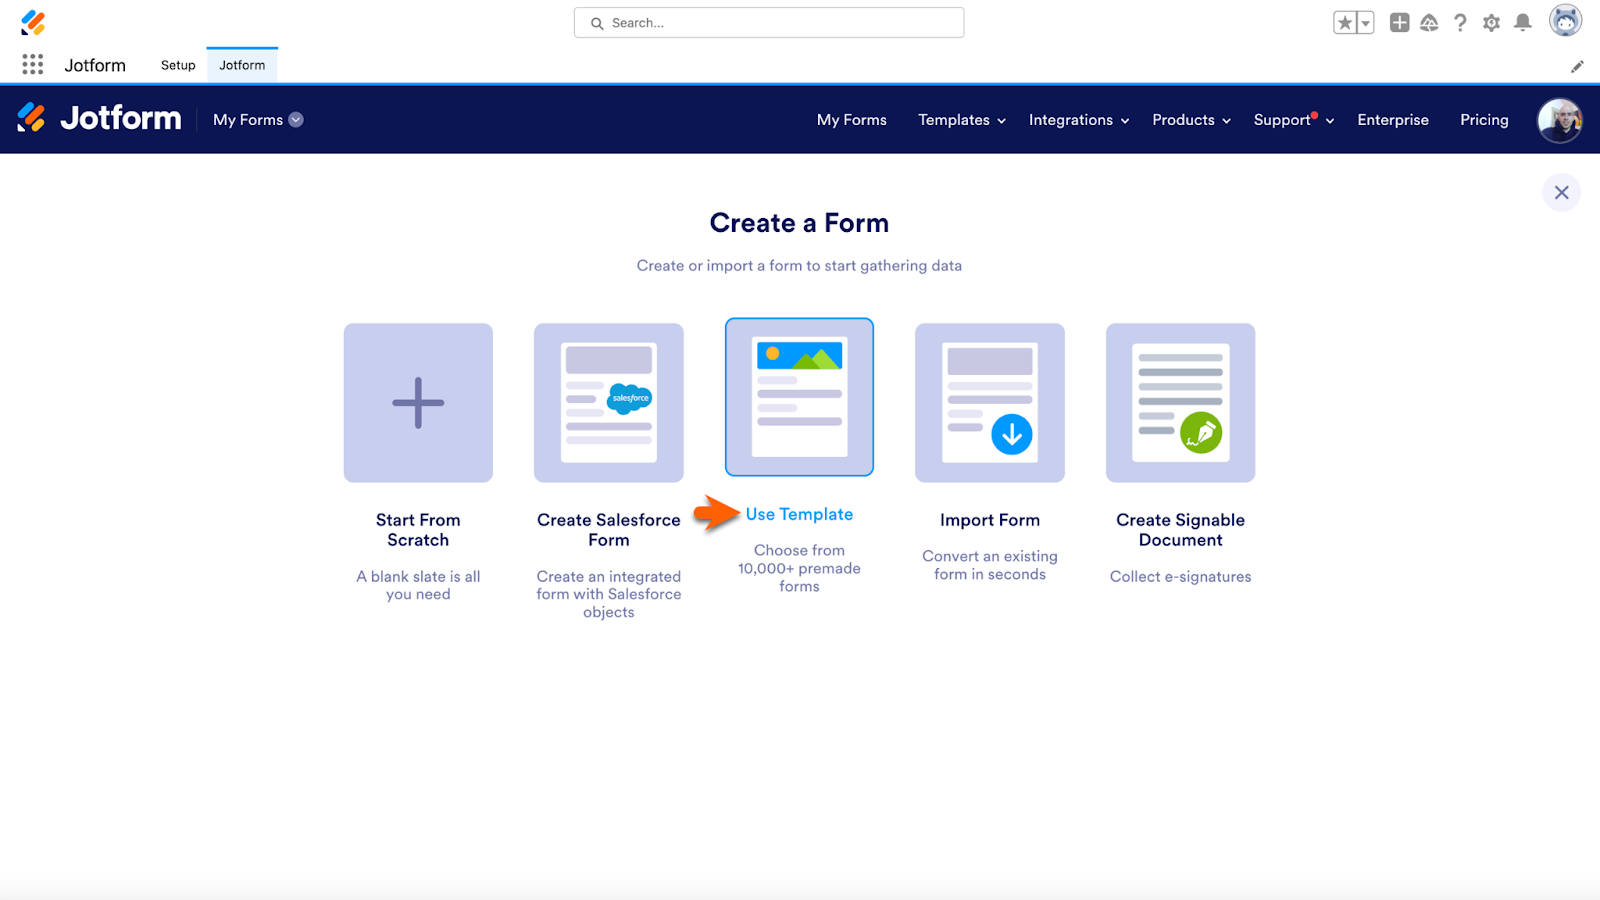
One difference is the Create Salesforce Form option on the Create a Form page, which creates a form that’s automatically integrated with your Salesforce objects.
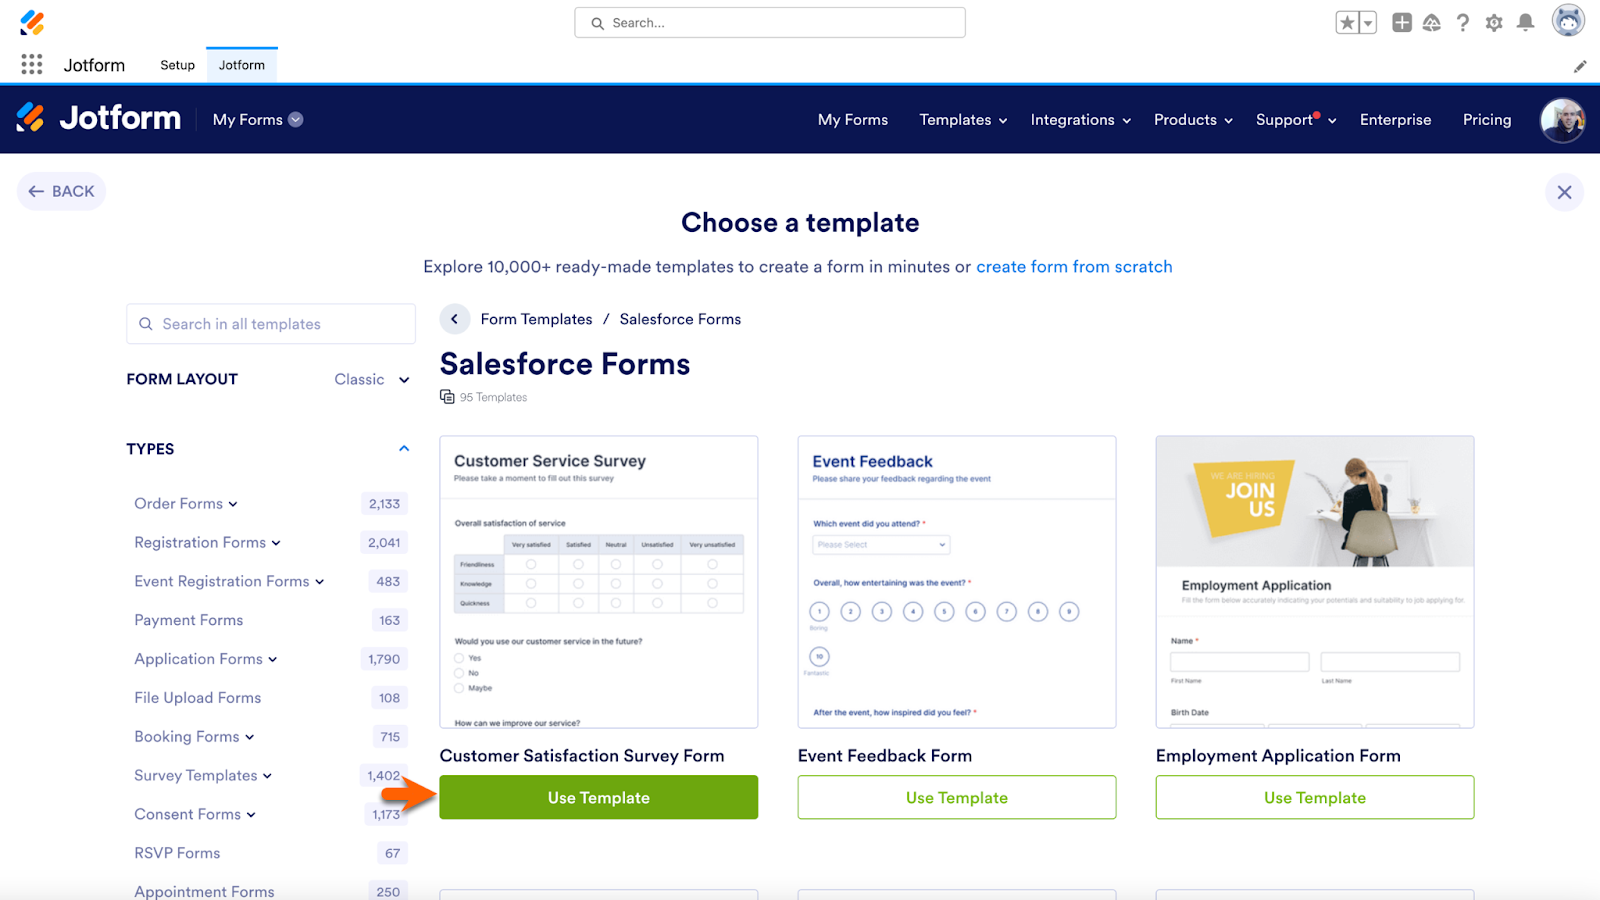
If you want to use a Salesforce form template instead of creating a form from scratch, click the Use Template option.
Did you know?
Jotform’s Salesforce form templates are fully customizable. Add your company logo, change the color scheme, add form elements, and more!
Next, select a Salesforce form template. Choose from options like event feedback forms, appointment request forms, and lead capture forms. Hover over each template to reveal the preview option, and when you’ve found the one you want, click Use Template.
Pro Tip
All of Jotform’s 20,000-plus form templates are available to use within Salesforce. If you choose a non-Salesforce template, you’ll need to set up the Salesforce integration manually. To do that, click on the Salesforce icon located on the right side of the Form Builder, below the App Designer (paint roller) icon.
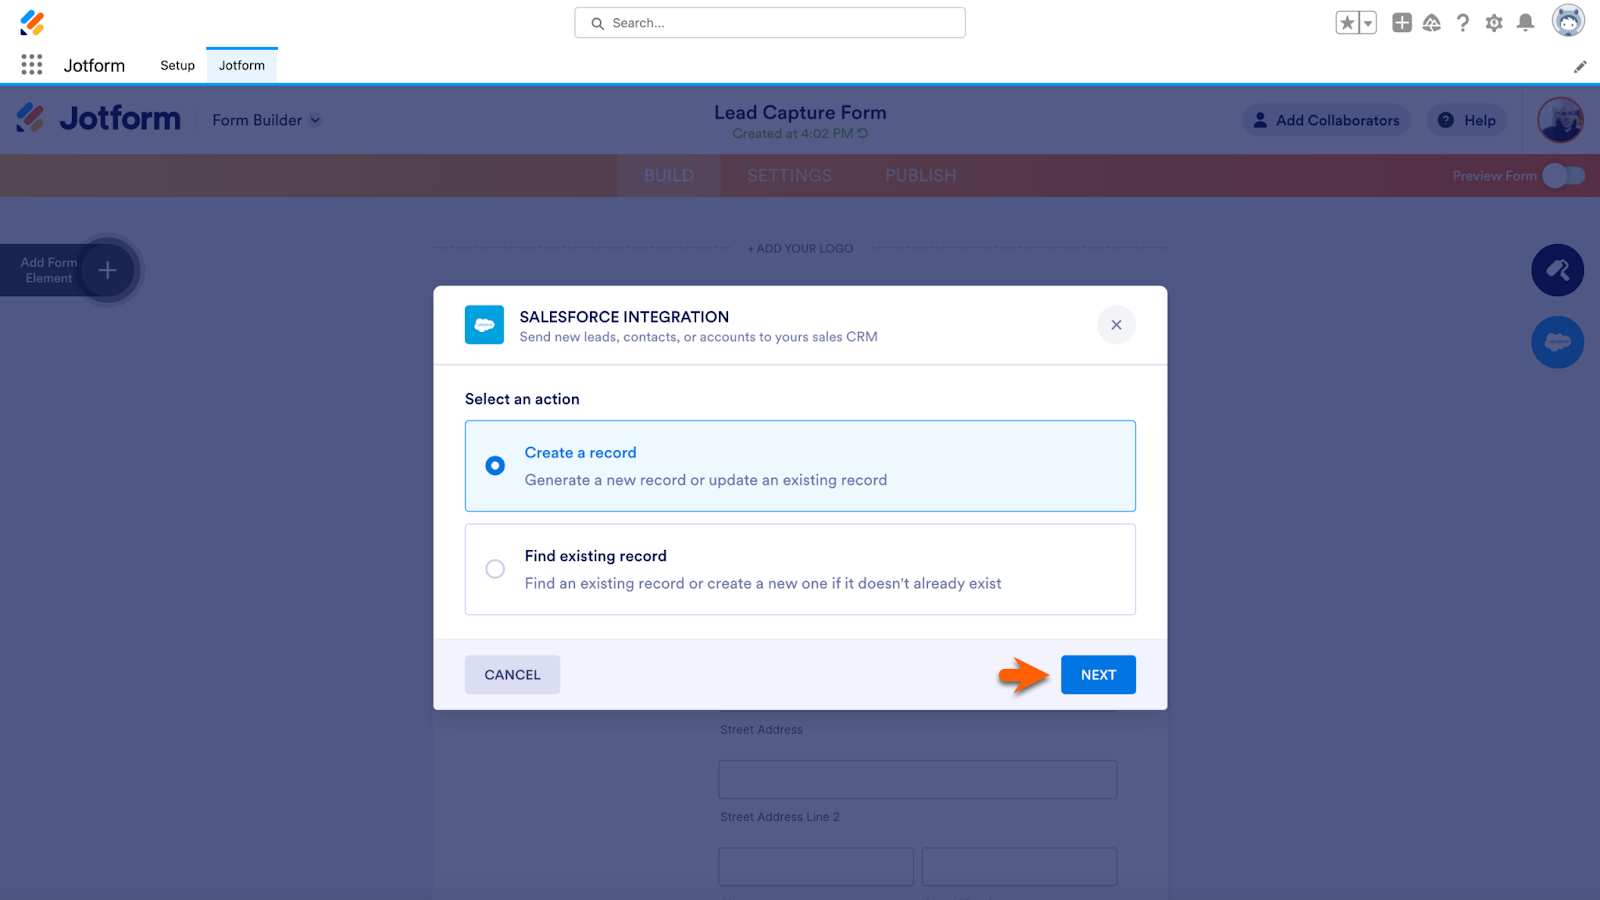
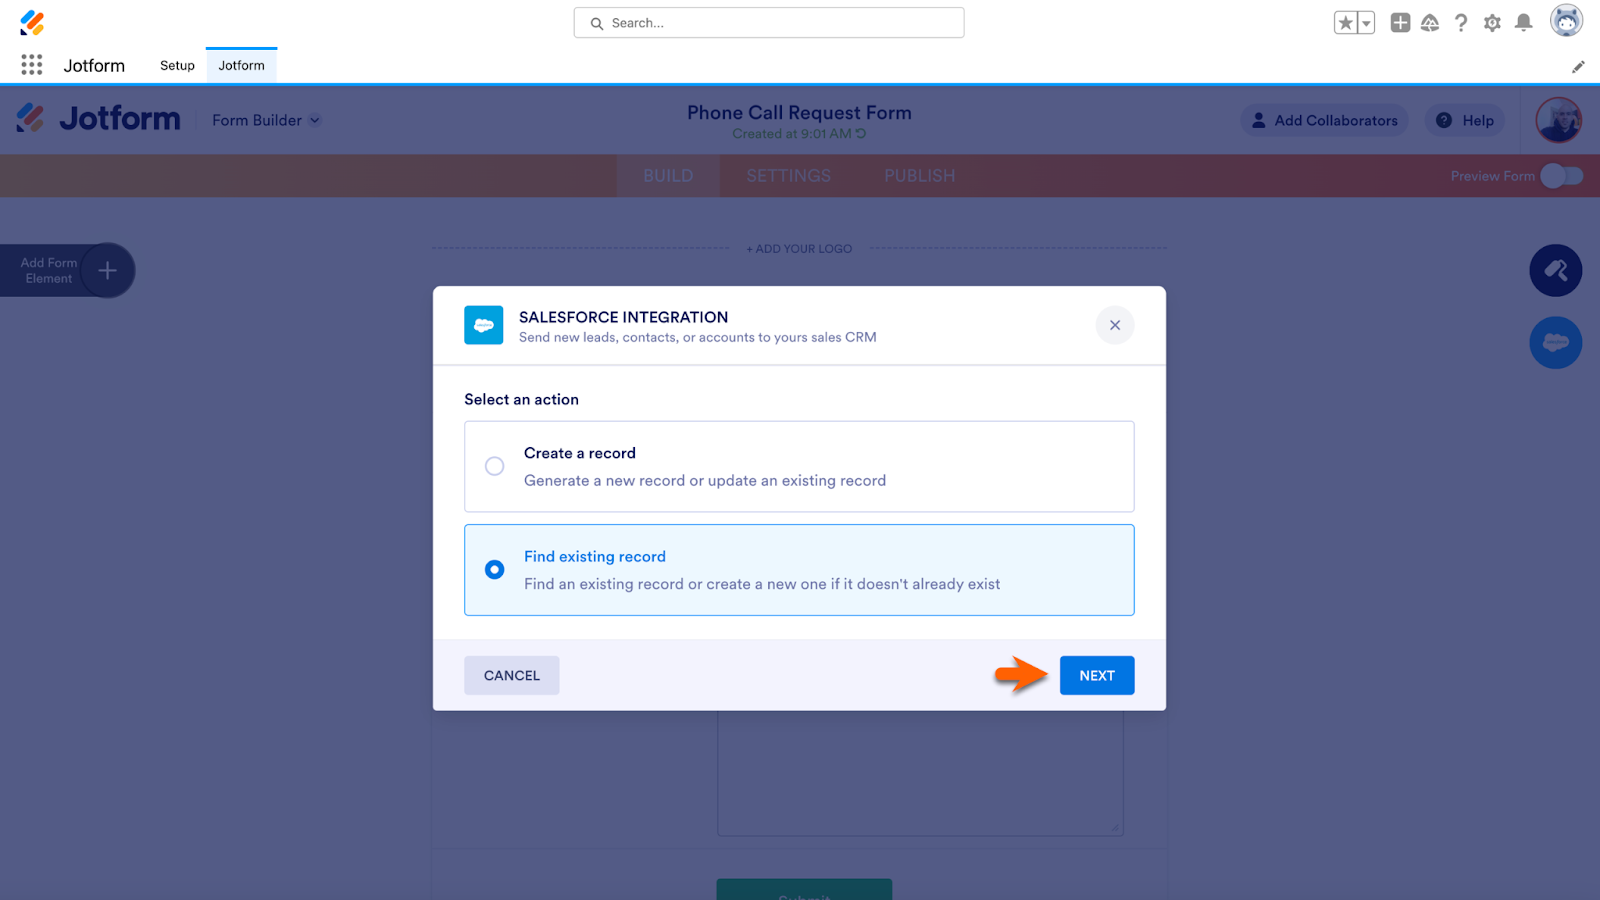
A Salesforce Integration popup menu will automatically appear, prompting you to either create a record or find an existing record within a chosen object.
Create a record option
To use the first option, click Create a record after selecting a Salesforce template. Click the Next button to continue.
For the following step, choose which Salesforce object you’d like to send data to. Since I’m using the Lead Capture form template, I’ve connected to my lead object in Salesforce.
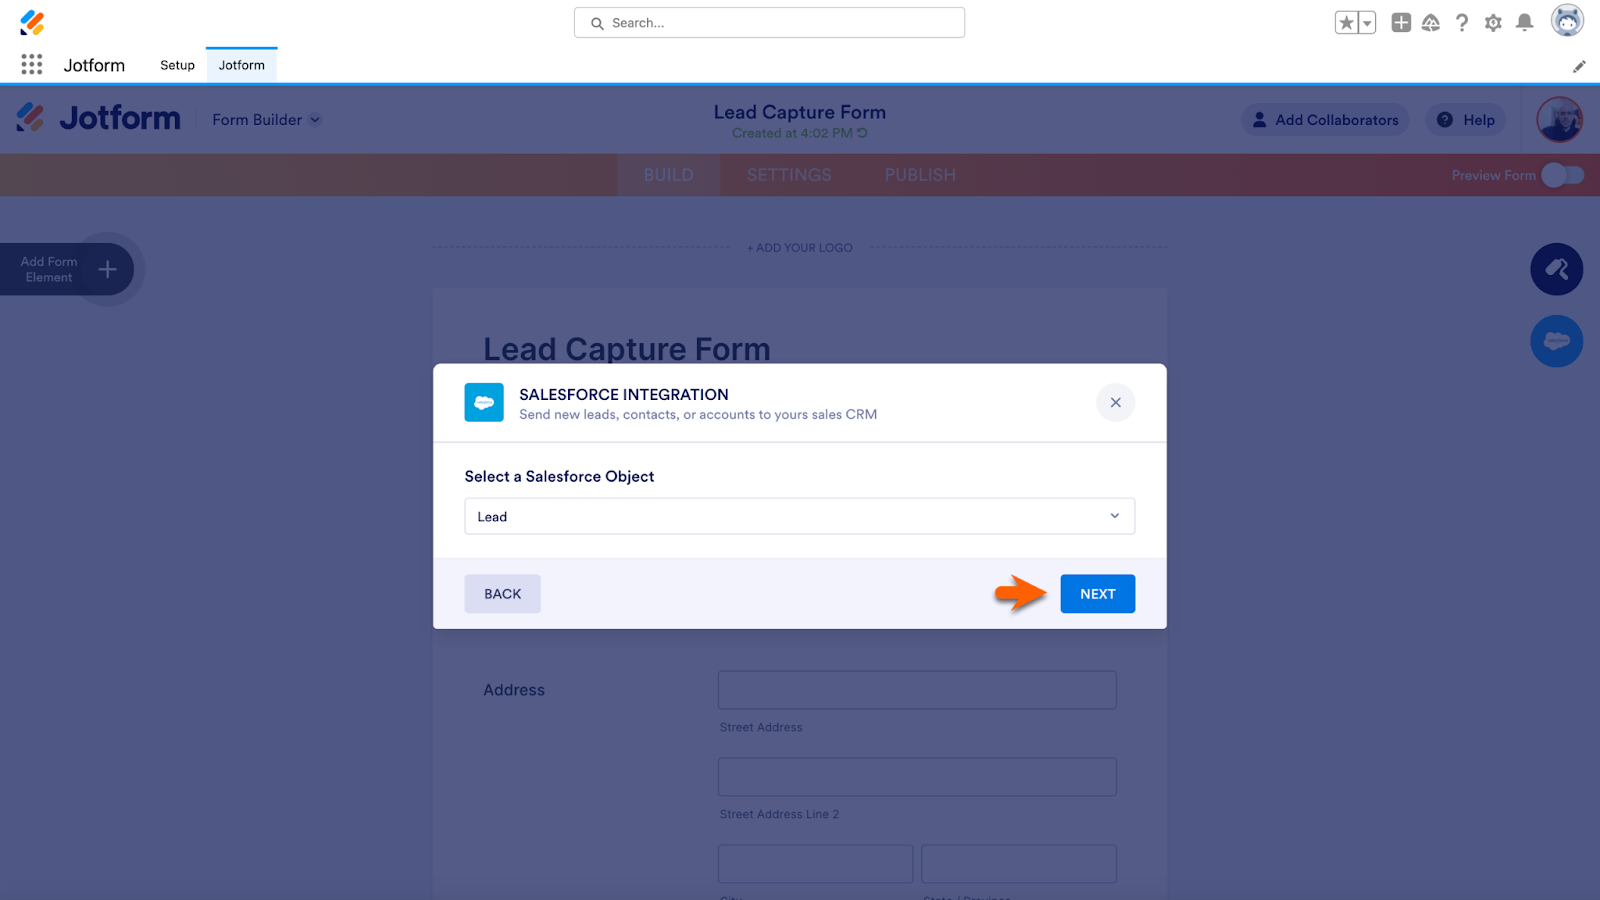
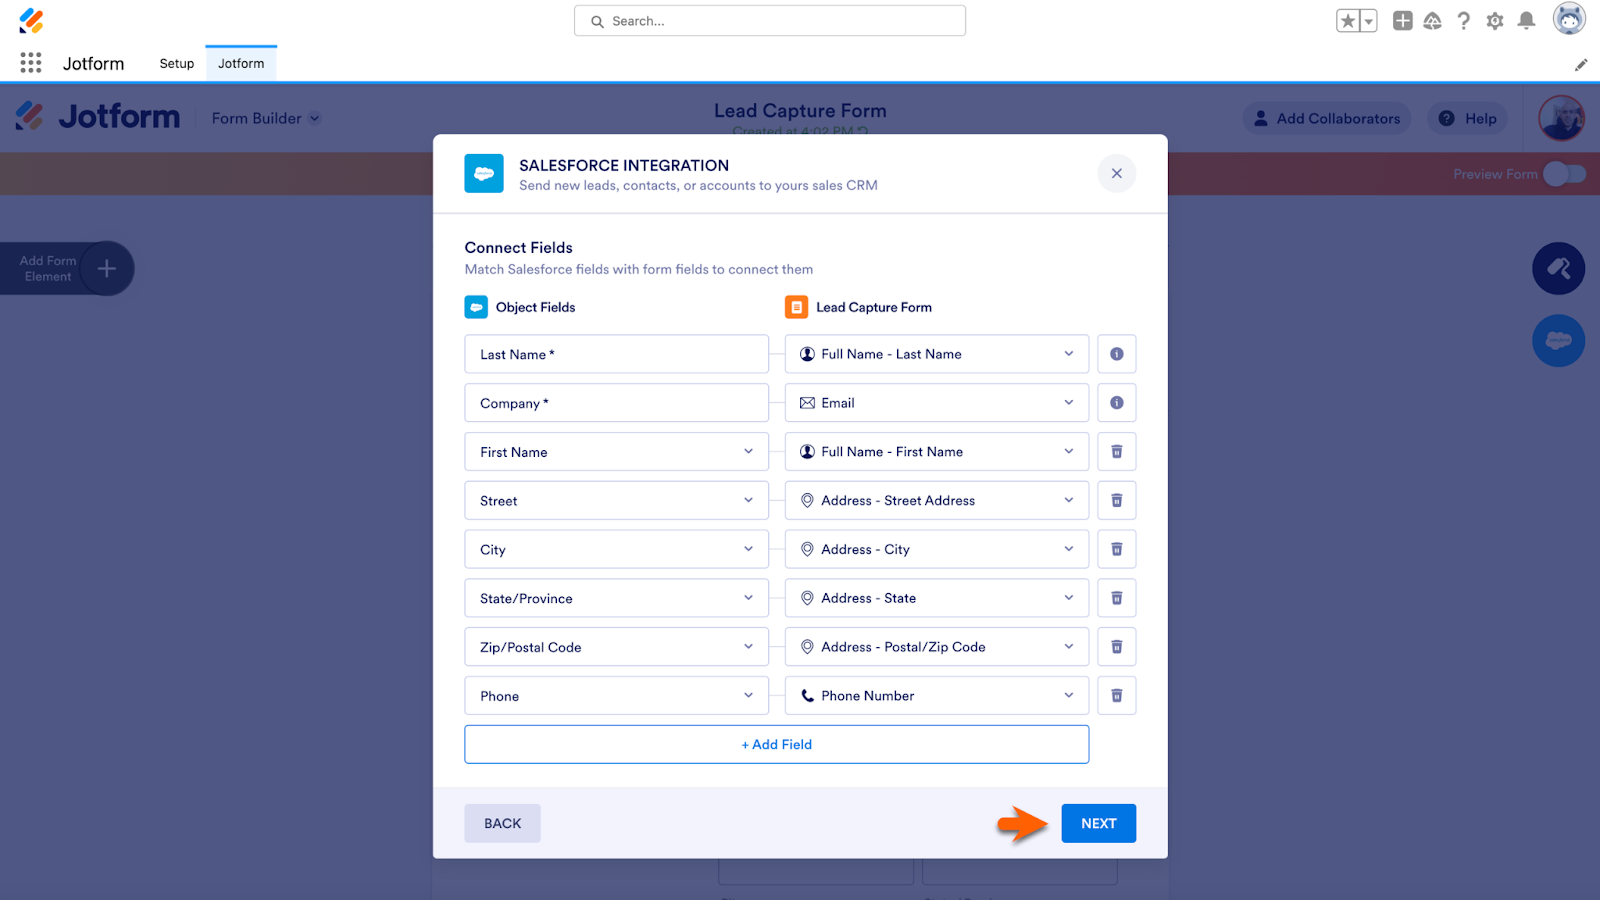
Salesforce objects are automatically matched up with the form elements on your Salesforce form template. If you’d like to override the automatic matching, use the dropdown menus beside each object field and form element in the Salesforce Integration menu. Click Next to continue.
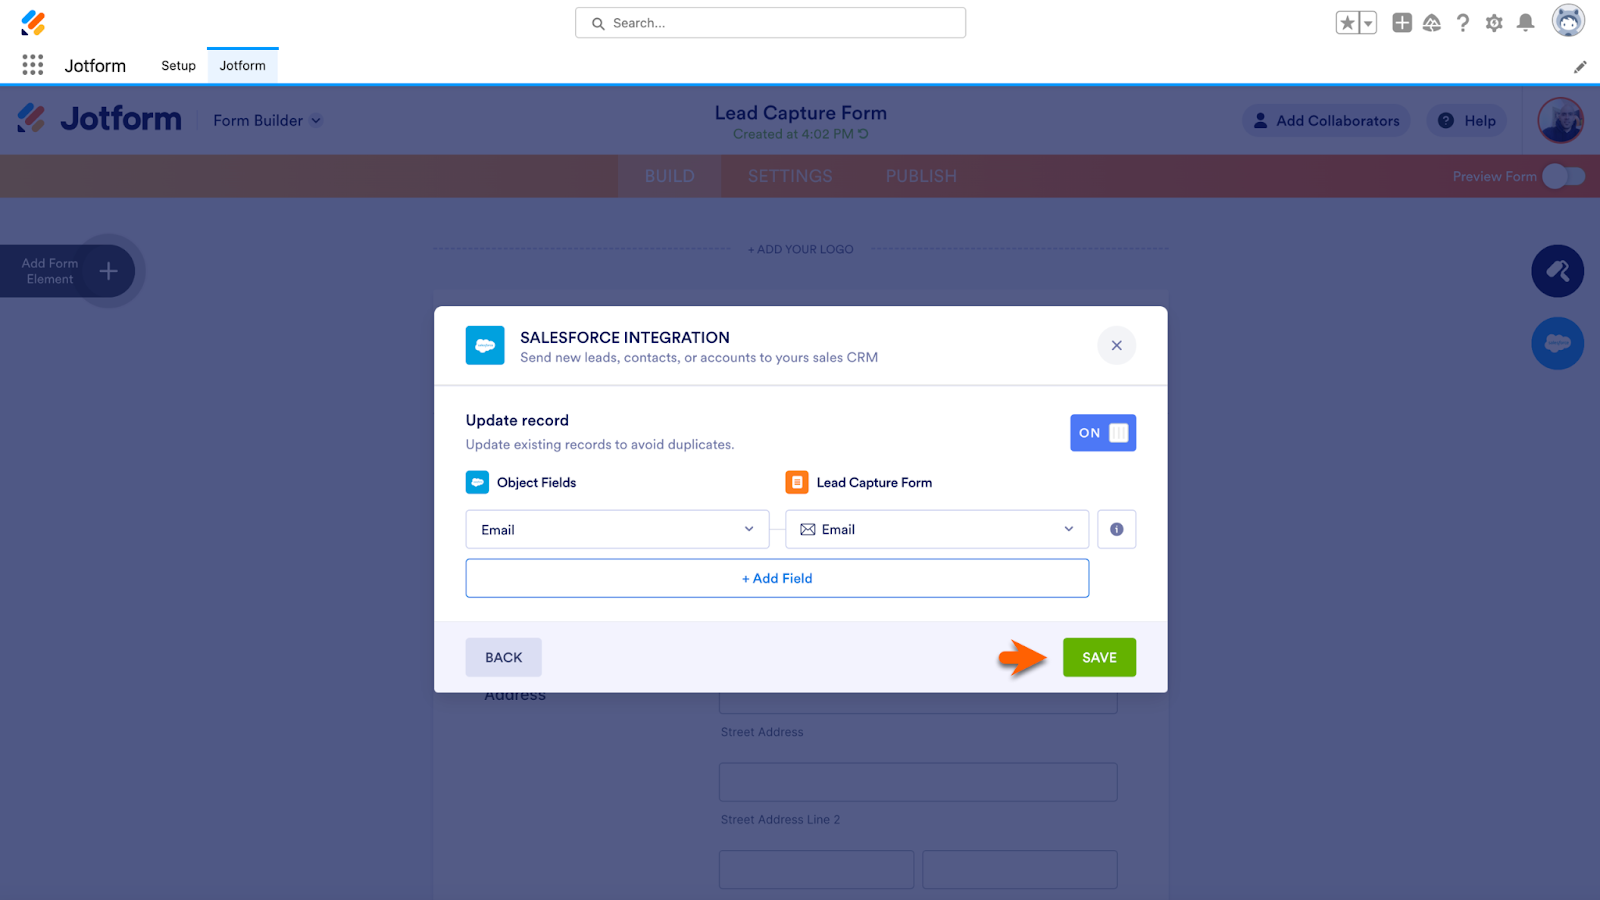
The final settings menu provides a way to update a record. This will ensure there’s no duplicate data in your Salesforce object. Switch on the Update record toggle button to reveal object fields and form fields from your template, similar to the previous menu. Choose which fields you’d like to update if duplicate data is found in Salesforce. Click Save, and your form will be ready to distribute.
After your form is optimized, it will open in the Jotform Form Builder within Salesforce. Click the Salesforce icon if you need to adjust the integration settings.
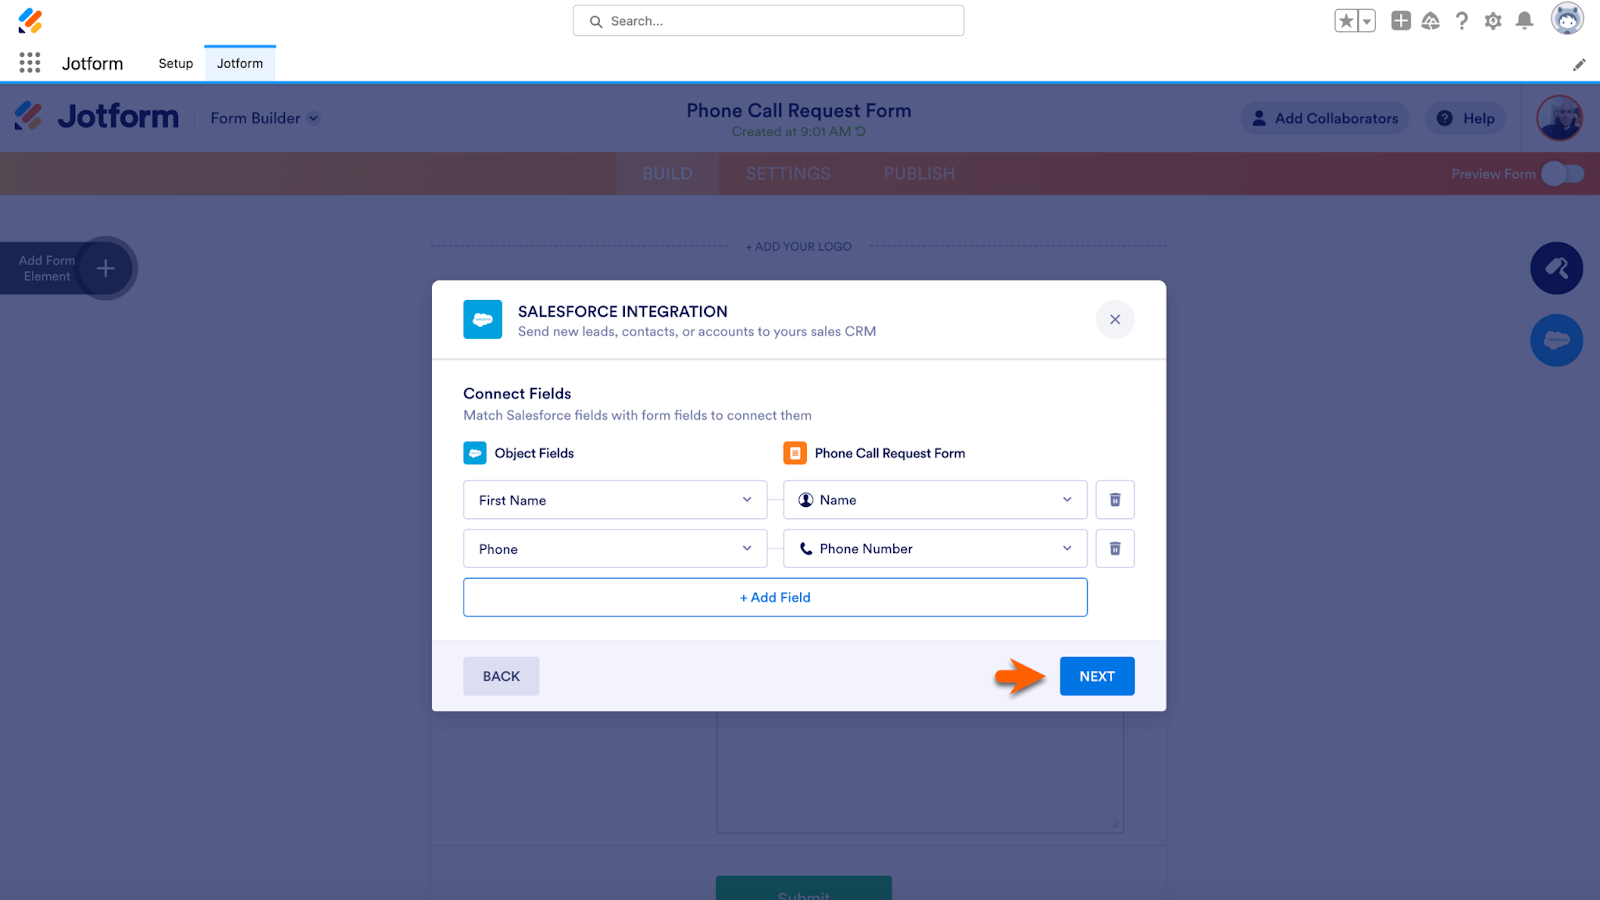
Find existing record option
To use the Find existing record option, select your preferred Salesforce form template, just as we did before. This time, click Find existing record from the Salesforce Integration popup menu. When you’re ready to proceed, click Next.
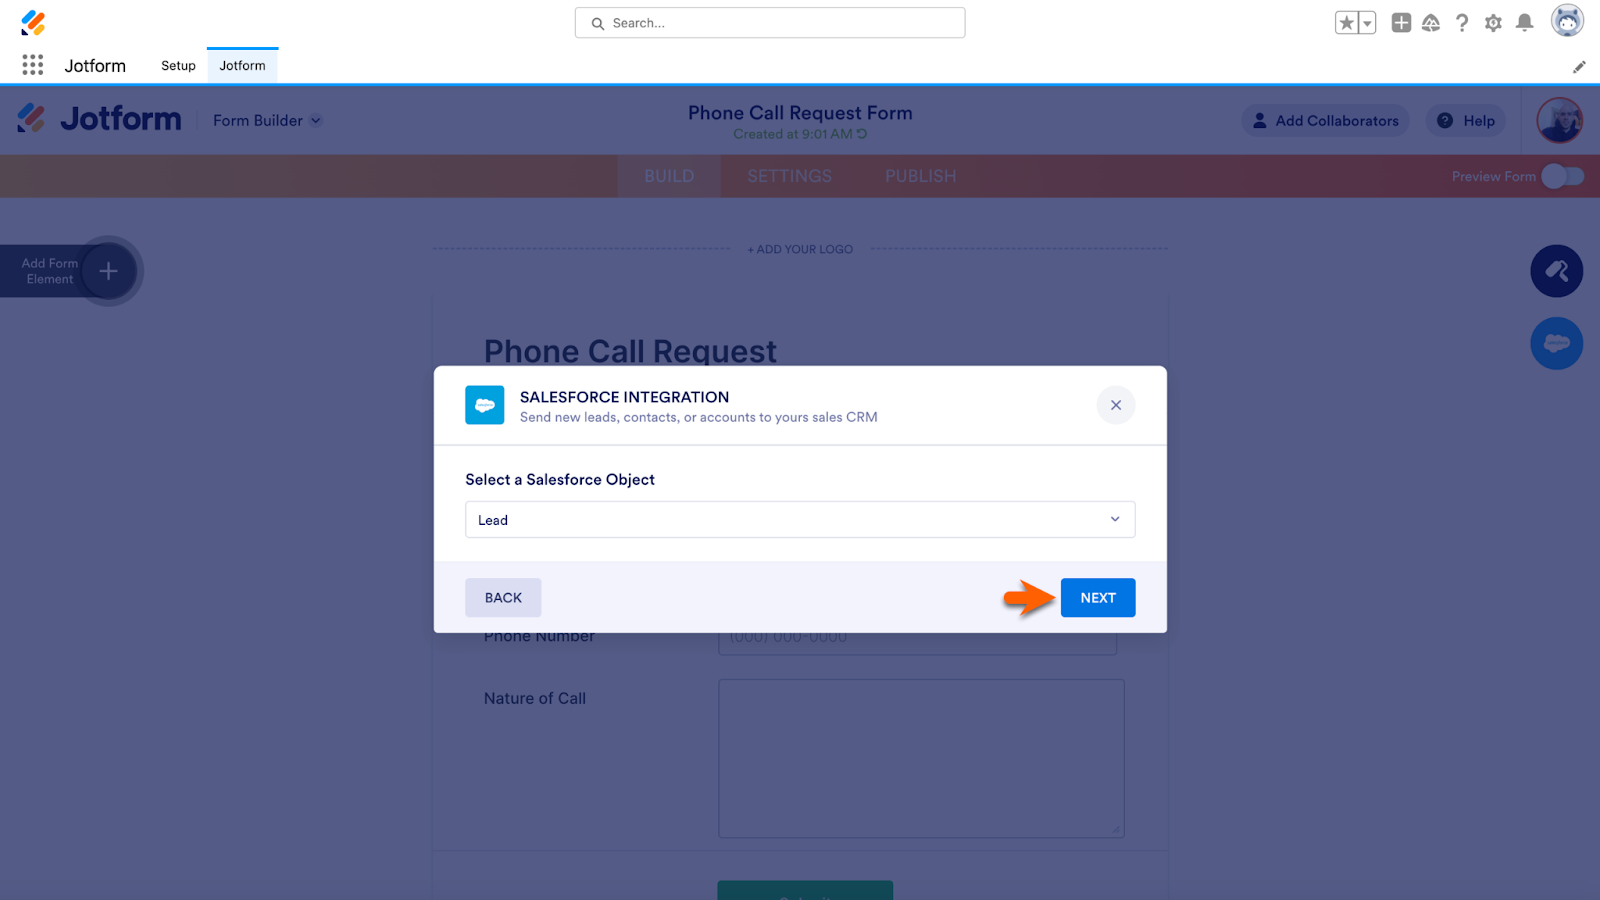
When the next popup menu appears, choose which Salesforce object you’d like to send Jotform submission data to and click Next.
Unlike the Create a record option, form elements aren’t automatically matched with objects. Fortunately, it’s easy to match them up manually. In the example below, I connected name and phone number elements from a phone call request form with identical Salesforce objects. When you’re finished matching, click Next.
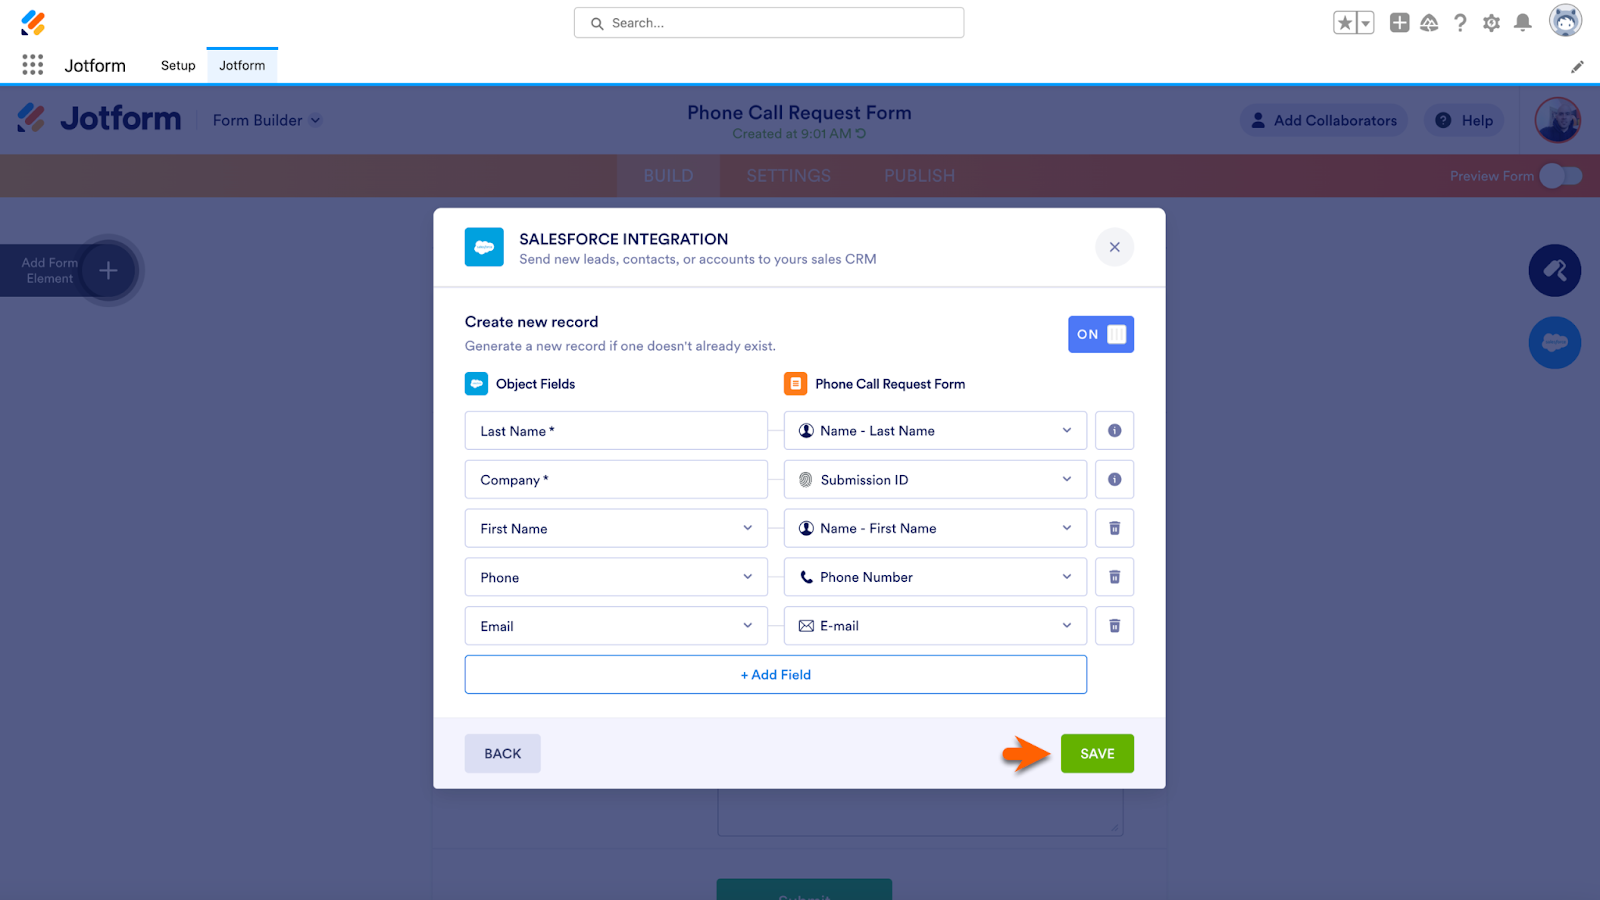
In this case, the final popup menu provides a way to generate a new record if an existing record isn’t found. To activate this feature, move the Create new record toggle button to the on position and match your form elements and object fields. Click Save, and your form will be ready to distribute.
Jotform and Salesforce: Get in on the ground floor
Jotform for Salesforce ushers in a new era of streamlined workflows with Jotform and the most popular CRM tool in the world. All the Jotform tools you’re familiar with, along with Jotform’s user interface, are available in Salesforce, so Jotform users can enjoy the familiarity of the Form Builder, Jotform Sign, and more while creating forms and workflows within Salesforce.
Another familiar aspect of Jotform remains unchanged: our culture of constant innovation. That’s why, less than a month after launching Jotform for Salesforce, we’ve added Salesforce form templates to the mix. And further updates are sure to come. Find Jotform in the Salesforce AppExchange and start automating today!


Send Comment: