
Salesforce’s customer relationship management (CRM) system is an invaluable tool for many businesses looking to keep their data organized. To enhance this organization, many companies implement record types in Salesforce. But, while record types are valuable, many people often use them incorrectly because they’re so complex.
Read on for a high-level overview of record types in Salesforce and a step-by-step process for how to create them yourself.
What is a record in Salesforce?
Records in Salesforce are similar to records you use for other administrative work. A record in Salesforce is essentially all the information relevant to a particular object (another Salesforce term) you’re creating. Salesforce objects are the data tables that store particular sets of information, such as contacts, accounts, leads, and opportunities.
As you create an object, you populate it with record information. Within the object (or data table), records are the rows that help organize data for sorting or filtering. For example, when you’re entering a new account into your CRM, your records could include the account name, contact information, and industry of that account.
Pro Tip
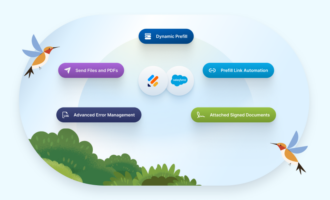
Manage multiple record types seamlessly with Jotform Salesforce Agent, an AI chatbot that automates record creation, updates, and lookups in real time.
When do you need to use records?
You use Salesforce records anytime you enter information into an object. Objects in Salesforce are structured around the information in records. If you’re adding a new sales opportunity, for example, the rows of information you enter that are relevant to that unique opportunity are the records that make up your new object.
What are Salesforce record types?
When you need to group records based on certain criteria, Salesforce allows you to use record types to organize specific records within an object. Record types allow you to sort through the information you don’t need so you can view only essential information instead.
This added layer of organization reduces the time you have to spend sifting through irrelevant information. Record types in Salesforce are designed to help the end user so your team can quickly and accurately locate the records they need.
Record types can also help your team improve the quality of CRM data by making sure they don’t fill in the wrong records or waste time filling out records they don’t actually need. Adding record types to your workflow can create a more streamlined data entry process while making sure you’re capturing only the essential records in your object.
How do you create record types in Salesforce?
Adding record types to your team’s Salesforce workflow can be beneficial, but creating them takes some getting used to. While the process is repeatable, learning the steps and terminology associated with creating record types in Salesforce may take your team a few tries before they’re comfortable with it.
Here’s how to get started:
- Open the Management Settings menu for the object you wish to apply record types to.
- Go to Record Types and select New.
- Click on the Existing Record Type dropdown and select Master to copy all available picklist values. If you want to clone an existing record type’s picklist, select that record type instead of Master. Choosing Master will include all standard and custom picklist values, which you can customize later.
- Type in a unique Record Label for your record type.
- Enter your Record Type Name. (Do not name your record type “Master,” as that’s reserved for the existing master record type. Using a unique name prevents naming conflicts when using Metadata API.)
- If your record type is related to an opportunity, case, lead, or solution, select a Business Process to associate it with.
- Enter a description for your record type.
- Select Active to make your record type accessible.
- To provide record type access for specific users, select Make Available next to the profile that corresponds to your desired user base. To make it available to all users, select the checkbox in the header row. Assigning a single record type to a single profile eliminates the need for users to search for a certain record type, as it will automatically populate when they create a new record. Users can still access and edit other records that aren’t associated with their assigned record type.
- To set a record type as a default for certain profiles, select Make Default next to your desired profiles. To make a record type the default type for all profiles, select the checkbox in the header row.
- Select Next and assign a page layout to your record type. Page layouts will determine how records are displayed to users who access that record type.
- If you want users to see the same page layout, select Apply one page layout to all profiles and choose the layout you want to display. To customize page layouts by profile, select Apply a different layout for each profile and select layouts for each profile.
- Click Save to finalize your record type, or click Save and New to finalize and start building a new record type.
Once you create your record types, your team can access them at any time to better organize data. You can adjust access to fit your team’s needs, adjust layouts to optimize performance, and create new record types if your current ones aren’t the right match for your team.
Photo by Tima Miroshnichenko


Send Comment: