
Creating a Salesforce relationship map
- Build your relationship map
- Customize it
- Expand it
- Organize it
- Keep your map updated
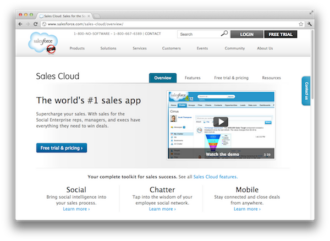
Managing customer relationships efficiently is a top priority for any organization. Salesforce, one of the leading customer relationship management (CRM) platforms, offers a robust set of tools to help businesses streamline their operations.
One of the many powerful capabilities Salesforce offers is relationship mapping. This allows users to visualize and manage connections between various Salesforce records. Relationship mapping is a tool that illustrates the connections between customers, contacts, and companies inside of Salesforce, assisting sales teams in strategically pitching accounts.
In this guide, we’ll explore what a relationship map is and how to create a Salesforce relationship map using Jotform, a versatile form-building and data-collection solution that seamlessly integrates with Salesforce.
Pro Tip
Strengthen your Salesforce relationships with Jotform Salesforce Agent, an AI chatbot that updates related records automatically to keep every object connection in sync.
How a relationship map works
A relationship map is a tool that organizes contacts inside of Salesforce, helping sales teams strategically manage multi-threaded accounts. This capability is especially useful in locating all the different stakeholders that sales teams should consider when constructing a pitch, helping to connect the dots between multiple people associated with an account.
Building a Salesforce relationship map
Let’s take a look at the steps for creating a Salesforce relationship map. Then we’ll explore the possibilities of using this tool.
1. Build your relationship map
Open a Salesforce document and enter @Relationship Map. This creates a placeholder relationship map in your document.
To populate your map with existing Salesforce data, click Import from Salesforce. Select a Salesforce object and enter the record name. Click Import.
Pro tip
You can also choose multiple records at once. For instance, choose Contacts from Account, and then choose the numerous contacts from one account. Change the object to an account, type the name of the account, and then add a card for the account as well.
2. Customize your relationship map
Customize the fields you want to appear on your relationship map cards using the Map Builder. To edit or add fields, click Edit Card Details and select the object template you want to customize.
You can add more fields to a card in the Detail View section, which appears when you click More on the card.
To add a field from the record, click Add Field, select a field, and save the action.
To change the fields in the compact and detailed views, delete and add the fields as needed.
You can also add a colored dot on a card to indicate its status by adding or editing a picklist field. Select Display a card’s status based on the picklist option, choose a status color for each picklist option, and save.
3. Expand your relationship map
After setting up your fields, add new cards to your map in the Map Builder. To import more Salesforce records, click Import Salesforce Records. To create a custom card, enter a name and click Add.
4. Organize your relationship map
To edit Salesforce cards in the Tree Map or Map Builder, click the card’s edit pencil and update the fields. Save the changes to Salesforce.
To edit custom card fields, click Edit Card Details and select Customized Template.
In the Map Builder, drag cards to create a hierarchy. To see it in the Tree Map, click View Map. To resize the card layout, click Layout and select a layout.
5. Keep your map updated
To ensure your map stays up to date with the latest Salesforce data, from the Tree Map, click Refresh Records.
Congratulations, your Salesforce relationship map is now ready to use. This powerful tool will help you stay on top of account health and maintain effective communication with stakeholders. You can also add it to your Account Plans for a comprehensive overview of your business relationships.
Integrating Jotform with Salesforce
You can further enhance your customer relationship management and sales processes by integrating Jotform with Salesforce.
Jotform offers a simple, user-friendly way to build online forms without any coding knowledge. It offers seamless integration with Salesforce, ensuring that your data is up to date every time you receive a new submission.
Using Jotform within Salesforce delivers a host of benefits:
- Seamless data capture: Jotform simplifies data transfer to Salesforce records for leads, contacts, accounts, or custom data. There’s no need to deal with intricate integration details.
- Enhanced lead generation: Incorporating Salesforce forms on your website, landing pages, or social media platforms allows you to capture data directly, empowering your sales team to easily follow up with leads.
- Improved data quality: Accurate field mapping and integration setup reduce manual data entry tasks. Built-in error correction ensures the data is accurate before it enters the Salesforce database.
- Integrated user experience: The convenience of accessing Jotform within Salesforce eliminates platform switching, making sales processes smoother for users.
In terms of data security, Jotform provides robust protection mechanisms like 256-bit SSL encryption, PCI-DSS Level 1 certification, and CCPA and GDPR compliance. Jotform even provides optional HIPAA features and form encryption for sensitive data.
Integrating Jotform with Salesforce opens up even more possibilities for businesses that want to streamline data collection and relationship management. Creating a Salesforce relationship map using data collected with Jotform is a simple yet effective way to visualize and manage your records, enhance your CRM capabilities, and ultimately drive business success.
Photo by Brooke Cagle on Unsplash


Send Comment: