
Steps to use a lookup field in Salesforce
- Click the Set Up tab and select the Object Manager
- Select the object you want to add
- Open the Fields & Relationships tab and select New
- Open the Data Type list, select Lookup Relationship
- Open the Related To dropdown and select a Contact
- Enter information for Lookup Field
- Allocate labor appropriately
- Click Next and then Save
Managing data and information across a business is difficult to begin with —and it only gets harder as your organization grows. Being able to quickly access certain information across datasets, tables, and other points in your digital infrastructure is incredibly helpful when you’re keeping tabs on all the aspects of your business. This is where lookup fields in Salesforce come in handy.
For those who want to use lookup fields, Salesforce offers a deeply interconnected system that makes accessing data from multiple sources a simple and frictionless process. Let’s break down how these tools work and how you can take advantage of them in your Salesforce interface.
How a lookup field in Salesforce works
Lookup fields are any inputs in a Salesforce form or table with values that can be retrieved from another query in a separate form or table. These inputs can be anything from lines of text to specific dates or payment information.
For instance, if you want to reference a data point from a purchase order (PO) in your central customer relationship management (CRM) interface, you can include a lookup field in that PO ahead of time, ensuring you can reference it and pull from it in the future. That way, if you need the due date of a PO payment, you can pull it from that lookup field and easily bring the information into your CRM.
Users can also tap the Jotform for Salesforce app to create lookup fields in custom documents. By downloading the app and adding it to your Salesforce interface, you can create your own unique forms and establish lookup fields within those documents to access later in Salesforce or other external tables.
Pro Tip
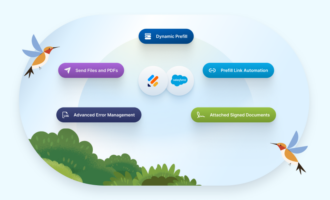
Keep related records linked effortlessly with Jotform Salesforce Agent, an AI chatbot that retrieves or updates lookup data across Salesforce objects through simple chat commands.
Why the lookup field is important
In rapidly changing business environments, being able to quickly draw on different data points across tables and forms is a game-changer. Rather than pulling up multiple tabs or interfaces, users can use lookup fields in Salesforce to immediately extract specific information from one table and bring it into another, expediting project management.
When to use the lookup field
There are many opportunities to use a lookup field in Salesforce. The platform offers a complex system of technology and integrations that makes these tools effective for any business. You can use them in financial documents, project management processes, or surveys from customers.
How to use a lookup field in Salesforce
The following information applies to Salesforce Lightning users, who are the most likely to access lookup fields in their daily tasks. Follow these steps:
- In your Salesforce Lightning account, click the Set Up tab (gear icon) and select the Object Manager underneath.
- Within the Object Manager, select the object you want to add to your lookup field.
- Next to your object, open the Fields & Relationships tab and select New.
- Next to that, open the Data Type list, select Lookup Relationship, and click next.
- On the next page, open the Related To dropdown and select a Contact. Then click next.
- This is where you’ll enter the following information for your Lookup Field:
- Field Label
- Field Name
- Description
- Help Text
- Complete each field, click Next, and then click Save. Now you have your first custom lookup field.
How to create a lookup table using Jotform
If you’re creating a form using Jotform for Salesforce with the intention of later accessing a lookup field, Salesforce can plug into Jotform Tables to draw information in a few simple steps.
- Set up the two tables or points of reference for the lookup field.
- Once you’ve set up your tables, click on Add to create a new column. In the example below, the user adds a column to the Projects table, which allows them to connect to a specific project.
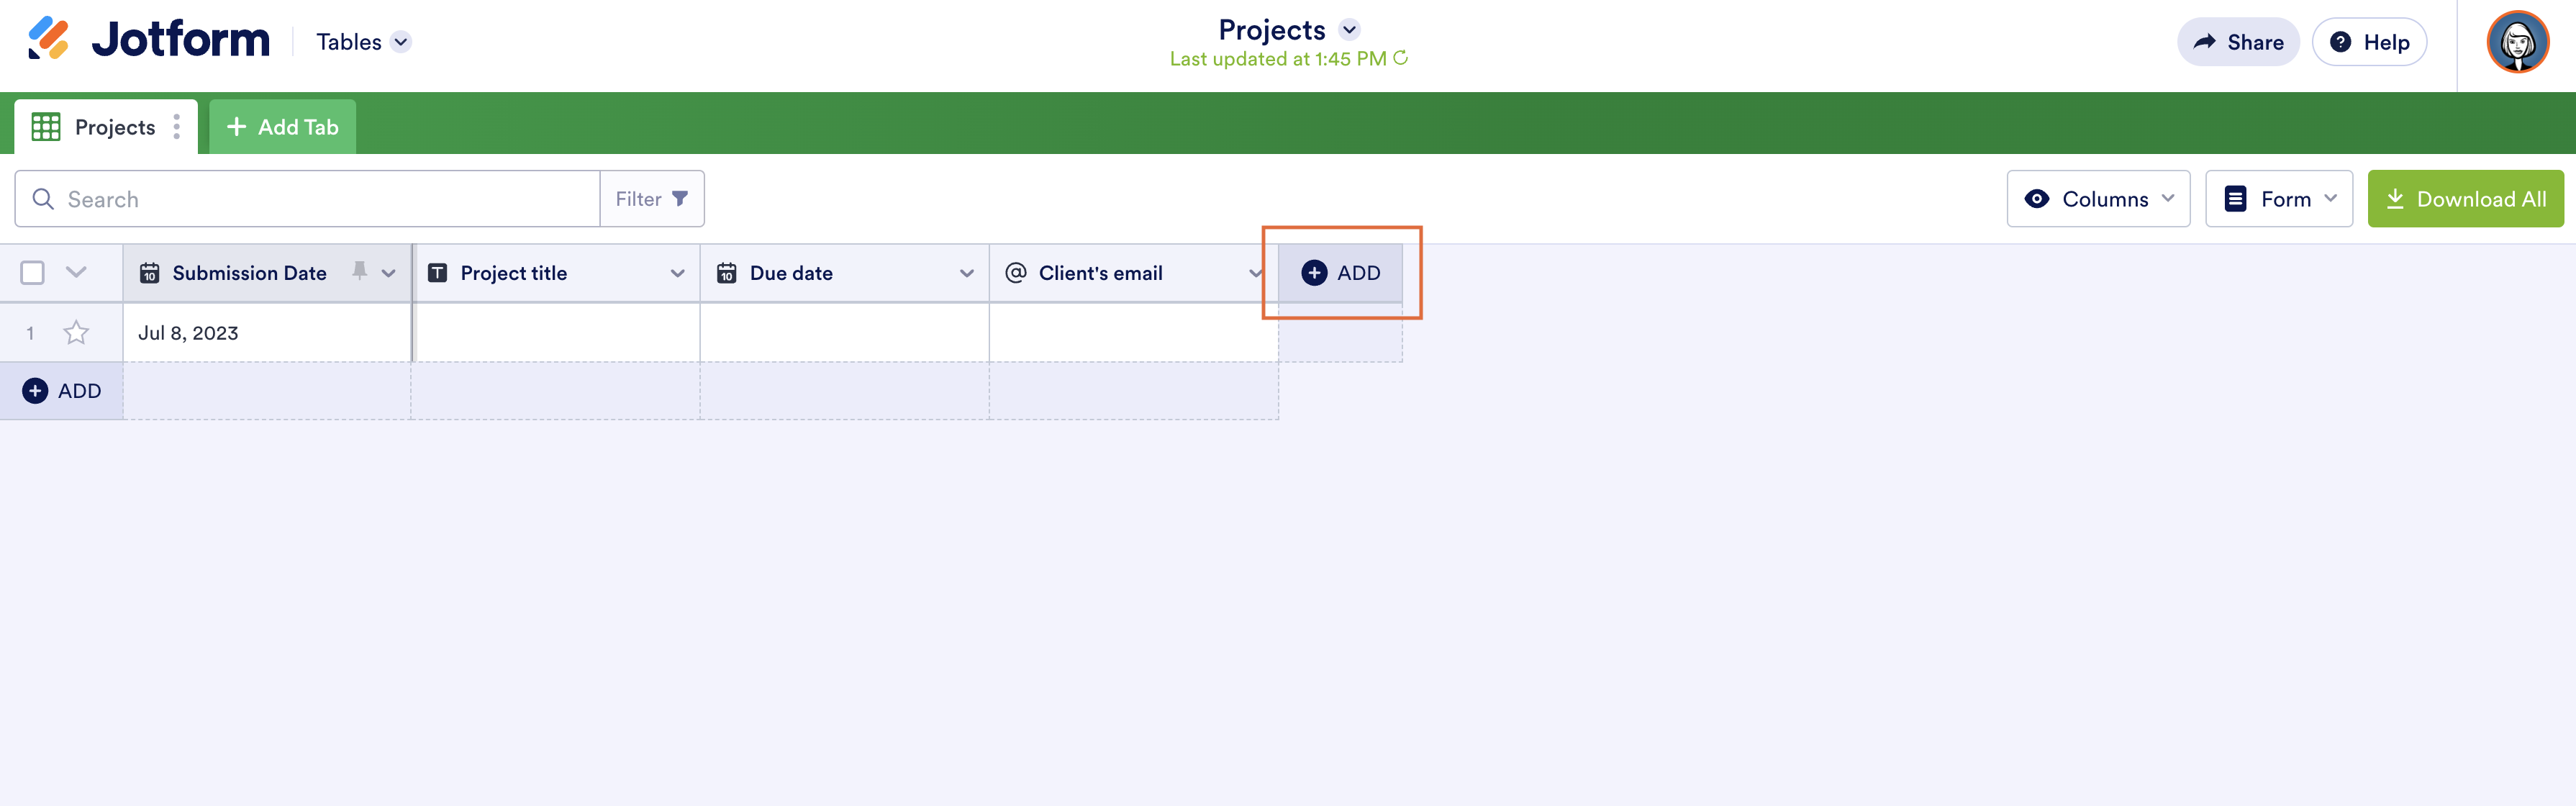
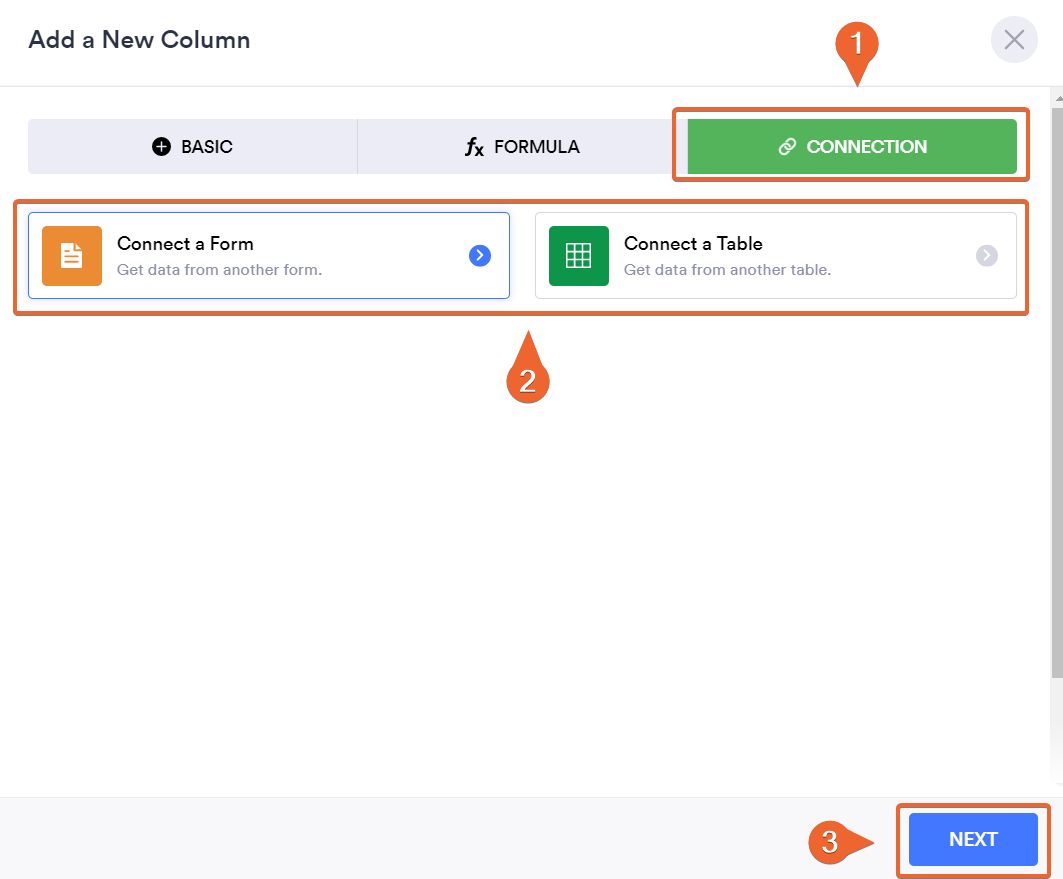
- Select Connection and choose whether you want to connect to a table or form. Then, click Next to create the new lookup field column in the table.
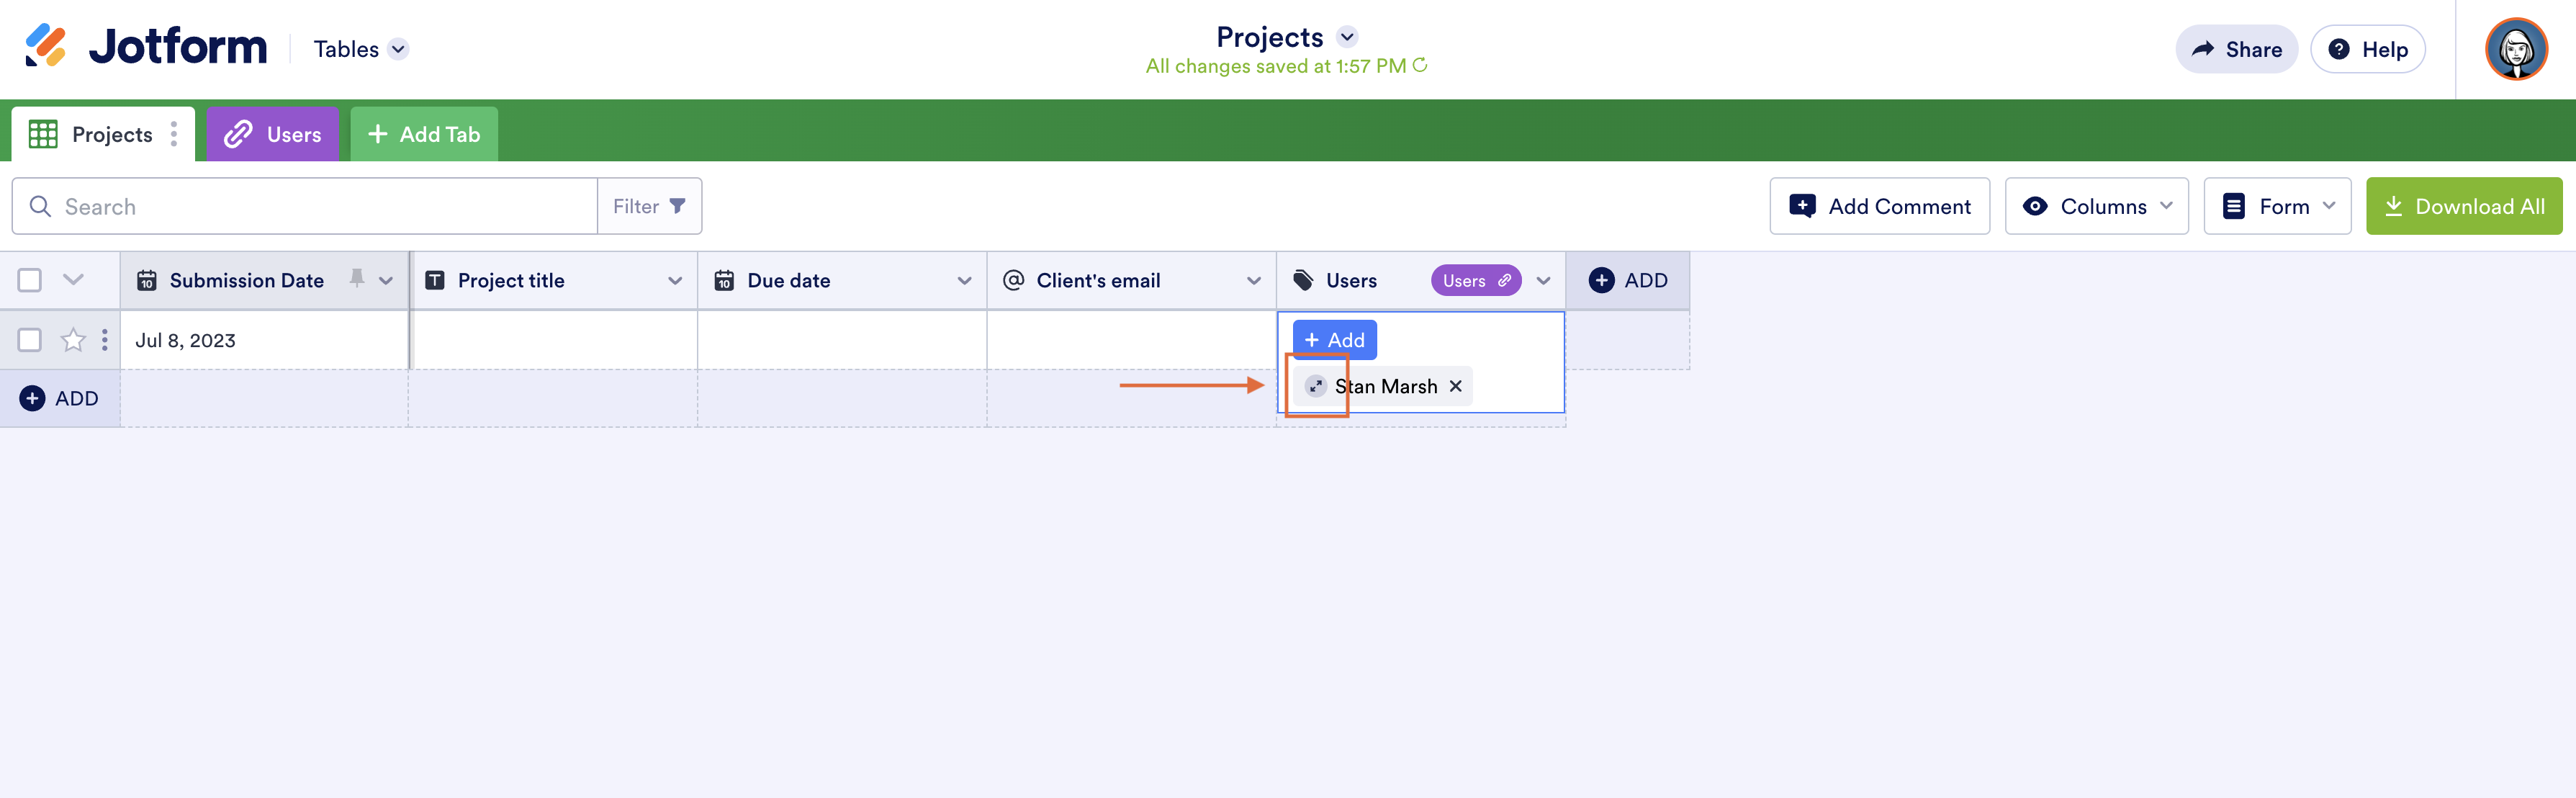
- You should now be able to select the value from the second table and see it in the first one. Click on the link in the selected value to open a popup where you can see all information about the selected row from the second table as well as all rows from the first table where this value is selected.
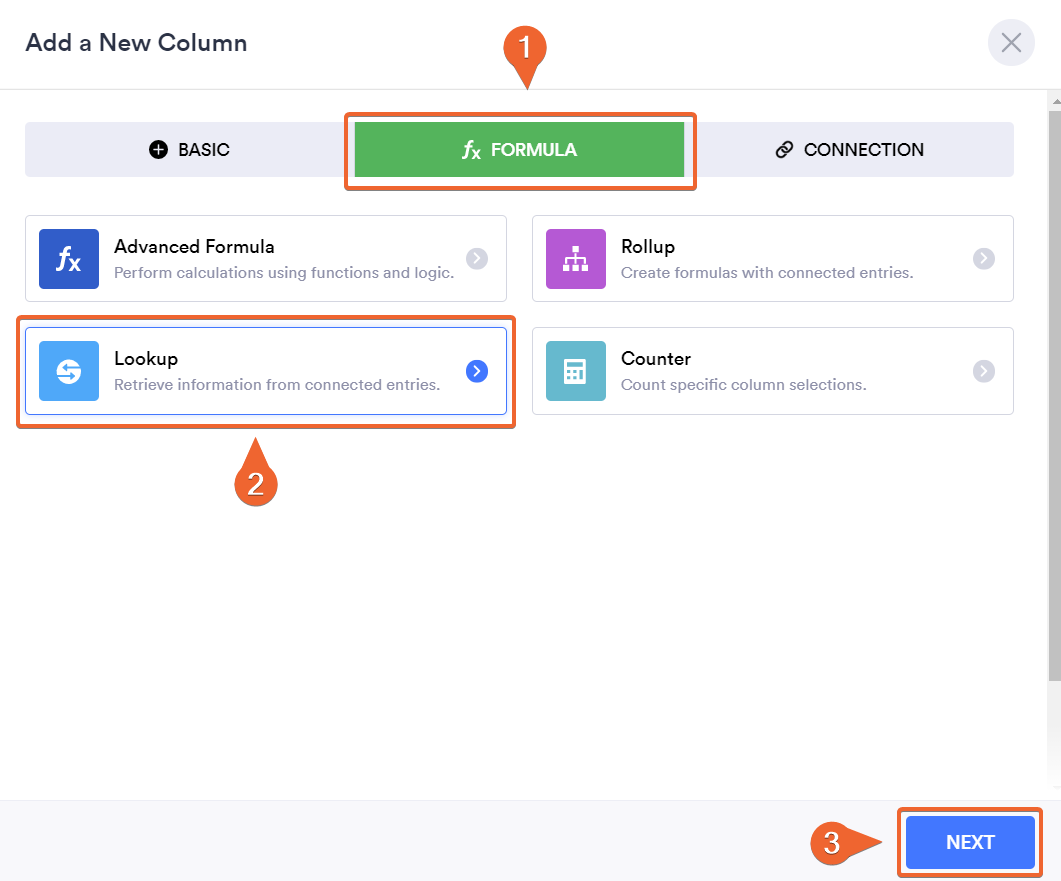
- Add a lookup by selecting the new row option and clicking on Lookup under the Formula tab. Then click Next to establish the connection.
- Select the previously added connected field, then select the field from the second table that you wish to show. Now, when you update the first field, this one will update automatically.
In just a few easy steps, you’ve established a lookup field between two tables — a practice that you can replicate across other datasets or even other Jotform for Salesforce custom forms.
Without the help of a lookup field, Salesforce users can struggle to search through a mound of information to find what they need. Thanks to these helpful, automatic tools, any business can expedite its processes and ensure the accuracy of information — no matter when or where it needs to be accessed.
Photo by Corinne Kutz on Unsplash


Send Comment: