
Steps to deactivate a Salesforce account
- Log into Salesforce
- Go to the user record
- Locate the user
- Edit the user
- Deactivate the user
- Save changes
- Verify the deactivation
When using Salesforce, you can’t completely remove user records or delete them from the system. The platform was intentionally designed like this to protect data integrity and give users the ability to track changes.
Instead, Salesforce allows you to deactivate or “freeze” user accounts, which effectively prevents these users from accessing the platform. However, their user records and associated data remain in the system.
Keep reading to find out how to deactivate a user.
Pro Tip
Try Jotform Salesforce Agent to streamline user lifecycle actions, the chatbot can log deactivation requests, trigger record updates, and guide conversational workflows, helping your admin tasks stay interactive and trackable.
Why you might want to deactivate a user in Salesforce
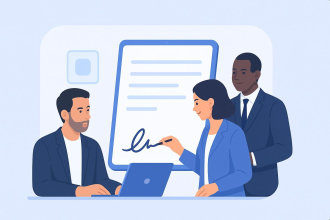
There are several reasons why you might need to deactivate a user in Salesforce. The first is when an employee departs your company.
When someone leaves your organization, you should deactivate their Salesforce account to prevent them from accessing sensitive company data. You may also need to do this on a temporary basis for employees who go on parental or medical leave.
On the other hand, if a user’s role within the organization changes significantly, you might deactivate their current user profile and create a new one to align with their new responsibilities. Companies often go through reorganizations or mergers, and in that case, you might find that certain employees no longer need access.
Other reasons for deactivating revolve around security or compliance concerns. If you suspect that a user’s account has been compromised or you have security concerns about their account, deactivating it can help mitigate potential risks.
Certain industries and regions have strict compliance and regulatory requirements regarding user access to sensitive data. Deactivating users who shouldn’t have access can help maintain compliance.
Another reason could be just plain user error. If you accidentally created two profiles for a user, you should remove one and clean up any duplicate data. Last, you might deactivate a user just to free up licenses. Salesforce licenses are often limited by the number of active users, and deactivating unnecessary users can help manage license costs.
What to do before deactivating a user in Salesforce
Before deactivating a user in Salesforce, it’s important to take several steps to ensure a smooth transition, maintain data integrity, and comply with any internal or regulatory requirements.
Here’s a checklist of things to do before deactivating a user:
- Transfer ownership of records. Identify and transfer ownership of records and data the user owns to an active user or a designated admin. Use Salesforce’s record transfer tools to do this.
- Reassign workflows and approvals. If the user is part of any workflow rules, approval processes, or queues, reassign these to another user or update them as needed to prevent disruptions in business processes.
- Update reports and dashboards. Review any reports, dashboards, or analytics that rely on the user’s data. Modify them as necessary to reflect the new data ownership or access permissions.
- Back up data. Create backups of the user’s data, including their email templates, reports, and other Salesforce objects, if needed. This ensures that you won’t lose any critical information during the deactivation process.
- Consider your compliance requirements. If your organization has compliance requirements, be sure to follow any specific protocols or documentation procedures related to user deactivation.
- Follow company policies. Make sure your actions comply with your organization’s internal policies and procedures for user management and data security.
By following this checklist, you can minimize disruptions and maintain data integrity when deactivating a user in Salesforce. Effective planning and communication are keys to a successful user deactivation process.
How to deactivate Salesforce accounts
Here’s a step-by-step guide on how to deactivate a user in Salesforce:
- Log into Salesforce. Log into your Salesforce account with administrator privileges. You need administrative access to deactivate users.
- Go to the user record. Click on the App Launcher (grid icon) in the upper left corner and type “Users” in the search bar. Select Users from the dropdown results.
- Locate the user. Find the user you want to deactivate from the list of users. You can use the search bar or scroll through the list.
- Edit the user. Click Edit next to the user’s name.
- Deactivate the user. From the user’s profile, find the checkbox that says “active” and uncheck it.
- Save changes. After confirming the changes are correct, save them. This action will deactivate the user’s account.
- Verify the deactivation. To ensure the user is deactivated, you can go back to the list of users and see if the user’s status is now set as inactive.
Remember that when deactivating a user, it’s essential to follow best practices for data management, such as transferring ownership of records, ensuring there are no disruptions to critical processes, and maintaining data integrity. Communication with the affected user and/or their manager is also crucial to ensure a smooth transition and prevent any unexpected issues.
Photo by Karolina Grabowska


Send Comment:
1 Comment:
May 31, 2024
How to deactivate or delete a user in Salesforce.
You can't delete, why have a misleading title?