
Using the Notes object in Salesforce
- Create a new form with Jotform
- Under Basic Elements, click Short Text
- Choose Create or Update a record
- Select an object from the list
- Map your form fields to the corresponding data fields
- Click Save Action, and Save Integration, then Finish
Want to make a note for your sales team about an upcoming meeting with a customer? Unsure of where to save the notes you took during a phone call with a prospect?
Here’s where the Notes object in Salesforce comes in handy. As a way to capture free-form text directly related to various Salesforce records, the Notes object allows teams using Salesforce to keep track of important information without cluttering up other fields.
But how do you start using the Notes object in Salesforce? Read on to find out.
What the Notes object in Salesforce does
The Notes object in Salesforce is a feature that allows users to add text notes related to other objects and records like accounts, contacts, and opportunities.
You can view your notes in Salesforce under the Notes & Attachments related list on record pages.
Pro Tip
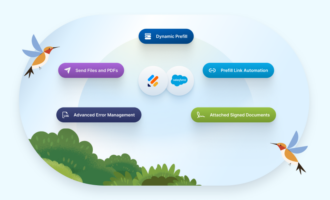
Streamline record management with Jotform Salesforce Agent, an AI chatbot that connects directly to Salesforce to retrieve, edit, or add notes conversationally and automate related tasks instantly.
How Notes and Attachments are different in Salesforce
While both Notes and Attachment objects allow you to connect additional information to Salesforce records and objects, they store that information differently. Notes are for capturing text-based information directly in Salesforce, whereas Attachments are for uploading files (such as Word docs, PDFs, images, videos, and spreadsheets) to supplement a record.
Create a new record of a custom Salesforce object from form submissions
DetailsAutomatically create a new record of a specified custom objects in Salesforce based on form submissions. Available in all Jotform plans, including the free, Starter Plan.
How to create a Notes object in Salesforce
Here’s a step-by-step guide for getting started with the Notes object in Salesforce:
- Navigate to any object tab — like an account, contact, or opportunity.
- Choose a record from the list.
- Click on New Note to open up the Notes editor.
- Fill out the fields, including Title and Description. Choose who you want the note to be visible to —just you, certain team members, or all internal users.
- Hit Save when you’re done entering your note. The note will now be saved and attached directly to that record.
Want to edit a note? Follow these steps:
- Click on the object in which you created the note.
- Select the record that the note is stored in.
- Click on the Related List tab, then select the note you want to edit.
- Select Edit, then make your desired changes.
- Click Save.
If someone else is the creator of the note, you may not have editing permissions. They can click on the Note Sharing Settings to give you access.
How you can use the Notes object in Salesforce
Given that the Notes object in Salesforce is designed to capture free-form text, the sky’s the limit on what you can use it for. You can use Notes for things like
- Capturing meeting minutes or call summaries
- Saving internal comments or reminders related to a customer
- Adding background info on prospects that sales reps should know
- Jotting down next steps and follow-ups after interactions
- Creating Q&As about customer needs and pain points
Having this open field makes it easy to capture critical contextual information without the limitations of other structured fields.
How to integrate the Notes object in Salesforce with Jotform
Jotform is a powerful online form builder that integrates seamlessly with Salesforce. By using Jotform alongside Salesforce, you can capture more information to funnel to Salesforce, which you can then use to manage deals from start to finish.
Here are some key Jotform features that make it an ideal addition to the Salesforce ecosystem:
- Its drag-and-drop form builder allows you to quickly create customized forms without coding.
- Conditional logic, calculations, and other advanced form options let you capture complex information.
- Jotform connects to Salesforce with just a few clicks — no complex setup or coding needed.
While Jotform is a powerful online form tool that syncs information (such as name, address, email, and phone) directly into Salesforce records, it doesn’t yet have a feature to integrate note-taking within Jotform to the Notes object in Salesforce.
That said, there’s a workaround: the short text element for custom fields. Designed to connect your Jotform fields to custom fields in Salesforce (such as URL or currency), you can use it to capture notes, just not in the standard Notes object.
To do this, simply follow these steps:
- Create a new form with Jotform.
- Under Basic Elements, click Short Text.
- Once you’ve integrated your Jotform and Salesforce accounts, choose Create or Update a record.
- Select an object from the list.
- Map your form fields (including Short Text) to the corresponding data fields (including your custom Salesforce field).
- Click Save Action, then Save Integration, then Finish.
Your form data will now sync to Salesforce every time someone submits a response.
Why you should power your Salesforce toolkit with Jotform
The Notes object in Salesforce is essential for including additional information in records. The key to success is finding a workflow that fits your use case and company needs.
Given that Jotform’s drag-and-drop builder and 20,000-plus templates make creating branded forms simple and intuitive, combining it with Salesforce’s custom fields provides a robust system for managing unstructured data and keeping your team aligned. This syncing allows you to set up note-taking in a way that works best for your business.
Photo by George Milton


Send Comment: