
Making a checkbox grid in Google Forms
- Create a new Google Form
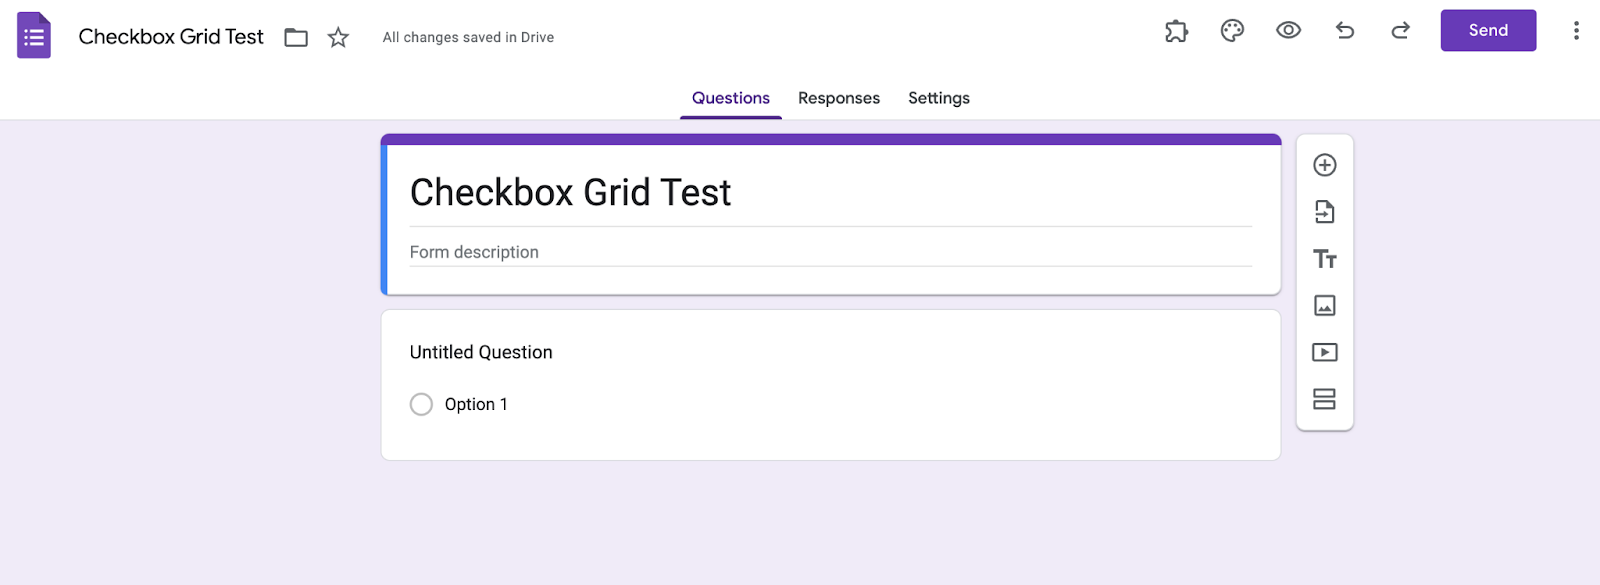
- Click on the plus sign icon
- Add your question in the Question field
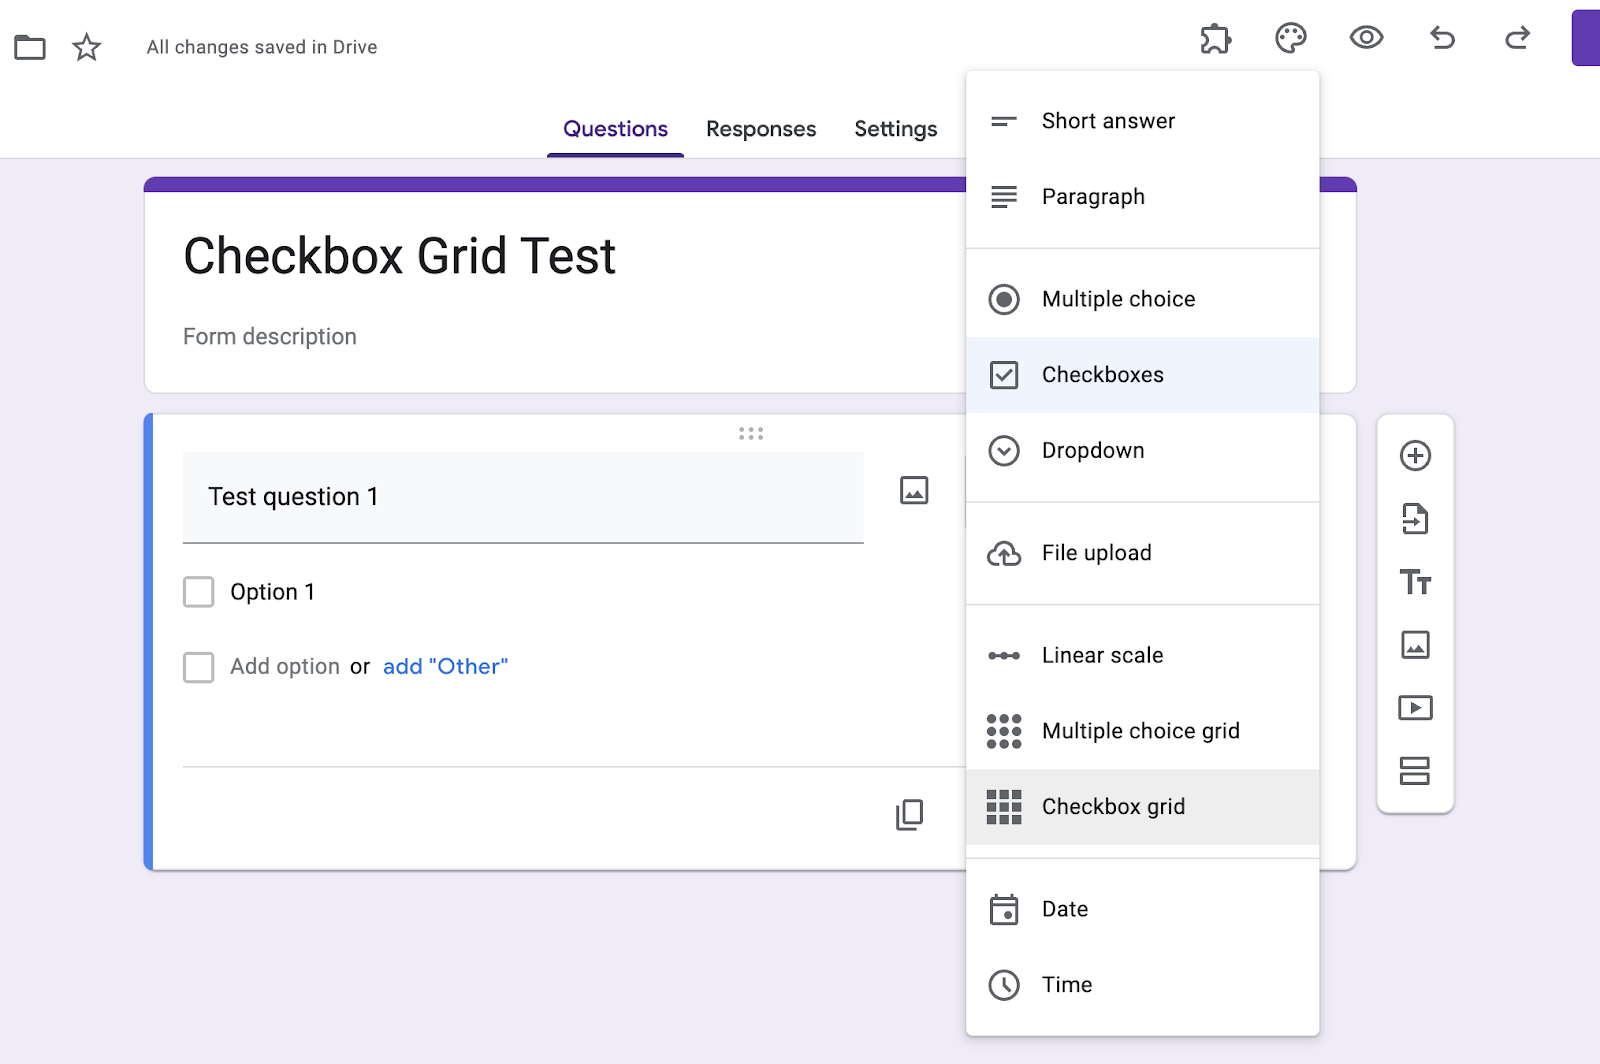
- Click the dropdown menu to the right of the question field
- Select Checkbox grid
- Edit the table according to your needs
- Toggle on the option to Require a response in each row
- Click on the eye icon at the top of the page
- Check your form
- Send your form to recipients to fill out
Interactive step-by-step tutorial
Whether you’re conducting your first survey or your 400th, you know there are lots of different ways to ask and answer questions. One of those ways is a checkbox grid, which lets respondents choose multiple answers from a provided answer set involving different sets of criteria.
Many online form builders let you use checkbox grids, but it isn’t always intuitive. Adding a checkbox grid in Google Forms, for example, can be complex. This article will explain how to do it.
But first, let’s look at checkbox grids in more detail.

Looking for the best alternative to Google Forms?
Jotform’s full-featured form-building solution is mobile-friendly and has the most integrations in the industry. Use it to collect payments, automate workflows, gather leads, and more.
How checkbox grids work
In a survey, a checkbox grid is a type of answer format that presents multiple answer options in an easy-to-understand, table-like grid. People commonly use it to ask complex questions with multifaceted responses.
The table format displays all available answers at the same time, organized in rows and columns, making it easy for users to compare options. The checkbox format allows users to choose all responses that apply to them, rather than just one.
Checkbox grids make it easy to collect structured data that’s easy to analyze and cross-reference.
Here are a few examples of questions that checkbox grids work best for:
- Likert scale or rating questions (e.g., “Please indicate your level of agreement with the following statements.”)
- Feature and attribute comparisons (e.g., “Which of the following features are important for these products?”)
- Scheduling questions (e.g., “Please check all dates and times you are available.”)
- Data filtering or segmentation questions (e.g., “Which of the following marketing channels have you used in the listed years?”)
How to use checkbox grids in Google Forms
Now that we know more about checkbox grids, let’s look at how to create them in Google Forms.
- From the homepage of Google Forms, either create a blank form or choose one of the templates.
- To add a new question, click on the plus sign icon at the top of the vertical menu on the right side of the page.
- Fill in the question field with whatever you’d like to ask.
- Click the dropdown menu to the right of the question box.
- Select Checkbox grid from the dropdown menu.
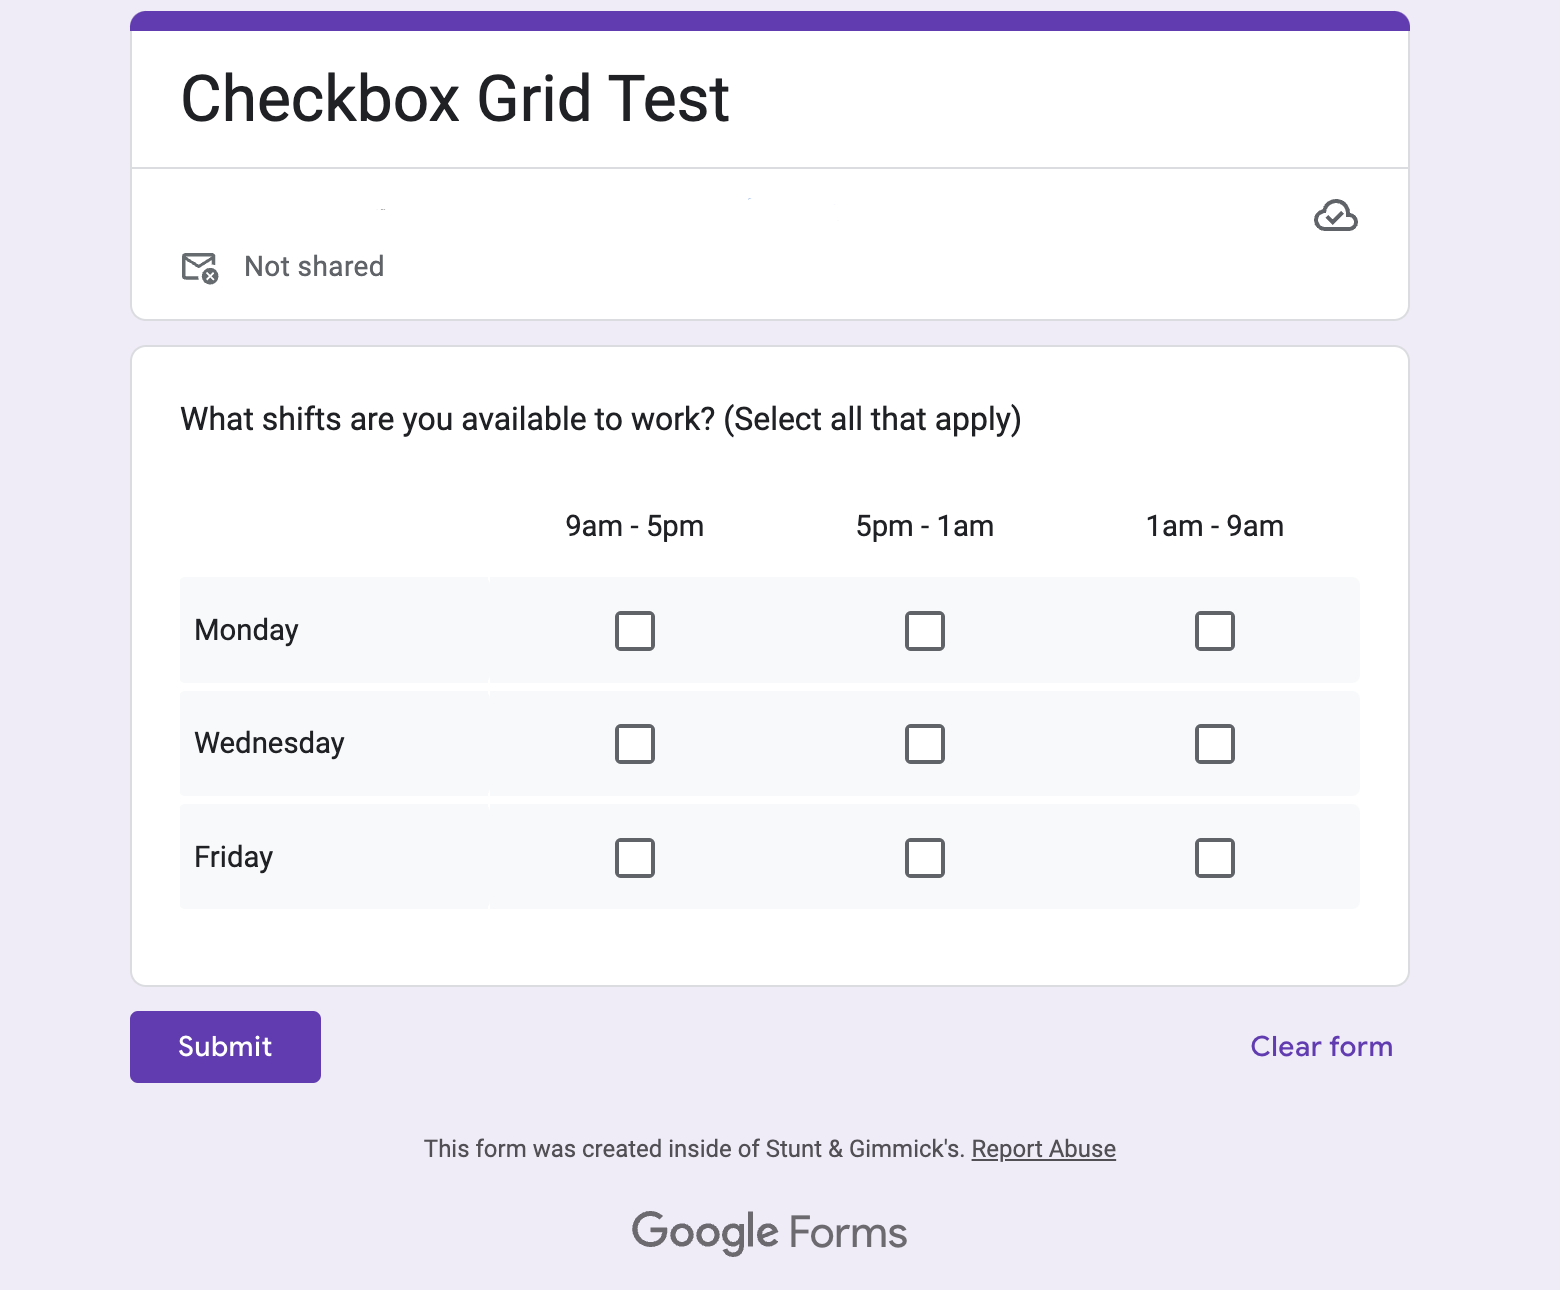
- This will create a checkbox grid you can customize. Add rows and columns as needed and enter your desired information. This example shows a checkbox grid used for scheduling shifts.
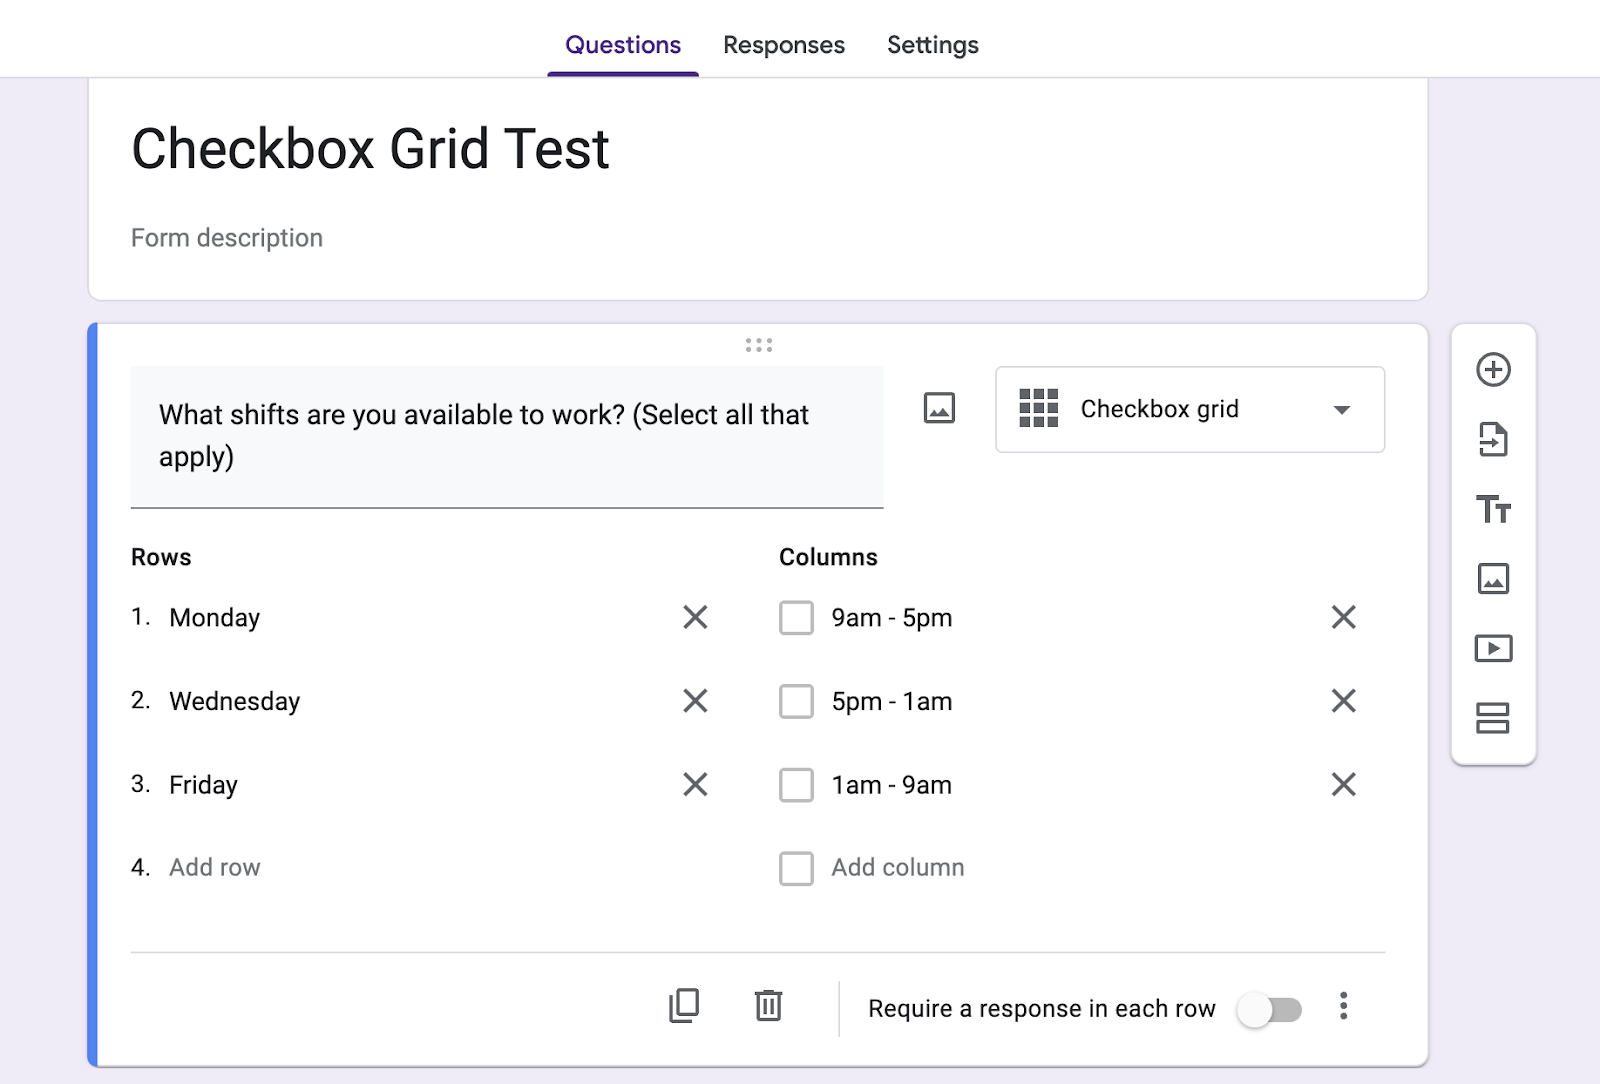
- If necessary, toggle the Require a response in each row option to prevent respondents from accidentally missing a response.
- Next, preview the form to see what it will look like for respondents by clicking the eye icon from the menu at the top of the page.
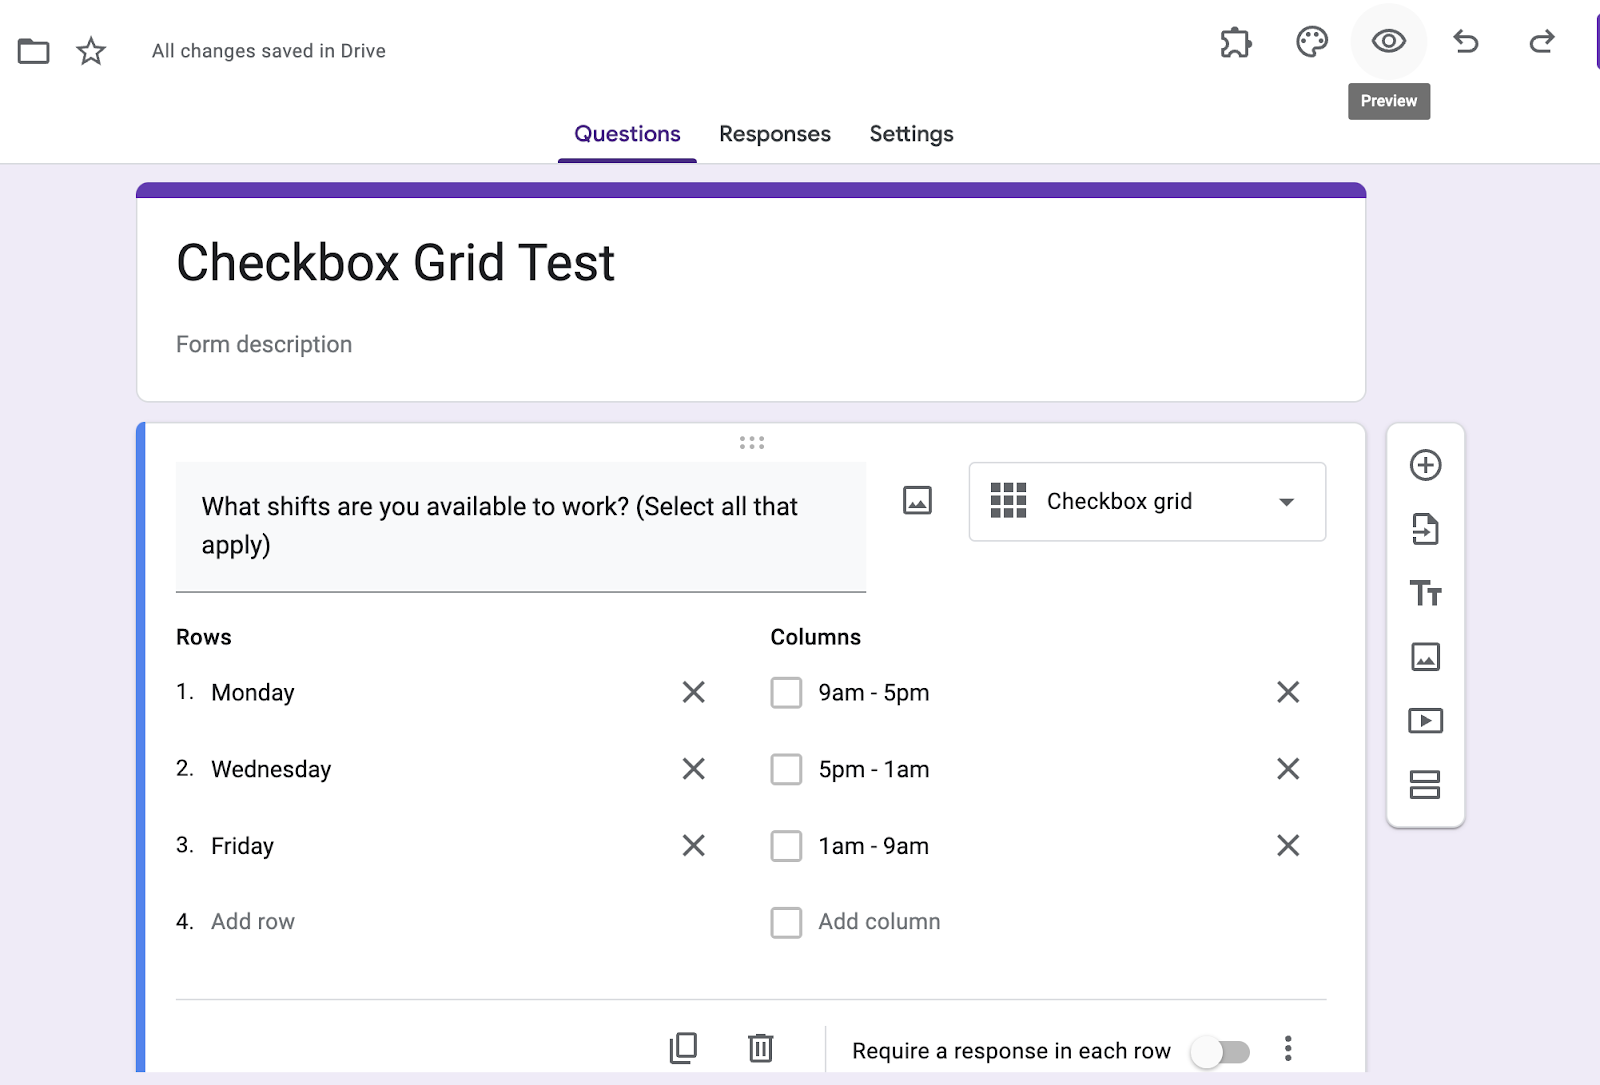
- Check to make sure your form has everything it needs.
- Once you’ve edited the form to your liking, you can send it to recipients to fill out. Click the Send button at the top right of the page and choose how you’d like to share your form.
How to shuffle row order in Google Forms
In certain situations, you may want to randomly shuffle your checkbox grid’s row order to avoid placement-based bias in responses. For example, some users may be more inclined to click answers in the first or last rows.
Google Forms has a shuffle function. In the checkbox grid box, click the three-dot icon in the bottom-right corner and select Shuffle row order. The form will then display the rows in a different order for different users.
How the Google Forms checkbox grid compares to a multiple-choice grid
A multiple-choice grid is another table-based question type. Unlike a checkbox grid, it allows users to select only one option from each row, while a checkbox grid allows users to select multiple options from each row.
If you want users to be able to select all the answers that apply to them, use a checkbox grid. If you want users to select only one answer per row, then go with a multiple-choice grid.
Here’s a summary of the key differences between checkbox grids and multiple-choice grids.
| Multiple-choice grid | Checkbox grid |
|---|---|
| Allows one selection per row | Allows multiple selections per row |
| If enabled, allows one selection per table | Allows multiple selections across the entire table |
| Useful for ratings/numerical scale questions | Useful for appointments/scheduling |
How to make a checkbox grid with a powerful Google Forms alternative
Google Forms is far from the only online form builder available. Jotform, for example, allows users to create and customize a wide array of surveys, quizzes, applications, and other forms with a convenient drag-and-drop interface, offering advanced customization capabilities without any need for coding.
The platform features over 20,000 (and counting) customizable form templates for every need, making it a versatile solution for collecting data, processing payments, and automating workflows.
Jotform’s intuitive and user-friendly interface makes it an ideal alternative to Google Workspace — and one that enables more customization.
With Jotform’s input table feature, it’s extremely easy to make a checkbox grid. Here’s how:
- Log into Jotform and select Create Form on your homepage.
- In the Form Builder, click the Add Form Element option on the left side of the screen.
- Scroll down to the Survey Elements section and click Input Table. This will add an input table to your form.
- To convert the input table to a checkbox grid, click the gear icon on the right side of the field. A menu will open on the right side of the screen. Select the Fields tab, and under Input Type, click the Checkbox option. This will convert the table to a checkbox grid.
- Easily customize the input table within the Input Table Properties menu, which you can open at any time by clicking the gear icon to the right of the table form field. The Field tab lets you add, delete, and edit columns and rows.
- When your form is complete, toggle on Preview Form at the top right of the Form Builder screen to see what the final form will look like to recipients.
See it in action 👇
Checkbox grids are one of the best ways to collect in-depth and highly structured data from your surveys. They are a critical part of many marketing, customer satisfaction, and user experience campaigns.
There are many online form builders that let you build robust checkbox grids, but not all of them offer Jotform’s level of convenience and customization. If making a checkbox grid in Google Forms doesn’t work for you, give Jotform a try instead.
Other Resources:
Google Form multiple choice vs checkboxes
FAQ
The checkbox grid is a closed-ended question format, so you can’t collect open-ended answers. If you’d like to get more details about a specific topic, you can add a separate open-ended question to your form that asks users for additional information.
If you want users to select only one option in a column, open the menu in the bottom right corner of the question box and click Limit to one response per column.
Checkbox grids are ideal for any closed-ended question that has multiple options for multiple criteria — for example, if you want to know both the dates and times when respondents are available, or if you want to compare how users evaluate multiple products on the same rating scale.
Photo by Anna Shvets


Send Comment: