
Steps to grade Google Forms
- Create a Google Form
- Click on Responses
- Click on the Google Sheet Icon
- Click Create
Interactive step-by-step tutorial
Even before COVID-19 turned the classroom experience on its head, teachers were exploring new digital media to use with their students. Now that students have returned to in-person learning, there’s still plenty of room for technology to play a role in teaching.
This trend isn’t new, of course. A 2019 report from Gallup and the NewSchools Venture Fund found that 65 percent of teachers used digital tools daily in class, and 71 percent of students used them to do their homework when they’re not at school. These tools are hallmarks of the modern learning environment, so educators should familiarize themselves with what’s at their disposal.
One of these tools is Google Forms, which you can easily use to build quizzes and share them with students. Though building a quiz is simple enough, you still have to evaluate and score students’ responses. Here’s how to grade a Google Form.

Looking for the best alternative to Google Forms?
Jotform’s full-featured form-building solution is mobile-friendly and has the most integrations in the industry. Use it to collect payments, automate workflows, gather leads, and more.
Grading Google Forms quizzes
Google Forms has a user-friendly design that makes creating quizzes simple. But figuring out how to grade Google Forms takes a bit more than intuition. Thankfully, a few special features make grading particularly helpful for not only collecting results but also identifying problem areas for your students, potentially revealing opportunities to incorporate new approaches in your curriculum.
Note: In order to be able to grade a form, you’ll first need to designate it as a quiz. In your Google Form, under Settings, make sure to toggle on Make this a quiz.
Pro Tip
Create online quizzes, tests, and homework forms with Jotform. You can even use conditional logic to grade them automatically!
Grading responses
Google Forms allows you to respond to students’ answers differently, depending on the type of questions and style of feedback you want to provide. For example, if your quiz is composed of multiple-choice or short-answer questions, you’ll likely have a simple answer key that assigns points to correct answers.
Short-answer or multiple-choice questions
Every time you create a Google Form, you can automatically generate an accompanying Google Sheet that displays all the responses to help you calculate a number or letter grade. To do this, just follow these steps:
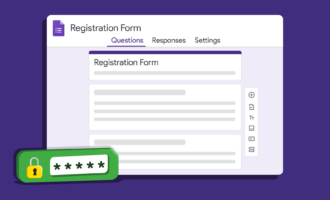
- At the top of your form, you’ll see tabs for Questions, Responses, and Settings. Click on Responses.
- In the top right corner, you’ll see the green Google Sheets icon. Click on that to create a new spreadsheet with all the responses from your form.
- Enter a name for your new spreadsheet. Then click Create.
With these simple steps, you’ve created a grading grid to collect all your students’ results. You can use this chart to quickly tabulate scores for shorter-form questions with specific responses.
Long-form questions
For questions with longer responses, such as essay questions, Google Forms provides more in-depth ways for educators to give feedback to each response, using this method:
- On your form, click the Responses tab.
- You’ll see three options: Summary, Question, and Individual. Click on Individual to see individual responses to each question.
- For long-form questions that don’t have one correct answer, you can score the response by entering a number or using the arrows in the upper right of the question box.
- For more detailed feedback, you can click on the tab below the box marked Add individual feedback to write comments or provide links.
To get insights about overall student performance on the quiz, return to the Responses tab and click on Summary to see a visualization of the results. These insights reveal the most frequently missed questions as well as the average, median, and range for all scores.
Releasing grades
Google Forms offers different ways to release grades to students. Chances are, you won’t want to go with the default settings, which immediately show students their scores after they submit a quiz.
Instead, make a few back-end changes before you share your quiz with students:
- Click on the Settings tab above the quiz.
- Under Release Grades, change the setting to Later, after manual review. This means students won’t get their grades automatically — they’ll only see them after you’ve had a chance to review the responses and add feedback.
- Selecting the Later, after manual review option automatically enables Collect email addresses under the Responses tab. This requires users to log into Google to fill out the quiz and allows you to collect students’ email addresses. With this information, you can associate responses with individual students and open separate email conversations about their performance.
- At the top-right of the page, click the Share button to send the quiz via email. You can also copy the quiz link to share it on social media by clicking Copy responder link at the top-right, or embed the quiz on a website by clicking More (three dots) at the top-right and selecting Embed HTML.
Grading with Jotform
As it turns out, Google Forms isn’t the only form builder you can use to build quizzes and tests. Jotform is a similarly easy-to-use tool with powerful customization and grading features to boot.
If you know how to grade Google Forms, getting a handle on Jotform will be even easier. First, get started by customizing one of Jotform’s quiz templates, many of which are built for common school subjects. Then, you can easily repurpose these forms into exams with the Jotform Quiz App. This tool lets you set the correct answers ahead of time and automatically calculate scores for each student.
The way we teach kids is changing. With powerful technology, you can make testing more efficient and effective. Whether you use Google Forms or Jotform to accomplish these tasks, you have access to a whole new world of educational tools that can enhance your classroom and make student learning more hands-on than ever.
See also Jotform’s detailed guide about: Google Forms


Send Comment: