
Embedding a Google Form in an email
- From your Gmail, open Google Drive
- Select New
- Hover over the arrow next to Google Forms in the dropdown
- Select From a template
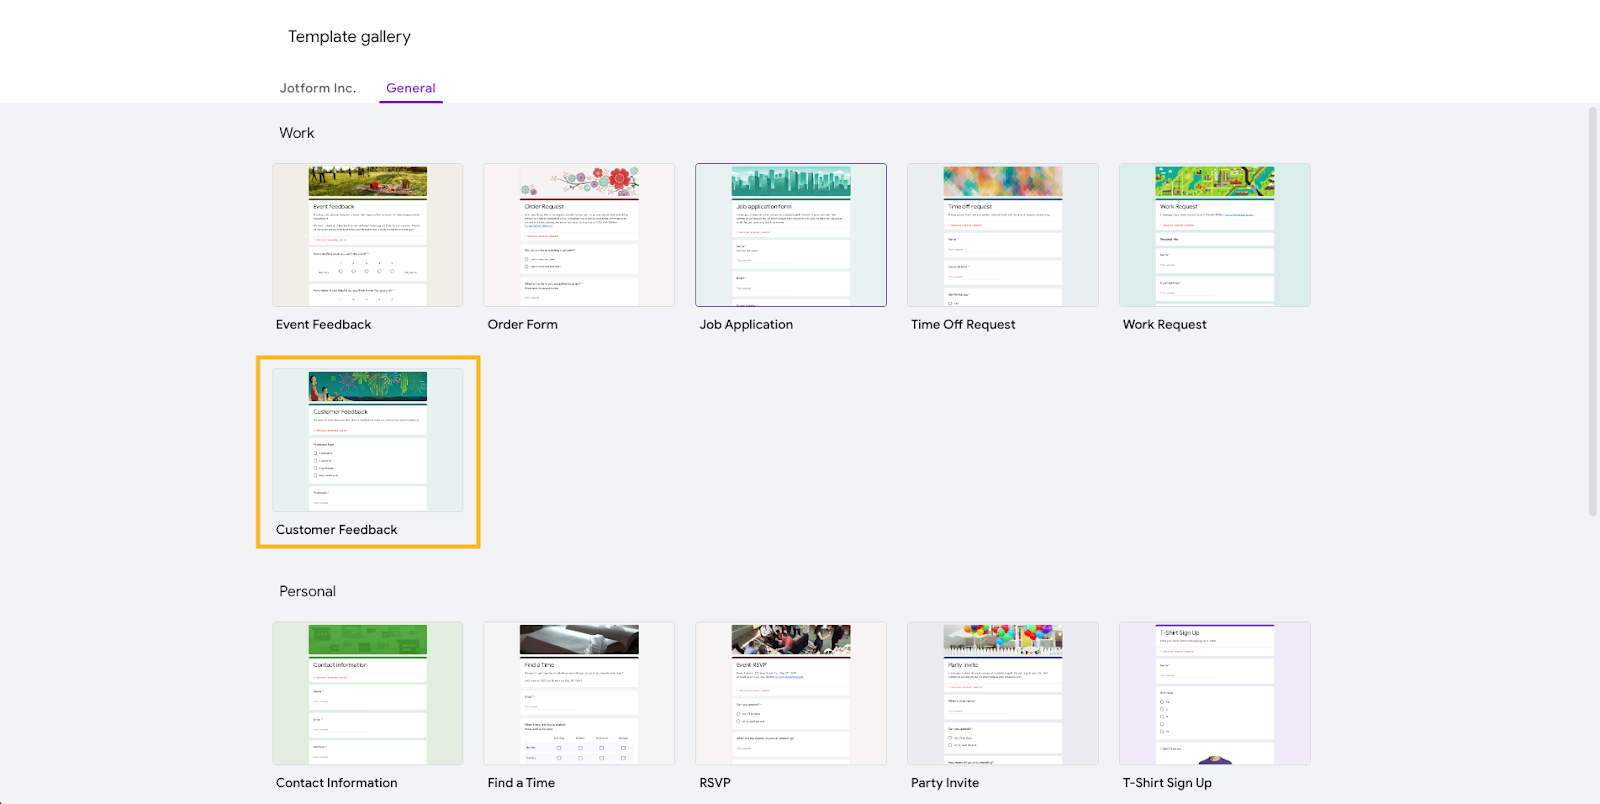
- Select Customer Feedback
- Click Send in the upper right corner
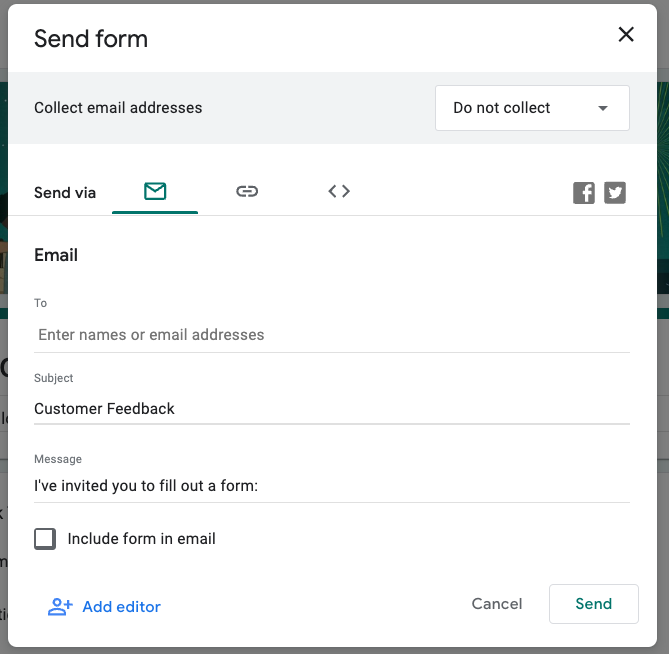
- Enter the recipient’s email address as well as your subject line and message
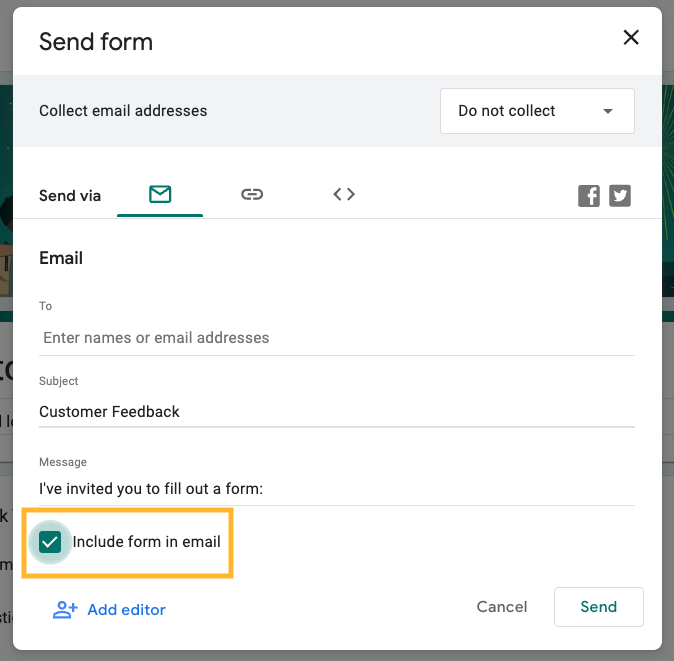
- Select the box next to Include form in email
- Click Send
One of the easiest, most effective ways to grow and scale your business is by engaging with your existing and prospective customers. You can interact with them on social media, host a webinar, or even just reach out via email through a fun quiz, customer feedback survey, or e-newsletter.
While email marketing services like Mailchimp, ActiveCampaign, and MailerLite are great options for creating and embedding creative content into emails, they’re not the only ones.
An online form builder like Google Forms can also help elicit customer feedback and foster engagement, and it’s much simpler to use than a mass mailer solution. Google Forms is also free and includes a good selection of templates and design tools to customize your forms.
To take advantage of the platform as a customer interaction tool, all you have to do is embed a Google Form in an email.

Looking for the best alternative to Google Forms?
Jotform’s full-featured form-building solution is mobile-friendly and has the most integrations in the industry. Use it to collect payments, automate workflows, gather leads, and more.
How to embed a Google Form in an email
Here’s how to embed a Google Form in an email:
- From your Gmail, open Google Drive by clicking on the grid of dots in the upper right. (While you can use another email platform to send a link to your Google Form, you can only directly embed a Google Form in an email using a Gmail account.)

- Select New in the top left corner.

- Hover over the arrow next to Google Forms in the dropdown. You’ll see three options: Blank form, Blank quiz, or From a template.

- To keep things simple for this illustration, select From a template. (Keep in mind that you can use Google Forms to create a form or quiz from scratch.)
- Select Customer Feedback.
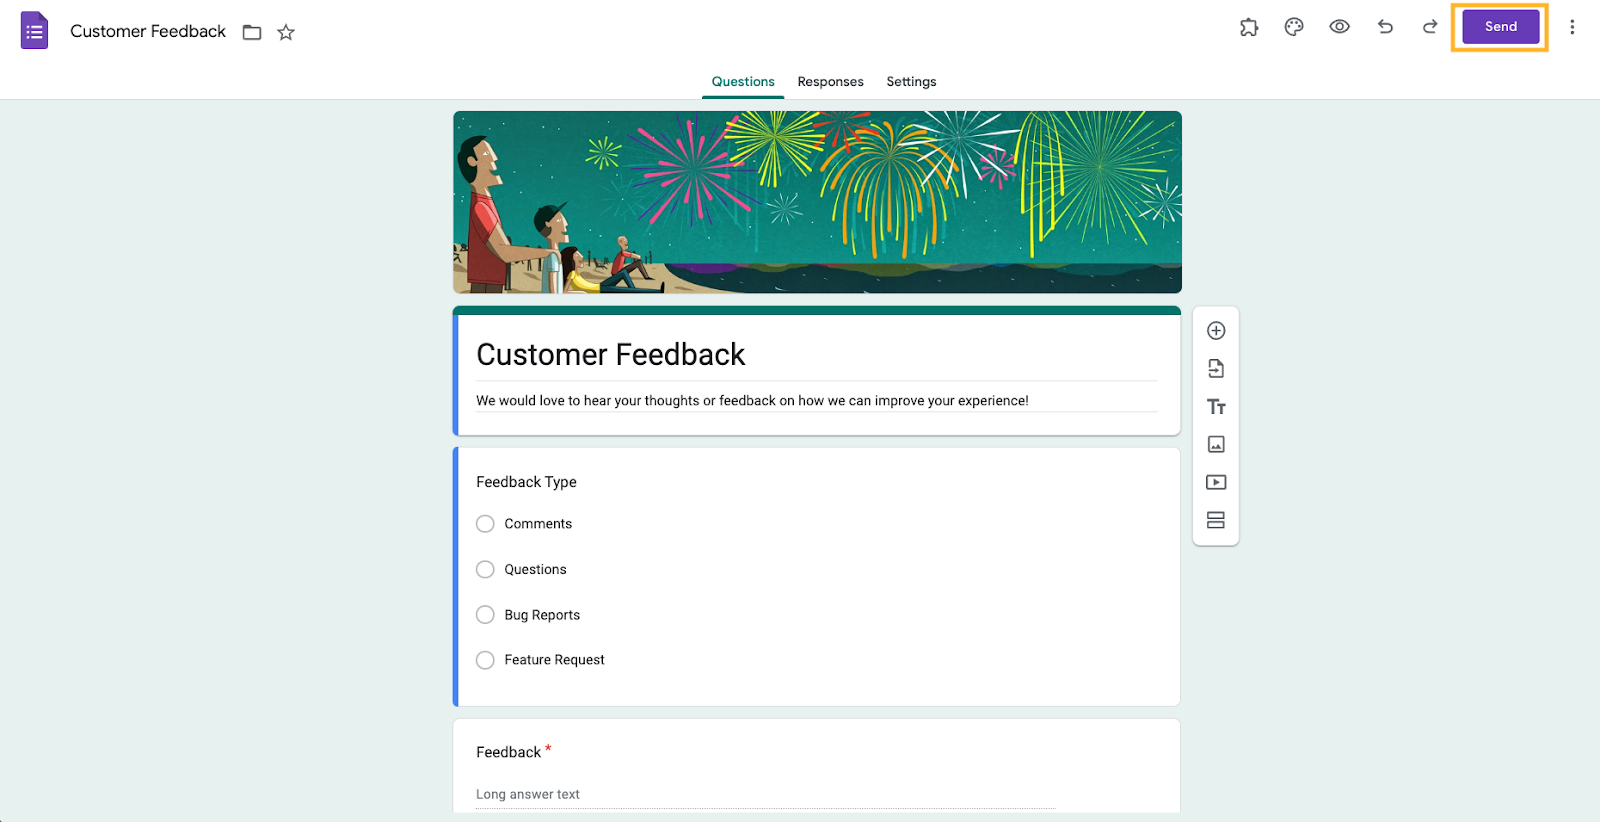
- Once you’ve customized the form, click Send in the upper-right corner.
Pro Tip
Before you send your email, check out the Responses and Settings tabs for even more form customization. For example, you can opt to receive email notifications when forms are submitted or edit the confirmation message that lets respondents know their answers were successfully submitted.
- Enter the recipient’s email address as well as the email subject line and message. (You can also copy the Google Form link here by clicking on the link icon if you want to use a different email provider or share your form on social media.)
- Select the box next to Include form in email.
- Click Send.
Congratulations! You now know how to embed a Google Form in an email.
How to track form responses in Google Forms
Google Forms also gives you the ability to see, manage, and track the responses to your form. There are a couple of different ways to do this.
Option 1: Enable email notifications for form responses
Turn on this feature if you want an email notification every time a respondent submits a form.
- Go to your Google Form and click on the Responses tab at the top.
- Select the three vertical dots option at the top right.

- Click on Get email notifications for new responses.
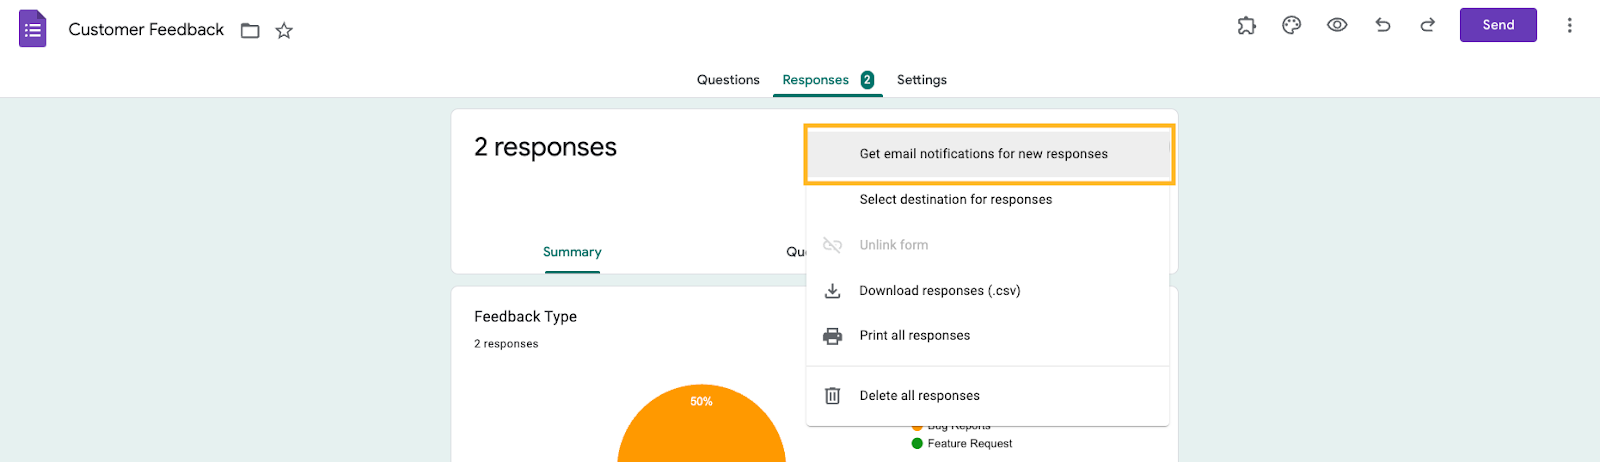
You’ve now activated this feature. Every time a respondent submits a form, you’ll receive a notification in the Gmail account associated with the form.
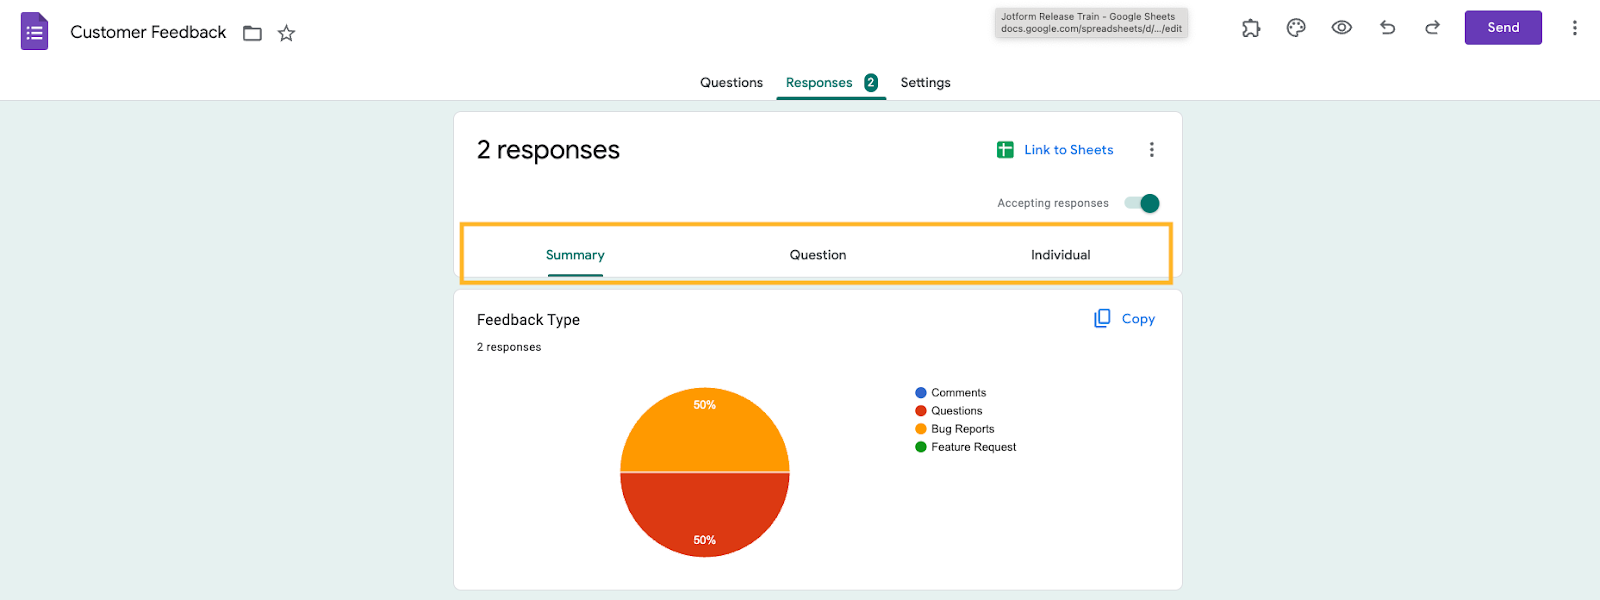
Option 2: View answers in the Responses tab
If you just want to view all the responses, click on the Responses tab. You can see the responses in three different areas:
- The Summary sub-tab provides you with a brief overview of all the responses.
- The Question sub-tab provides you with a breakdown of responses by question.
- The Individual sub-tab provides you with a detailed view of each individual answer for your form.
Option 3: Send Google Forms responses to a Google Sheet
If you’d like to view and track form responses in a spreadsheet, you can easily connect your Google Form to a Google Sheet.
- Go to your Google Form and click on the Responses tab at the top.
- Click Link to Sheets at the top right.

- Choose Create a new spreadsheet or Select existing spreadsheet, depending on your needs.
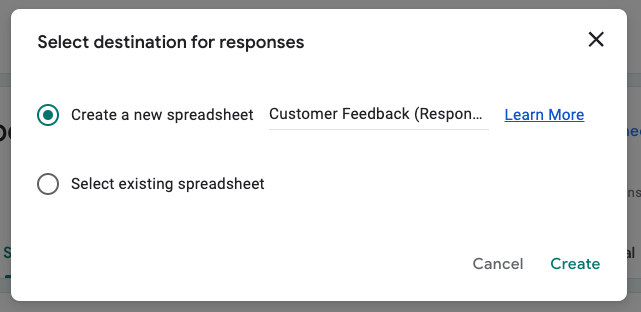
Your form responses will now immediately feed into the Google Sheet you’ve selected.
Why you might want to embed Google Forms in an email
It’s perfectly acceptable to just include a link to the Google Form in your email, so why should you bother with the additional step of embedding the form?
Here are some reasons for doing it:
- It removes an additional step for the form respondent. When you embed the form within the email, the customer doesn’t have to click through to the form. It’s already there for them to see and fill in, making it more likely they’ll take action.
- It increases your chances of getting form responses. Many customers skim through emails without reading them in detail. They may scroll past a form link, but an entire form is too big to miss!
- It makes emailing forms easier. Embedding a form in your Gmail involves just a few steps, and it can be significantly easier than using a complicated mass mailing system that requires specialized coding knowledge in order to embed items in the body of an email.
How embedding forms in email benefits your data collection
The point of sending out forms is to get responses, right?
One of the main advantages of embedding a form within an email for data collection is the smooth experience you’ll create for your user, which will improve your odds of getting responses. You’ll be removing the obstacles in their way because they won’t have to click on a link.
In addition to providing the benefit of a smooth user experience, you’ll also build goodwill with respondents in the process. The customer will appreciate your efforts in making it easier for them to see and fill out the form.
However, it’s also possible to create a smooth user experience without embedding a form. In some cases, you may not have room for an entire form within the body of the email. In other cases, you may want to limit who sees the form if it contains confidential information, so embedding it may not be the best choice.
In these cases, you can simply include a link to the form within the email and clarify what the link leads to with text, such as “Click here to see the registration form.” This simple workaround still makes it clear where the link leads, and it’s easy to understand from a user perspective.
How to use a Google Forms alternative: Jotform
Google Forms isn’t the only online form builder on the market. Jotform is one of Google Forms’s biggest competitors, thanks to its library of 10,000-plus form templates, drag-and-drop functionality, mobile payment processing capabilities, robust integrations, powerful Report Builder, and top-notch security.
Jotform is simple to use, fully customizable, and completely code free, helping even those with no design or coding experience make professional-looking forms. However, unlike Google Forms, you can’t embed a Jotform in an email, and that’s for security reasons.
Jotform prides itself on the way it protects forms and user data — thanks to encrypted forms, Payment Card Industry (PCI) certification, and spam protection — and embedding a form into an email compromises Jotform’s security standards.
Instead, for a safer, more reliable user experience, you can share a link in an email that will allow respondents to access your form with a single click.
Here’s how to do it:
- Go to the Jotform Form Builder and click on Create Form.

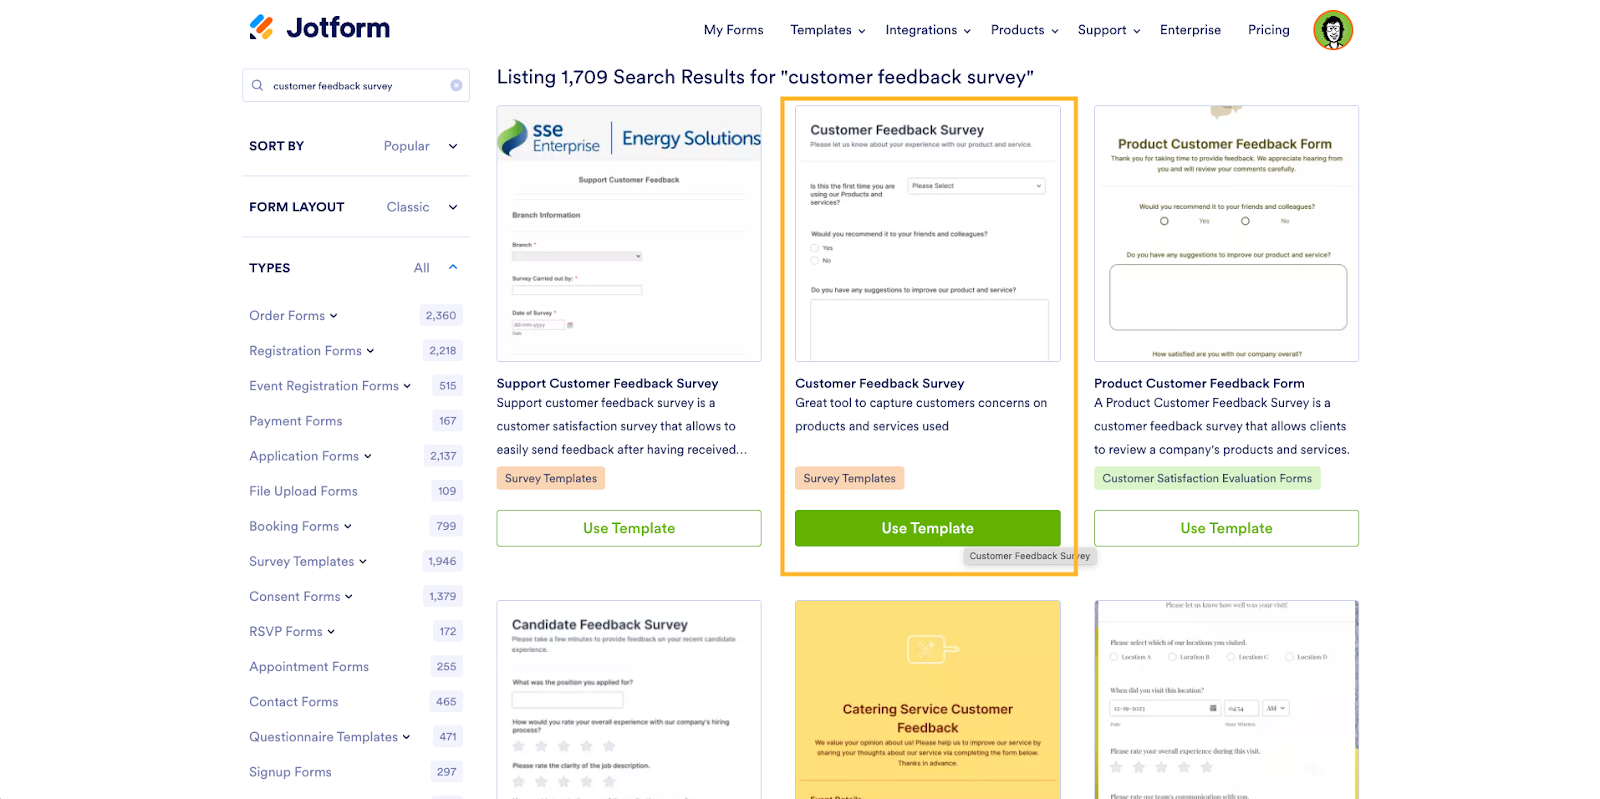
- Choose a premade template or build your own from scratch. Sticking with the earlier Google Forms example, let’s select Use Template.
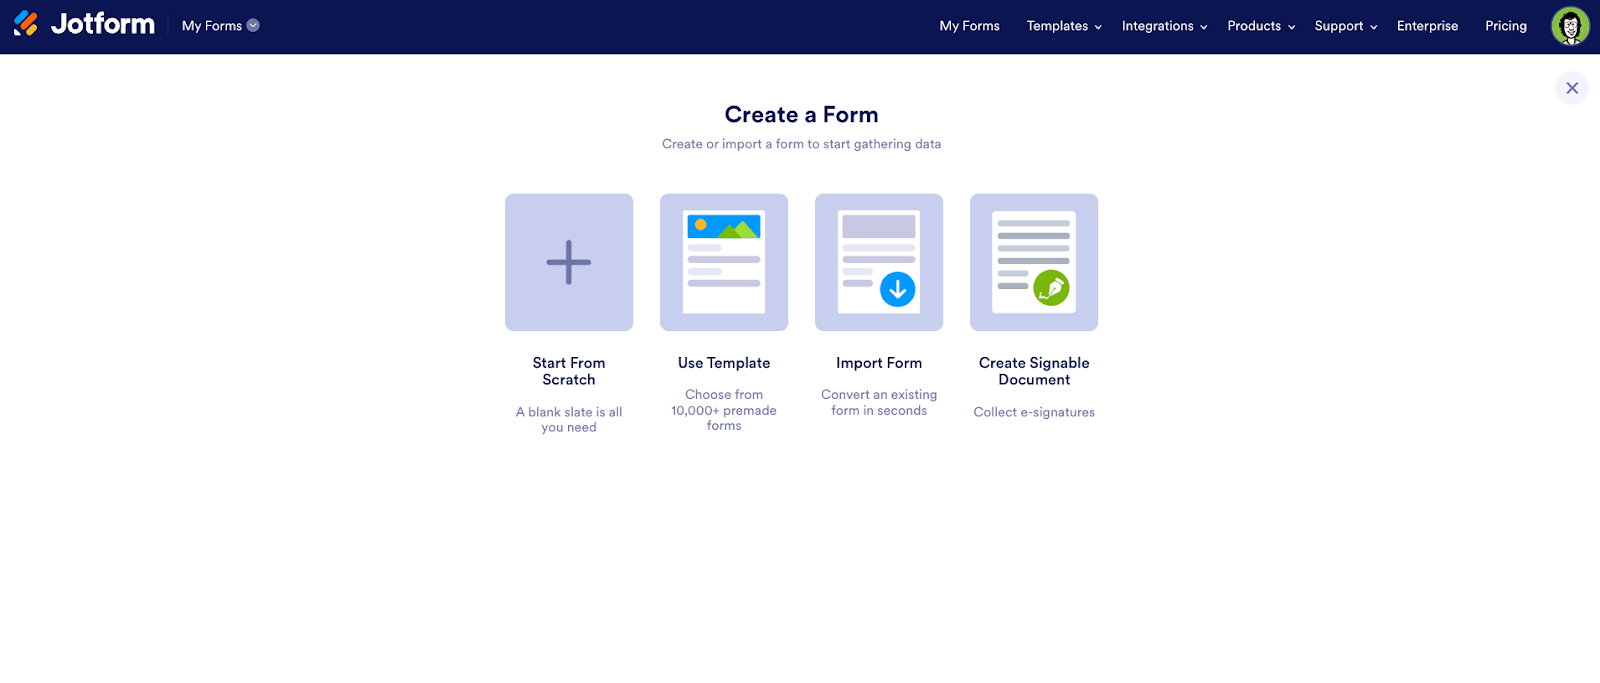
- Search for “customer feedback survey” in the template library and select one.
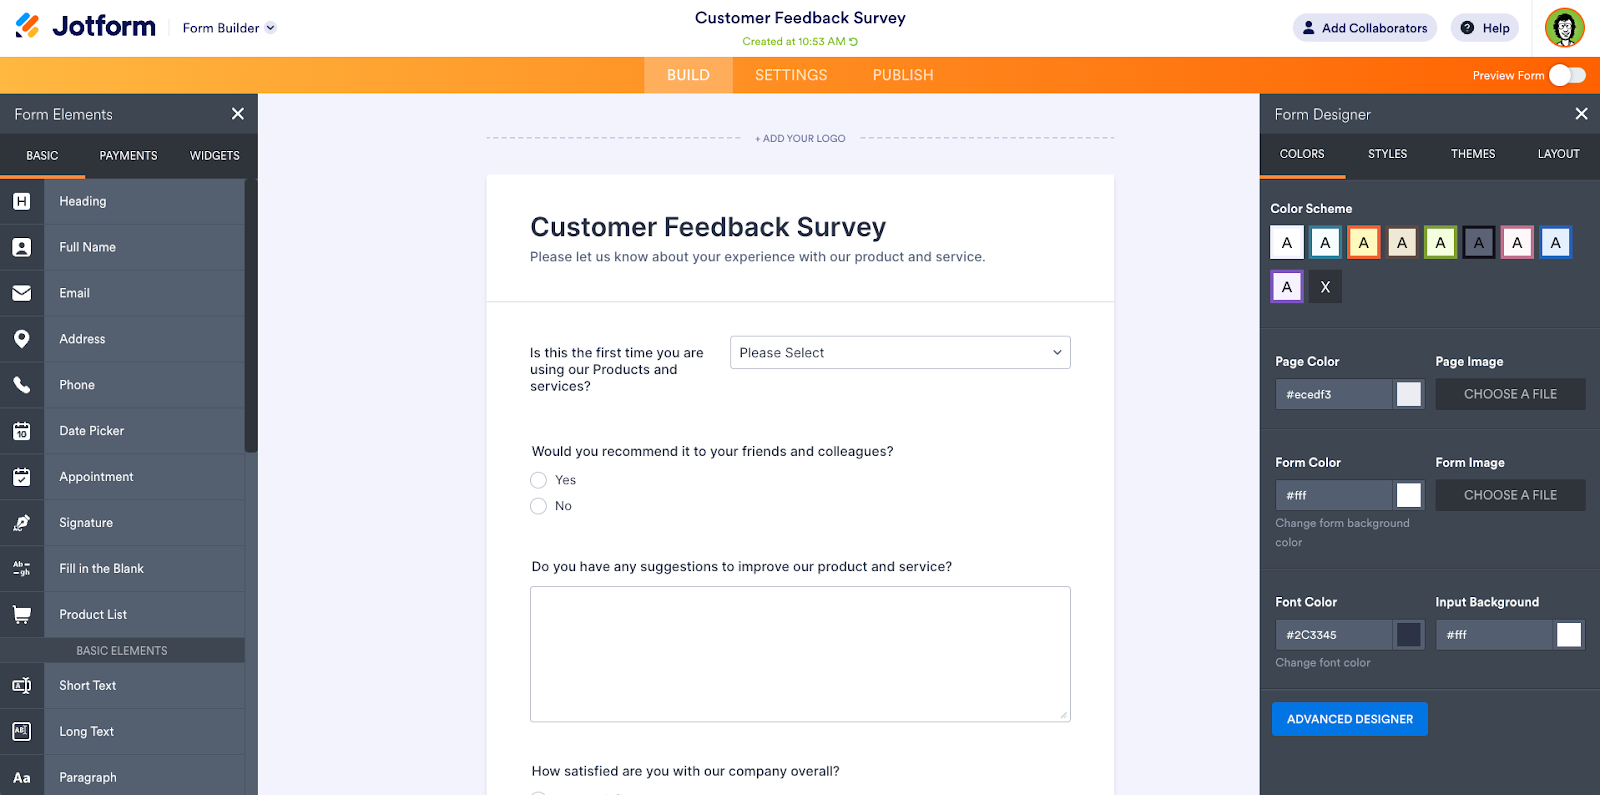
- Customize the form by adding your logo, changing its colors and fonts to match your brand, and more. Drag and drop form elements from the right to add more questions or click on the existing questions to edit them if you’re looking for feedback on specific topics.
- Once you’re happy with your form, click Publish at the top of the Form Builder.
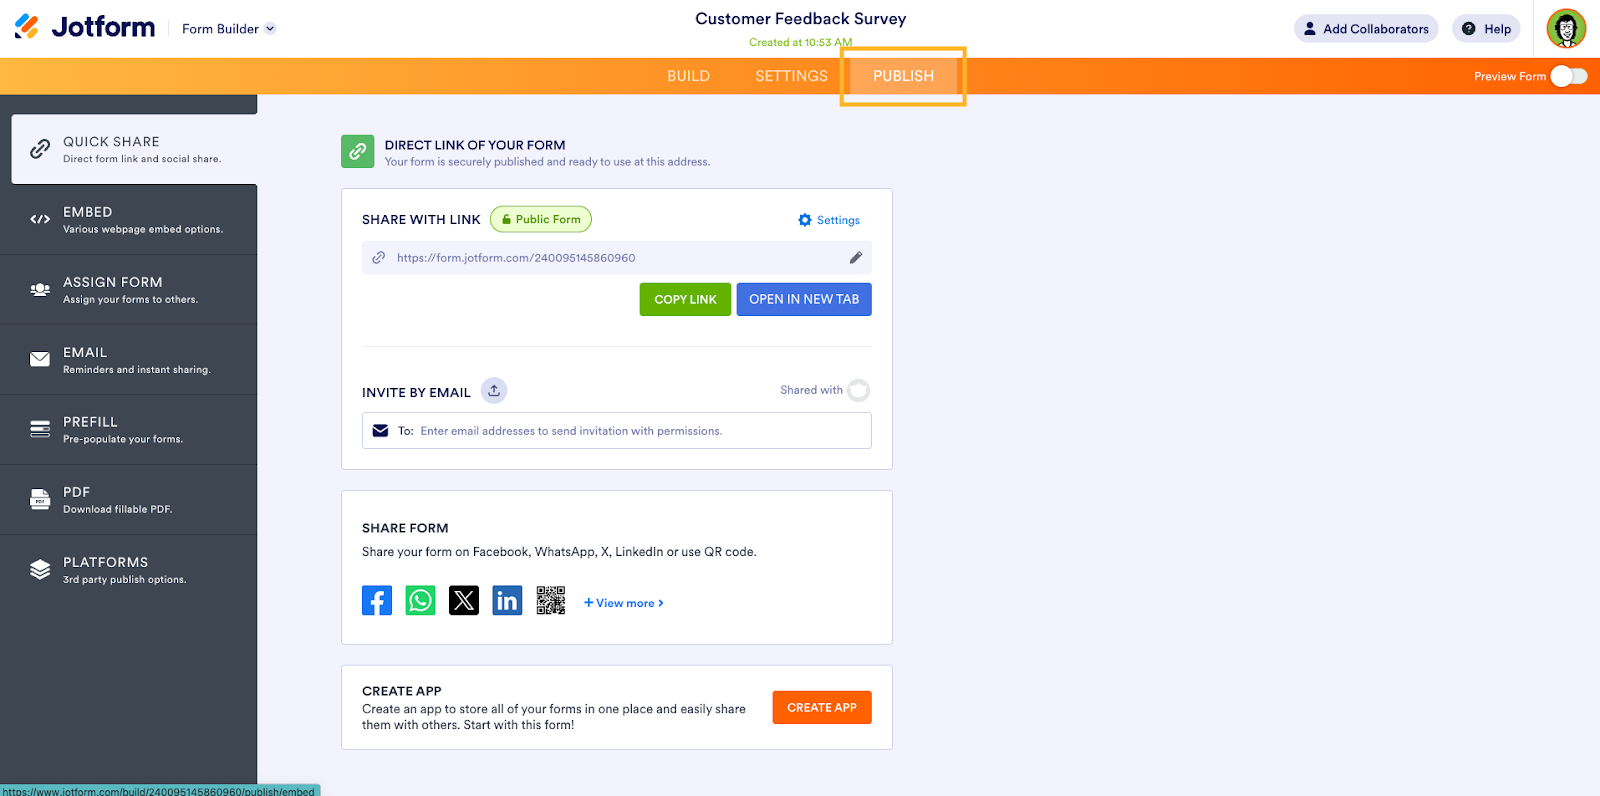
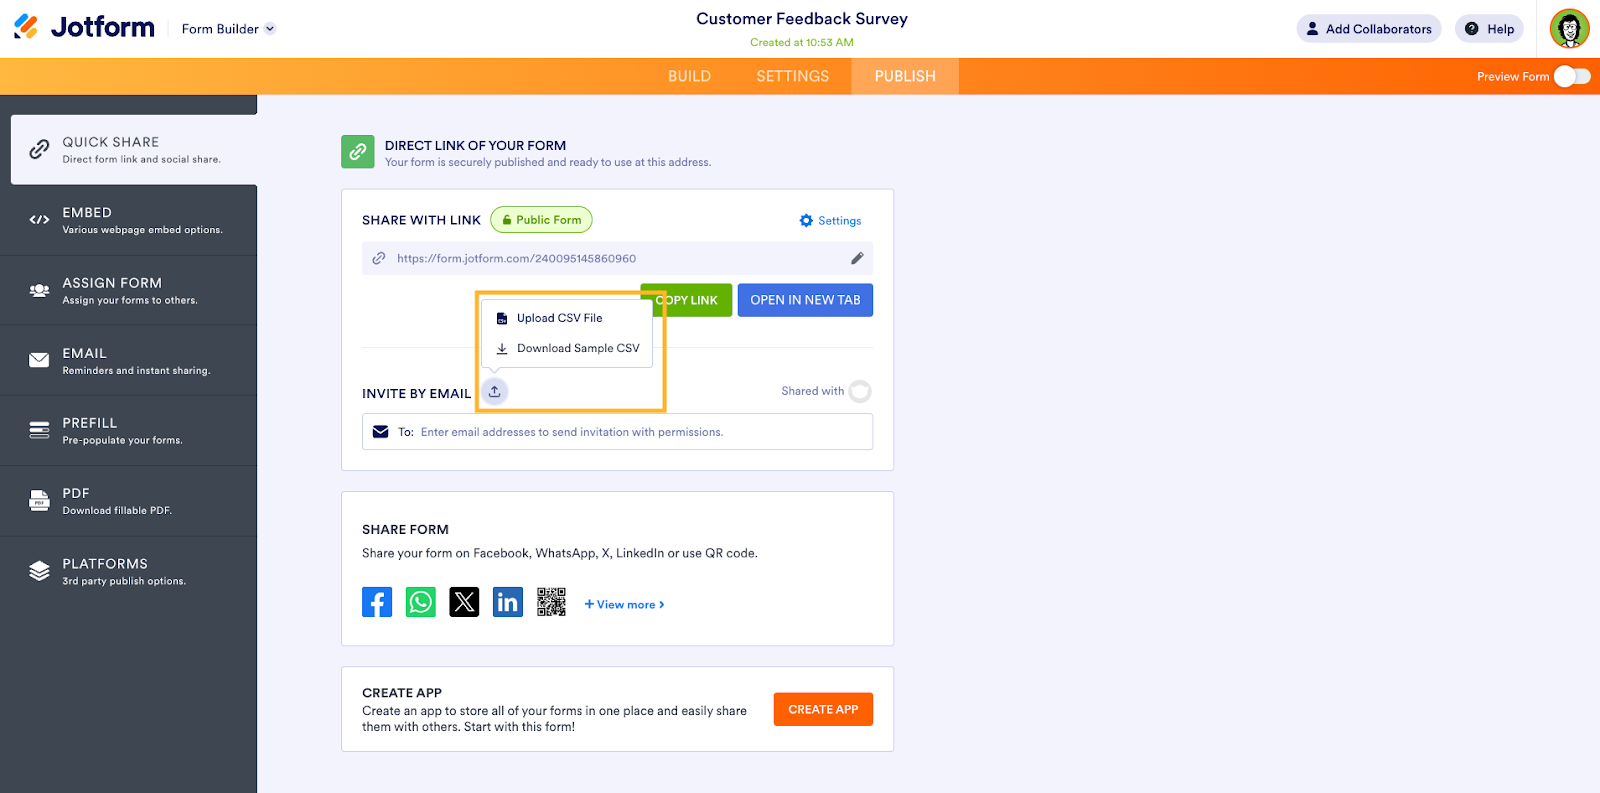
- Under the Quick Share tab — this is the default, so you should already be in it — click the Copy Link button to copy your form URL. You can also send a link to the form through email in the Invite by Email section.
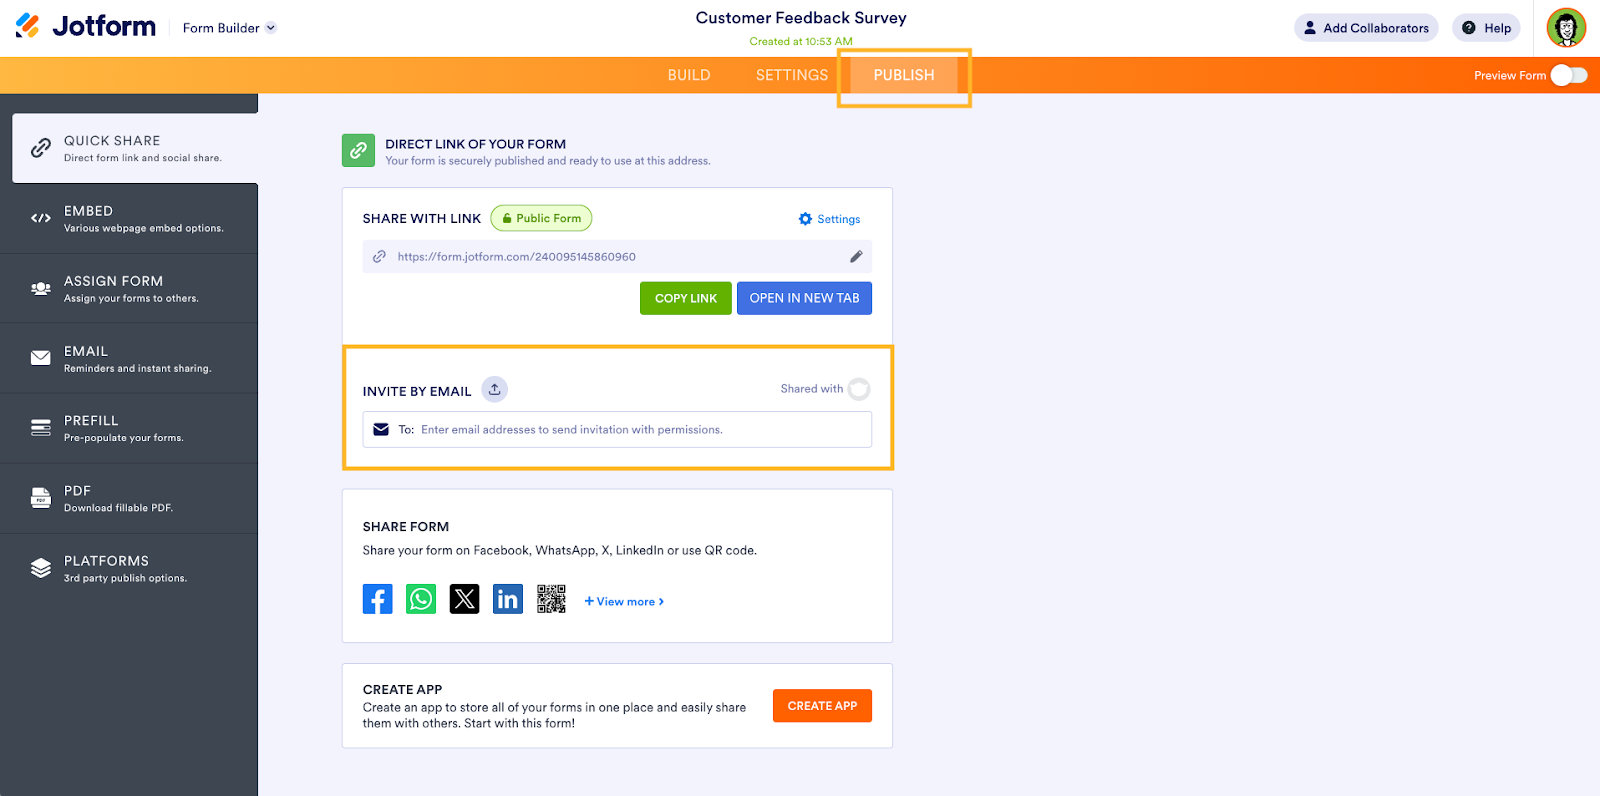
- If you’re sending a link to the form, paste the form URL into your email through your chosen email provider and send it out. If you’re sending the form through email in Jotform, add the recipient addresses manually or upload a CSV list of email addresses.
That’s it! You’ve successfully created a form with Jotform and shared it with your respondents via email.
Create a form and send it to respondents via email to collect valuable customer information and feedback. With the right software, it’s easy to do. So whether you use Google Forms or Jotform to create and share your forms, you can trust that they’ll impress your respondents and supply you the feedback you need to boost customer loyalty and grow your brand.
Photo by Alizée Baudez on Unsplash


")


Send Comment: