
How to create an RSVP form in Google Forms
- Go to Google Forms and create a new form
- Give it a title and a description
- Click on the question and change its type to Short answer
- Enter First Name as the question text
- Make the field required by toggling the Required setting on
- Copy the First Name field
- Click on the Add section icon to add a section
- Select the new section and name it “Extra Help.”
- Select the Checkboxes option
- Change the text to Trash bags, and hit the Enter key
- Add “Other” link at the bottom of the list
- Choose the Linear scale option


Interactive step-by-step tutorial
When you’re planning an event, no matter how big or small, you have to work out the details and stay organized. If you want to host an intimate gathering of friends for a cheese and wine tasting, you’ll need to know how much cheese and wine you should procure. And if you’re throwing a large party to thank your volunteers, you’ll need to know how many sandwiches, chips, and drinks to buy.
It also helps to know if any guests need special consideration — like if they have food allergies or need wheelchair access or a ride. And if someone on your guest list has a special skill — maybe someone’s a whiz with a grill, for example — it would be nice to know ahead of time so that you can work it into the event.
That’s where an online RSVP form can come in handy. Creating one doesn’t need to be complicated, and it doesn’t require special software. In fact, you can use a tool like Google Forms to make an RSVP form quickly and easily. Best of all, it’s free.

Looking for the best alternative to Google Forms?
Jotform’s full-featured form-building solution is mobile-friendly and has the most integrations in the industry. Use it to collect payments, automate workflows, gather leads, and more.
What is an RSVP?
RSVP stands for the French phrase “répondez s’il vous plaît,” which directly translates to “respond, if you please.” An RSVP confirms attendance at an event like a wedding or party.
Gathering RSVPs can be a big help in figuring out logistics, especially if you’re the event planner. For example, you don’t want to end up in a situation where there’s not enough food at a catered event or chairs to seat every attendee.
You can also create guest lists with the contact information from RSVPs and request feedback after the event to help you plan for future ones.
How to create an RSVP form in Google Forms
As an example, let’s create an RSVP form for a volunteer beach cleanup. Our volunteers will need gloves, trash bags, and a positive attitude. It might also help to have grabbers or other tools to make it easier to pick up trash without bending over.
Let’s create a form to find out how many people will be helping so we can buy enough bags and gloves. But let’s also try to save some money and see if anybody wants to contribute any supplies.
You probably already have a Google account, so let’s get right into it.
- Go to Google Forms and create a new form by clicking on the plus sign.
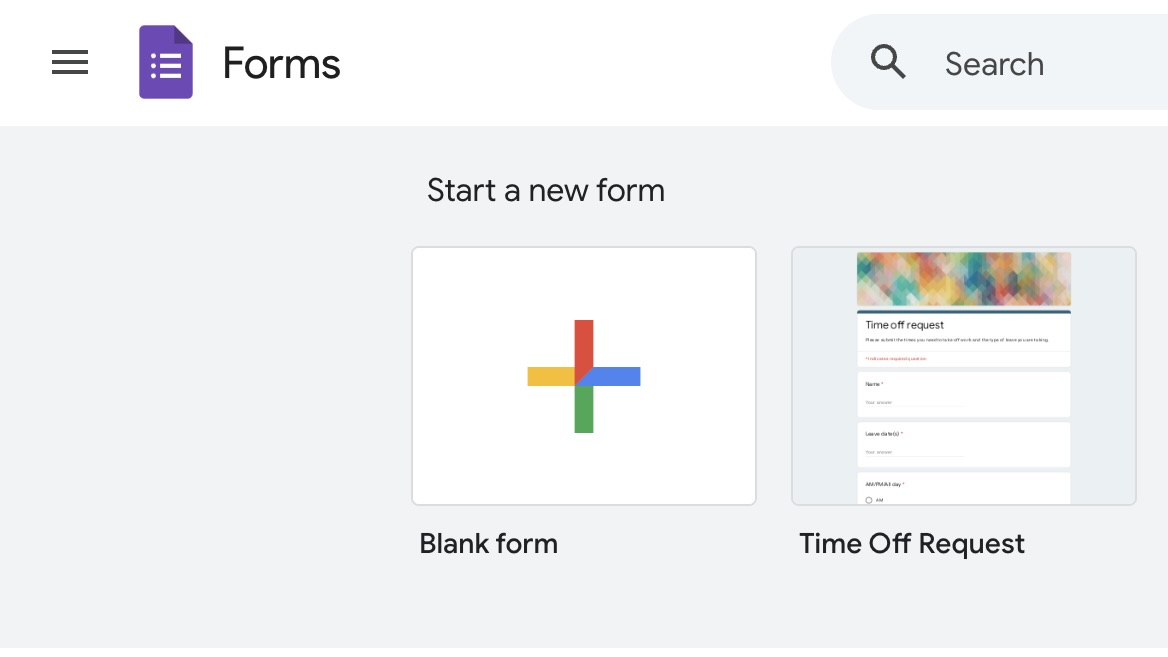
- Now we have a blank form. Let’s give it a title and a description.
- The first thing we need to ask is who’s coming. Click on the question and change its type to Short answer using the dropdown menu.
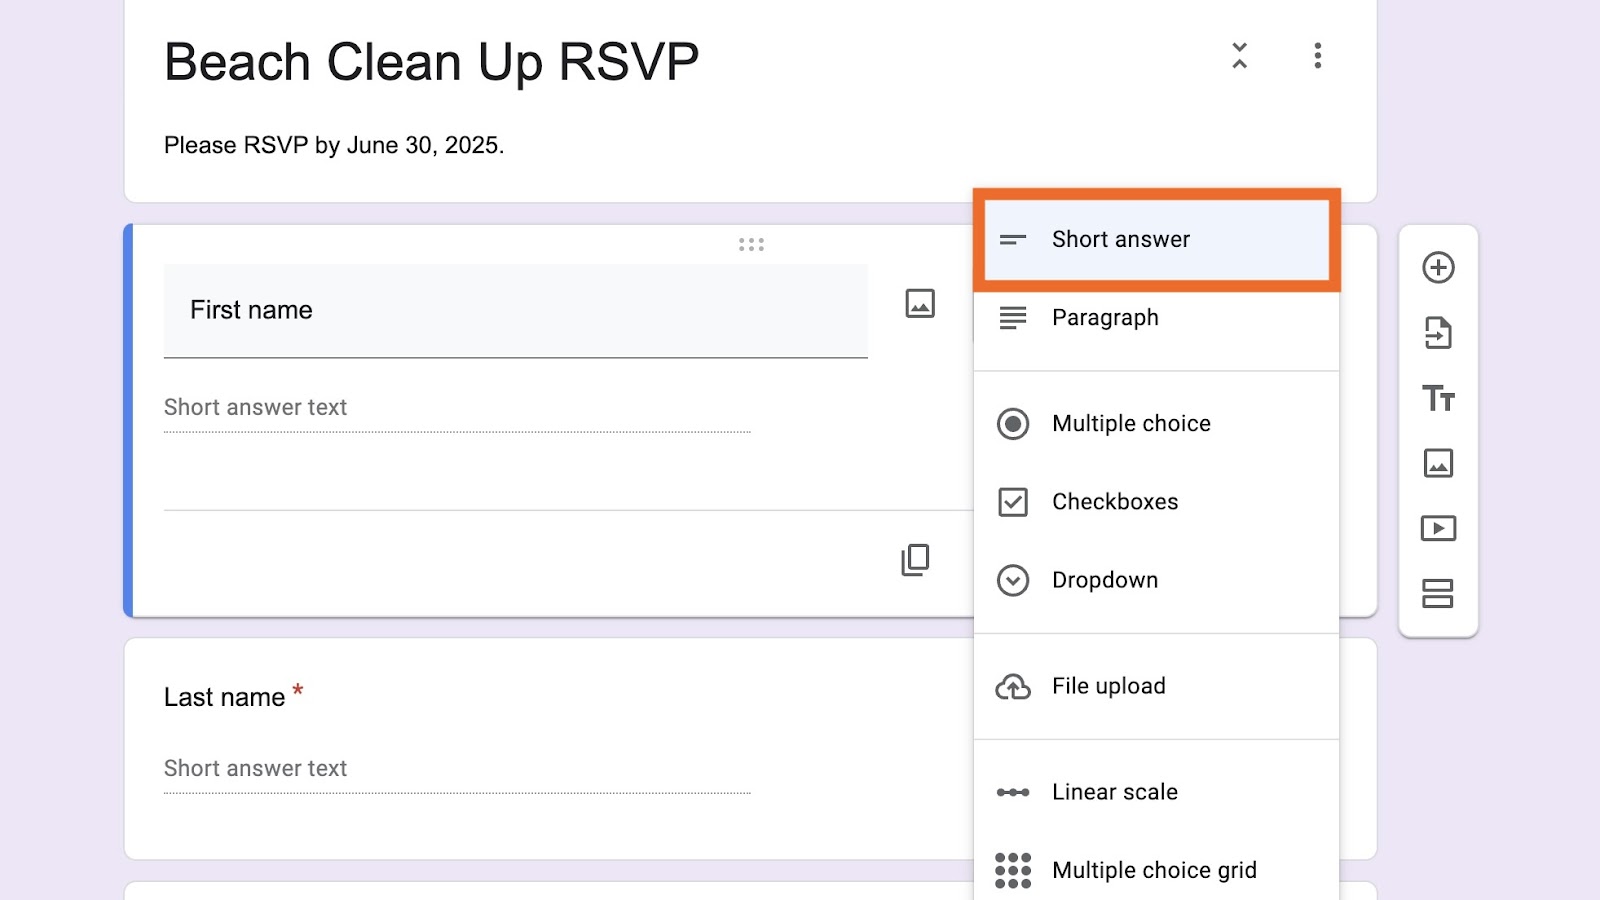
- Next, enter First Name as the question text.
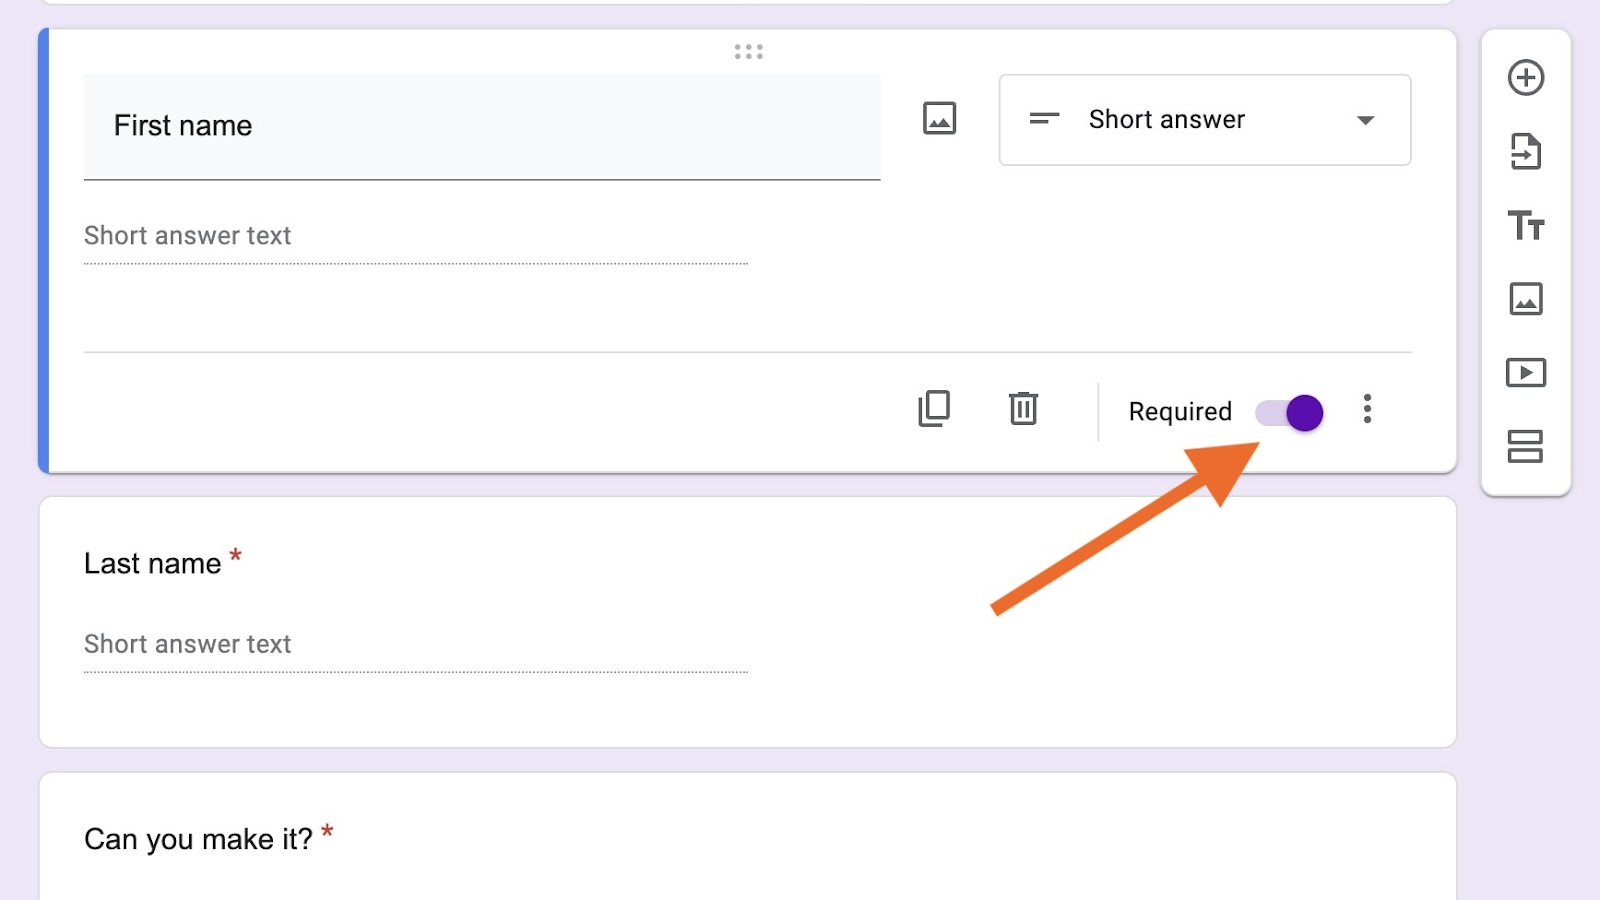
- Make the field required by toggling the Required setting on. While it isn’t necessary to require this information, it helps to know who’s filling out the form.
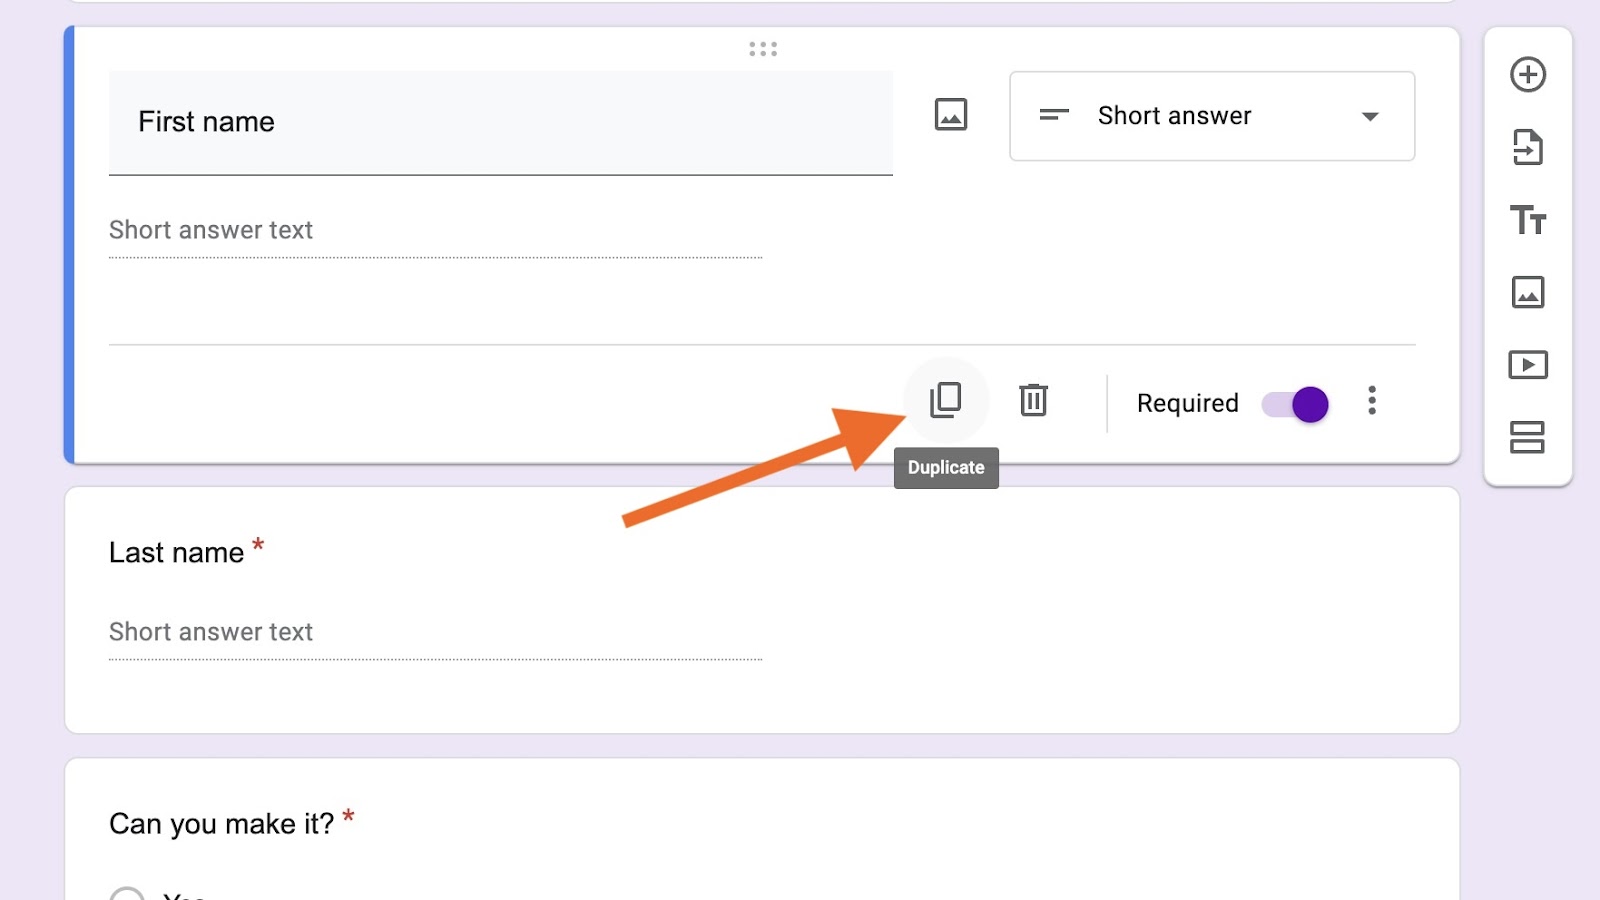
- To add a Last Name field, we can just copy the First Name field by clicking on the Duplicate icon next to the trash can icon.
Then change the field title from First Name to Last Name. We can do the same for the email and phone number fields.
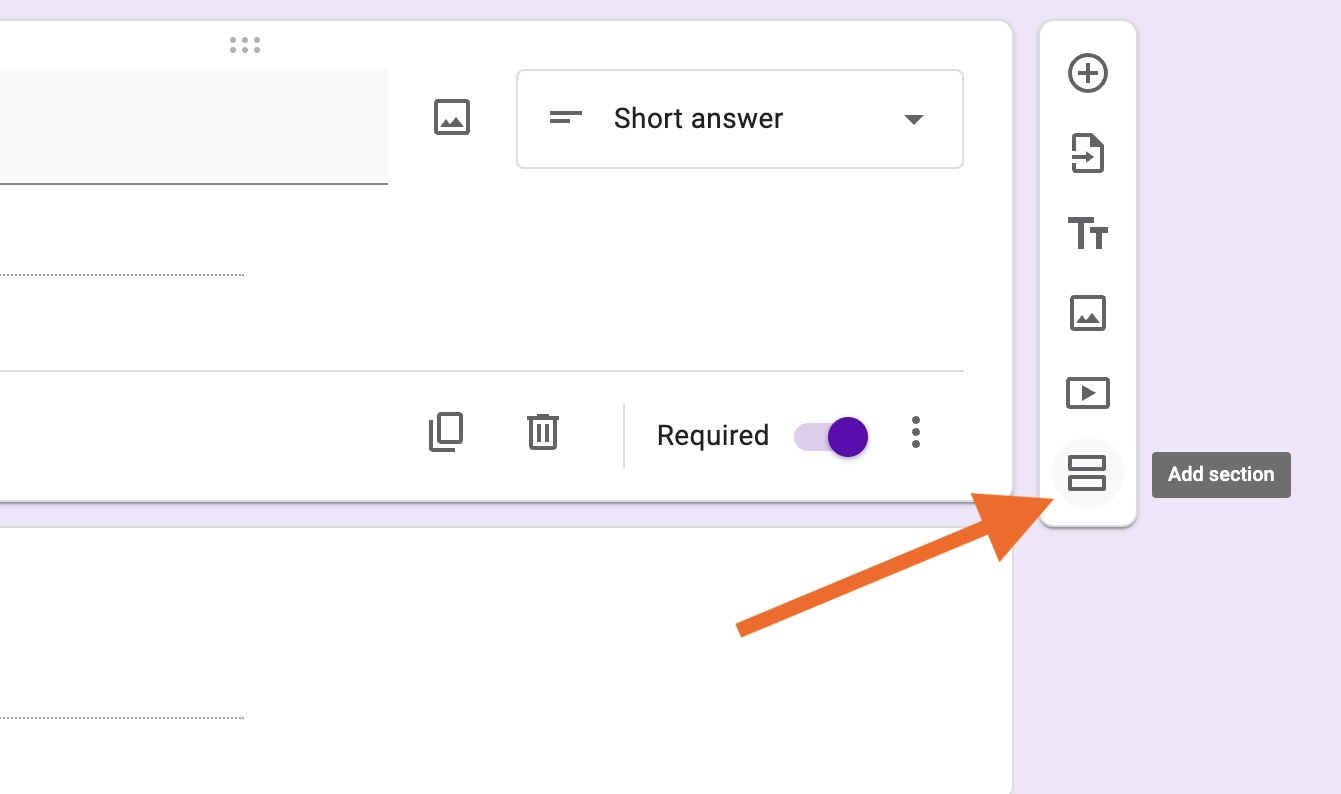
- People may get discouraged by a long form and abandon it. To prevent this, split your form into sections so people see a few questions at a time rather than all at once. You can do this by clicking the Add section icon to the right of the question after which you’d like to add a section.
- In the next section, let’s find out what and who respondents will be bringing. Select the new section and name it “Extra Help.” Then click the + in the upper right corner to add a new question.

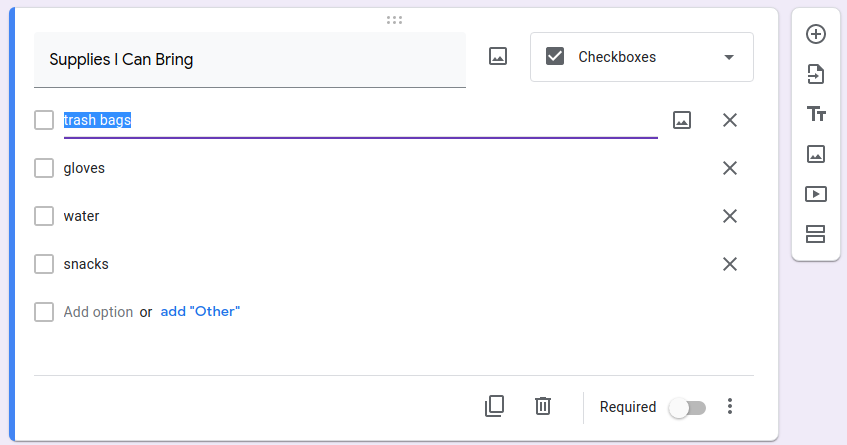
- Let’s see what supplies attendees are willing to bring. Select the Checkboxes option from the question type dropdown menu. This option will allow them to choose more than one item.
- Select the first answer field, change the text to Trash bags, and hit the Enter key. That will add a new line for your next item. Add all the items you think someone might bring.
- When you’re done, you’ll notice that there’s an add “Other” link at the bottom of the list. It makes sense to include this option for this question, so click that to add an extra text field.
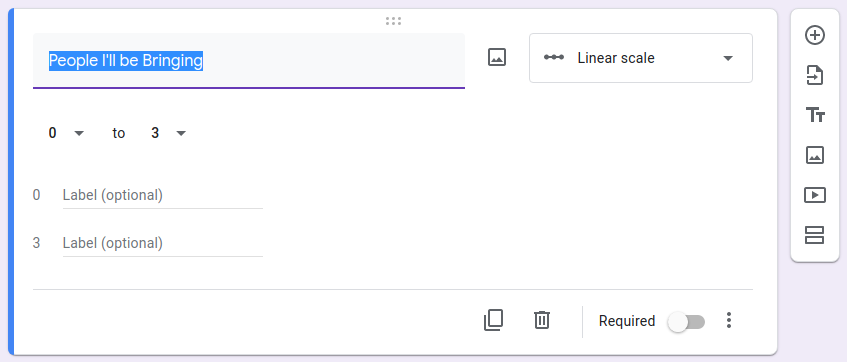
- Click the + again to add a question that asks about additional guests the person plans to bring. For this question, choose the Linear scale option from the question type dropdown menu. Because the attendee may not be bringing anyone else, let’s set the minimum to 0 and the maximum as high as you want.
Customize your RSVP invitations
Depending on what kind of event you’re planning, you’ll want the RSVP form to match the atmosphere. If this is for a wedding, for example, you don’t want to use just any plain old form.
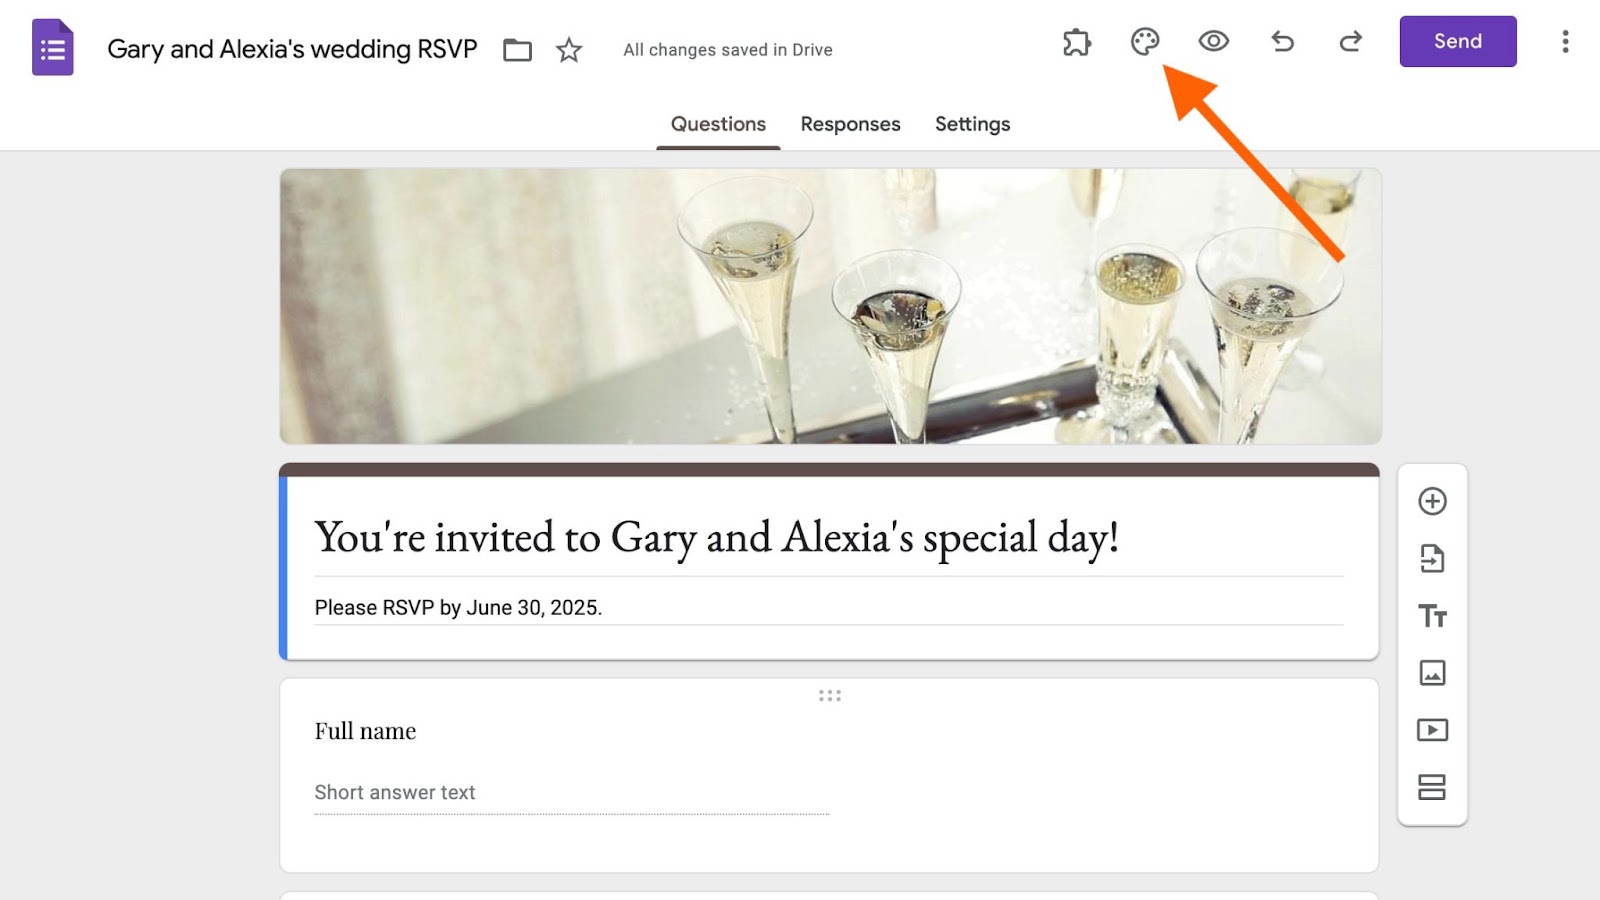
Use Google Forms’s customization capabilities to achieve the look you want. Adjust colors and fonts to evoke a certain feel, then add images and videos to make it feel more engaging.
To open the customization menu, simply click on the paint palette button at the top of the page.
Send out your RSVP link
Sending the form link to guests is easy. Simply click on the Send button at the top right of the page to share your form via email, link, or embed. You can choose whether or not your form will automatically collect email addresses, so guests won’t have to type out their own.
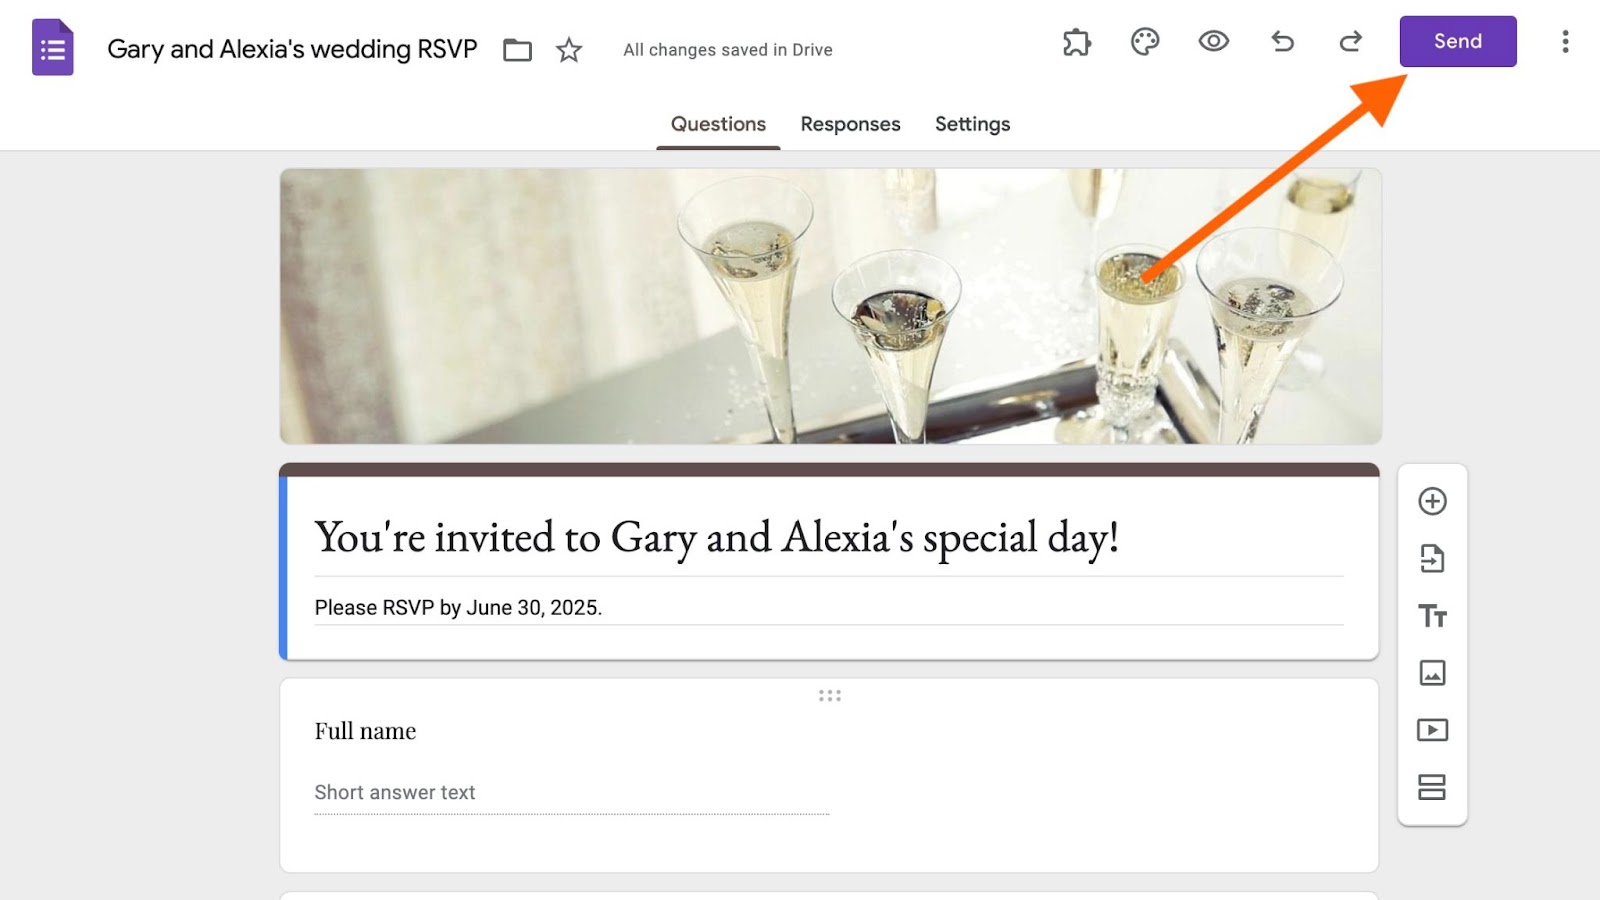
For email, enter either the names of your Google contacts or their email addresses. Then add the subject line of the email and the message. You can also select Include form in email, which allows guests to fill out the form directly from their email.
As for a shareable link, all you need to do is copy and paste the one provided to you. You can shorten the URL so it looks less clunky when you send it.
If you’re embedding your form, you can customize the width and height of it to your liking, then copy the embed code Google provides and paste it into your website.
There are additional options to connect to Facebook or X (formerly Twitter) to automatically create posts that share your form link.
Making the form smarter
You’ve probably noticed that we haven’t actually asked whether respondents will be attending or not. If the person receiving the form can’t make it to the event, it doesn’t make sense to gather all their information.
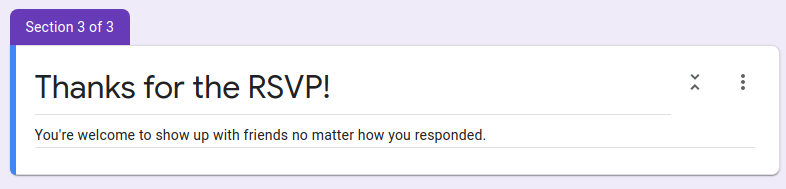
So let’s create a section that respondents can skip to if they’re not coming. We’ll keep it generic so it works whether they’re attending or not.
- Click the Add section icon from the menu on the right and name the section “Thanks for the RSVP!”
- Scroll back to the top of your form and click on the first section header. Click + to add a new question at the top. Change the question text to “Will you be able to attend?” We’ll then make this question multiple choice.
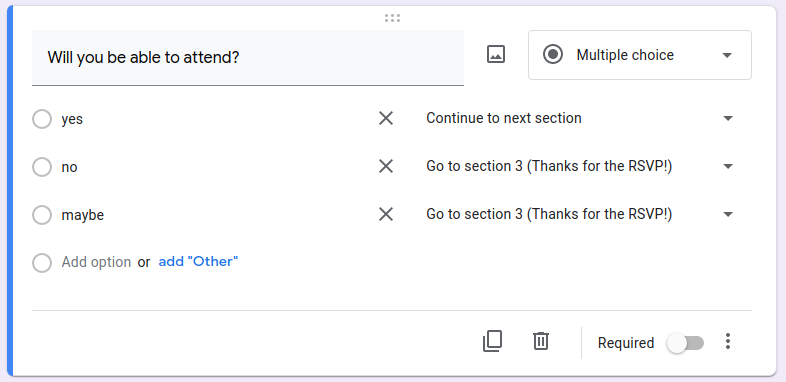
- When you’re done, click the three-dot icon in the lower right corner and select Go to section based on answer.
As you can see in the screenshot above, each answer choice now gives you the option to navigate to a different section of the form. You can set the navigation to jump to the end if they choose “no” or “maybe.”

- Let’s separate the RSVP question by creating a new section below it and calling it Contact Info.
Be sure you’re in the RSVP question when you click the Add section icon, so that the new section starts directly after this question.
- If you followed all the steps correctly, you should now have four sections, and your navigation should work as expected.
- Your last section will automatically show the Submit button at the bottom of the page.
You can check your work by clicking the eye icon in the upper right corner of the page. This will let you preview and test your form.
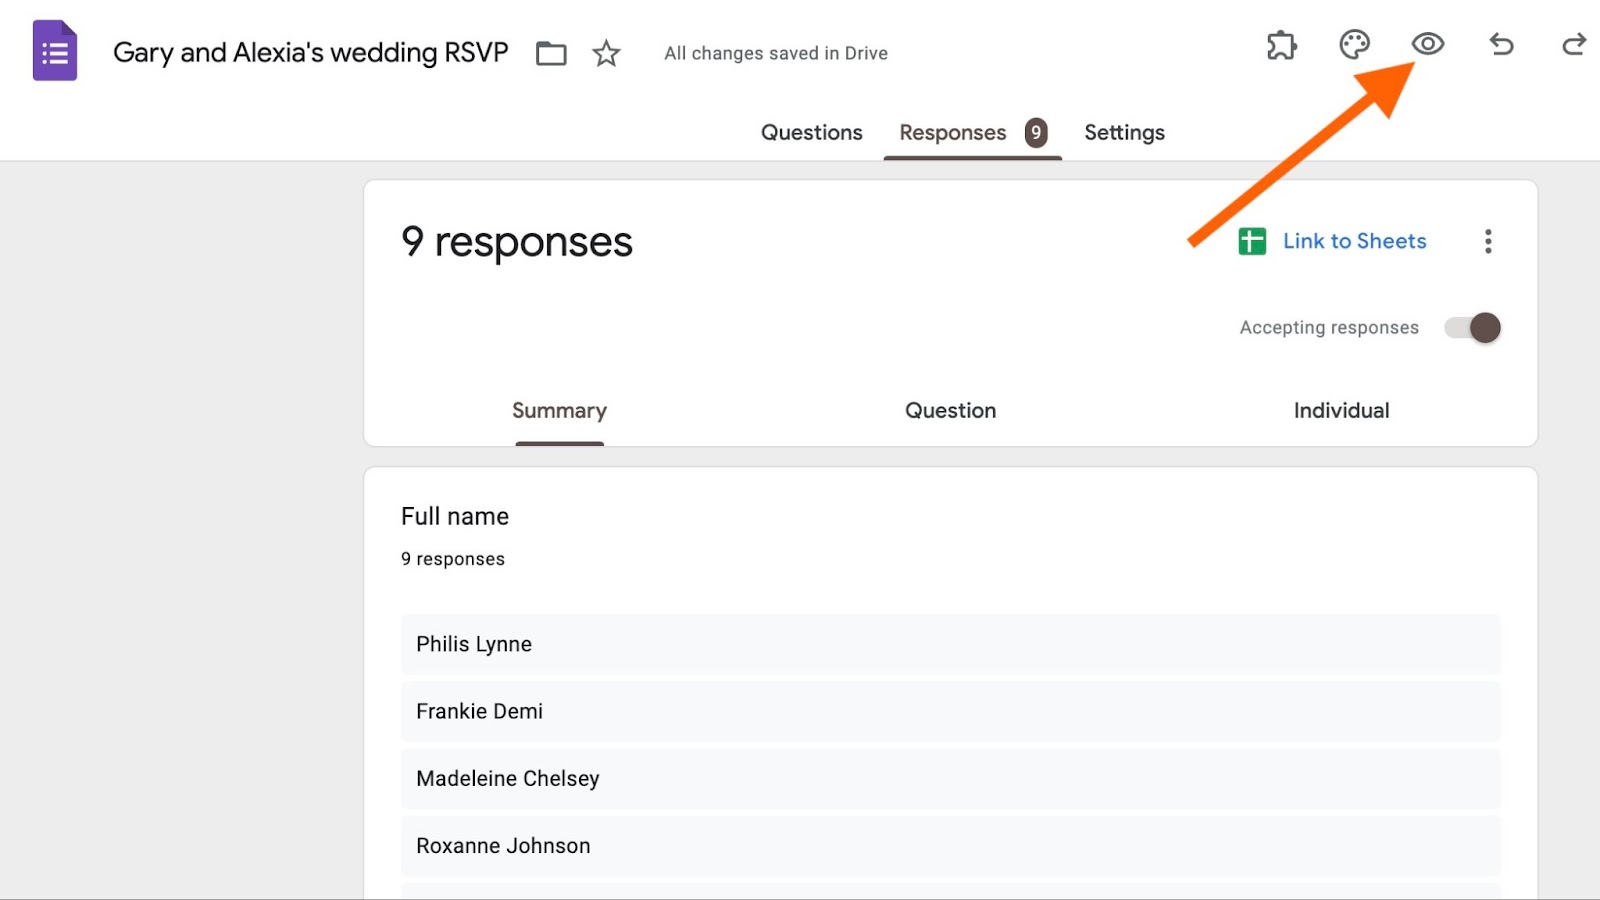
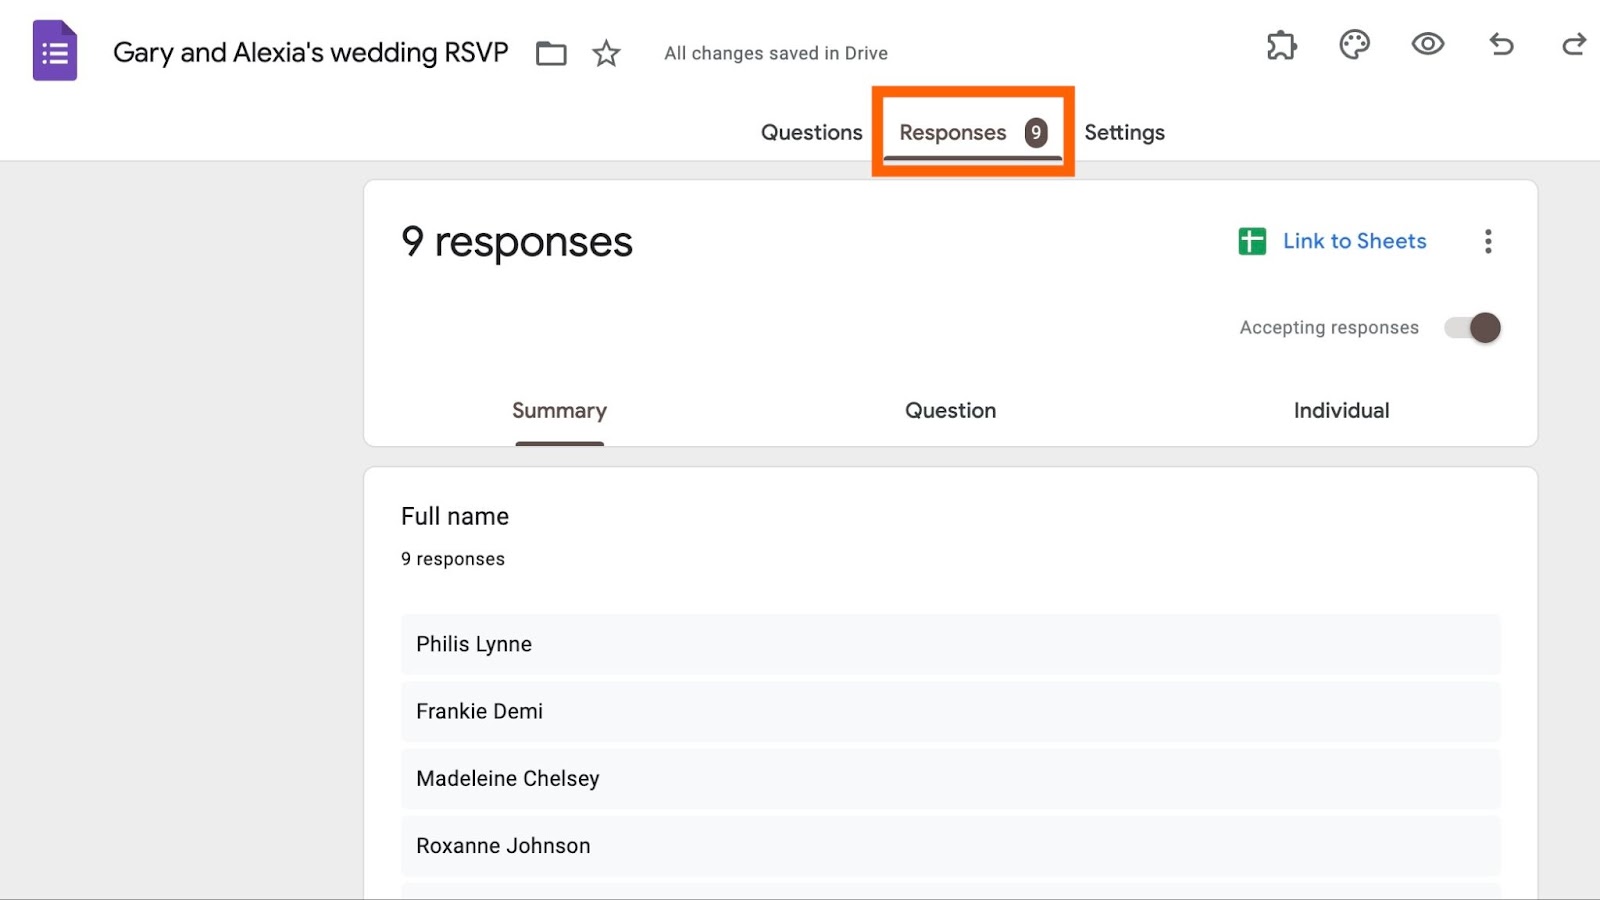
Track your results
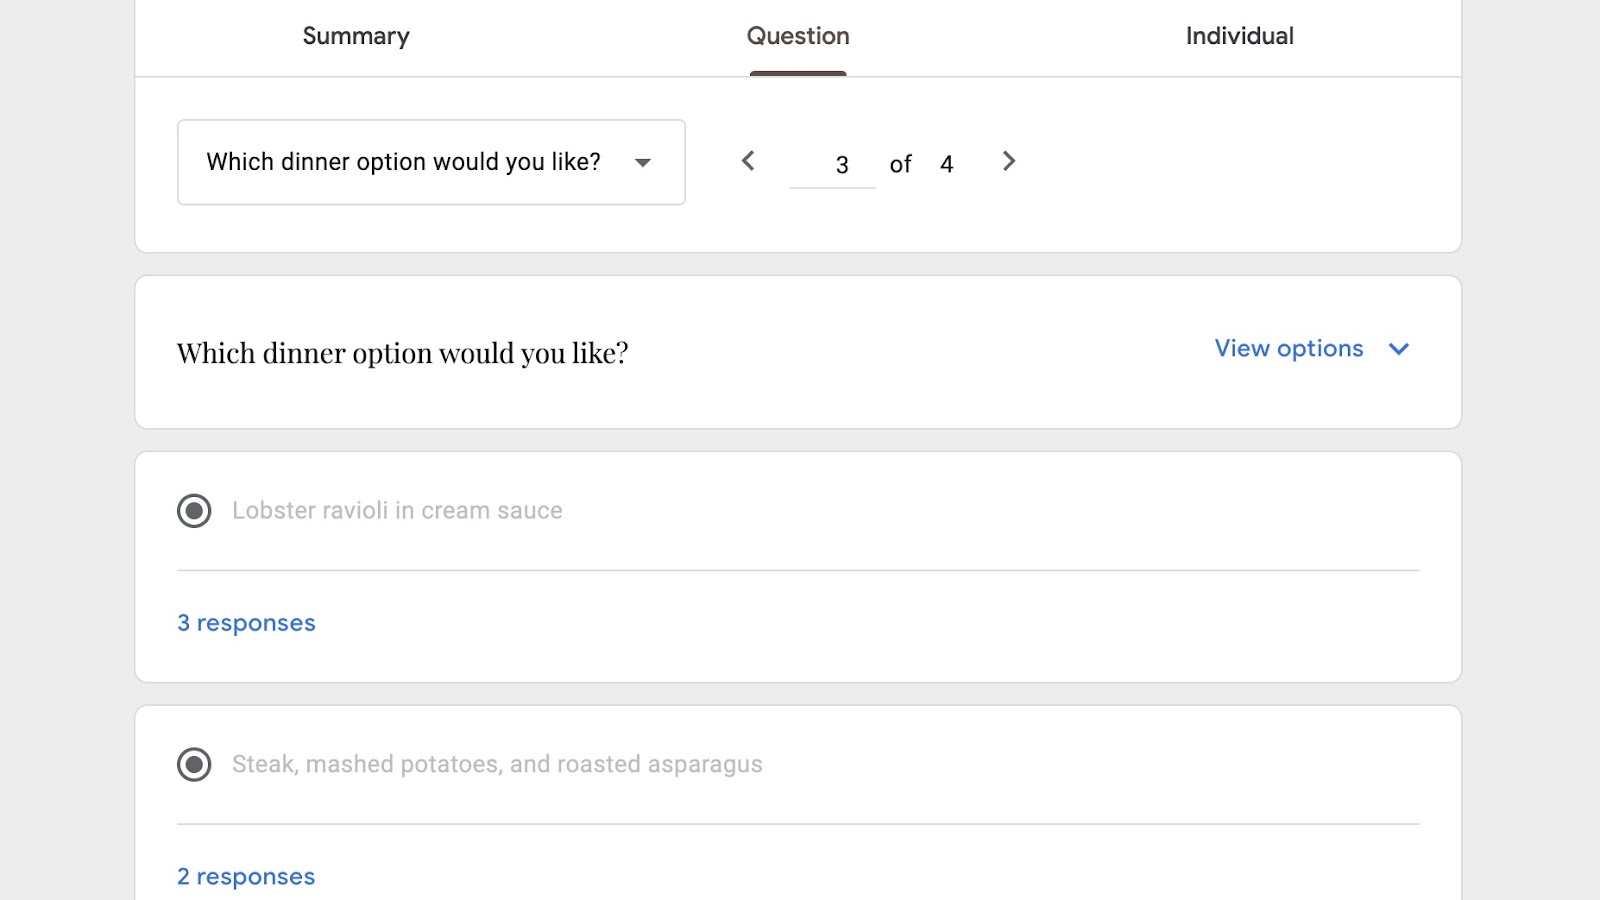
You can check on and manage your responses at any time by selecting Responses in the top tab of the form builder. You’re also able to change the view of your responses by selecting Summary, Question, or Individual.
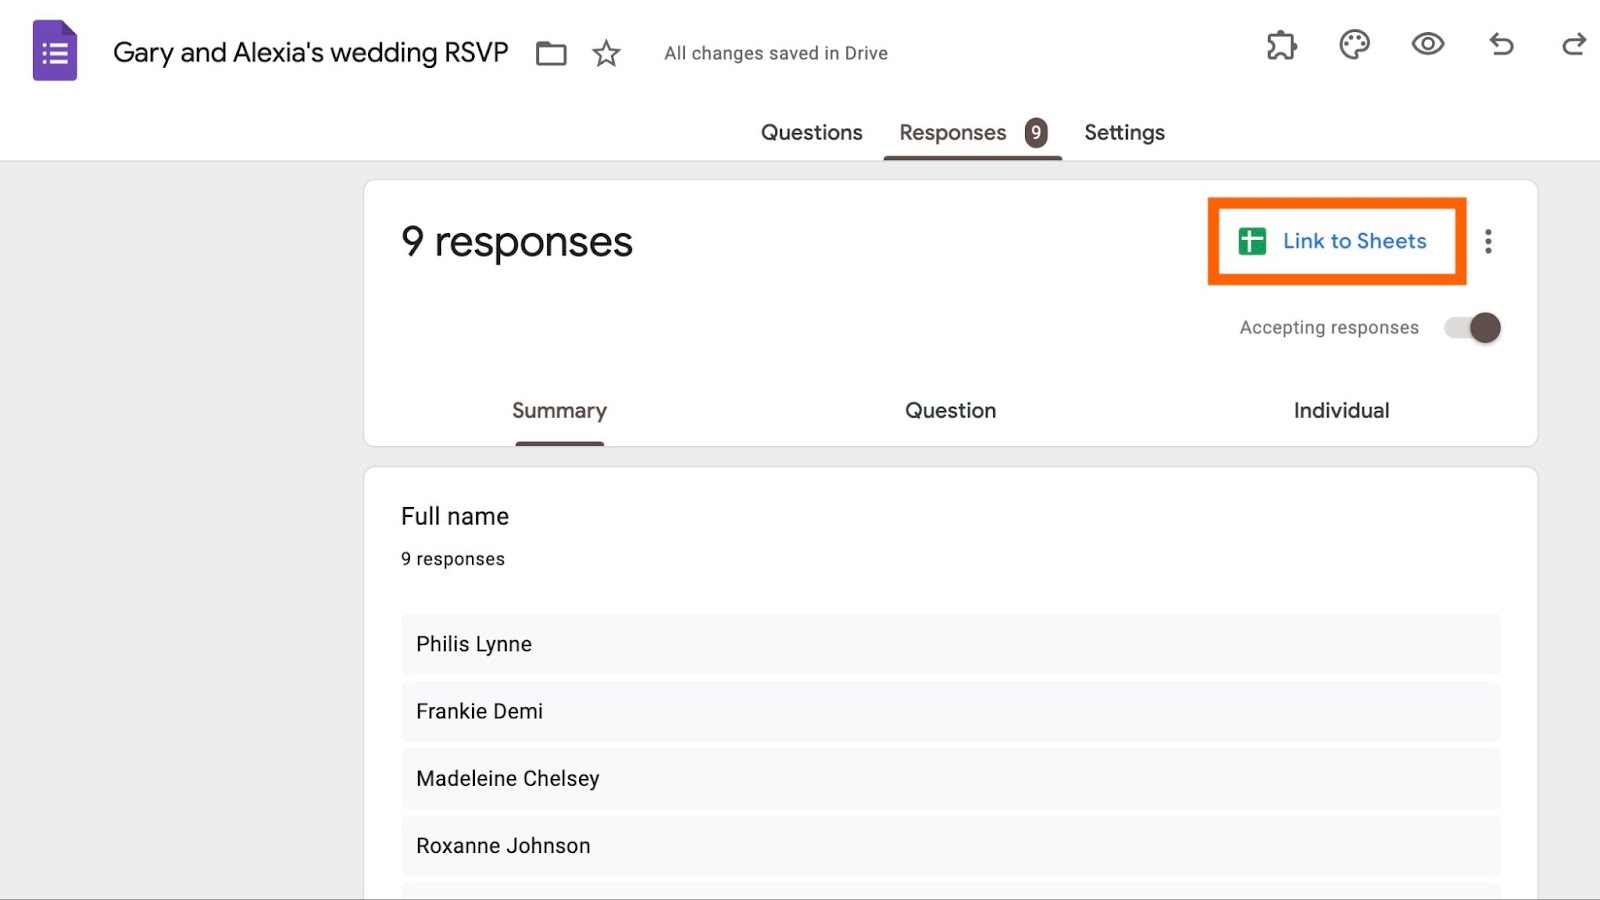
And if you want to track your responses through a spreadsheet, simply click on Link to Sheets in the top right corner of the Responses tab. This will automatically create a Google Sheet of your form’s submissions and will update as you receive more.

How to build an RSVP form with Jotform
If you want to take your RSVP form even further, try Jotform. The drag-and-drop Form Builder makes it easy to create and customize your RSVP form. If you’d rather get a head start on the process, you can also take advantage of our RSVP form template library.
Better yet, Jotform offers several form sharing options, including custom URLs, emails, and QR codes, and you can even view submissions in a spreadsheet with Jotform Tables.
Jotform also integrates with popular platforms like Salesforce and your favorite payment processors, so you’ll have the power of multiple automations in your hands.
Want more than just a form? You can also use Jotform to create your own RSVP mobile app with our no-code builder.
And believe it or not, Jotform has even more to offer, from an online PDF editor to e-signature software. Sign up for a free account to see how Jotform can power both your forms and your business, and check out our affordable pricing plans for upgrades.


: Which signup tool is right for you?")


: Which form builder is better for you?")


")


")


")


")


")


Send Comment: