Getting the perfect header image into Google Forms isn’t just about resizing an image, uploading it to your latest Google Form, and expecting it to work on every single device. To upload a Google Forms header with style, you need to understand how Google scales, crops, and renders your image across different screen sizes. That way, your form can look engaging on any laptop, tablet, or mobile.
In this guide, you’ll get the exact specs you need. We’ll also share a safe zone strategy to protect your key content from cropping, reveal the right file format for sharp results, and provide a step-by-step walkthrough to get your header looking the way it’s supposed to.

Looking for the best alternative to Google Forms?
Jotform’s full-featured form-building solution is mobile-friendly and has the most integrations in the industry. Use it to collect payments, automate workflows, gather leads, and more.
How to add a header image to Google Forms
If you want to learn how to use Google Forms to its full potential, the header is a great place to start. It’s one of the few areas where you can customize Google Forms by adding your own brand’s look and feel. Many users opt to add a logo to a Google Form, for example.
Here’s how to add a header in five steps:
- Open your Google Form and hover over the header image.
- Click the Replace header image button (the icon showing a picture with a plus symbol).
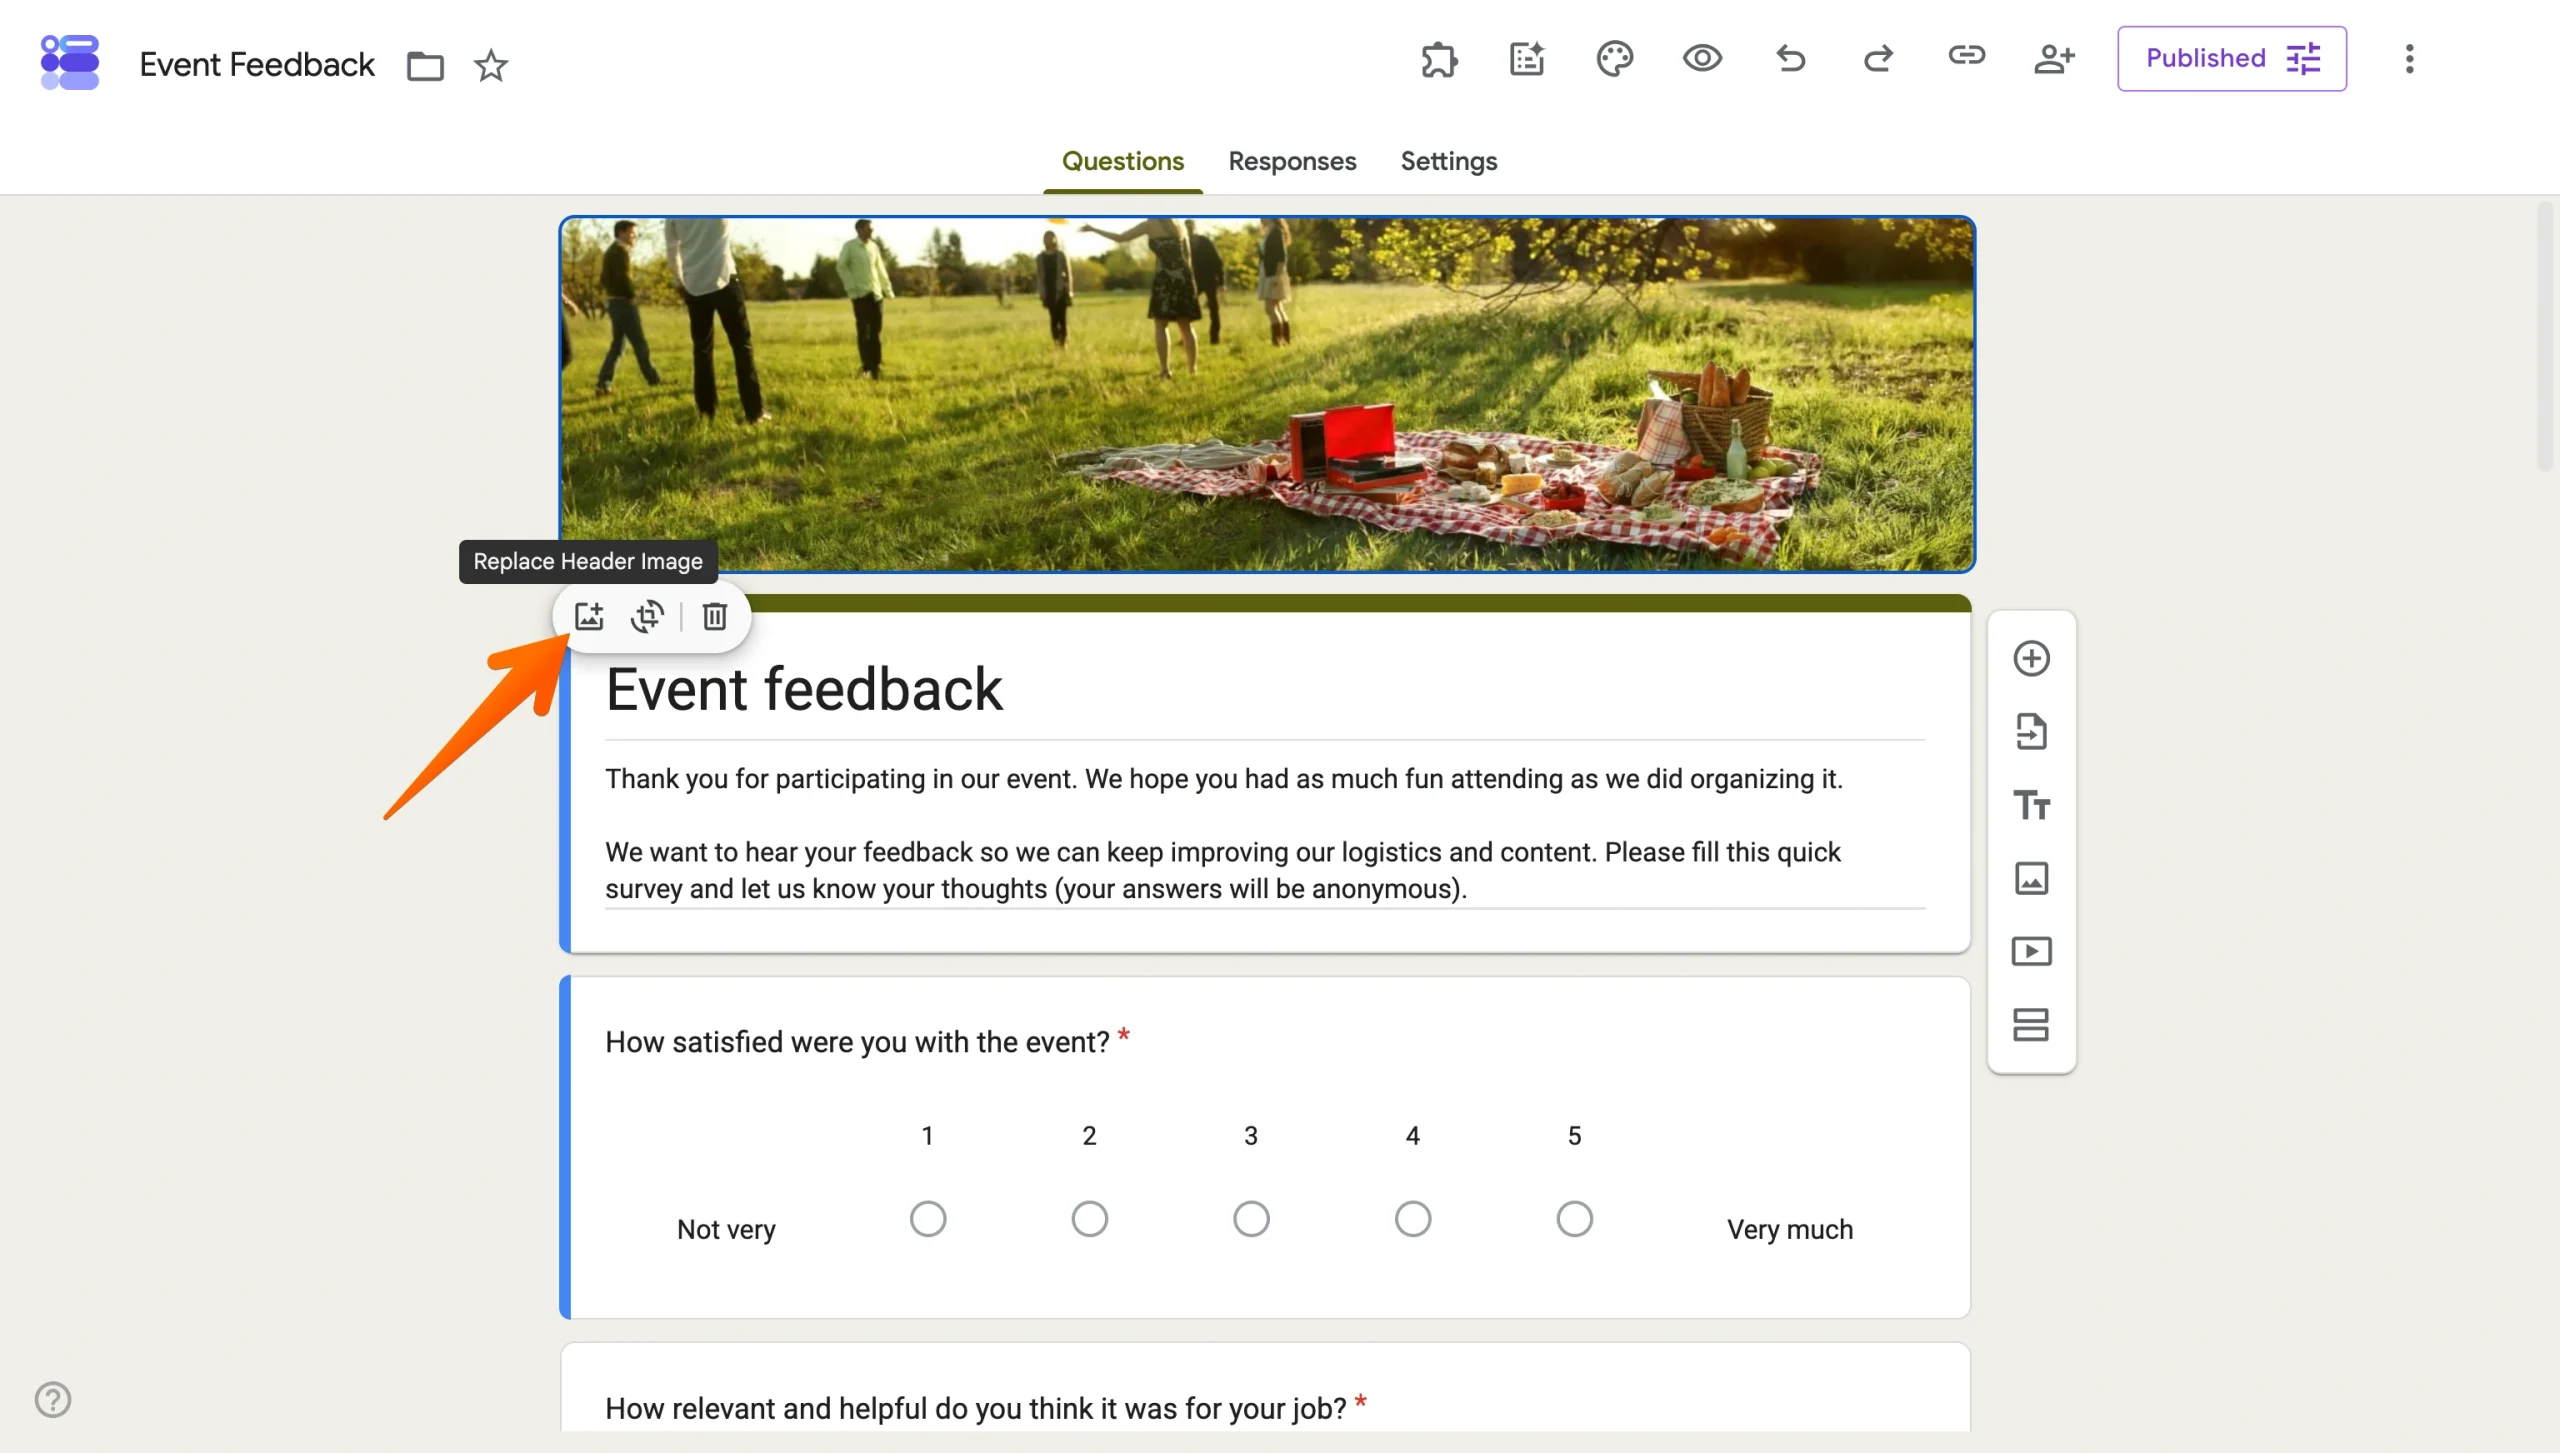
- The Select header window gives you a few options. You can choose a suitable image from Google’s pre-made headers, categorized by theme — ideal if you don’t want to mess with sizing and cropping. Or you can upload an image from your PC, pull from your Photos or Google Drive, search Google Images, or add an image by URL.
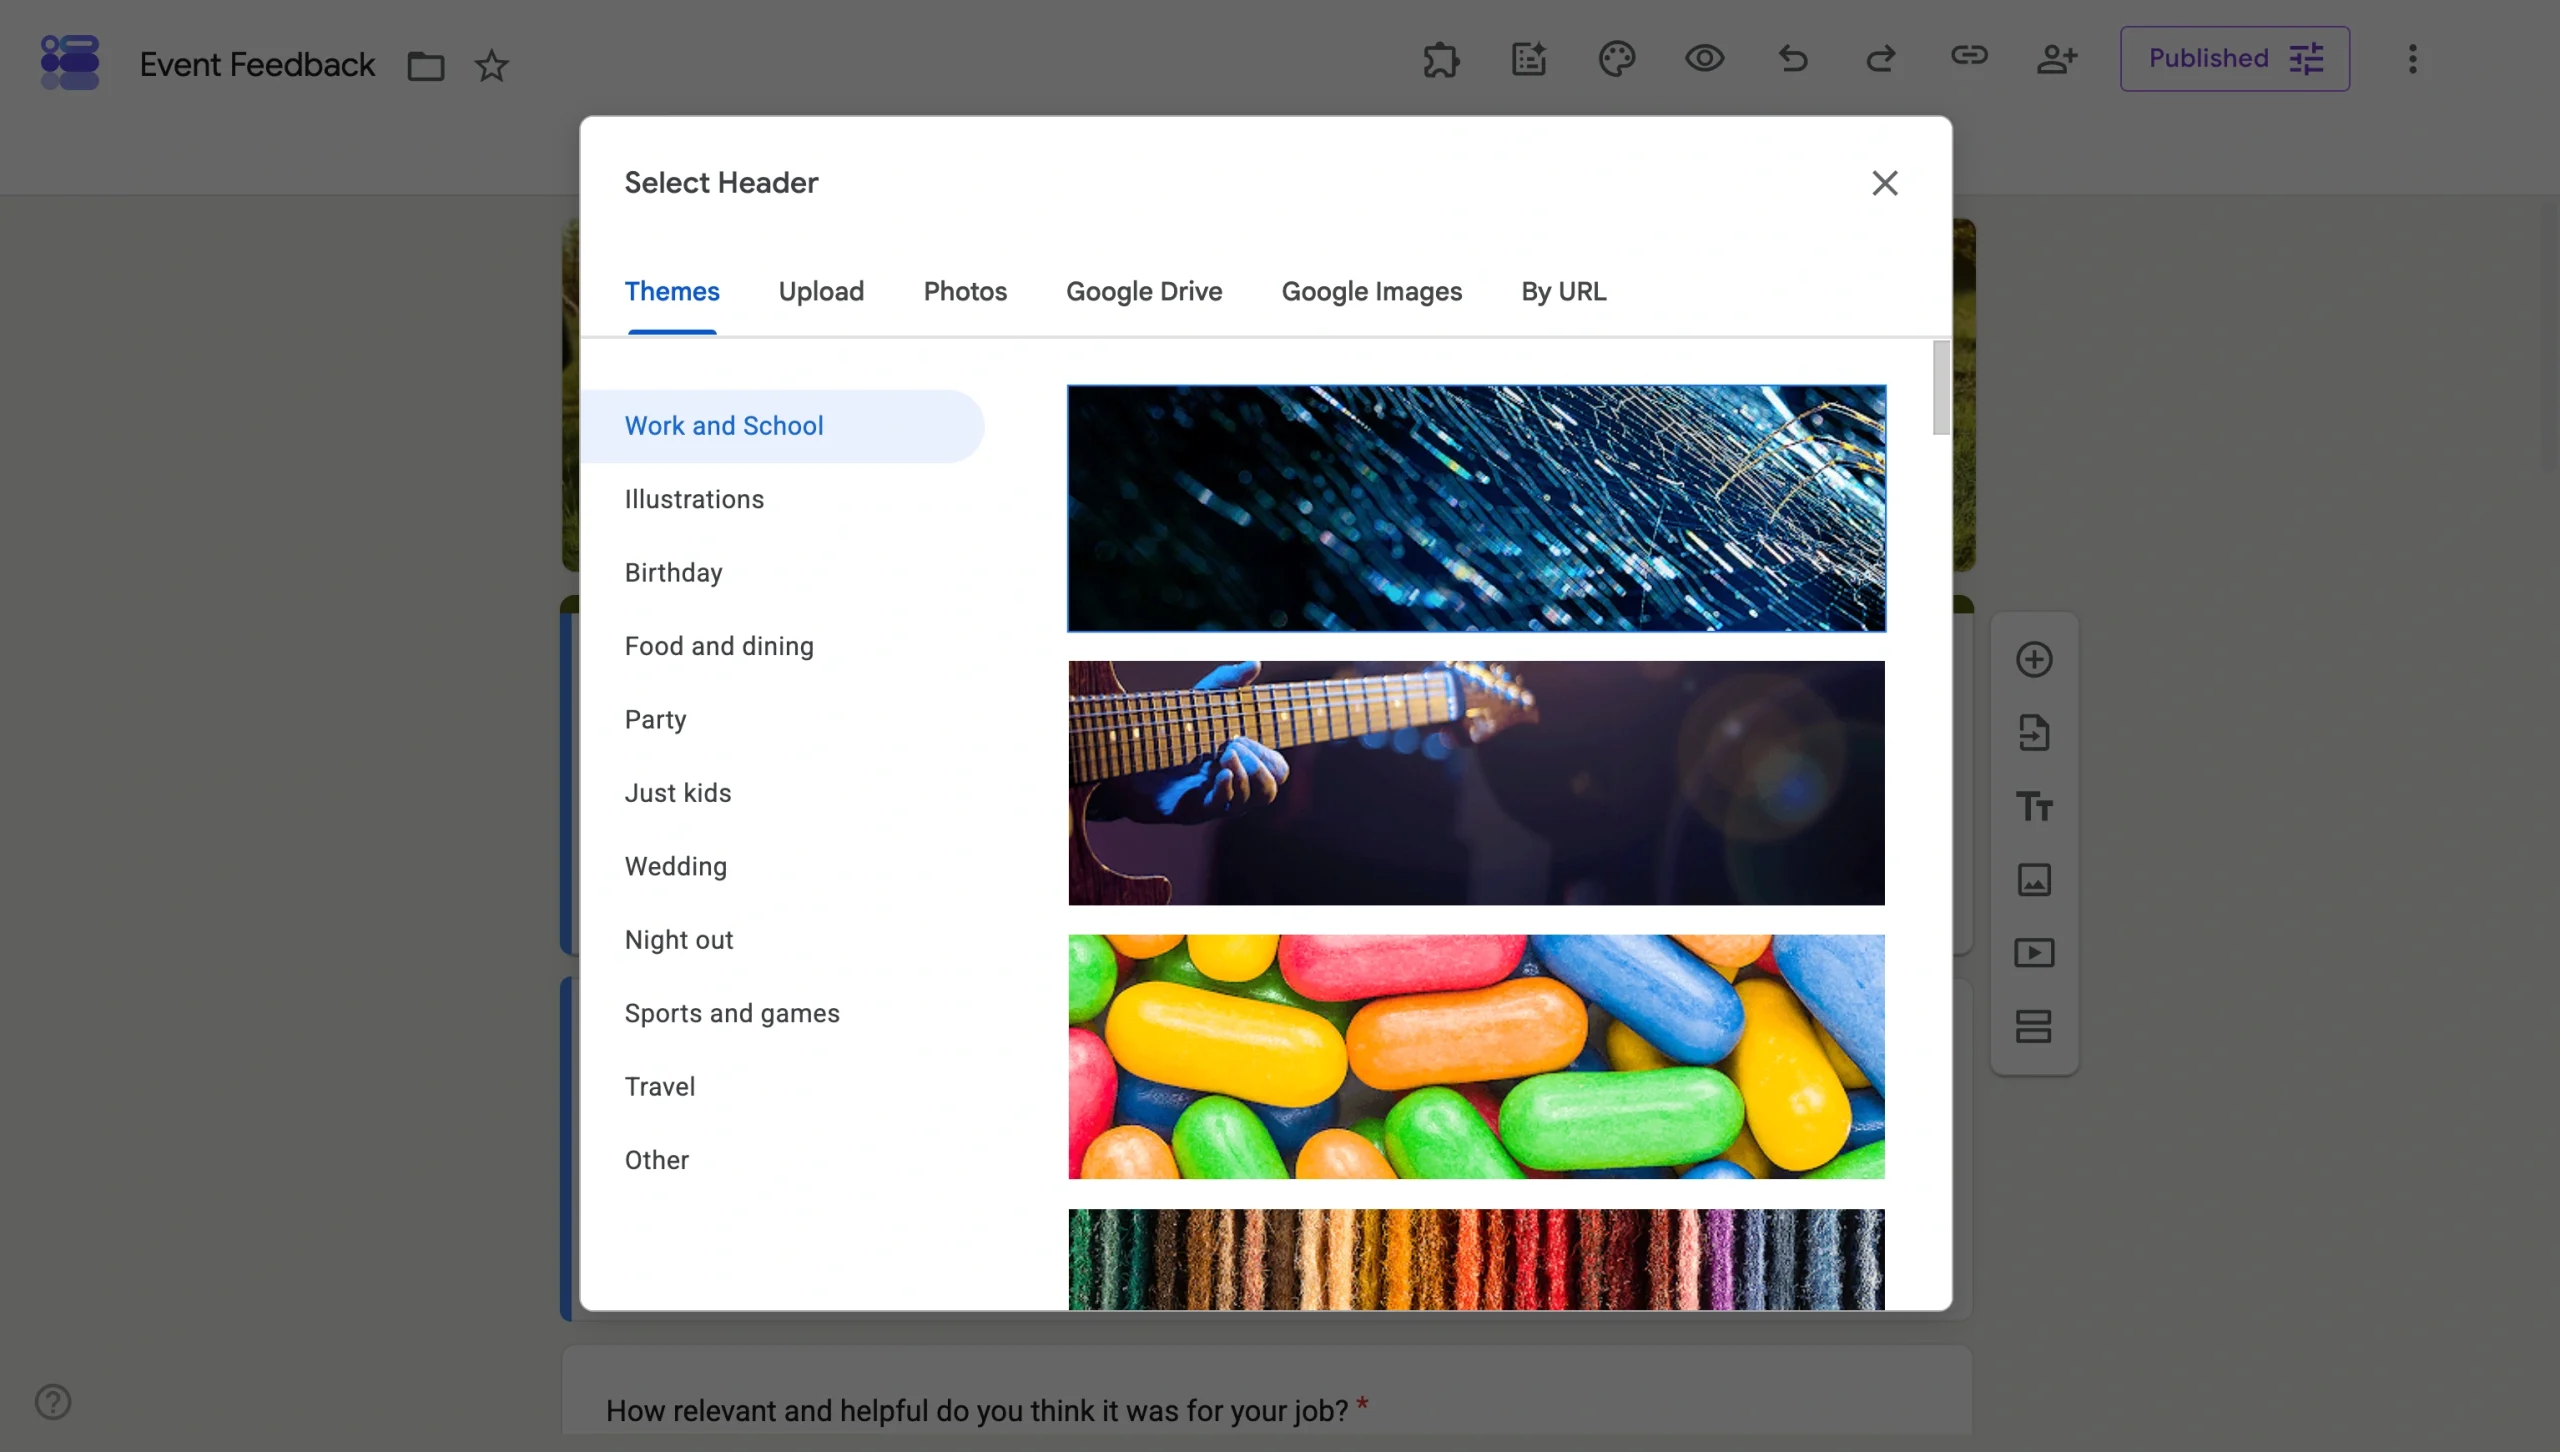
- If your chosen image is outside the pixel size of 1600×400, Google will either inform you that your image is too small or prompt you to crop it to fit the 4:1 frame. Use the crop tool to position your key content (more on exactly how to do that without losing important elements in the next section) or rotate your image clockwise or counterclockwise.
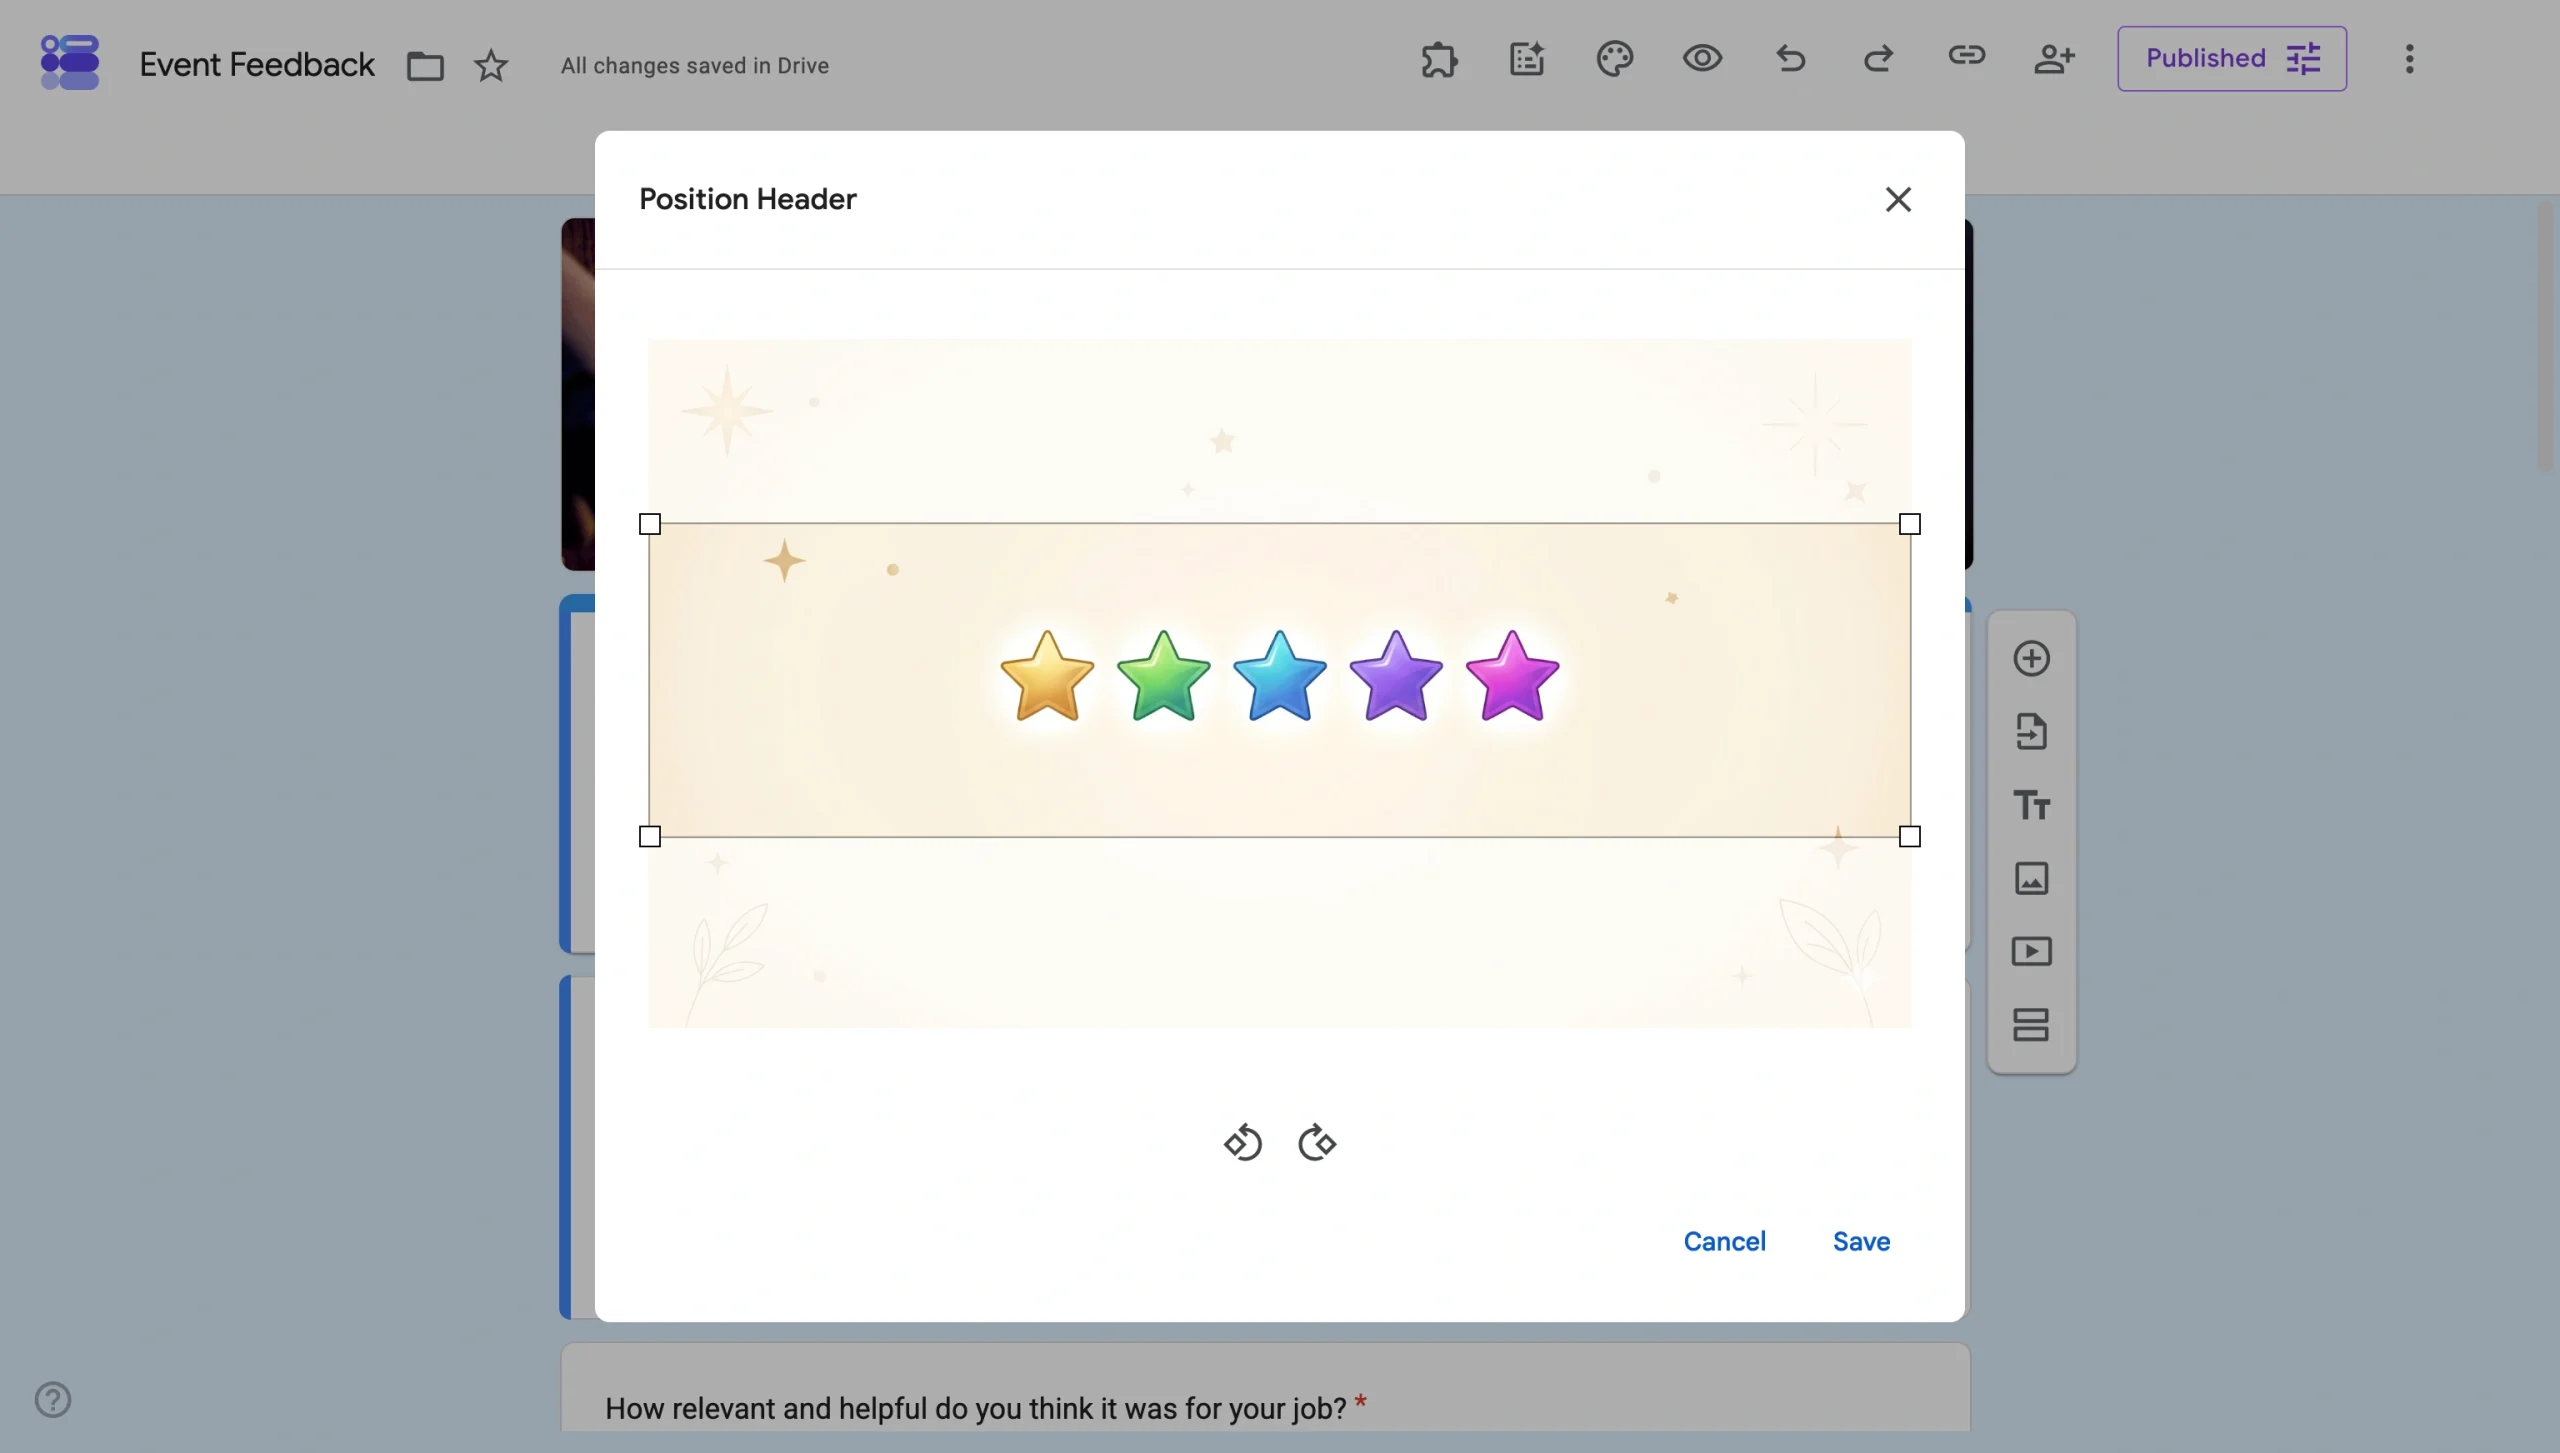
- When you’re happy with the crop, click Save. Your header will appear at the top of your form, and Google will automatically suggest a color theme to match.

Once your header is in place, you can continue to create a Google Form with all your questions.
Pro Tip
No matter how polished your header is, it’ll still look like a Google Form, locked into a 4:1 ratio with no repositioning or padding control. Switch to Jotform and start fresh, or migrate your Google Form with a single click.
Can you resize an image for a Google Form header?
You can’t resize an image for the Google Form header within Google Forms itself, and you can’t resize the header area either. It’s all locked down.
If you want to upload an image, you need to do all the editing work outside of Google Forms. Tools like Canva, Adobe Express, or Figma make it straightforward to build a 1600×400 px canvas and export it, but your image won’t necessarily work seamlessly across all devices because of the automated cropping.


What is the recommended Google Form header image size?
The recommended Google Form header image size is 1600×400 pixels. And the header image with the best chance of working on Google Forms will follow all the rules below.
| Recommended size | 1600×400 pixels |
| Aspect ratio | 4:1 |
| Minimum size | 800×200 pixels |
| High-resolution alternative | 2400×600 pixels for retina/large displays |
| Maximum file size | 2 MB |
| Accepted formats | PNG (recommended for logos and text), JPG (recommended for photos) |
Note: These ratios are important because Google Forms scales the image to fill horizontal space first, then crops vertically — making the 4:1 ratio non-negotiable.
Where to place your text and logo in the Google Form header image
Even a perfectly sized image can get elements cropped depending on the device your form respondent is using. For the greatest results, your header image needs to meet the right Google Form header dimensions.
To ensure your design looks great on all screens, follow these three basic rules.
1. Stick to the safe zone
All critical content, such as your logo, text, and any key visuals are within the central 1000×300 pixels of the canvas. That’s roughly the middle 60 percent horizontally and 75 percent vertically. Anything outside that zone is at risk of being cropped on certain screen sizes.
2. Keep edges decorative because these areas are risky
Google scales header images to fill horizontal space first, then crops vertically to fit the frame. That makes the bottom 150 px of your image — exactly where many people put logos or taglines — especially vulnerable on wide screens.
If your branding is sitting near any edge, it may disappear for a chunk of your audience. So, reserve the outer edges for background elements, such as gradients, subtle textures or patterns. These can fill the space and make sure nothing important gets lost.
3. Think about mobile because it behaves differently
Portrait phones render a taller crop than wide tablets or desktop screens, which means the same image can look completely different across devices. Always preview on mobile before publishing; what looks centered on your laptop may be off on a phone.
Pro Tip
Preview the header before you publish. Hit the Preview button of your form (the eye icon in the top-right toolbar) to check how your header renders. If you can, preview the header on multiple devices to see how it looks.
Why bother with fixed ratios? Design your forms the way you want in Jotform
Google Forms gets the job done, but it limits creativity and branding.
There’s a better way to build forms.
Jotform is the best online form builder, and design freedom is one of the biggest reasons. You can
- Upload any image: There are no rigid aspect ratios. You can upload your header image, and it displays the way you intended. The design control stays with you, not the platform.
- Customize the full theme, including fonts, colors, layouts, and more: Beyond the header, Jotform gives you complete control over how your form looks and feels. Unlike Google Forms, where your only option is squeezing a logo (that may or may not get cropped) into a header image, you can customize colors, fonts, backgrounds, and layouts to match your brand without a single workaround. And if you’ve got developers in-house, they’re welcome to use custom CSS for complete form freedom.
- Start with one of more than 20,000 templates, headers already included: Jotform’s library of 20,000-plus free form templates covers virtually every use case, including events, healthcare, education, e-commerce, business, and beyond. Pick a template, add your branding, and you’re done — no need for third-party editing tools or in-depth customization unless you want it.
- Connect to the tools you already use: Jotform also connects to over 150 form integrations, from CRMs and email marketing platforms to project management tools, so that your form data slots right into your existing workflows.
- Collect payments: If you’re collecting payments, Jotform supports more than 40 payment integrations including Stripe, PayPal, and Square, making it just as capable for commerce as it is for data collection.
Google Forms is free and simple — adequate for small forms where branding isn’t important. But if your forms need to reflect a real brand, handle payments, or connect to a professional tech stack, Jotform is the upgrade you need.
How to customize your header in Jotform
To get started with Jotform, sign up for a free account. Just like in Google Forms, you can get the ball rolling easily with a template.
The biggest difference between the templates you get with Jotform and those in Google Forms is just how many there are. Google Forms has fewer than 20 form templates, while Jotform offers more than 20,000.
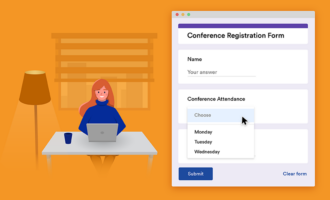
Explore our RSVP templates now 👇
If one of the templates looks good, click Use Template. That will take you to the Form Builder.
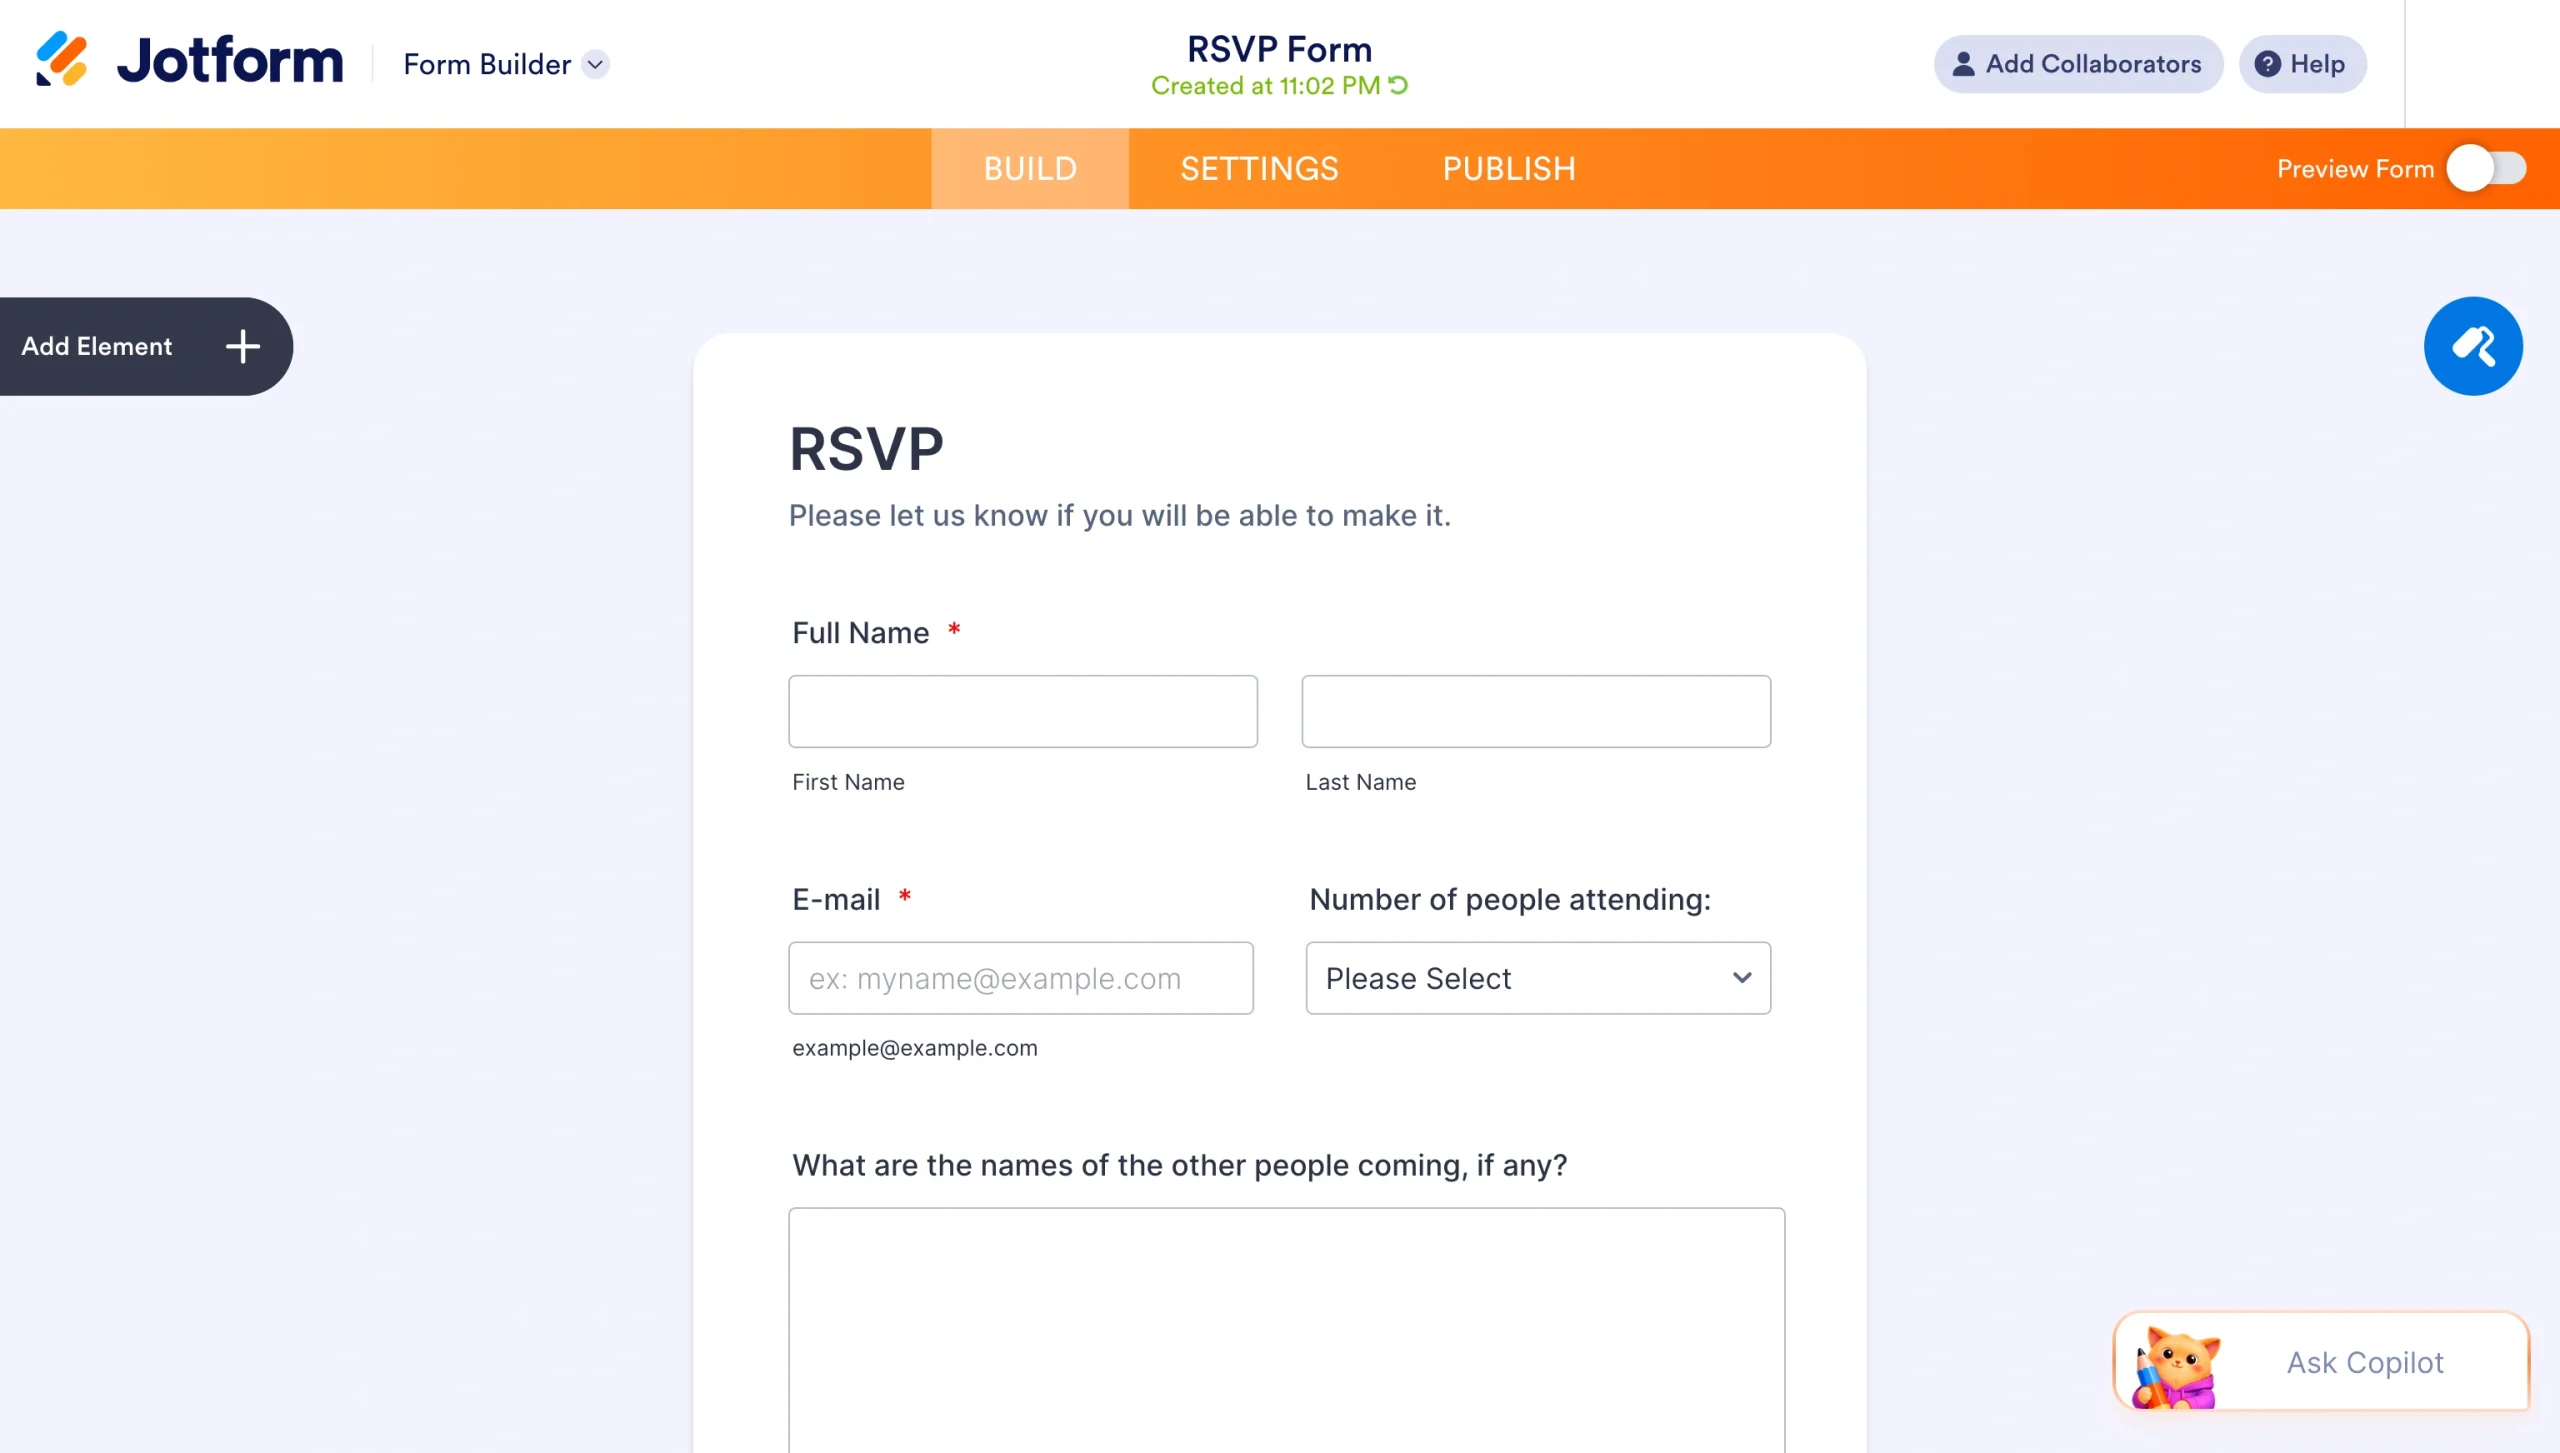
To add a header image, click + Add Your Logo at the top of your form. You’ll then see the Styles menu.
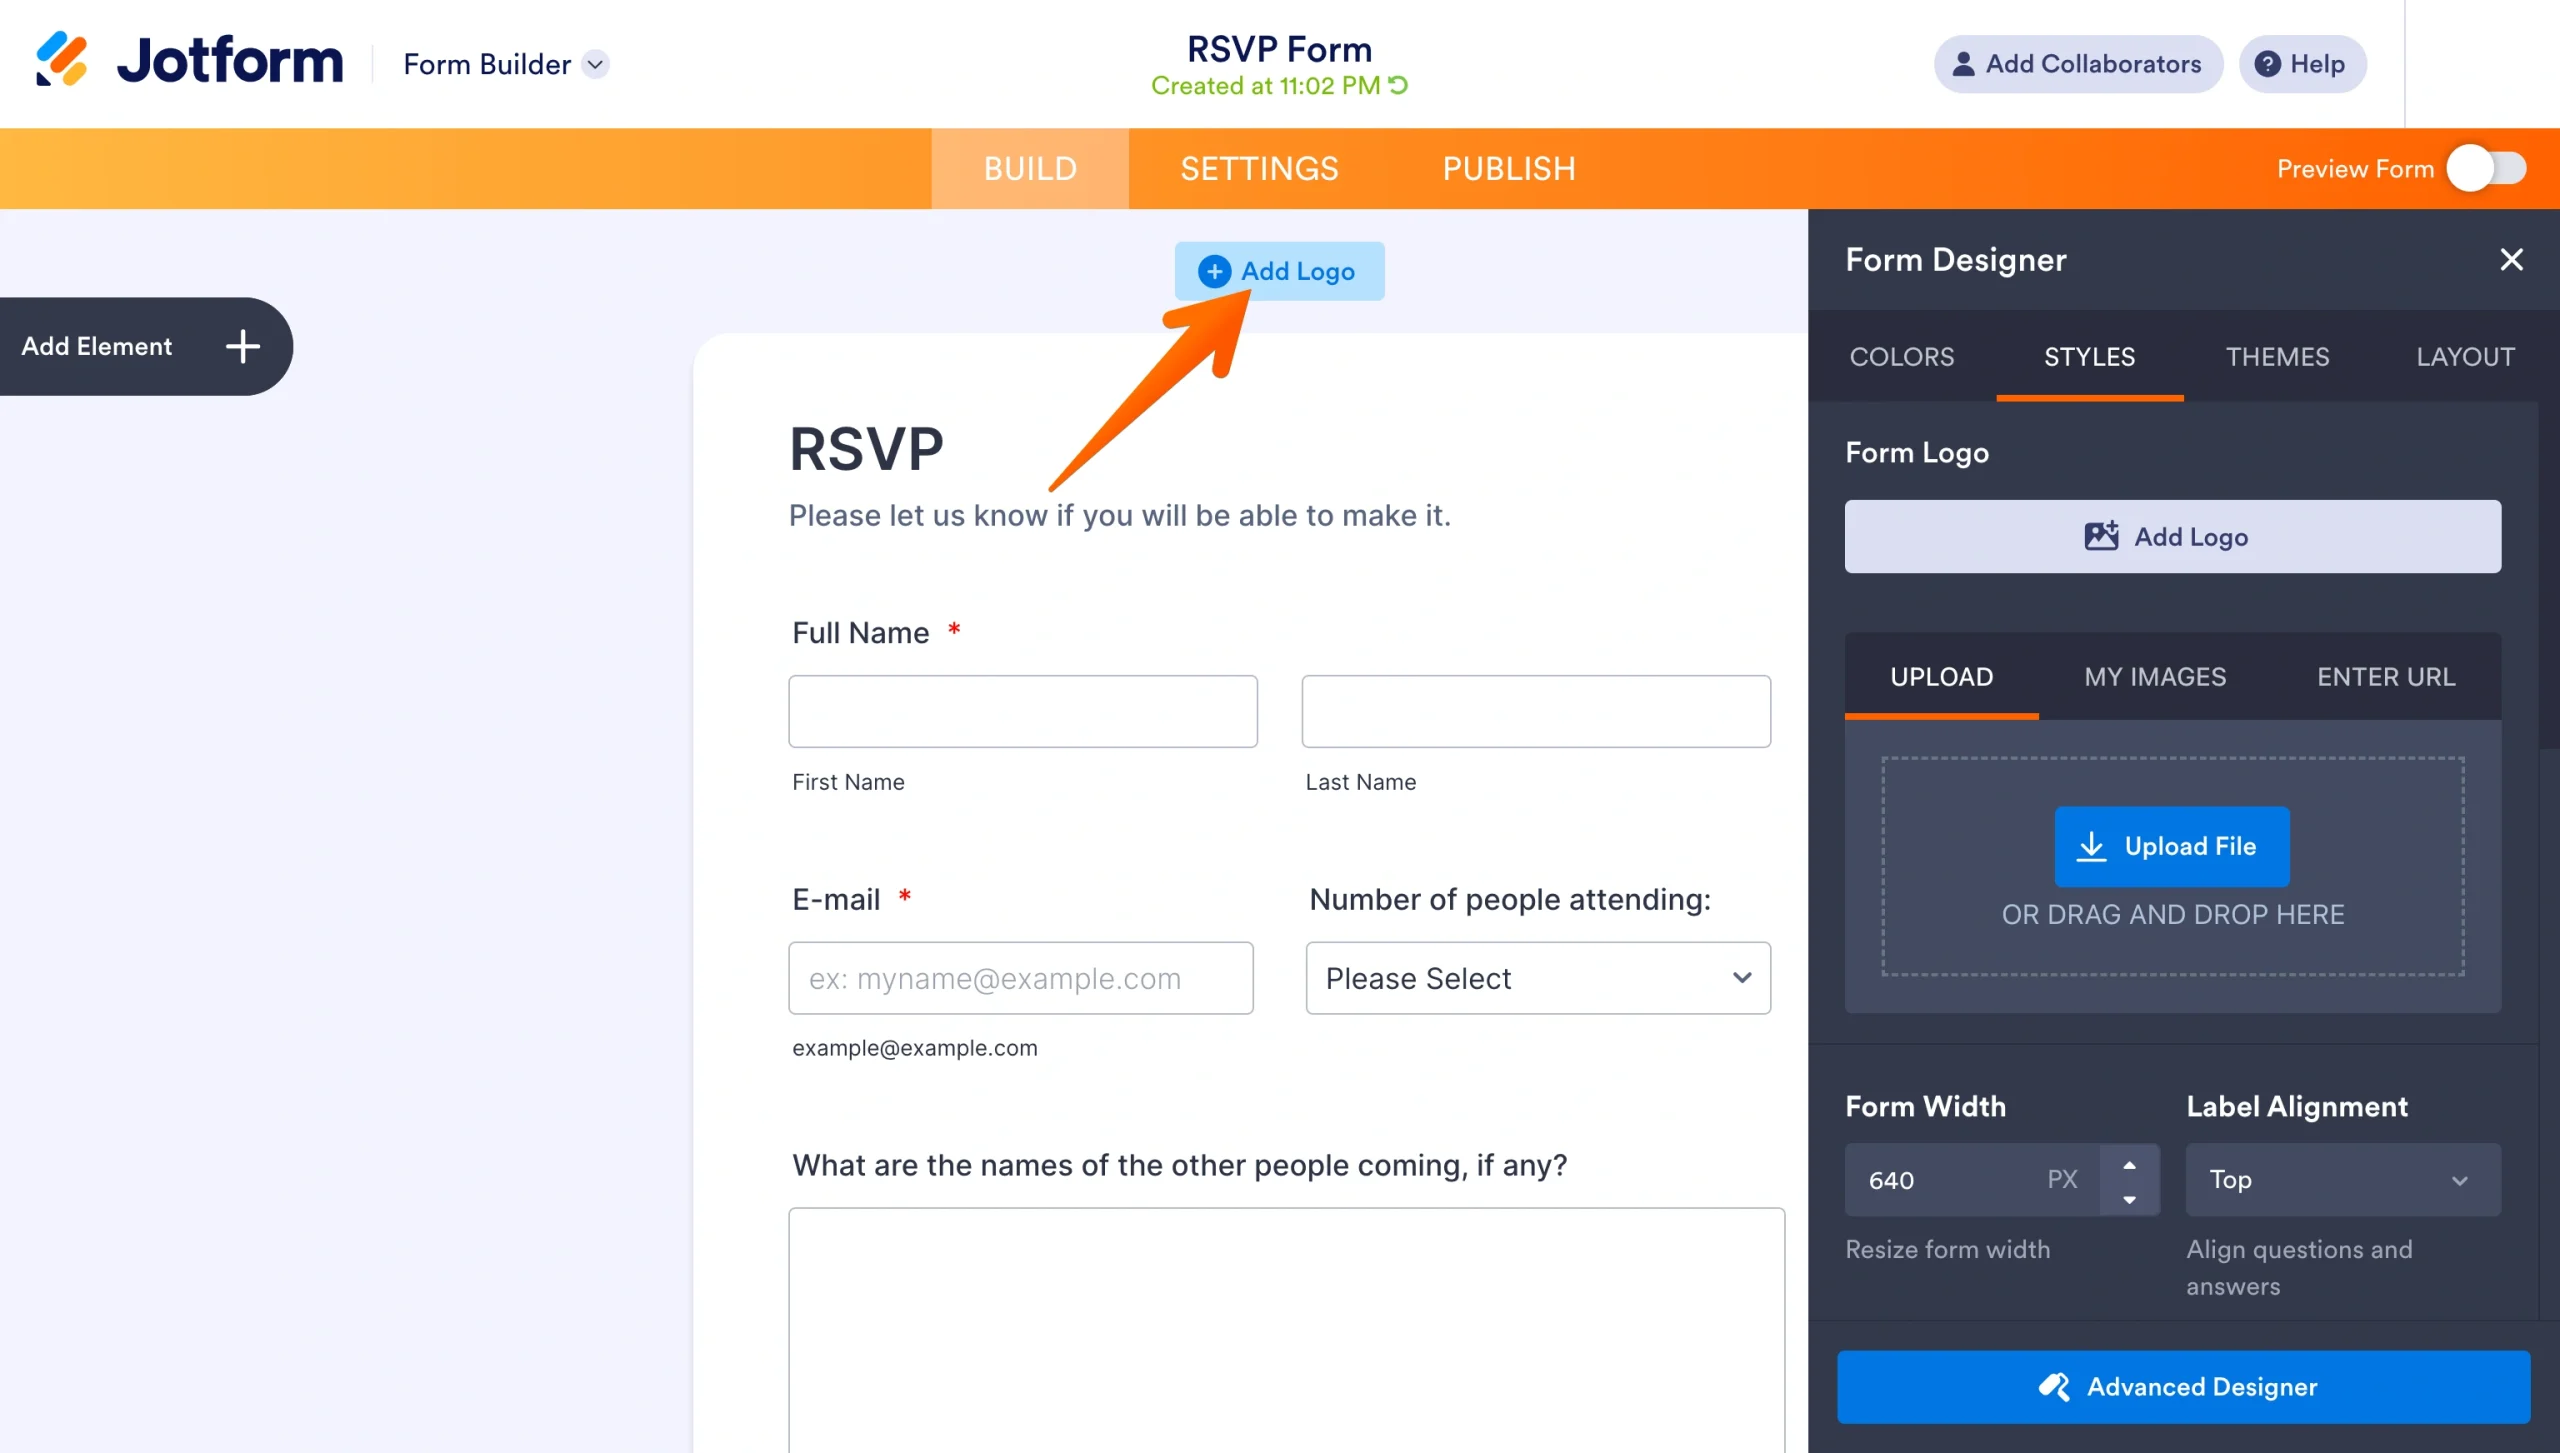
The Styles menu gives you three options that are similar to the image options in Google Forms. You can
- Upload an image from your computer.
- Choose an image you’ve previously uploaded to Jotform.
- Add an image from anywhere on the web by pasting in its URL.
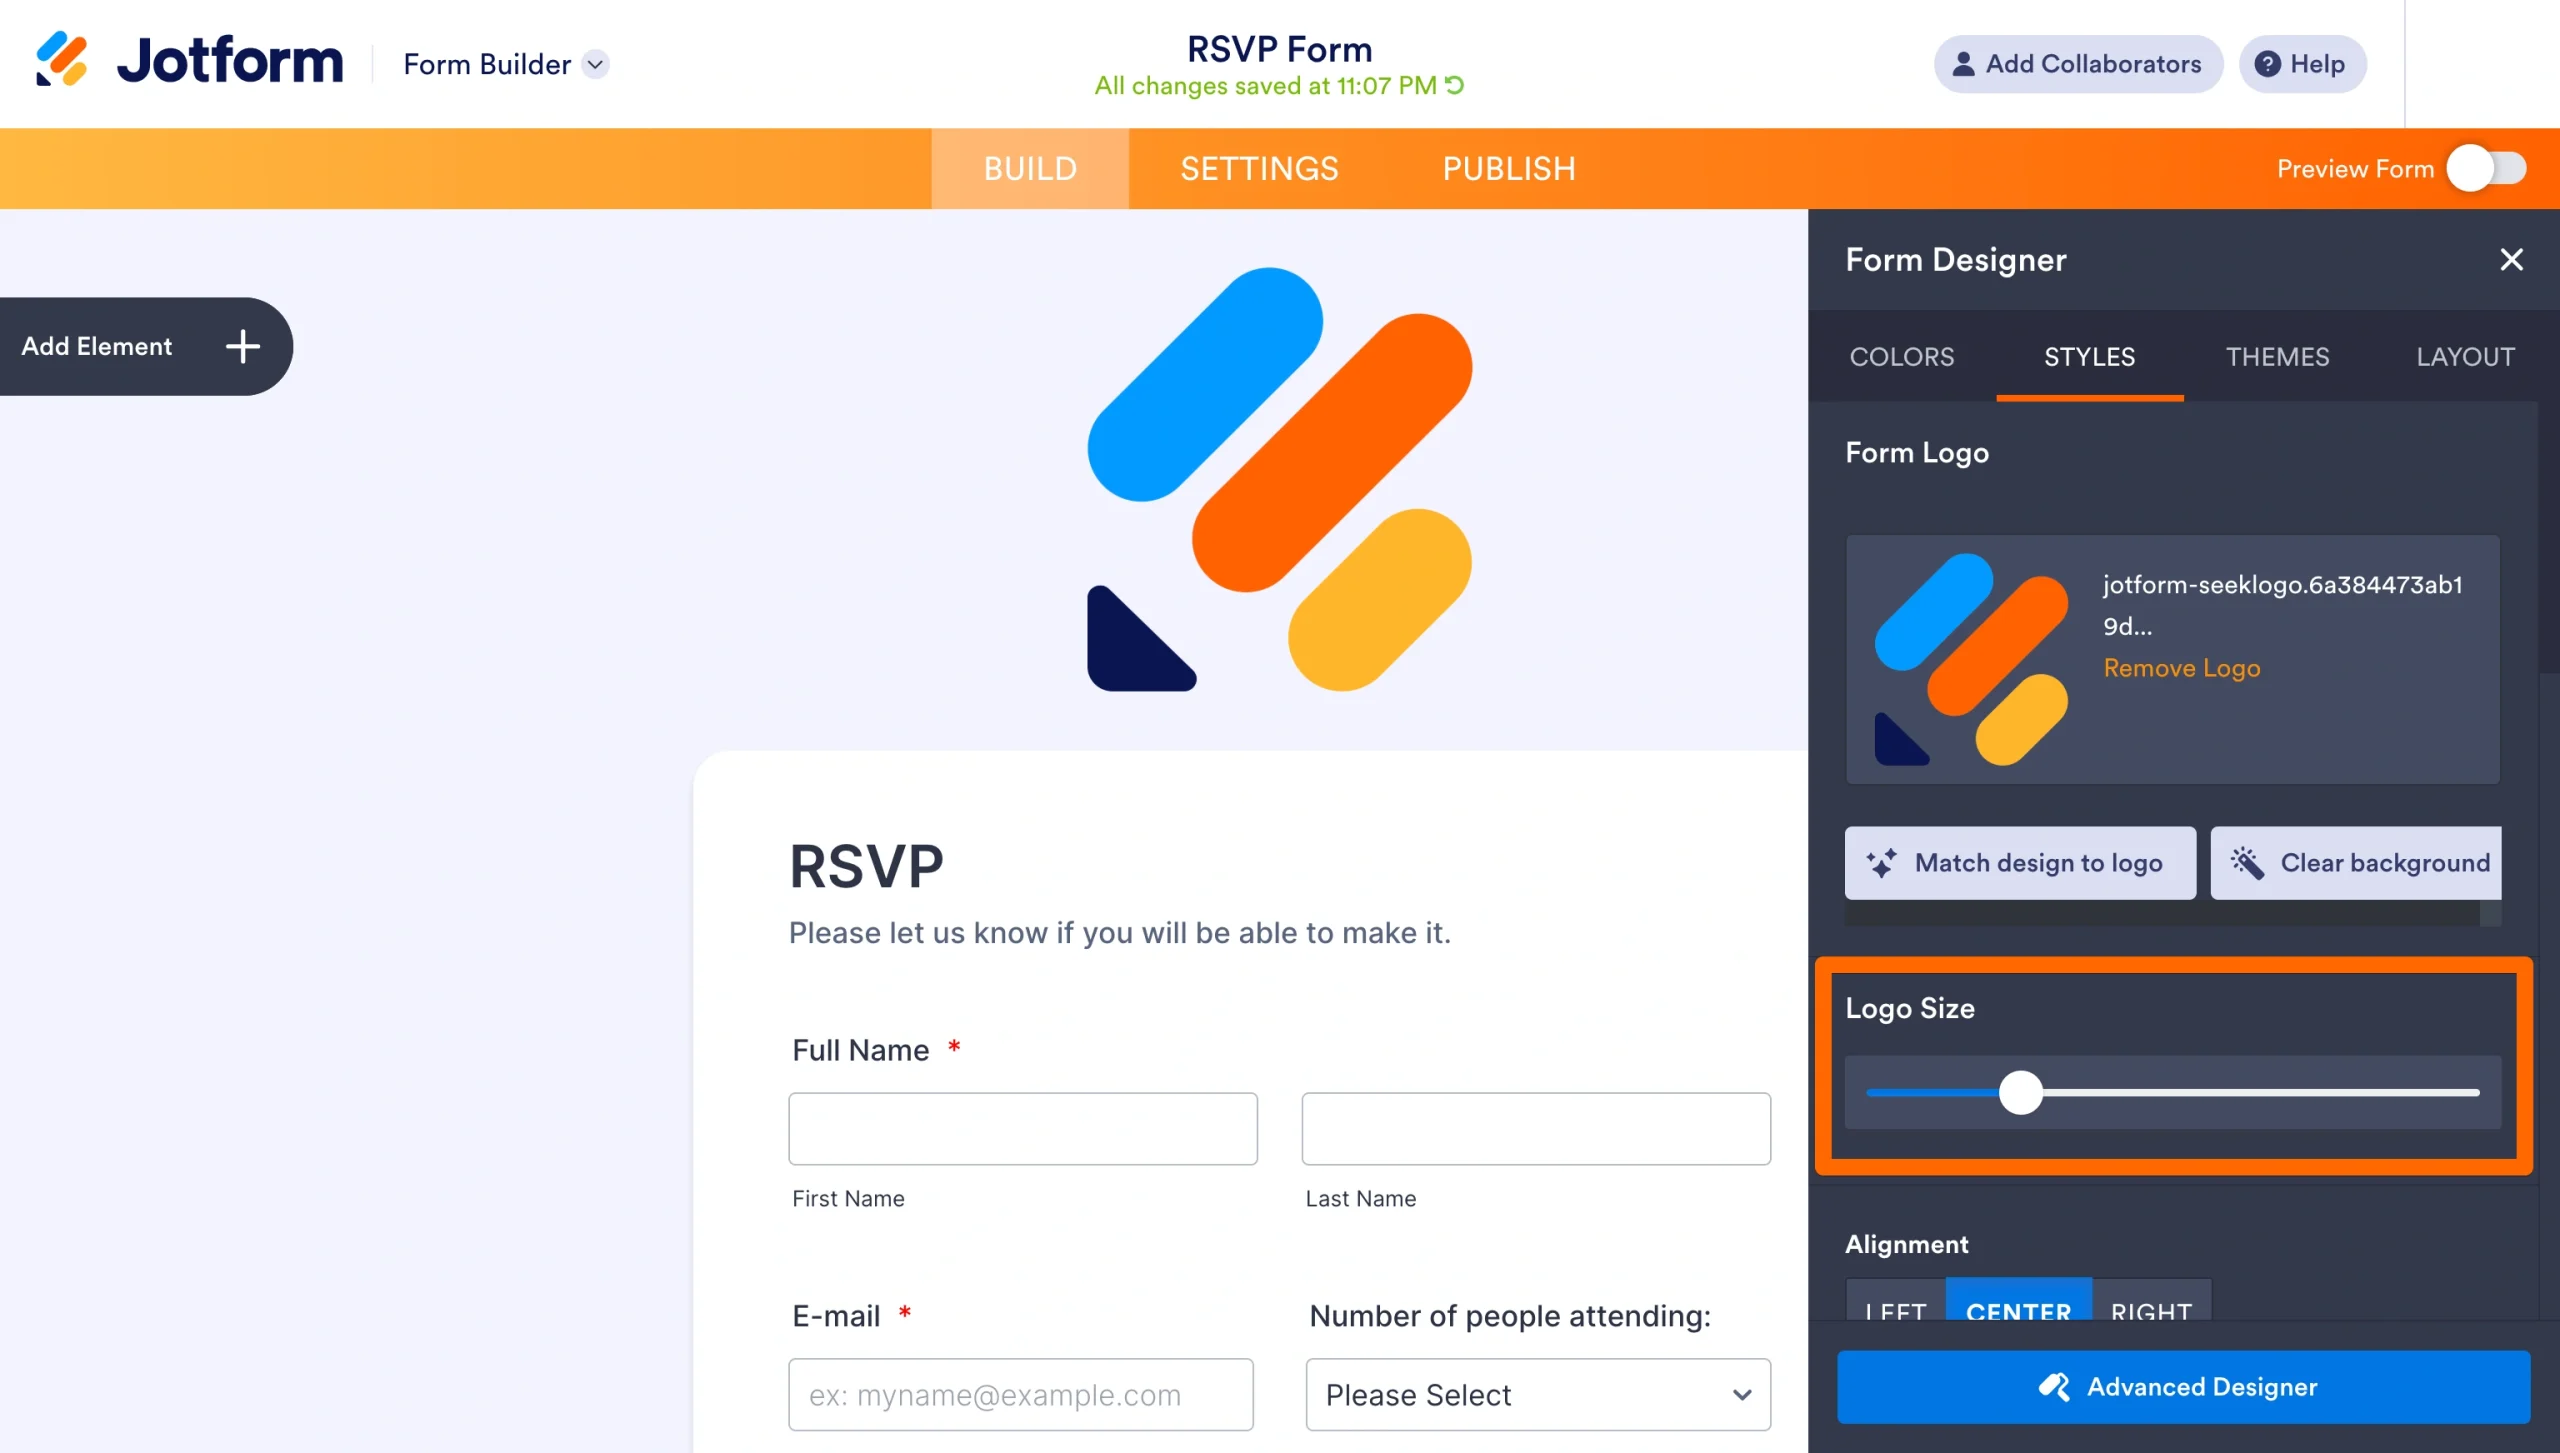
You can use the Logo Size slider to change the image size, and you can align it to the left, right, or center. If you want to edit your image further, you can do that better with an outside photo-editing tool.
That said, you can do more with Jotform if you don’t mind rolling up your sleeves. This tab gives you the most in-depth options available for customizing your form without getting too involved. And if you scroll to the bottom, you’ll see more options to really supercharge your form.
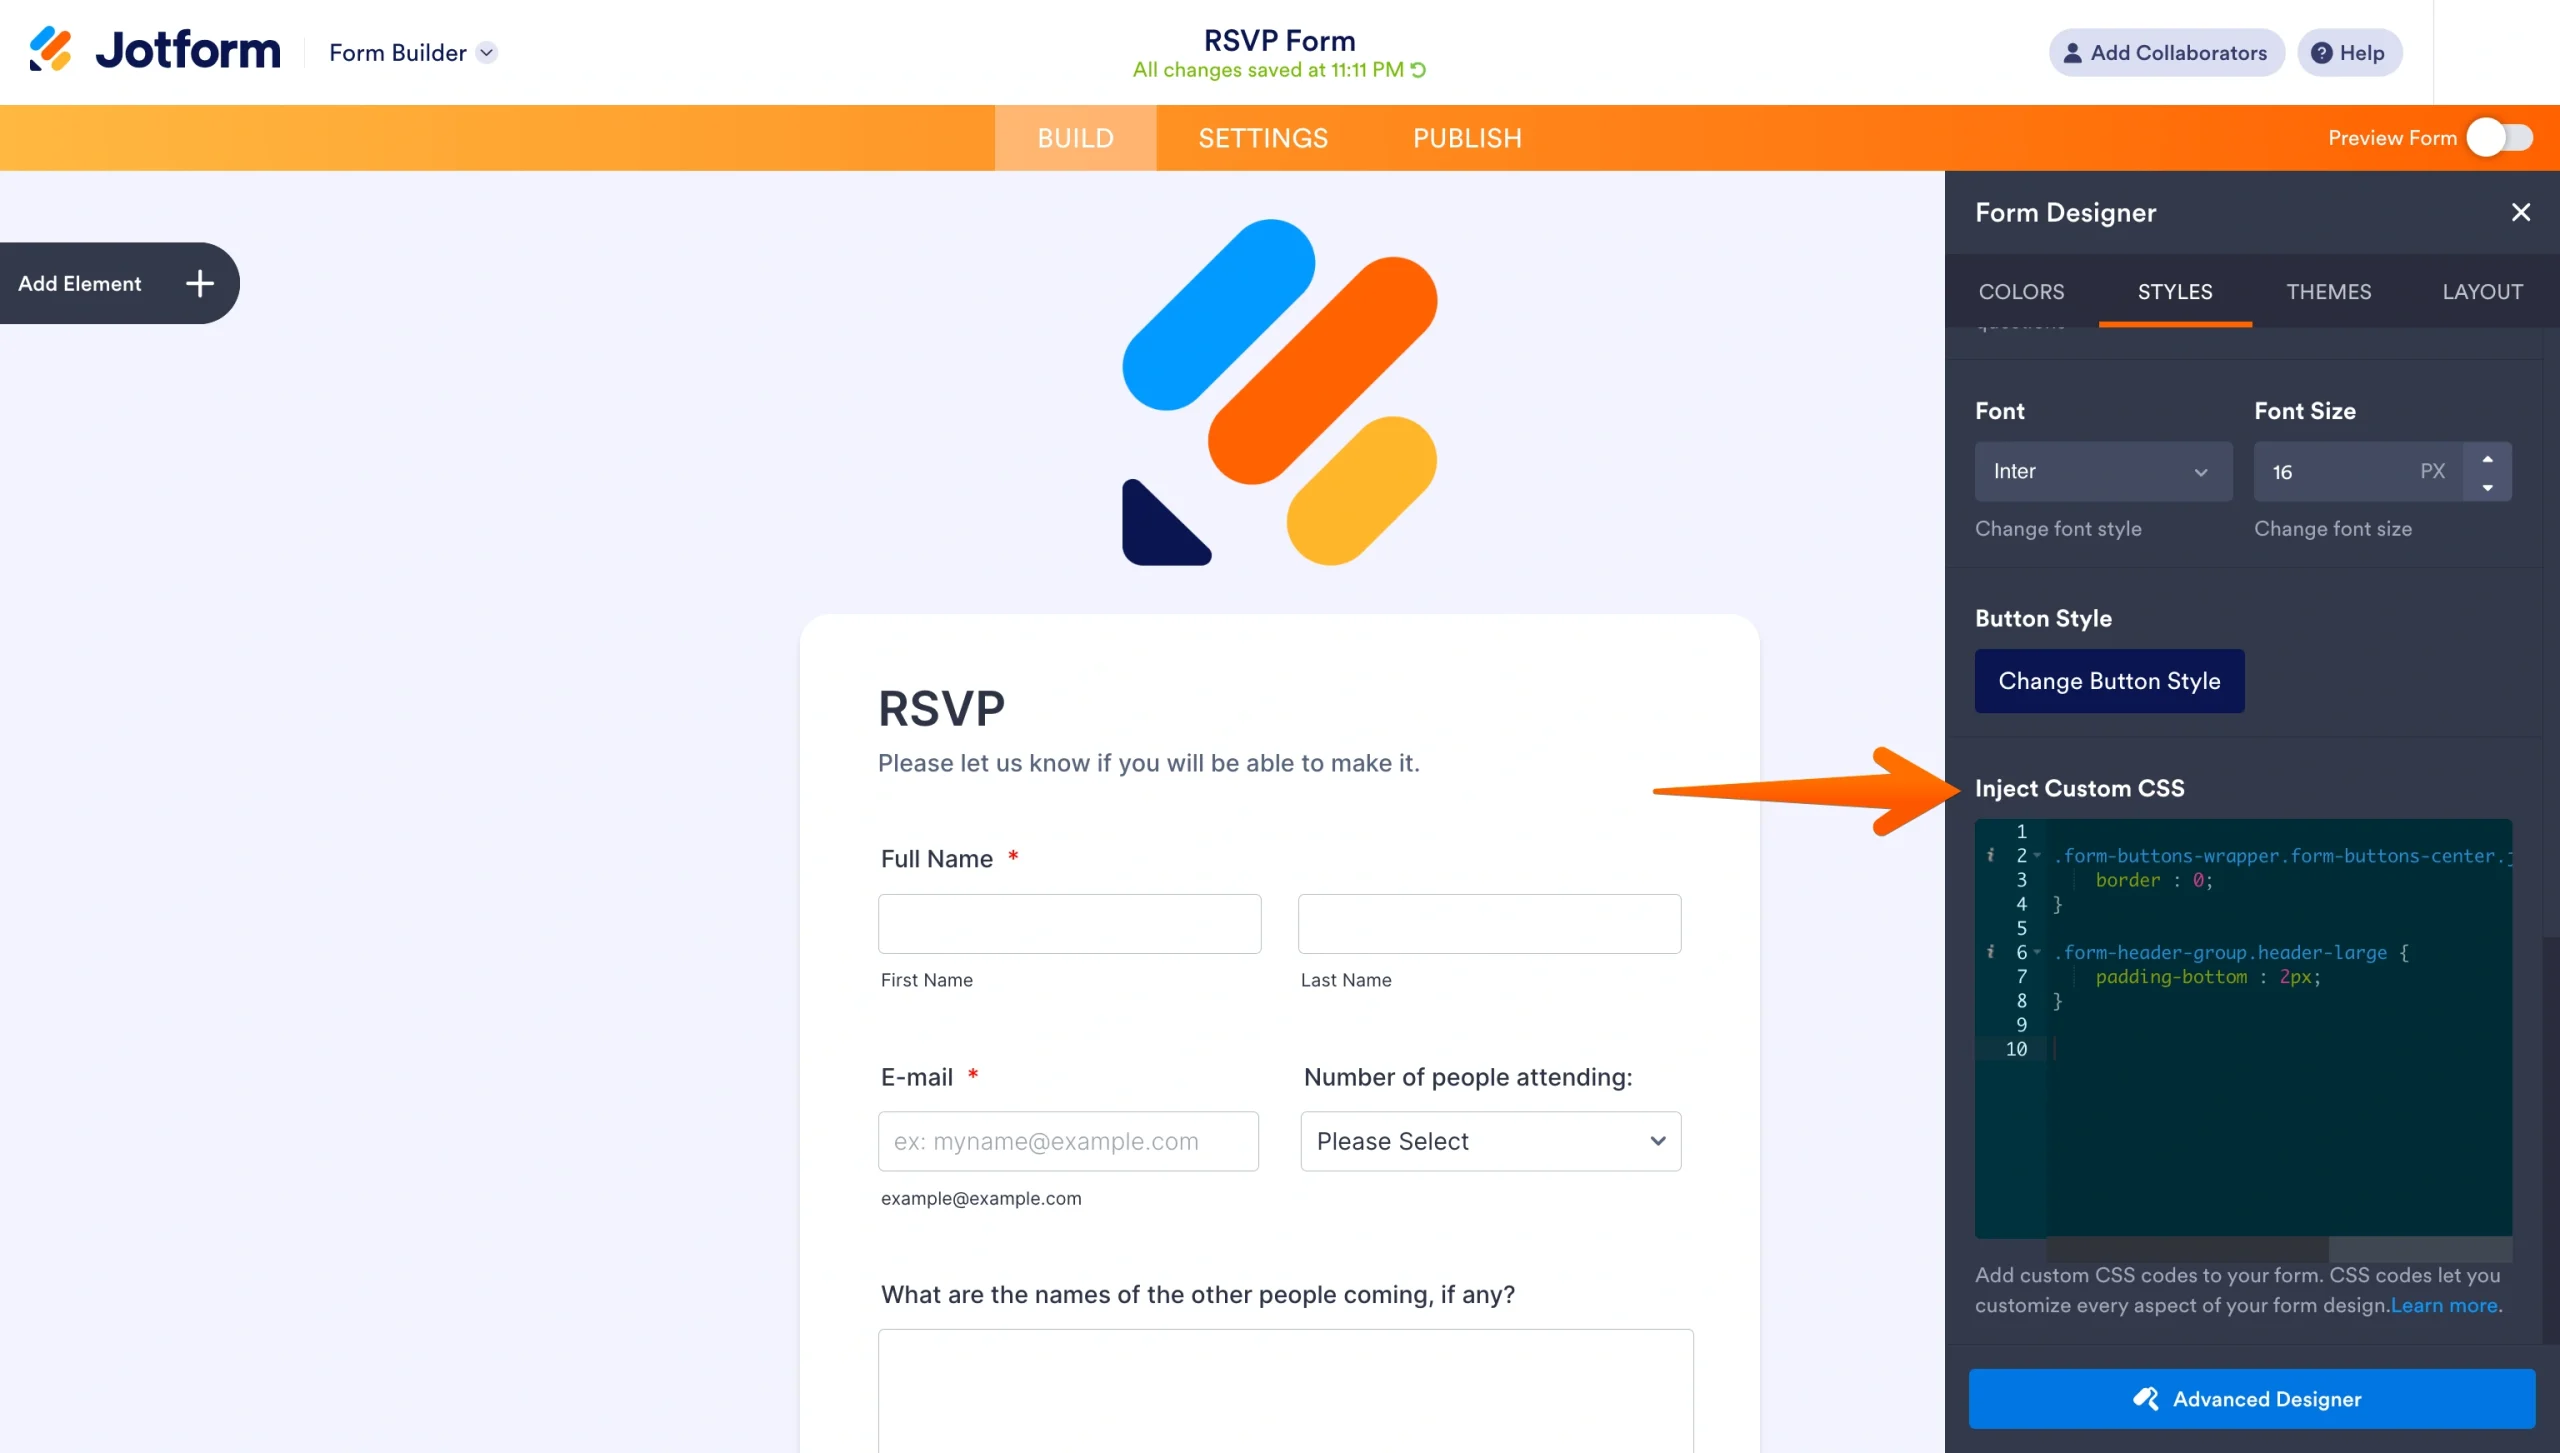
As you can see, you can inject custom CSS into your form, which should make your web designer friends happy. Click the Learn more link to see which elements you can alter here.
You can go even deeper into CSS design options with the Advanced Designer. At the bottom, there’s a large Advanced Designer button that will take you to the tool. Click that, and you’ll go down a rabbit hole of customization options.
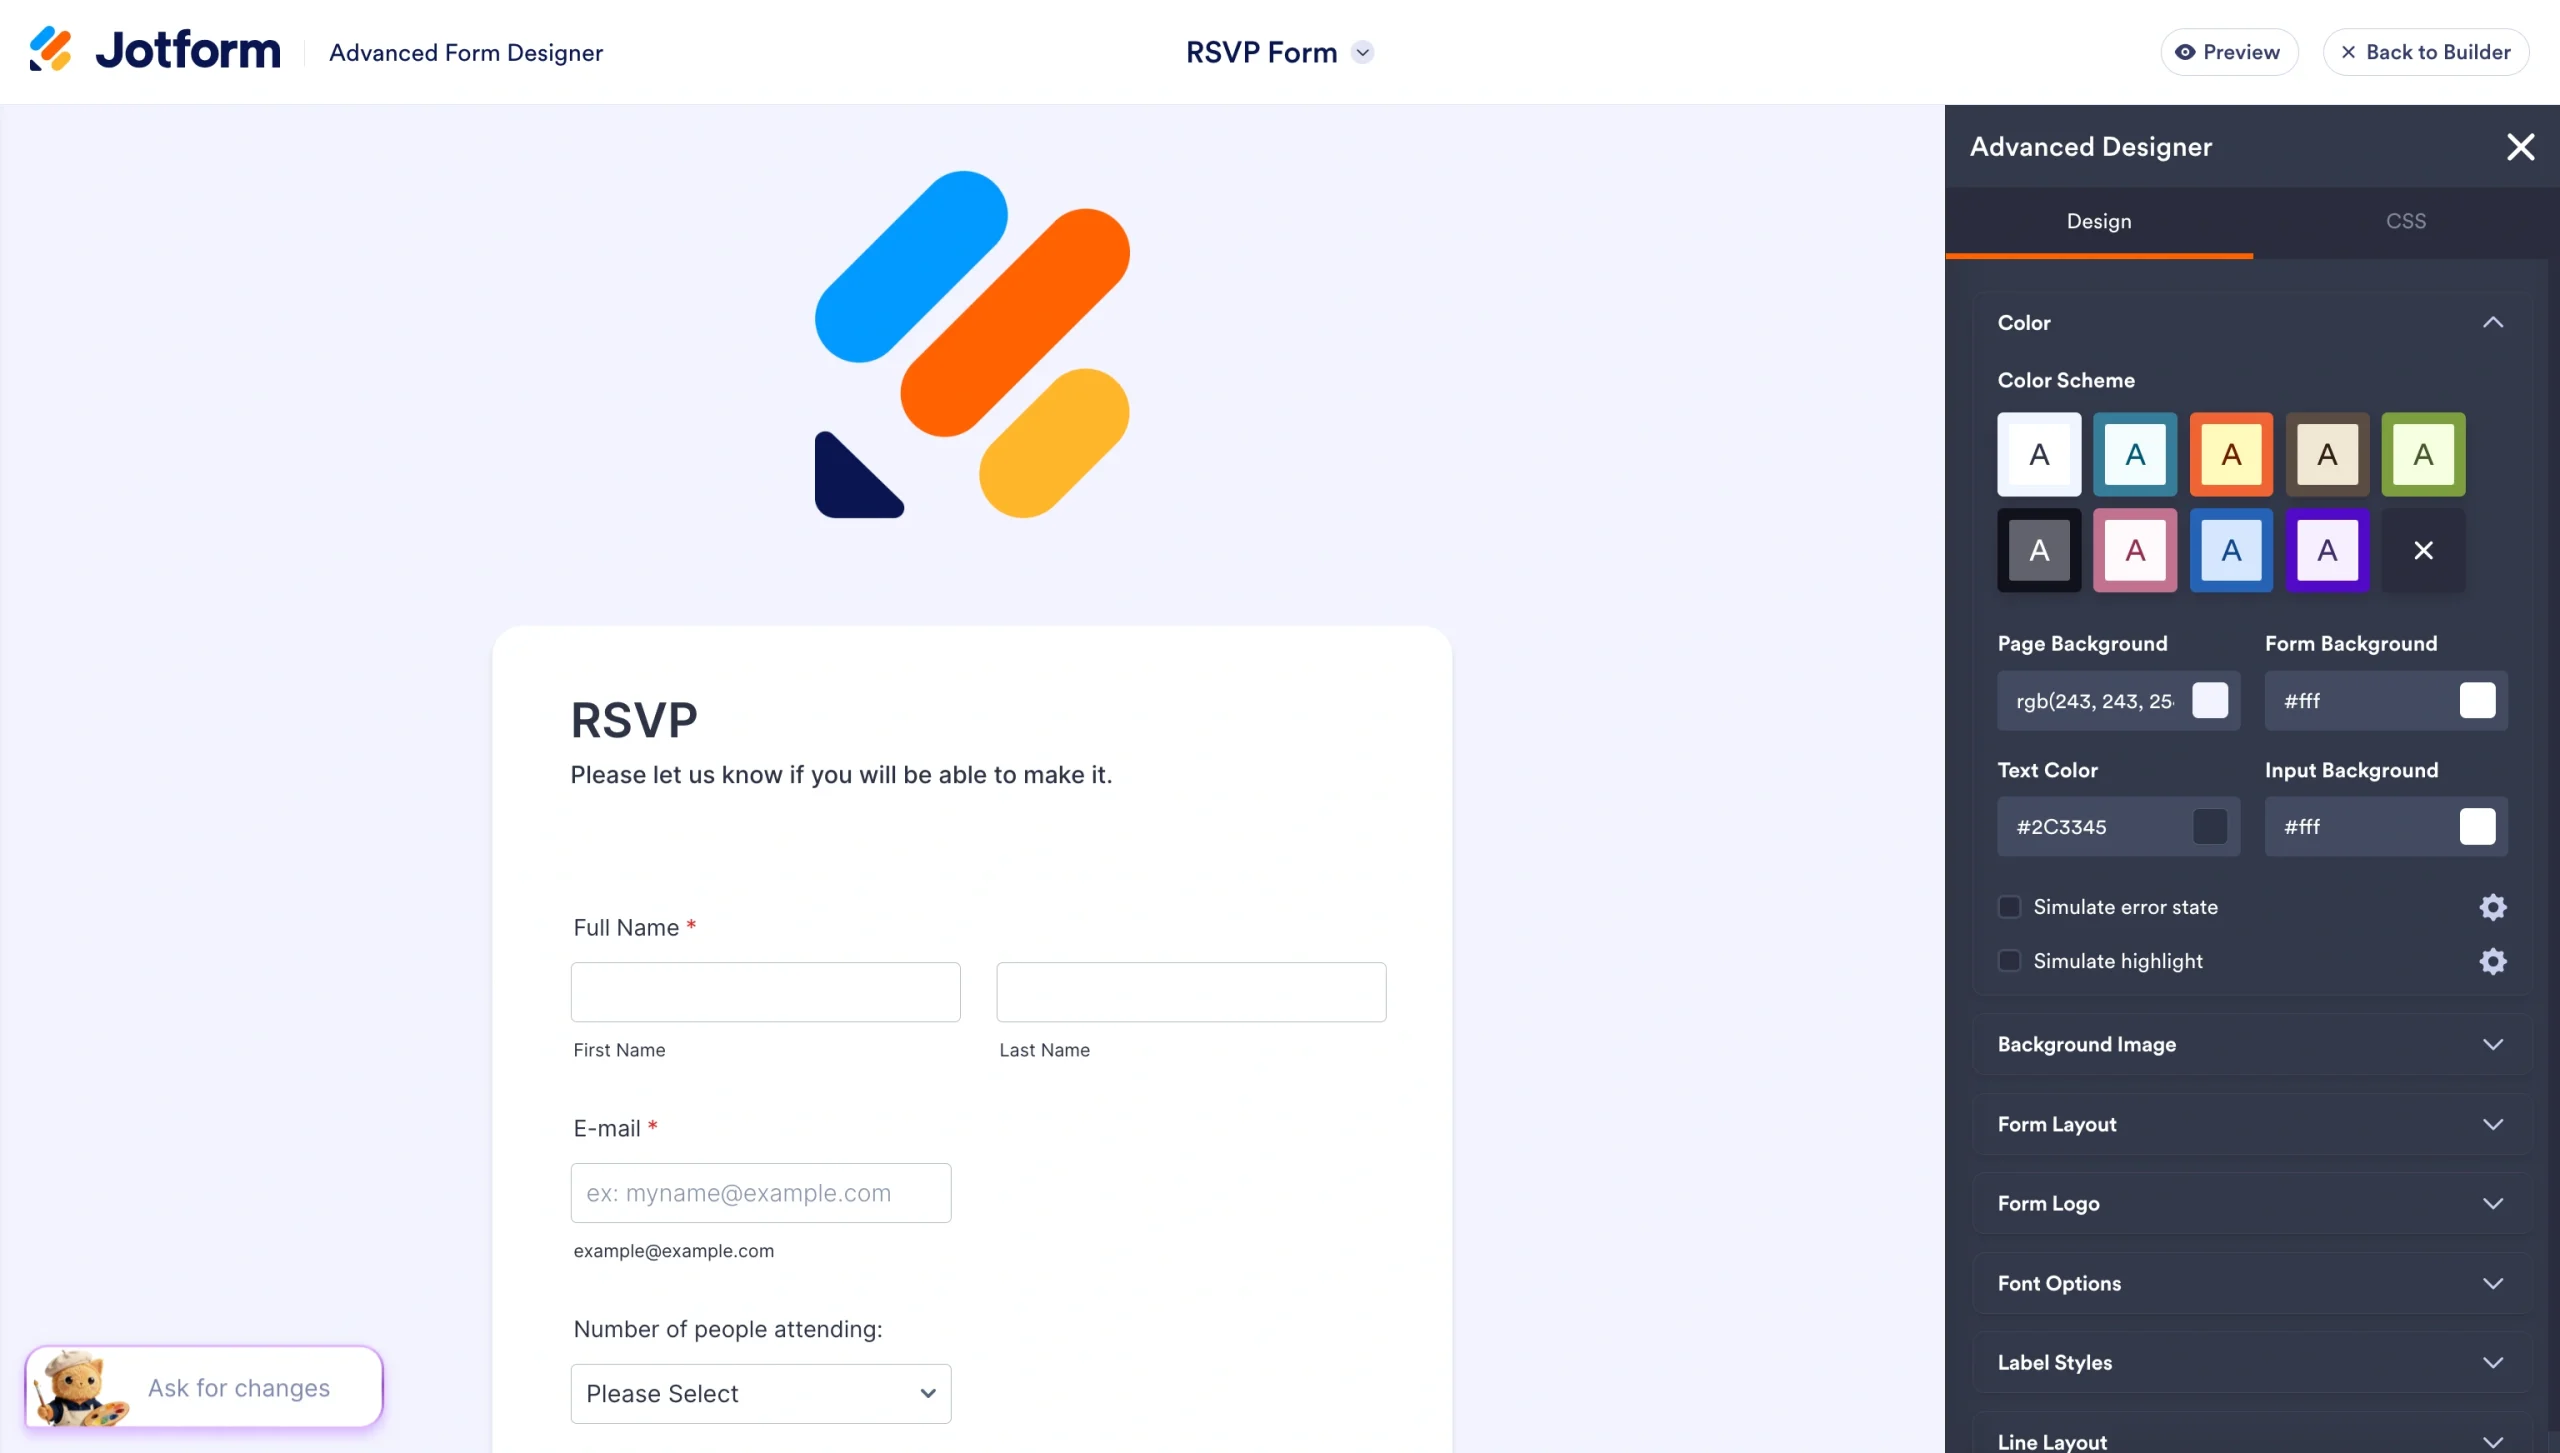
If you click on the CSS tab, you’ll see a more advanced editor than the simple CSS field you got in the standard designer.
Not only do you have easy access to the proper elements of your form, but you also have buttons to quickly add some of the most common CSS options to your HTML element.
How to customize more than headers
By only looking at the header image, we’ve barely scratched the surface of Jotform’s customization options.
If you’re not technically inclined, then Jotform’s basic options alone will take you much further than other form editors on the market. And if you’re a professional designer — or you work with someone who is — then you’ll appreciate the immense flexibility you’ll get with Jotform.
FAQs about Google Forms header images
Google Forms accepts JPEG, PNG, and GIF files for header images. JPEG works best for photographs and complex visuals, while PNG is the better choice if your design includes transparency or sharp-edged graphics like logos and text. Whatever the file, its size should stay under 10 MB, though smaller files load faster for respondents.
Yes, but it crops differently. On portrait mobile screens, Google Forms shows a taller crop of the image than on desktop or tablet, meaning more of the vertical space is visible, and more of the horizontal edges get cut.
Design your image at exactly 1600×400 px and keep all critical content — such as logos, text, and key visuals — within the central 1000×300 px safe zone. This ensures nothing important gets cropped on any screen size.
You can’t change the header dimensions within Google Forms itself. The 4:1 ratio is fixed by the platform.
Blurriness usually means your image was uploaded at too low a resolution. Google Forms stretches the header to fill the full width of the viewer’s screen, so anything under 1600 px wide will soften noticeably on larger displays.
You can upload a GIF, but Google Forms won’t animate it — it’ll display as a static image using the first frame only.
Google Forms doesn’t have a shared asset library, so you’d need to re-upload the same image manually to each form. The workaround is to save your header image to Google Drive and upload from there each time, keeping one master file that’s easy to find and consistent across all your forms.
This article is for Google Forms users, website operators, educators, marketers, small business owners, and anyone who wants to create professionally branded forms with properly sized header images that display correctly across devices while understanding the customization options available in Google Forms and Jotform.


Send Comment: