
Using Google Forms for inventory management
- Open Google Sheets and create a new sheet
- Name your spreadsheet and list your inventory
- Add your current inventory numbers
- Go to the Tools menu and select Create a New Form
- Add the data fields you need to track
- Click on the three vertical dots to add a Response validation
- Manage and sort data
- Share it with your team or anyone
Interactive step-by-step tutorial
Google Forms is an effective tool for businesses to gather the data they need for daily operations like inventory management — a business operation that requires detailed and meticulous tracking.
While some businesses rely on dedicated inventory management programs, Google Forms offers a cost-effective alternative that anyone can use. Not only is Google Forms easy to navigate, but it also integrates with the Google Workspace suite of products. This allows you to connect your Google Forms to your Google Sheets, creating a seamless exchange of information that empowers your team.
Here’s how to use Google Forms for inventory management, as well as how a powerful alternative offers an easier and more valuable inventory solution.

Looking for the best alternative to Google Forms?
Jotform’s full-featured form-building solution is mobile-friendly and has the most integrations in the industry. Use it to collect payments, automate workflows, gather leads, and more.
How to use Google Forms for inventory management
Once you’ve decided to manage your inventory with Google Forms, the initial setup takes a bit of work. While there are multiple ways to get started with this process, the easiest way to guarantee proper migration of your data is to begin in Google Sheets. Once you’ve completed this process, you can use and update your forms any time.
Here’s how to begin using Google Forms for inventory management:
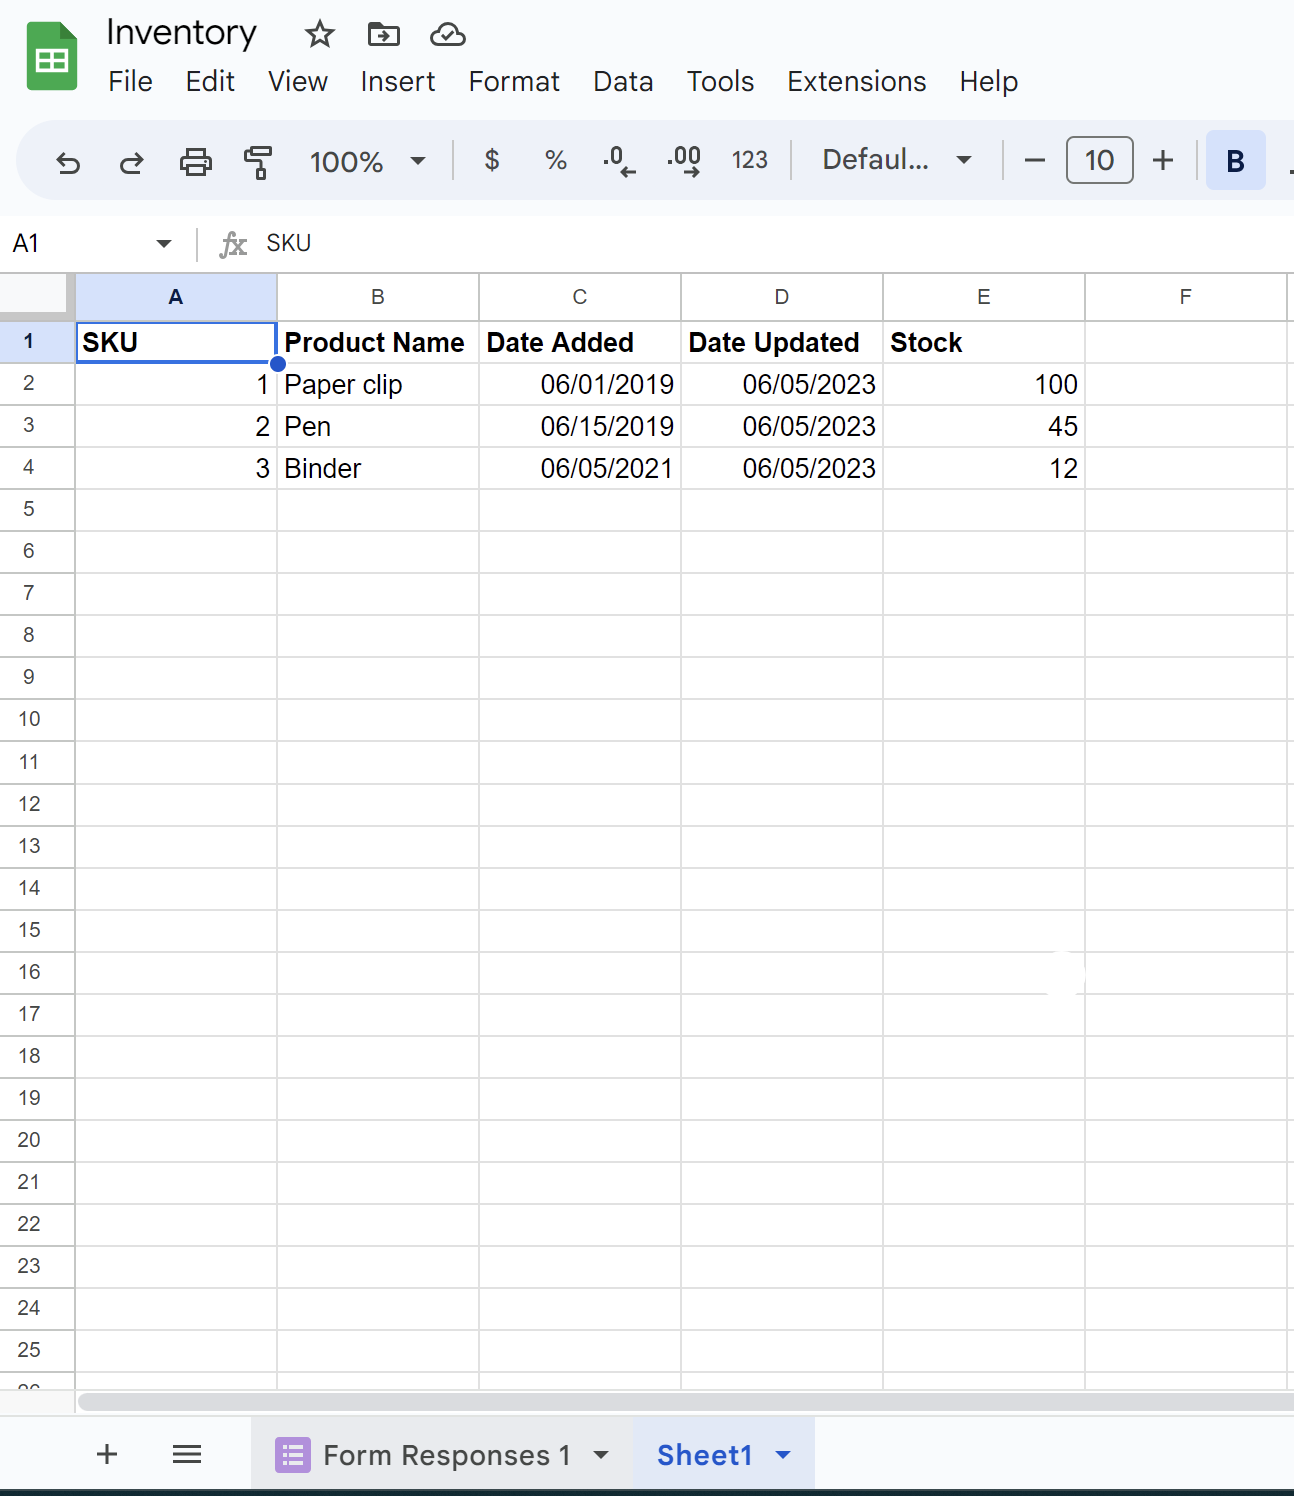
- Open Google Sheets and create a new sheet to manage your inventory data.
- Name your spreadsheet and list your inventory, making sure to include stock keeping units (SKUs) or product IDs for organizational purposes.
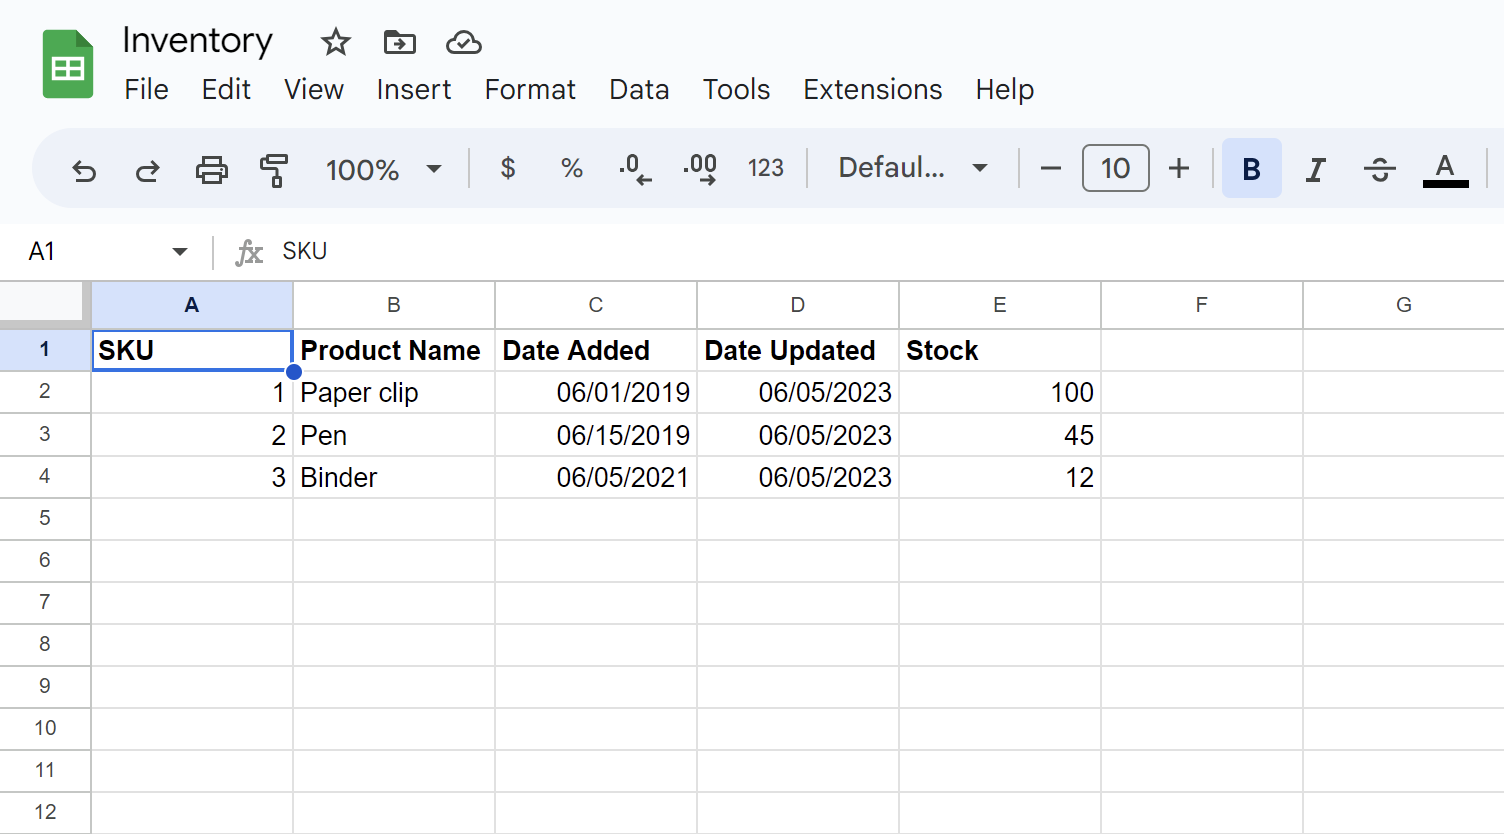
- Add your current inventory numbers as a baseline for your Google Form.
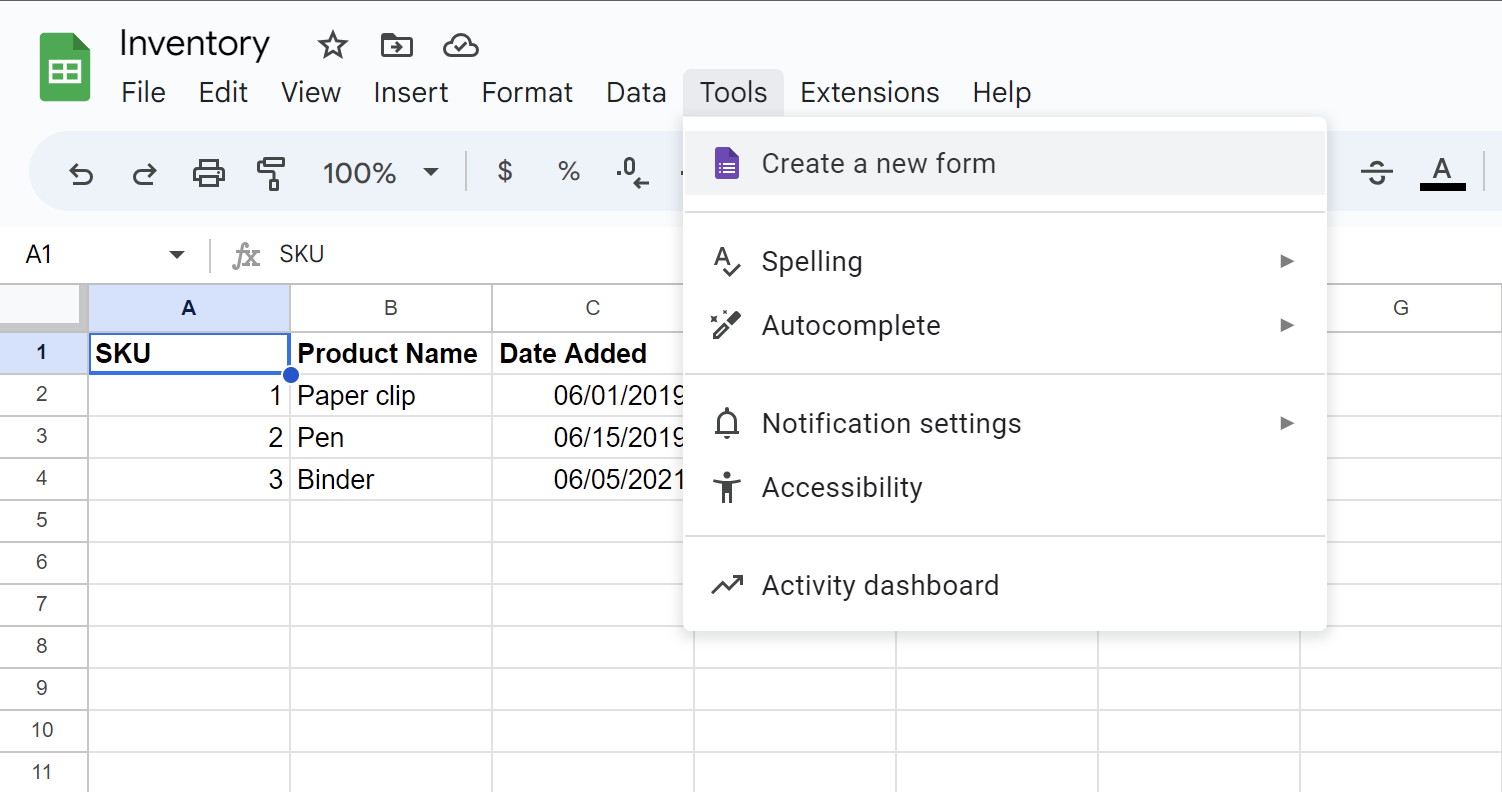
- Once your sheet is finished, go to the Tools menu at the top of the page and select Create a New Form.
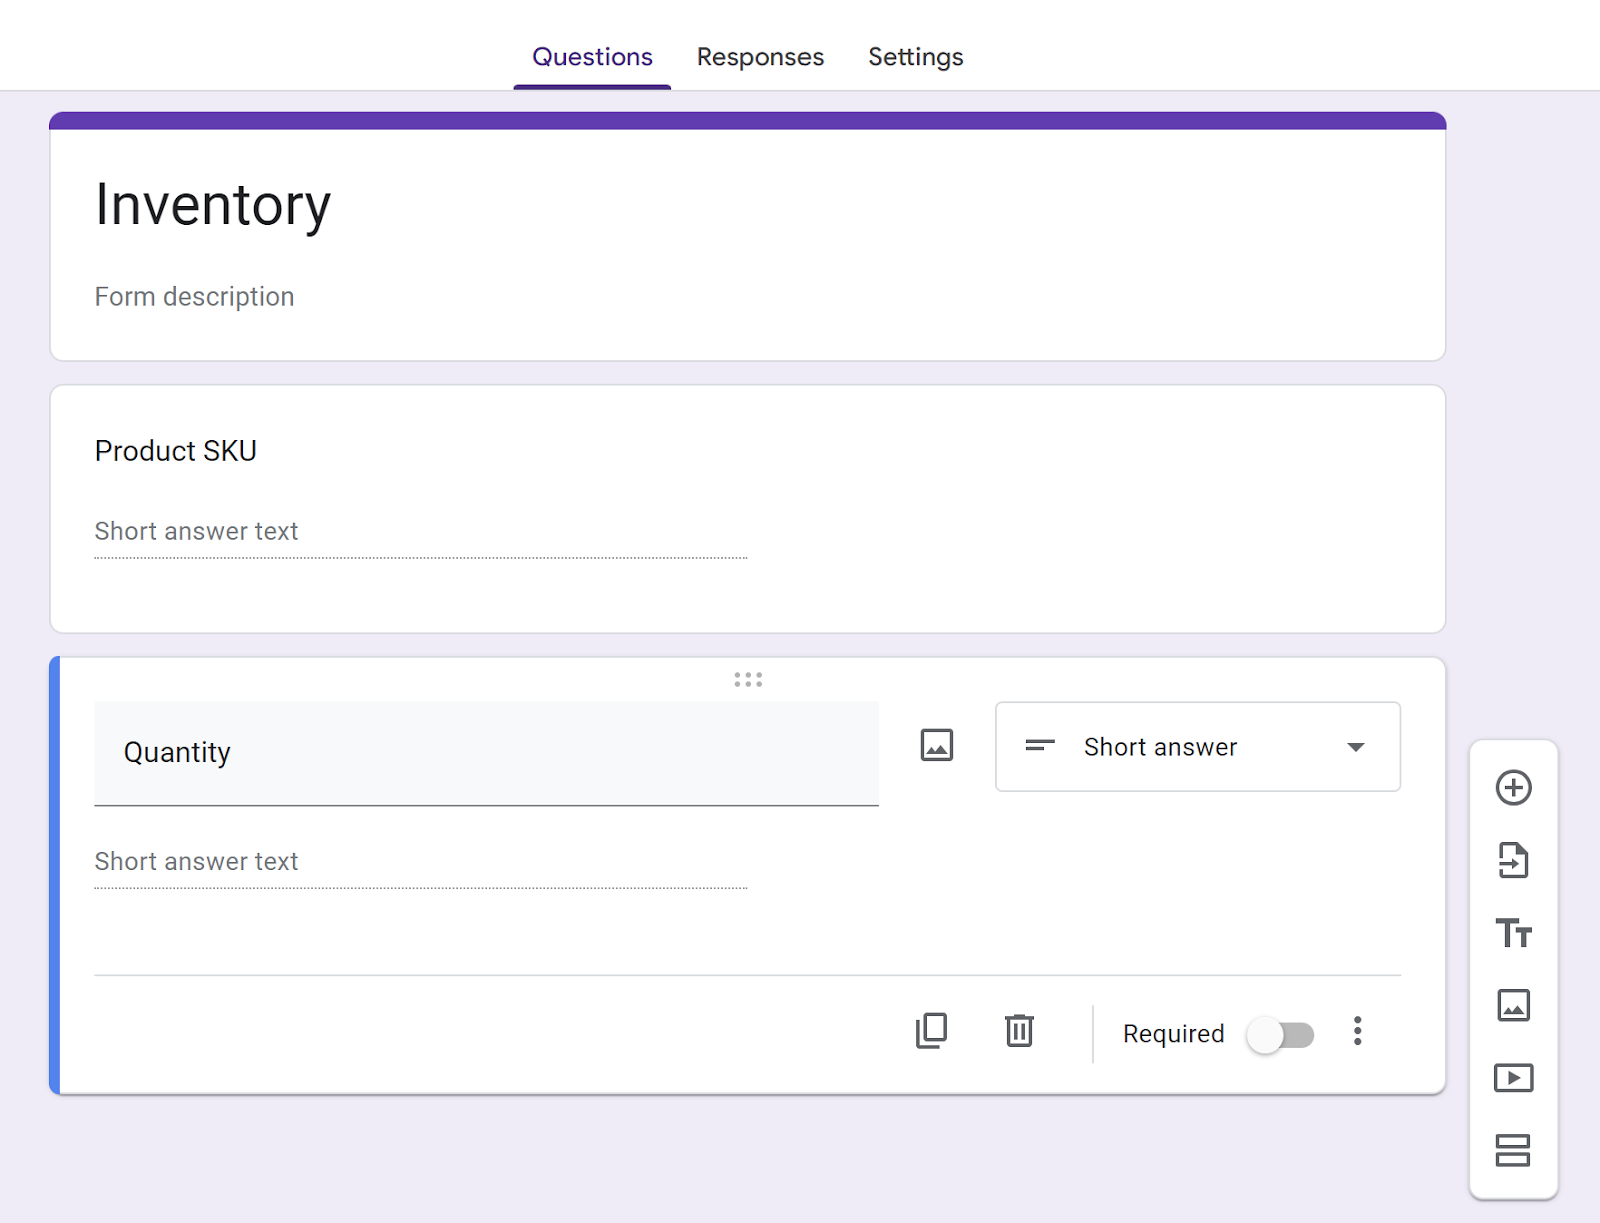
- Now that you’ve created a form, add the data fields you need to track. These typically include SKU and product quantities, but your form can be as complex or simple as you’d like.
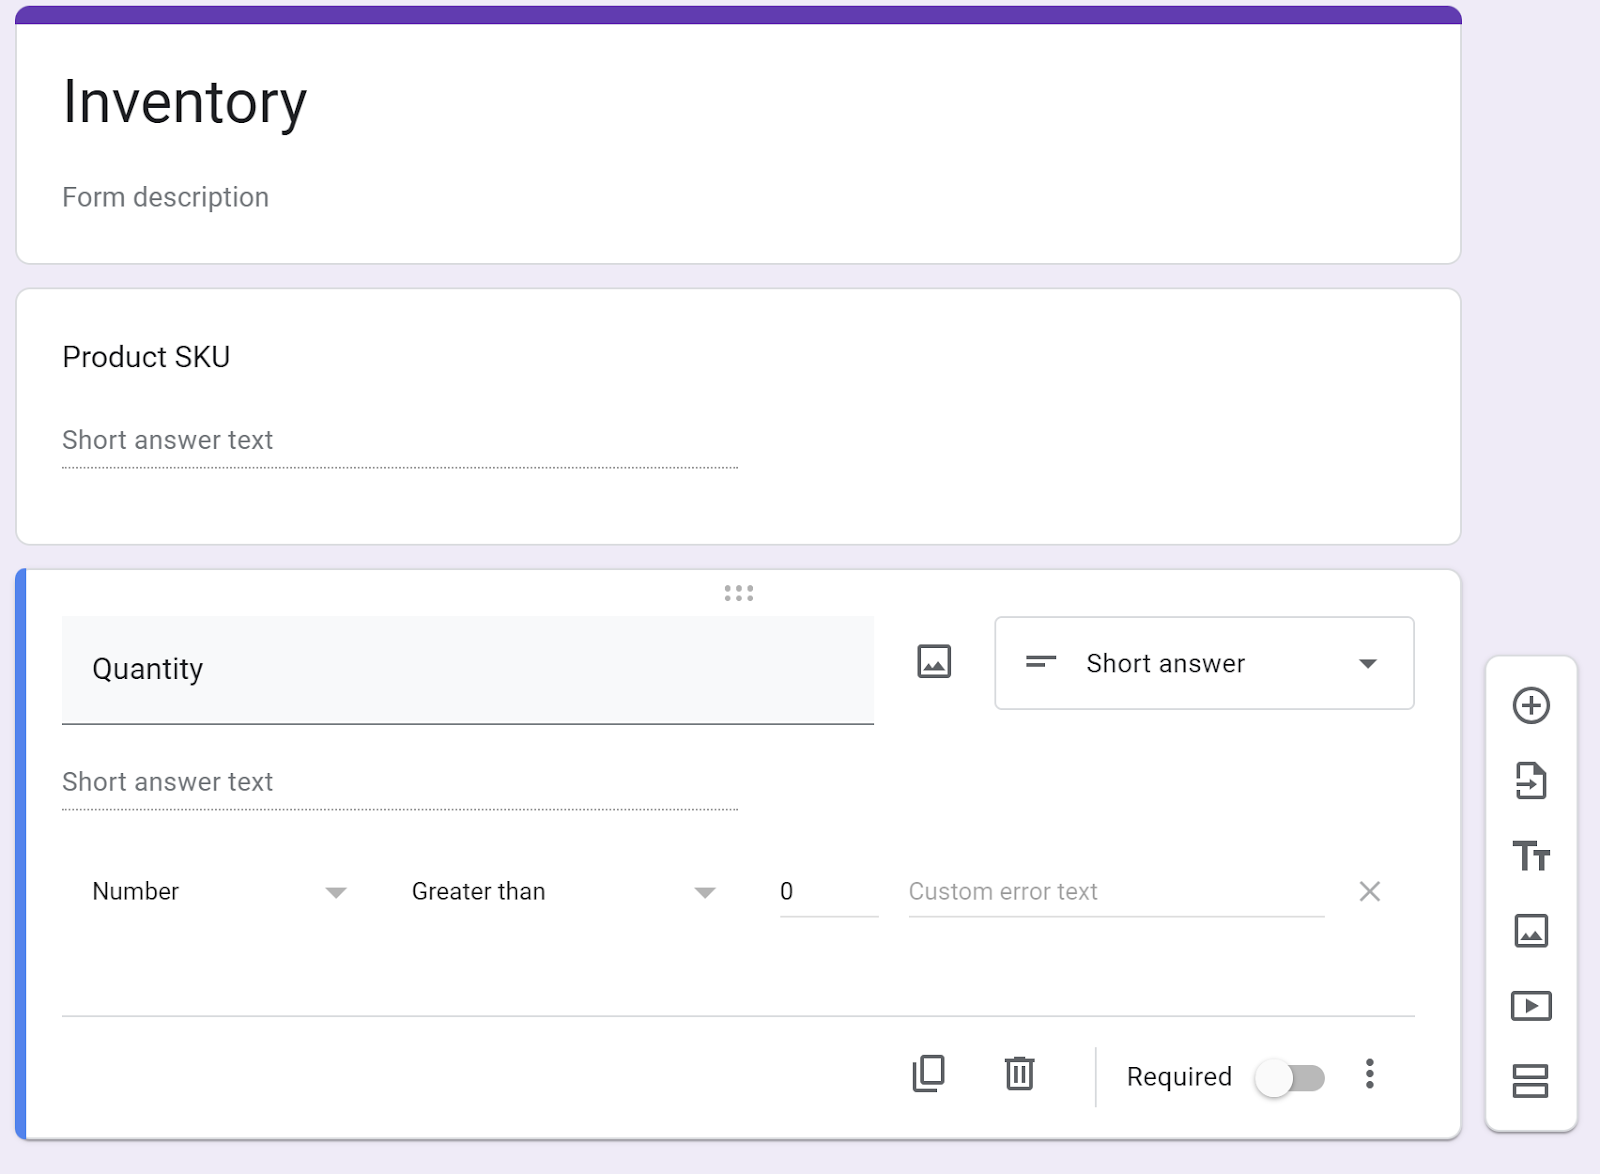
- To ensure accuracy, click on the three vertical dots in the bottom right of the question to add a Response validation to your quantity question and format your data by setting limits on how few or how many units can be entered.
- When you create your form through Sheets, your form responses will populate in a new tab automatically. In this tab, you can manage and sort data to help get accurate and timely inventory updates.
After you’ve finished setting up your form, share it with your team or anyone involved in your inventory process. Send it through a link or email, embed it on a web page, or post it on social media. Be sure to set up notifications for your forms, so you don’t lose track of entries.
While using Google Forms for inventory management is simpler than some other more complicated programs, it still involves many steps and requires an understanding of data management software — and not everyone has that. That’s why several Google Forms alternatives offer a simpler and more beneficial toolkit for inventory managers.
What makes Jotform a powerful Google Forms alternative
Google Forms provides users with a recognizable and accessible way to manage their inventory. However, the benefits of some alternatives significantly outweigh those of Google Forms.
With online form builder Jotform, for example, inventory management has never been easier. In addition to its free-to-use form-building software, Jotform has a full host of features that offer your team more control over your data. Some of the top features include
- More than 20,000 form templates, including over 400 tracking templates
- Data collection and organization with Jotform Tables
- Instant analytics reports with Jotform Report Builder
- 100-plus integrations, including with Google products
- Enhanced 256-bit SSL encryption
Organizing your inventory with Jotform allows you to quickly and securely gather data. Collect, share, and analyze your data with Jotform’s easy-to-use features that empower your team and improve efficiency.
How to collect data with Jotform
Collecting inventory data with Jotform is as simple as following a few steps. Once you create your inventory form, your data will automatically populate in an associated Jotform Table. Follow along to get started:
- Open the Form Builder.
- Title your form and add your organization logo, if desired.
- Click the Add Form Element button on the left side to select your form fields, then drag and drop them into the order you want.
- Once you’ve built your form, share it with your team by selecting the Publish button at the top right.
After you’ve created your form, Jotform Tables will automatically create a spreadsheet to help you capture and organize your responses. To access the results, go to My Forms, select your form, and then click the Submissions button in the top menu.
Don’t have time to build a form yourself? Use a template to save time, or use an inventory table template to quickly create an inventory spreadsheet and an associated form simultaneously.
You can also import data from your forms to your Jotform Tables inventory template or upload existing CSV and Excel files to organize them through Jotform. Jotform even lets you integrate your form with Google Sheets, so you can use the tools you prefer.
Inventory management is more accessible than ever with convenient options like Google Forms and Jotform. With both options offering universal access and user-friendly interfaces, your team will be sorting data with ease and improving the accuracy of your company’s operations.
Photo by Alexander Isreb


")


")


: Which is better for you?")


Send Comment: