Building a Google Forms expense tracker
- Create the expense form
- Select Google Forms
- Add an appropriate name to your form
- Modify the blank first question
- Change the question type to Short paragraph
- Click the three-dot icon and select Response validation
- Select Number
- Toggle the Required option on
- Click the + button to add a new question
- Label the question Category
- Create the next question about the expense
- Change the question type to Short answer
Interactive step-by-step tutorial
Expense tracking is one of the most important (and least glamorous) parts of managing finances. Without accurate and up-to-date records, it’s easy to run into cash flow problems from overspending, struggle to plan future purchases, and mismanage finances. It even makes filing taxes more difficult.
Expense forms can help streamline all of this.
Expense forms provide a standardized way to track and manage expenses, maintaining an up-to-date picture of your organization’s financial health at all times. Expense tracking is easier than ever with the right software. Even free online form builder Google Forms can serve as a robust expense tracker for organizations and departments of every size.
Read on for a breakdown of everything you need to know about setting up and managing a Google Forms expense tracker, including all the forms and spreadsheets it comprises.

Looking for the best alternative to Google Forms?
Jotform’s full-featured form-building solution is mobile-friendly and has the most integrations in the industry. Use it to collect payments, automate workflows, gather leads, and more.
How a Google Forms expense tracker works
A Google Forms expense tracker consists of a customized form for collecting expenses as well as a Google Sheets spreadsheet that helps businesses log all outgoing funds. This tracker allows businesses to keep track of expenses efficiently by providing a standardized format to input and upload expense data. Best of all, each Google Form entry is automatically logged in the spreadsheet, eliminating more processing work later on.
An expense tracker form should include fields like
- Date of the expense
- Amount spent
- Vendor/seller
- Expense category
- Any additional notes or comments
When you incur an expense, all you have to do is fill out the Google Form and hit the submit button. The information will automatically import into the master expense Google Sheet for later review. This data can help you analyze spending patterns, track cash flow, and make better decisions about future spending.
How to build a Google Forms expense tracker
Creating a Google Forms expense tracker is a straightforward but lengthy process. Here’s exactly what you need to do.
- First, create the expense form your employees will use to submit expenses.To create a new Google Form, sign in to Google Drive and click the +New button on the left.
- Select Google Forms to automatically create a new blank Google Form.
- Add an appropriate name to your form, such as “Expense Tracker,” and feel free to add a description as well.
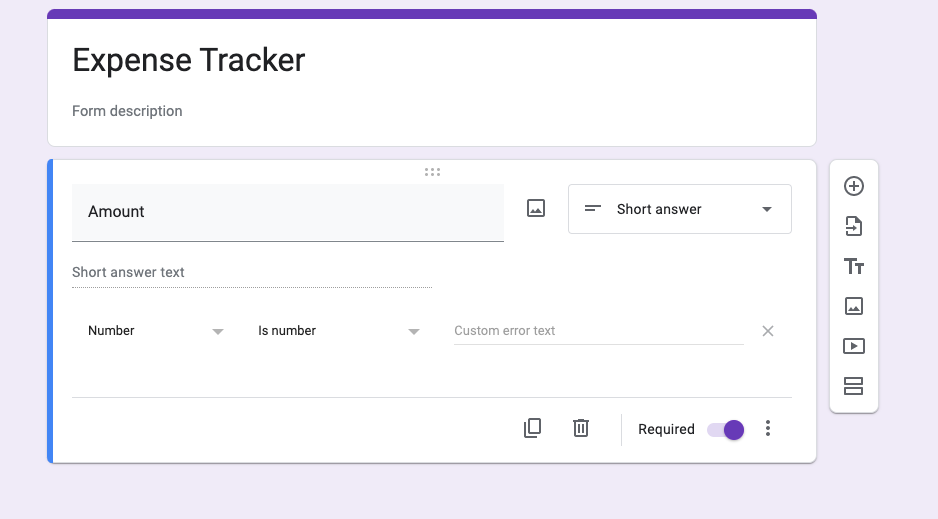
- Next, modify the blank first question to ask about the amount of the expense being submitted.
- Click the dropdown menu on the right side of the box and change the question type to Short paragraph.
- Click the three–dot icon at the bottom right of the box and select Response validation.
- In the new answer parameters section, select Number in the dropdown menu to the left. In the middle dropdown menu, select the Is number option.
- Toggle the Required option on.
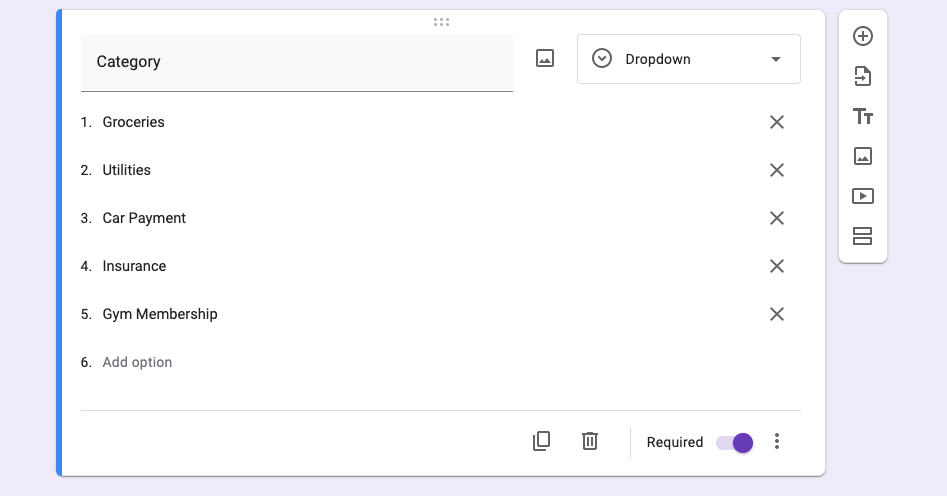
- Next, create a question about the category of the expense. Click the + button on the right menu to add a new question below.
- Label the question Category and change the question type to Dropdown.
- Write the names of your expense categories in the fields below.
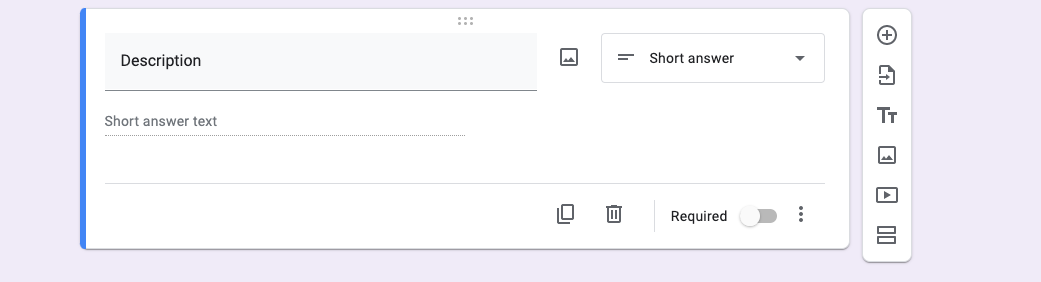
- Click the + button on the right menu to create the next question. This will be for additional information about the expense.
- Name the new question Description and change the question type to Short answer.
Now that you’ve built a basic expense tracker form, it’s time to create the Google Sheet that will keep track of all your expense entries.
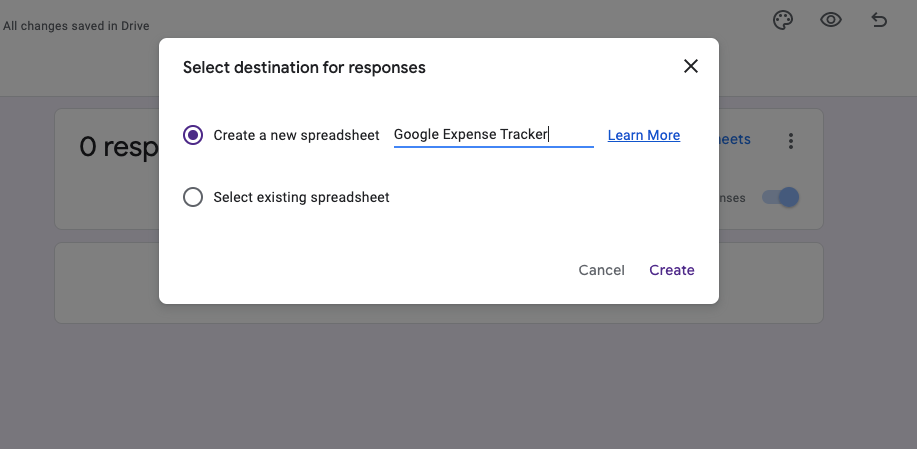
- Click the Responses tab at the top of the page.
- Click Link to Sheets on the right. You can also click the three-dot icon at the right of the screen and click the Select response destination option in the new menu.
- Select Create a new spreadsheet and name the sheet as you wish. Then click the Create button.
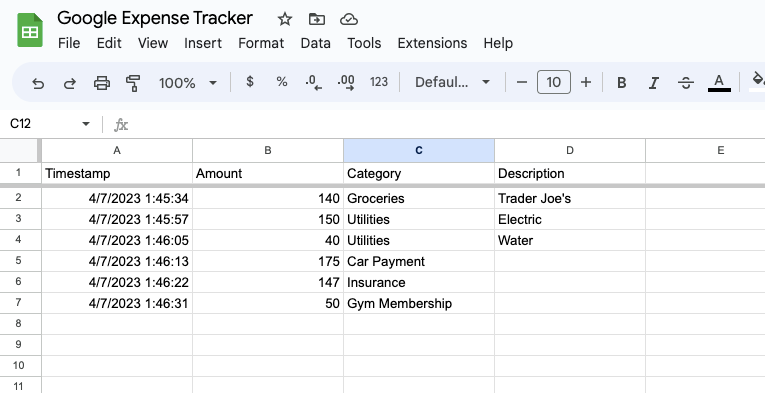
- The spreadsheet will already be set up with column labels that align with the form questions. Submissions will automatically populate in the spreadsheet as you add new expenses.
Why Jotform is a great Google Forms expense tracker alternative
Google Forms isn’t the only free online form builder available for expense tracking. Jotform is a robust, cloud-based form builder with a library of more than 20,000 customizable form templates, making it an advanced alternative to a Google Forms expense tracker. The template library even includes a wide array of expense tracking templates.
Jotform offers a number of advantages over Google Forms for expense tracking, including more customization options and payment integrations, in addition to a mobile-friendly interface. Users can easily customize expense forms to match their organization’s branding and even upload logos and custom images. Overall, Jotform’s flexibility and wide array of features make it a superior option for tracking expenses.
Tracking expenses with Jotform is similar to building a Google Forms expense tracker. Simply follow these steps:
- Create a customized form to capture your expense data, including fields for the purchase date, amount spent, vendor, expense category, and any additional information for recording an expense.
- Submit expense data directly through the form. Data is automatically recorded in Jotform Tables.
- Use Jotform Tables to analyze submissions — you’ll have all of the calculation capabilities you’re accustomed to using in Microsoft Excel or Google Sheets.
- As needed, export your data to other software, like QuickBooks, TurboTax, and other financial tools, for more streamlined data-sharing and recordkeeping.
Expense tracking is a tedious but unavoidable aspect of managing finances. Fortunately, the right form-building automations can make the process seamless. Follow this guide to build your own Google Forms expense tracker if you need a basic system, or use an alternative like Jotform if you’re looking for more advanced expense-tracking capabilities.
Photo by Dan Dimmock on Unsplash


")
")


")


: Which form builder is better for you?")

")
: Which is better for you?")


")


")


Send Comment: