
For many companies, the most important function of a business website is to generate leads — that means collecting contact information from site visitors so you can turn them into customers.
If your site runs on WordPress, one way to grab the attention of site visitors and increase the chances that they’ll provide their information is to use a WordPress popup form. In general, popup forms encourage visitors to engage with your company in a particular way, whether that’s to sign up for a discount, a newsletter, or something else. A WordPress popup form is the most efficient way to do this for WordPress sites.
In this article, we’ll explain when you should consider adding a popup form and how to build one in just a handful of easy steps.
When to use a WordPress popup form
Popup forms are popular as a lead generation tool because they’re effective. For example, using an exit popup form can increase conversions by 5–10 percent.
There are several types of popup forms, but these are the most popular:
- A classic popup form opens in a new webpage when a user clicks a button or link.
- A lightbox form pops up on the existing page when a visitor clicks on a link or a button, while the content behind it fades into the background. This is probably the most common type of popup form.
- A scroll-in form slides in from the side or bottom of the page as a visitor scrolls though a website’s content.
- An exit popup form appears when the visitor’s cursor leaves the webpage window (indicating that they’re going to click away from the site) and attempts to grab their attention before they go.
Despite their effectiveness, popup forms are controversial simply because they can be annoying when used inappropriately. This doesn’t mean you shouldn’t use them, but you should use them wisely — and only after a website visitor has done something to indicate that they might be interested in leaving their information — like staying on your website for more than 60 seconds or visiting a pricing page, for example.


How to make popup forms in WordPress
If you choose to include a popup form on your site, you can get it done with these two main steps:
- Build a contact form.
- Make that contact form appear in a popup window.
You can do both with a form builder and popup plugin, which you can install on your WordPress website.
How to build a contact form
The first step to building a form is deciding what you want from your site visitors. You’ll want to collect all relevant information from them, keeping in mind that short and simple web forms have higher conversion rates.
In this example, we’ll set up a form using Jotform. To get started quickly, you can use one of Jotform’s pre-built templates, like this customizable popup form.
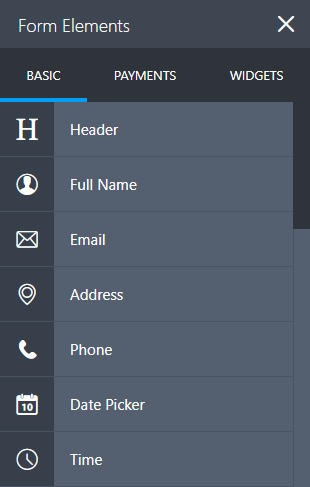
You can customize a Jotform template or build a new form from scratch. Once you’re in the Jotform Form Builder, you can select the fields you want to include from Jotform’s extensive list of form elements.
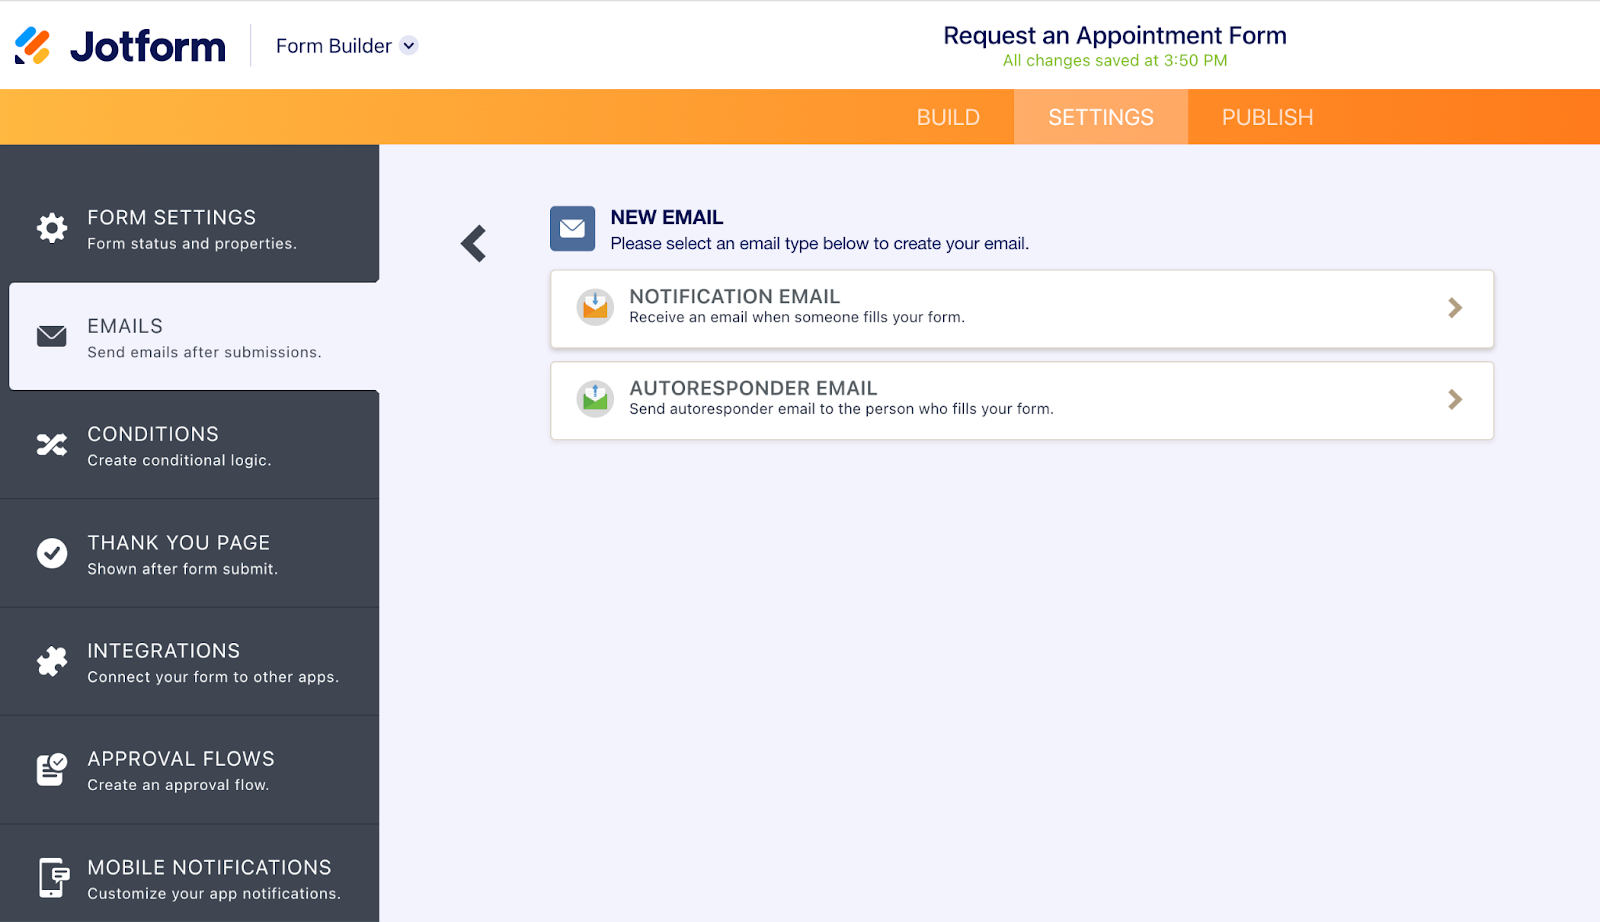
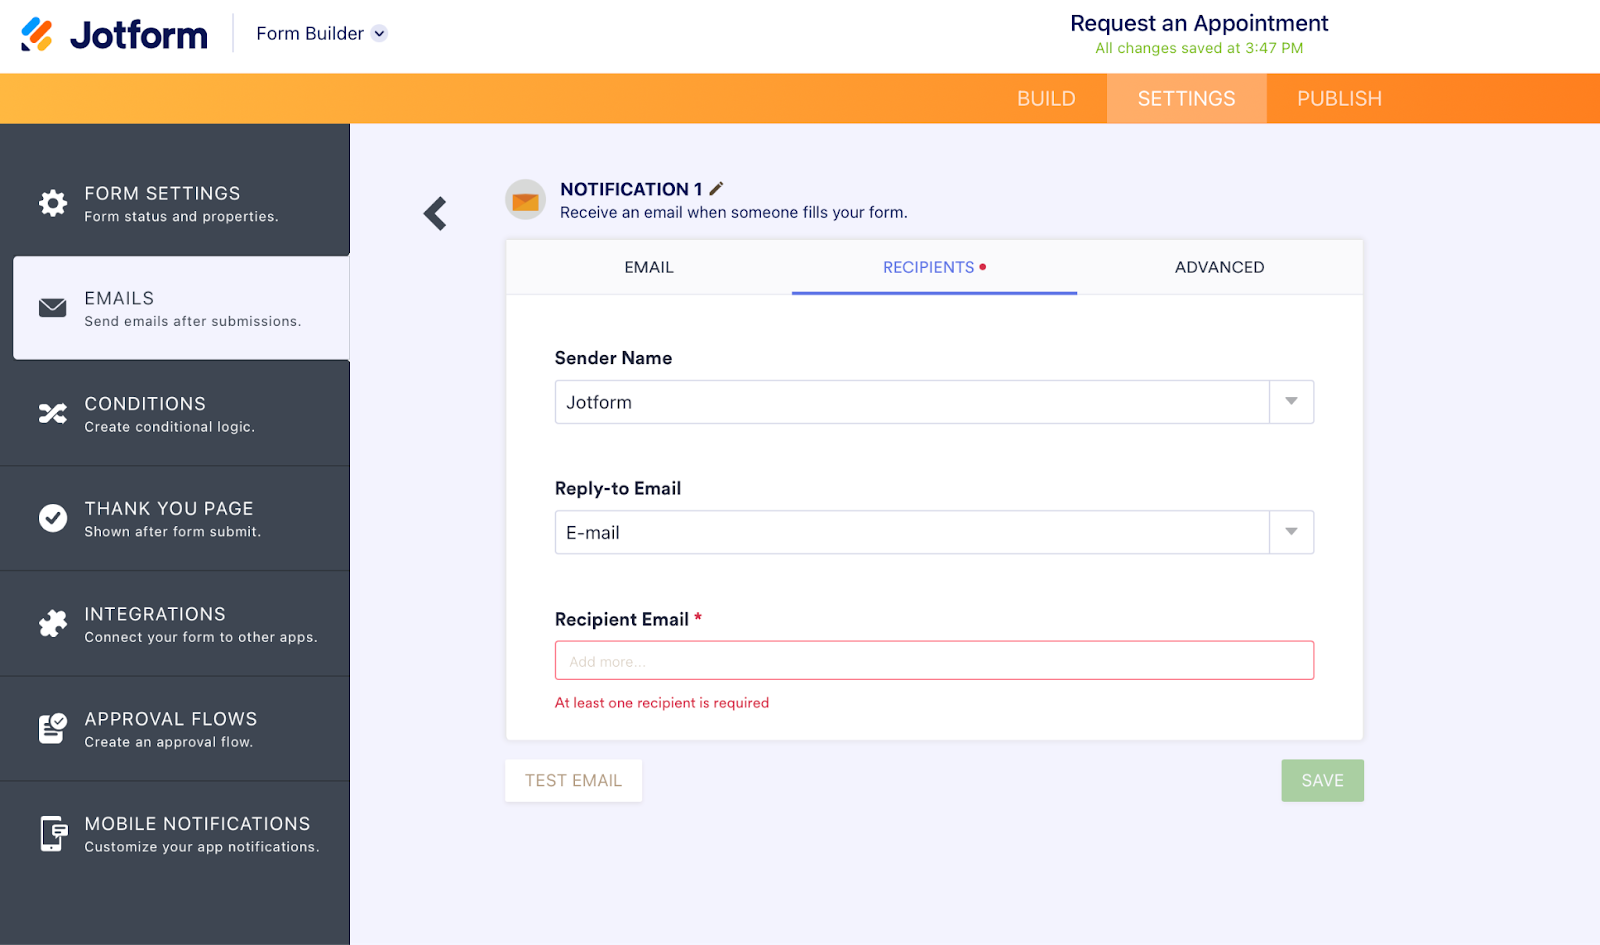
Once you’ve selected and customized all the relevant fields, set up email notifications so you know each time someone completes a form. You can do this under the Settings tab, by clicking Emails then Notification Email.
You can then customize the text of the email and add recipients.
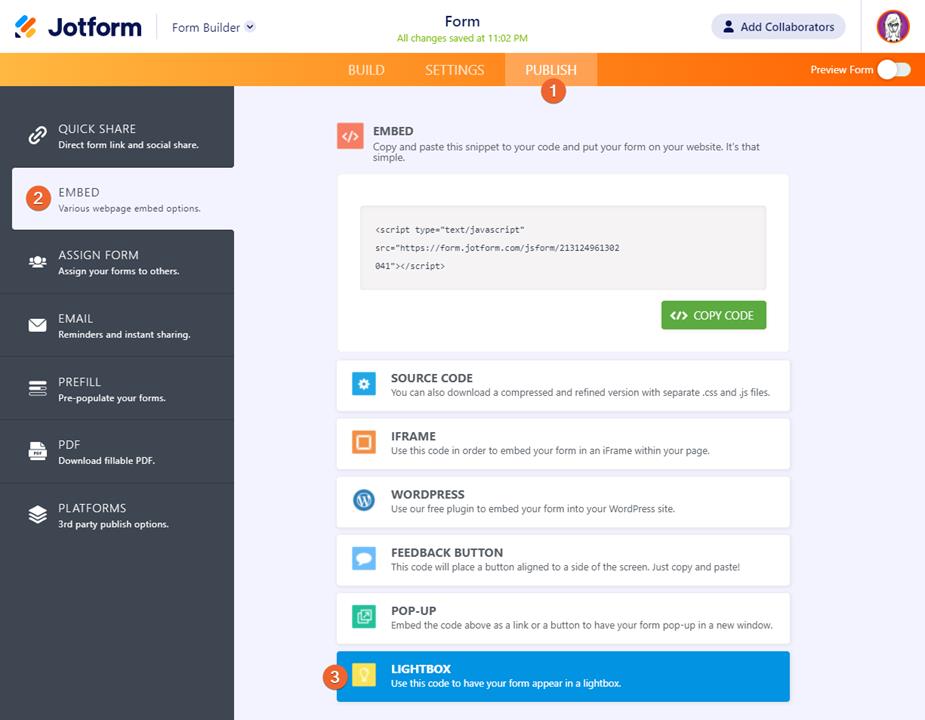
Next, you’ll want to select the right embed function to allow your form to appear in a popup window.
How to make the form appear in a popup window
Jotform’s WordPress plugin allows site owners to build secure, powerful, and well-designed forms that you can program to pop up when you want them to.
If you’re looking to create a traditional lightbox popup, start by selecting that form type when you build your form.
Customize the look of the lightbox by selecting the Customize button.
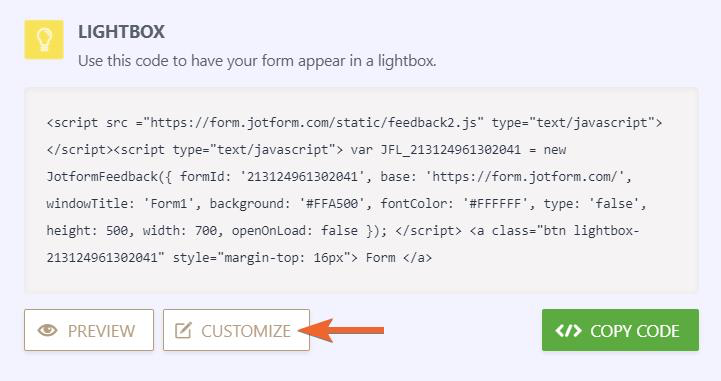
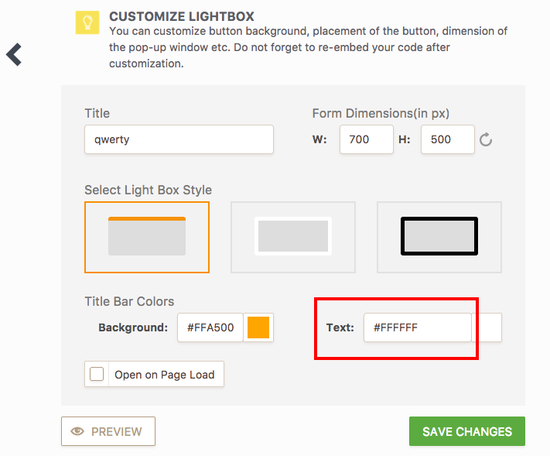
You can change the colors or style of the lightbox within the Customize widget, as the image below shows.
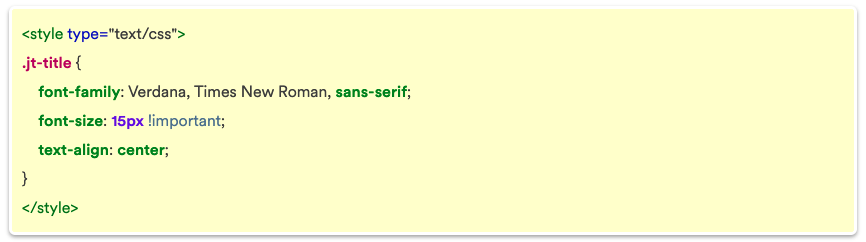
If you want to change the font or text size of your lightbox, you’ll need to add the following code and specify the exact font and font size that you want.
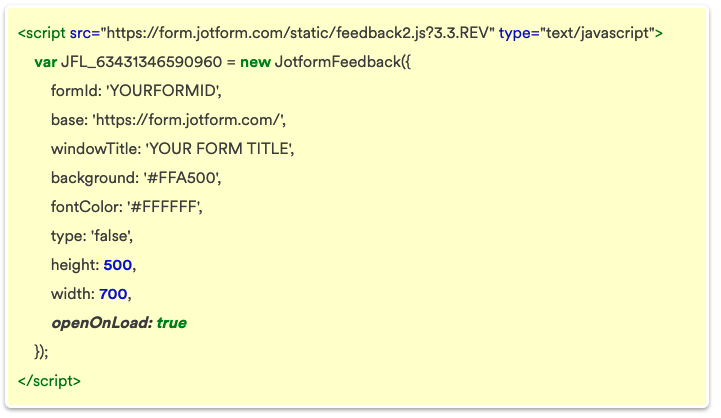
In some cases, you may want your lightbox to appear without a site visitor clicking a button or link. To make your lightbox appear automatically, set up auto-popup using JavaScript, which we’ll walk you through below.
If you’d like your WordPress popup form to appear right after a page has loaded, insert openOnLoad:true in the lightbox code, as you’ll see below.
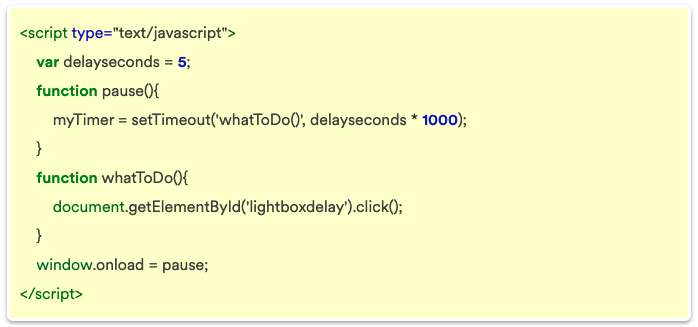
If you prefer the WordPress popup form to appear after a delay, add an id attribute after the anchor tag in the lightbox embed code.

Finally, use the following script to customize the length of delay by changing the number 5 to the desired number of seconds before your box appears.
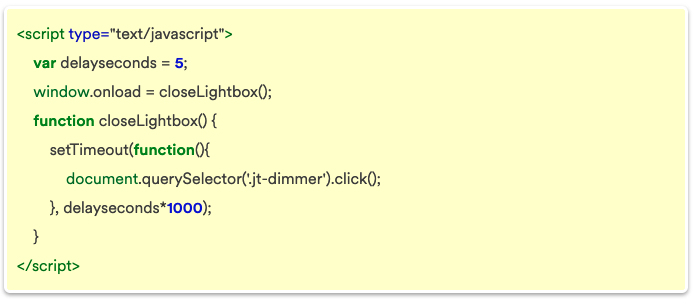
You can also close your lightbox after a certain amount of time — five seconds, for example — by using a similar code.
When you’re finished setting the attributes, insert your popup form onto your website by copying and pasting the embed code into the WordPress page of your choice or by inserting it using the Jotform WordPress plugin.
What’s the key to success?
The key to using popup forms effectively is to consider a visitor’s mindset — and that means programming them to display at the least disruptive time. Save your popup form until after they’ve browsed your site for a while or when they’re about to leave a page and you risk losing them. By following these best practices, you’re more likely to see the results you want.
Other resources
Photo by Anna Shvets


Send Comment: