
Best tips and tricks of Google Forms
- Create sections for to organize the flow
- Add conditional logic
- Add links anywhere
- Create quizzes
- Lock in responses
- Shuffle the question order
- Restrict how many times people can fill out a form
- Keep track of respondents
- Give your respondents a record of their response
- Show a progress bar
- Show respondents a custom thank-you message
- Use custom themes
- Use Google Sheets
- Prefill responses
- Limit form responses
- Get notifications on form submissions
- Configure the look and feel of your form
Creating a form in Google Forms is quick and easy. But if you’re not deeply familiar with Forms, you may not be aware of some interesting things you can do with it. Here are some tips to help you get the most out of Google Forms.

Migrate existing forms instantly
There’s no need to rebuild your online forms from scratch. Instead, migrate existing forms and submission data into your Jotform account in one click — so you can collect data without skipping a beat.
Tips for the form itself
Here are a few neat things you can do with the forms and questions.
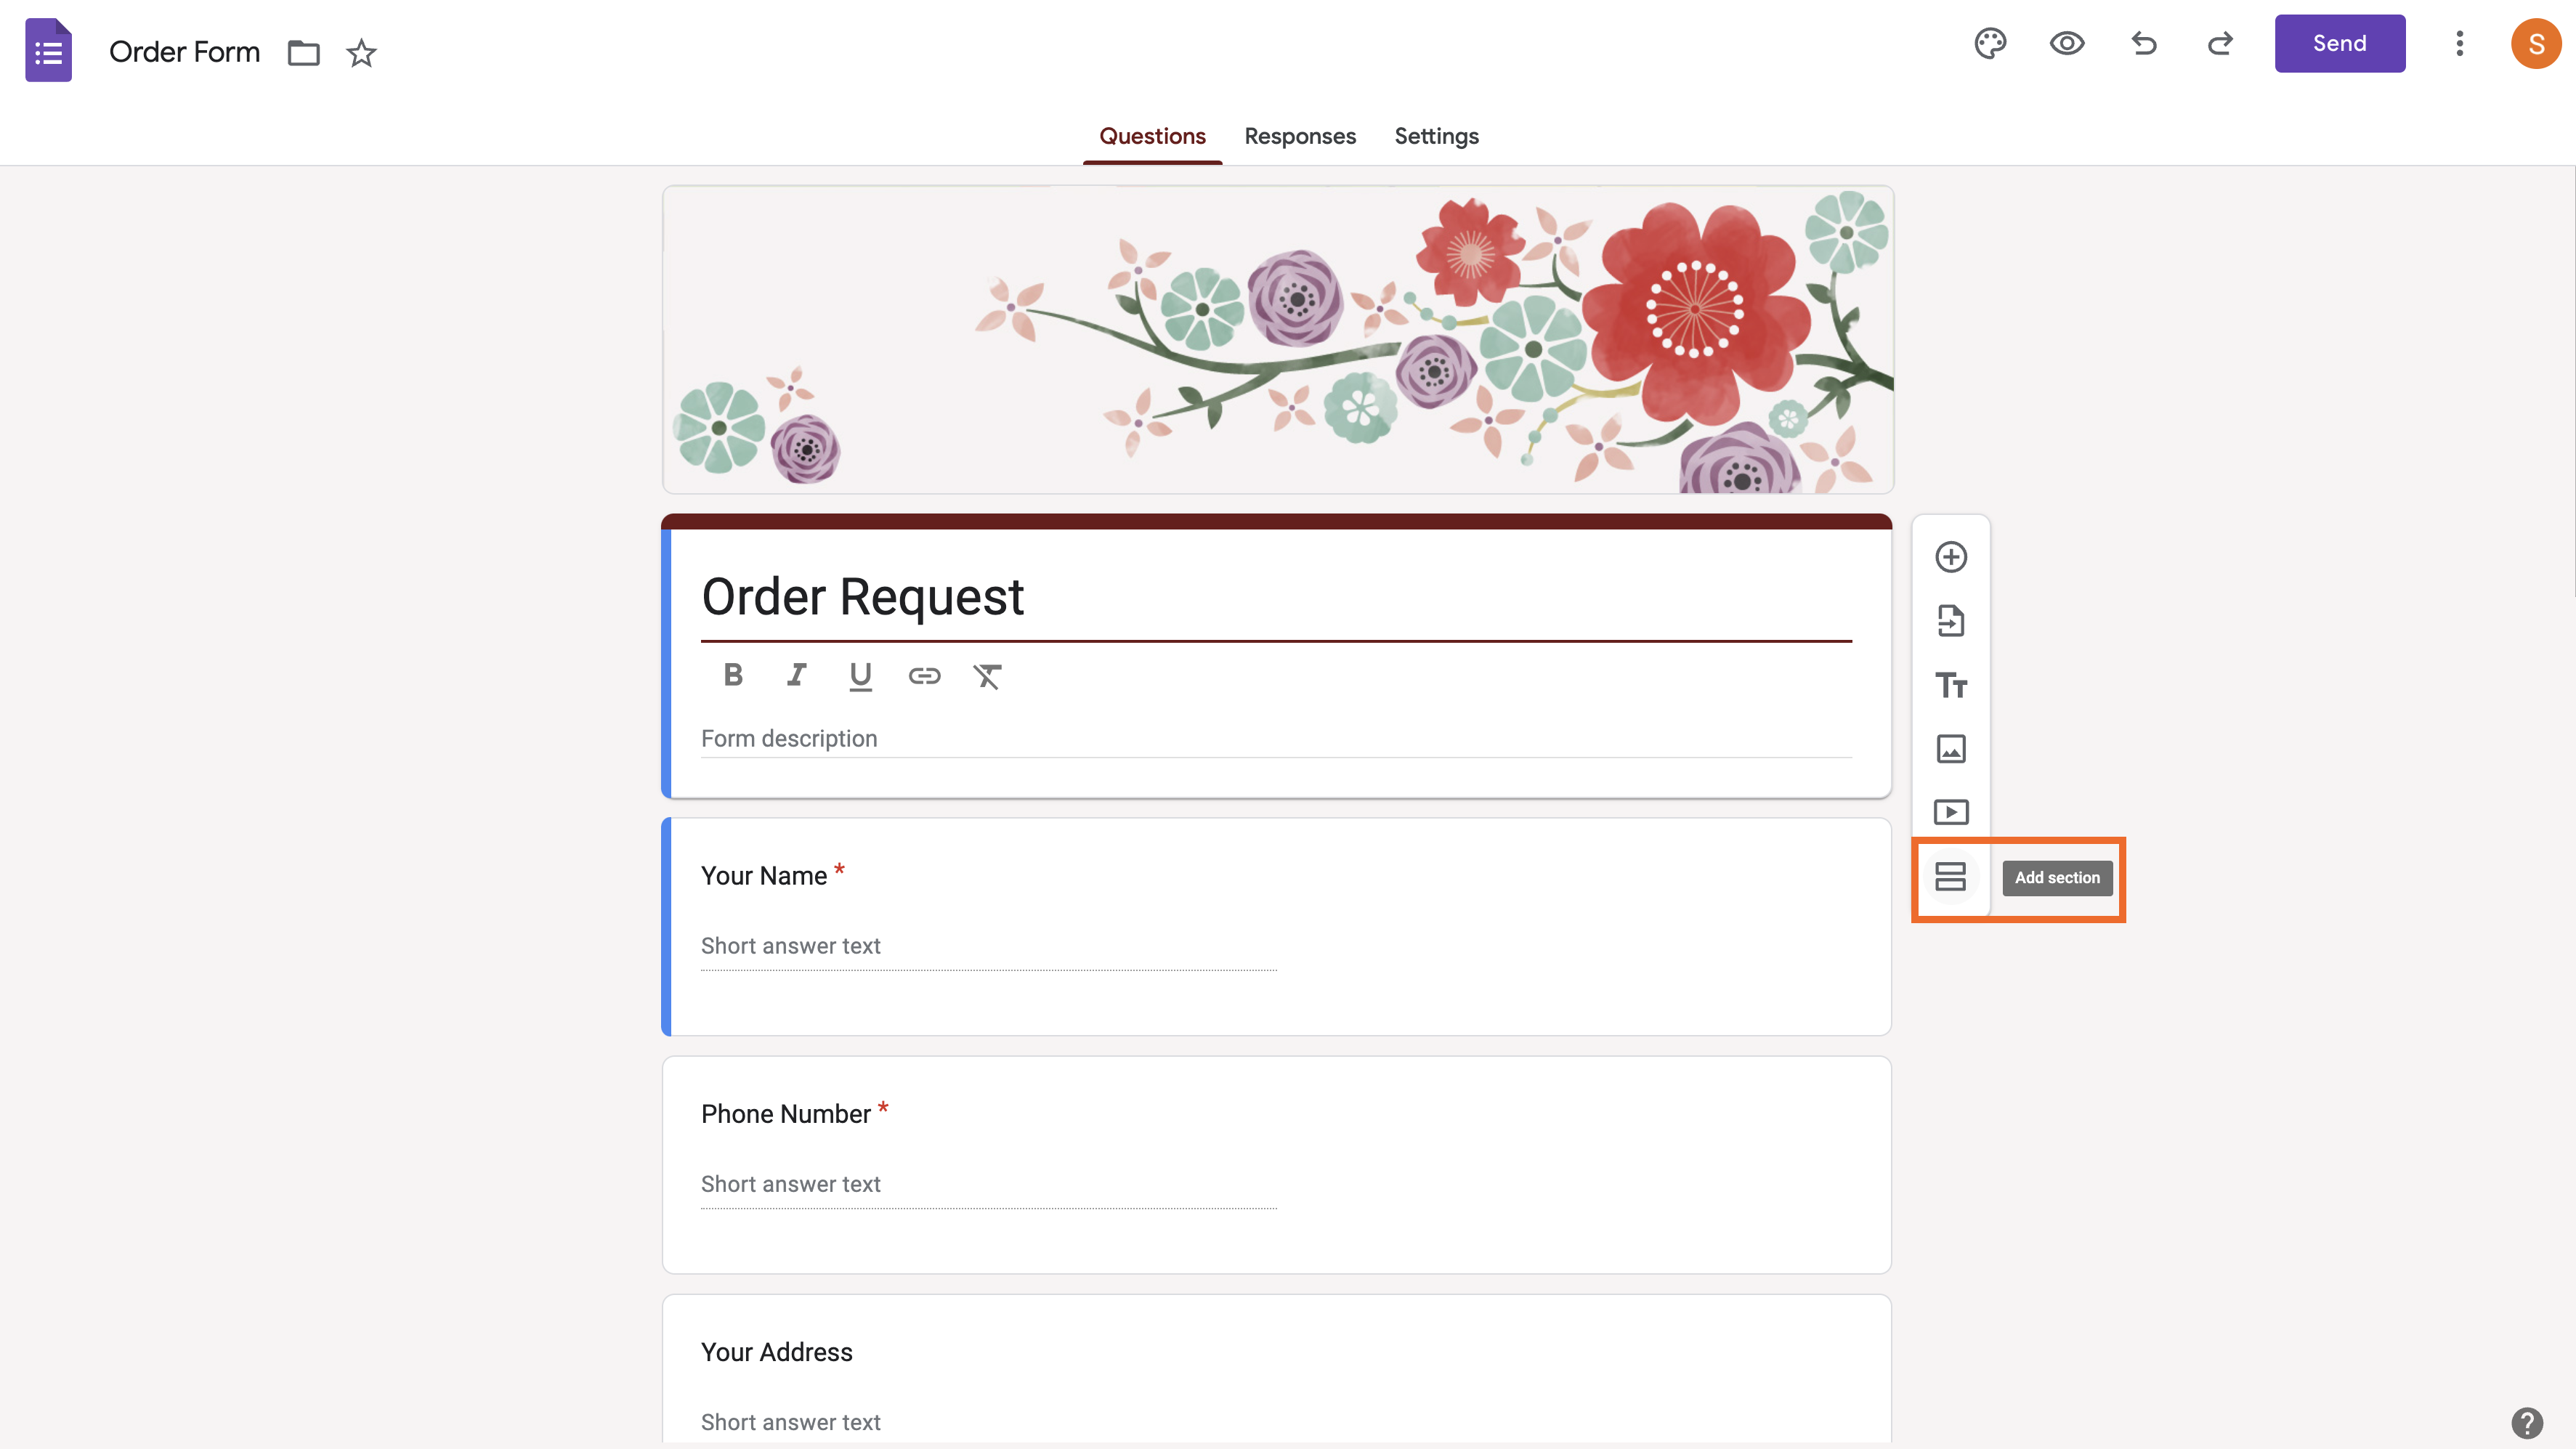
1. Create sections for to organize the flow of your form
To the right of the list of form questions, there’s a floating menu bar. That menu bar has a list of items you can add to your form.
The bottom icon lets you add sections to your form. Sections let you divide your form into logical chunks. Those chunks help organize your form and make it cleaner and easier to understand.
Find out more about them in our guide, How to create a Google Form.
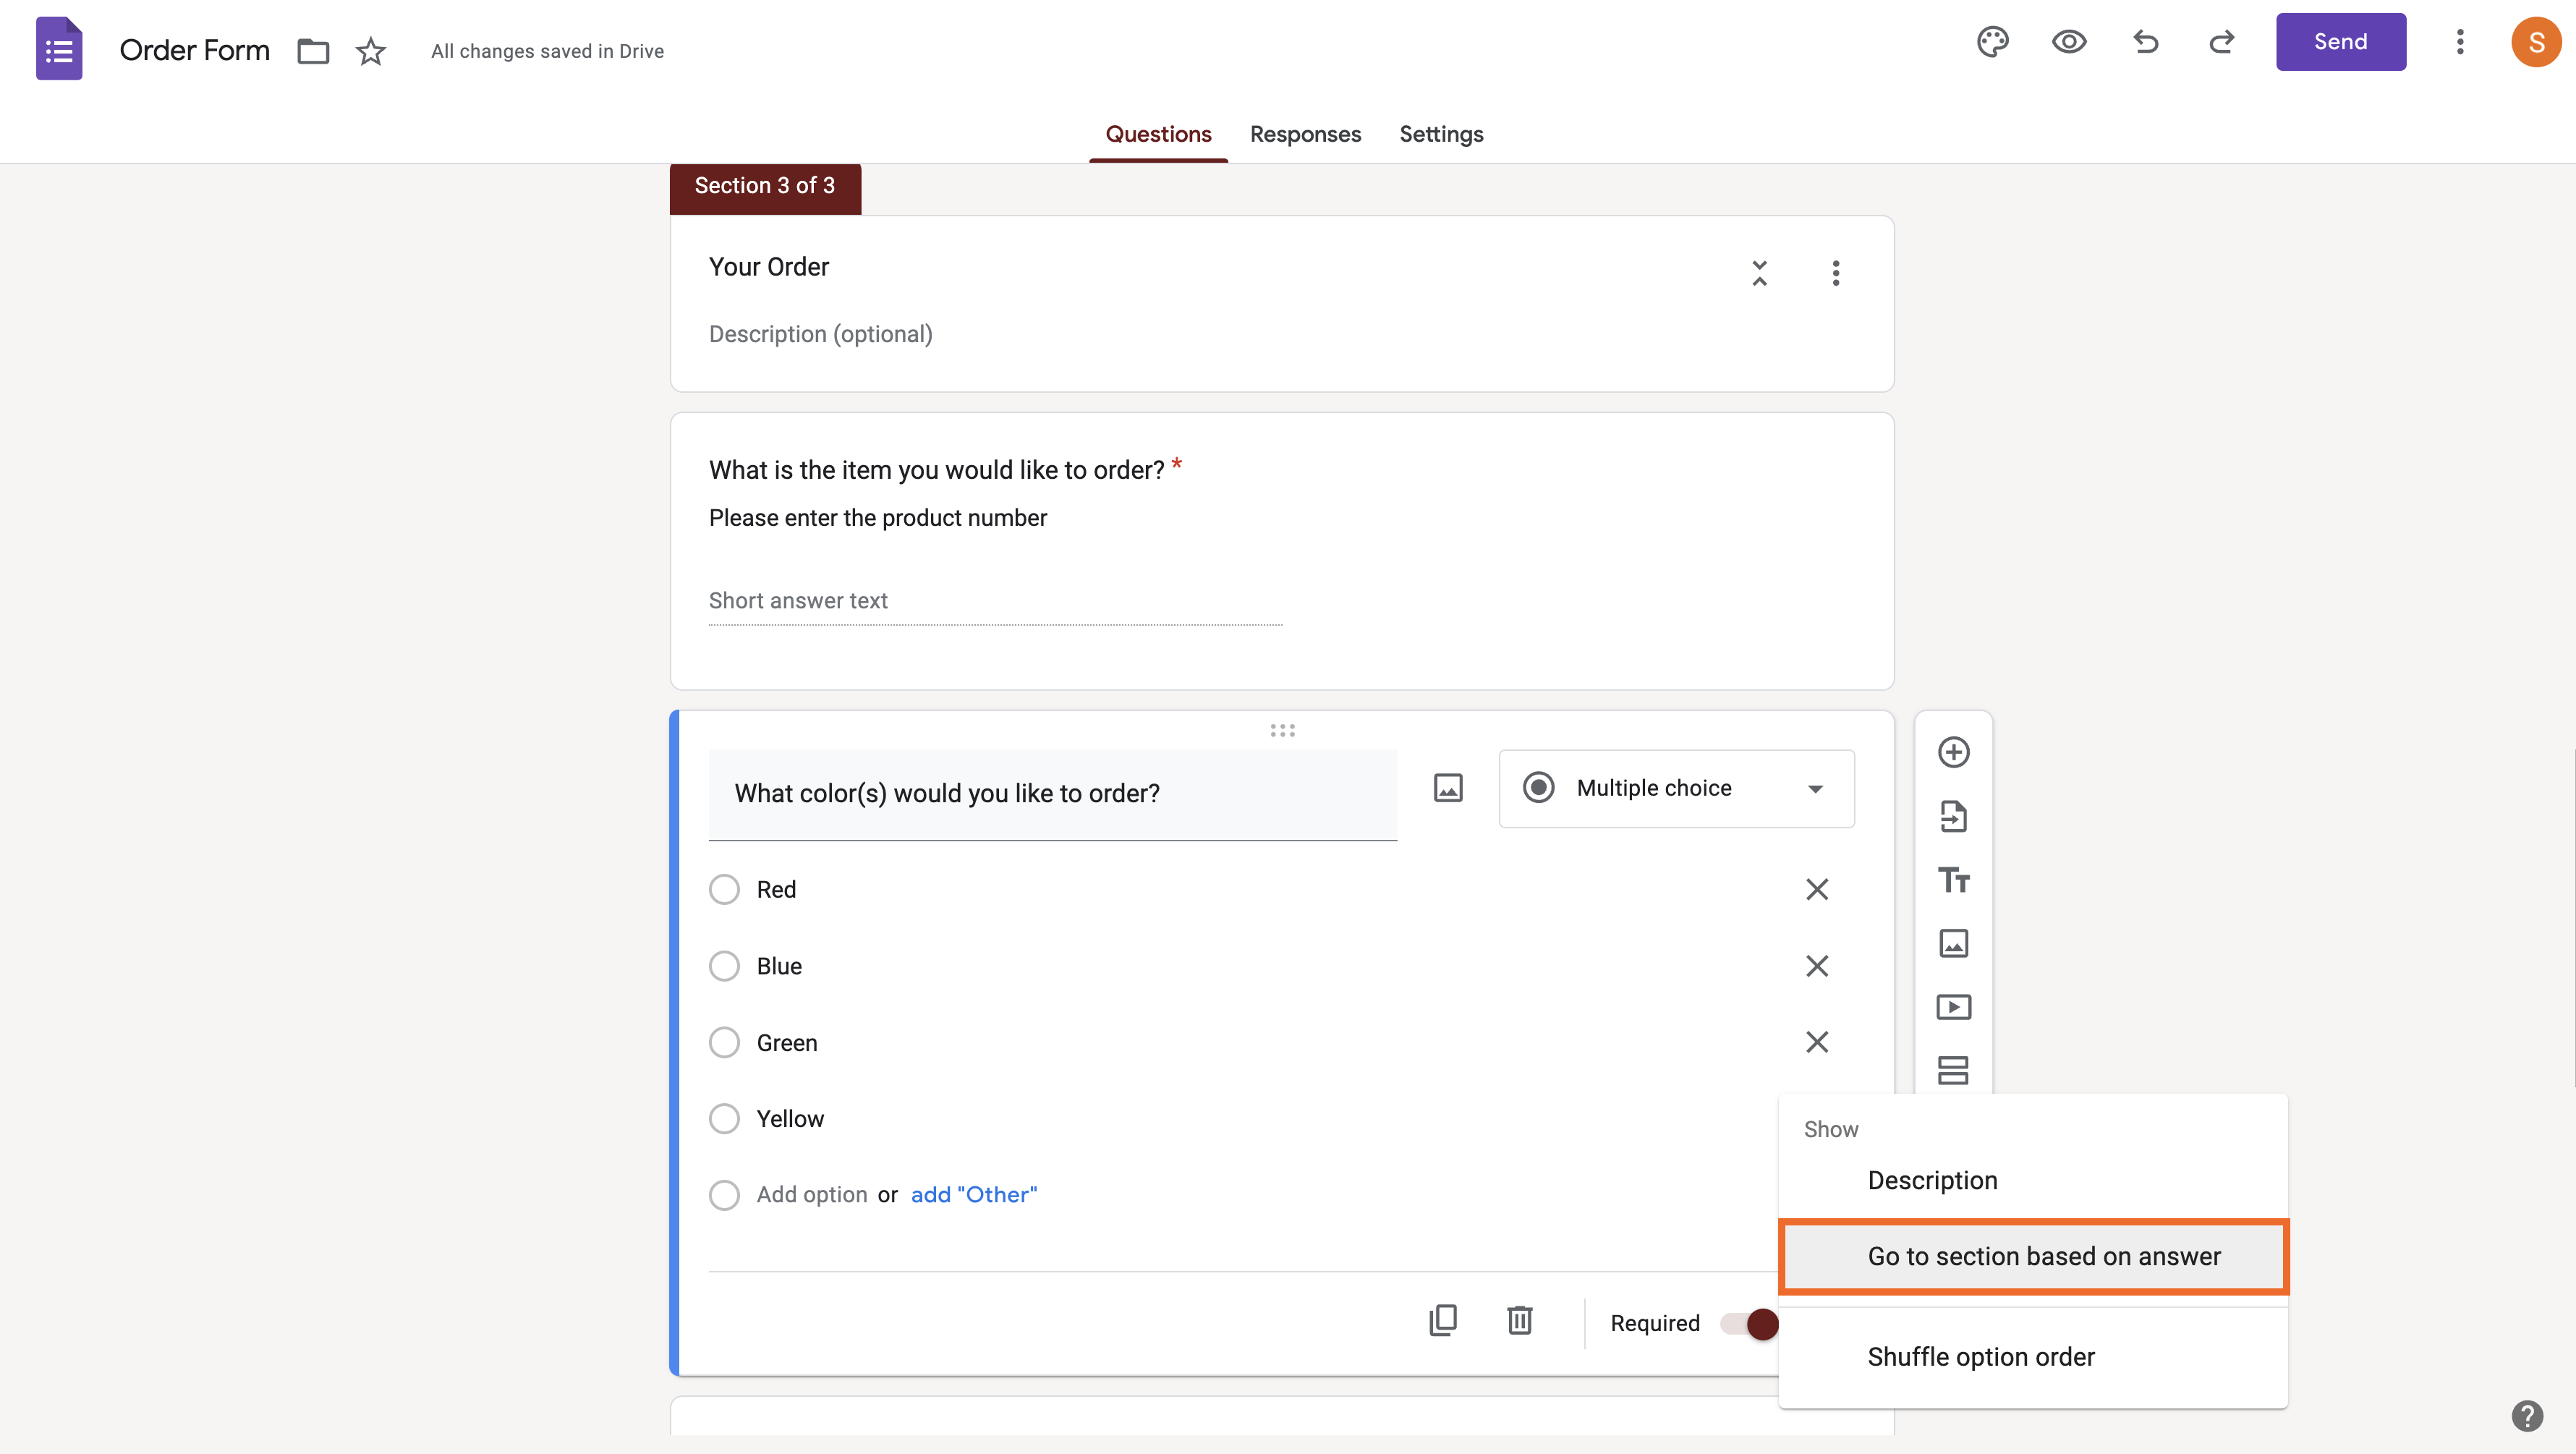
2. Add conditional logic
Now that you understand sections, you’re ready to learn about conditional logic. Multiple-choice questions and dropdown questions have the ability to move respondents to different sections of your form based on their answers.
To try it out, click on a question, then click the three-dot menu button in the lower right corner. Next, select Go to section based on answer. That will show you dropdowns next to each answer that will move the user to the appropriate section for that answer.
See how to make conditional questions in Google Forms in this post.
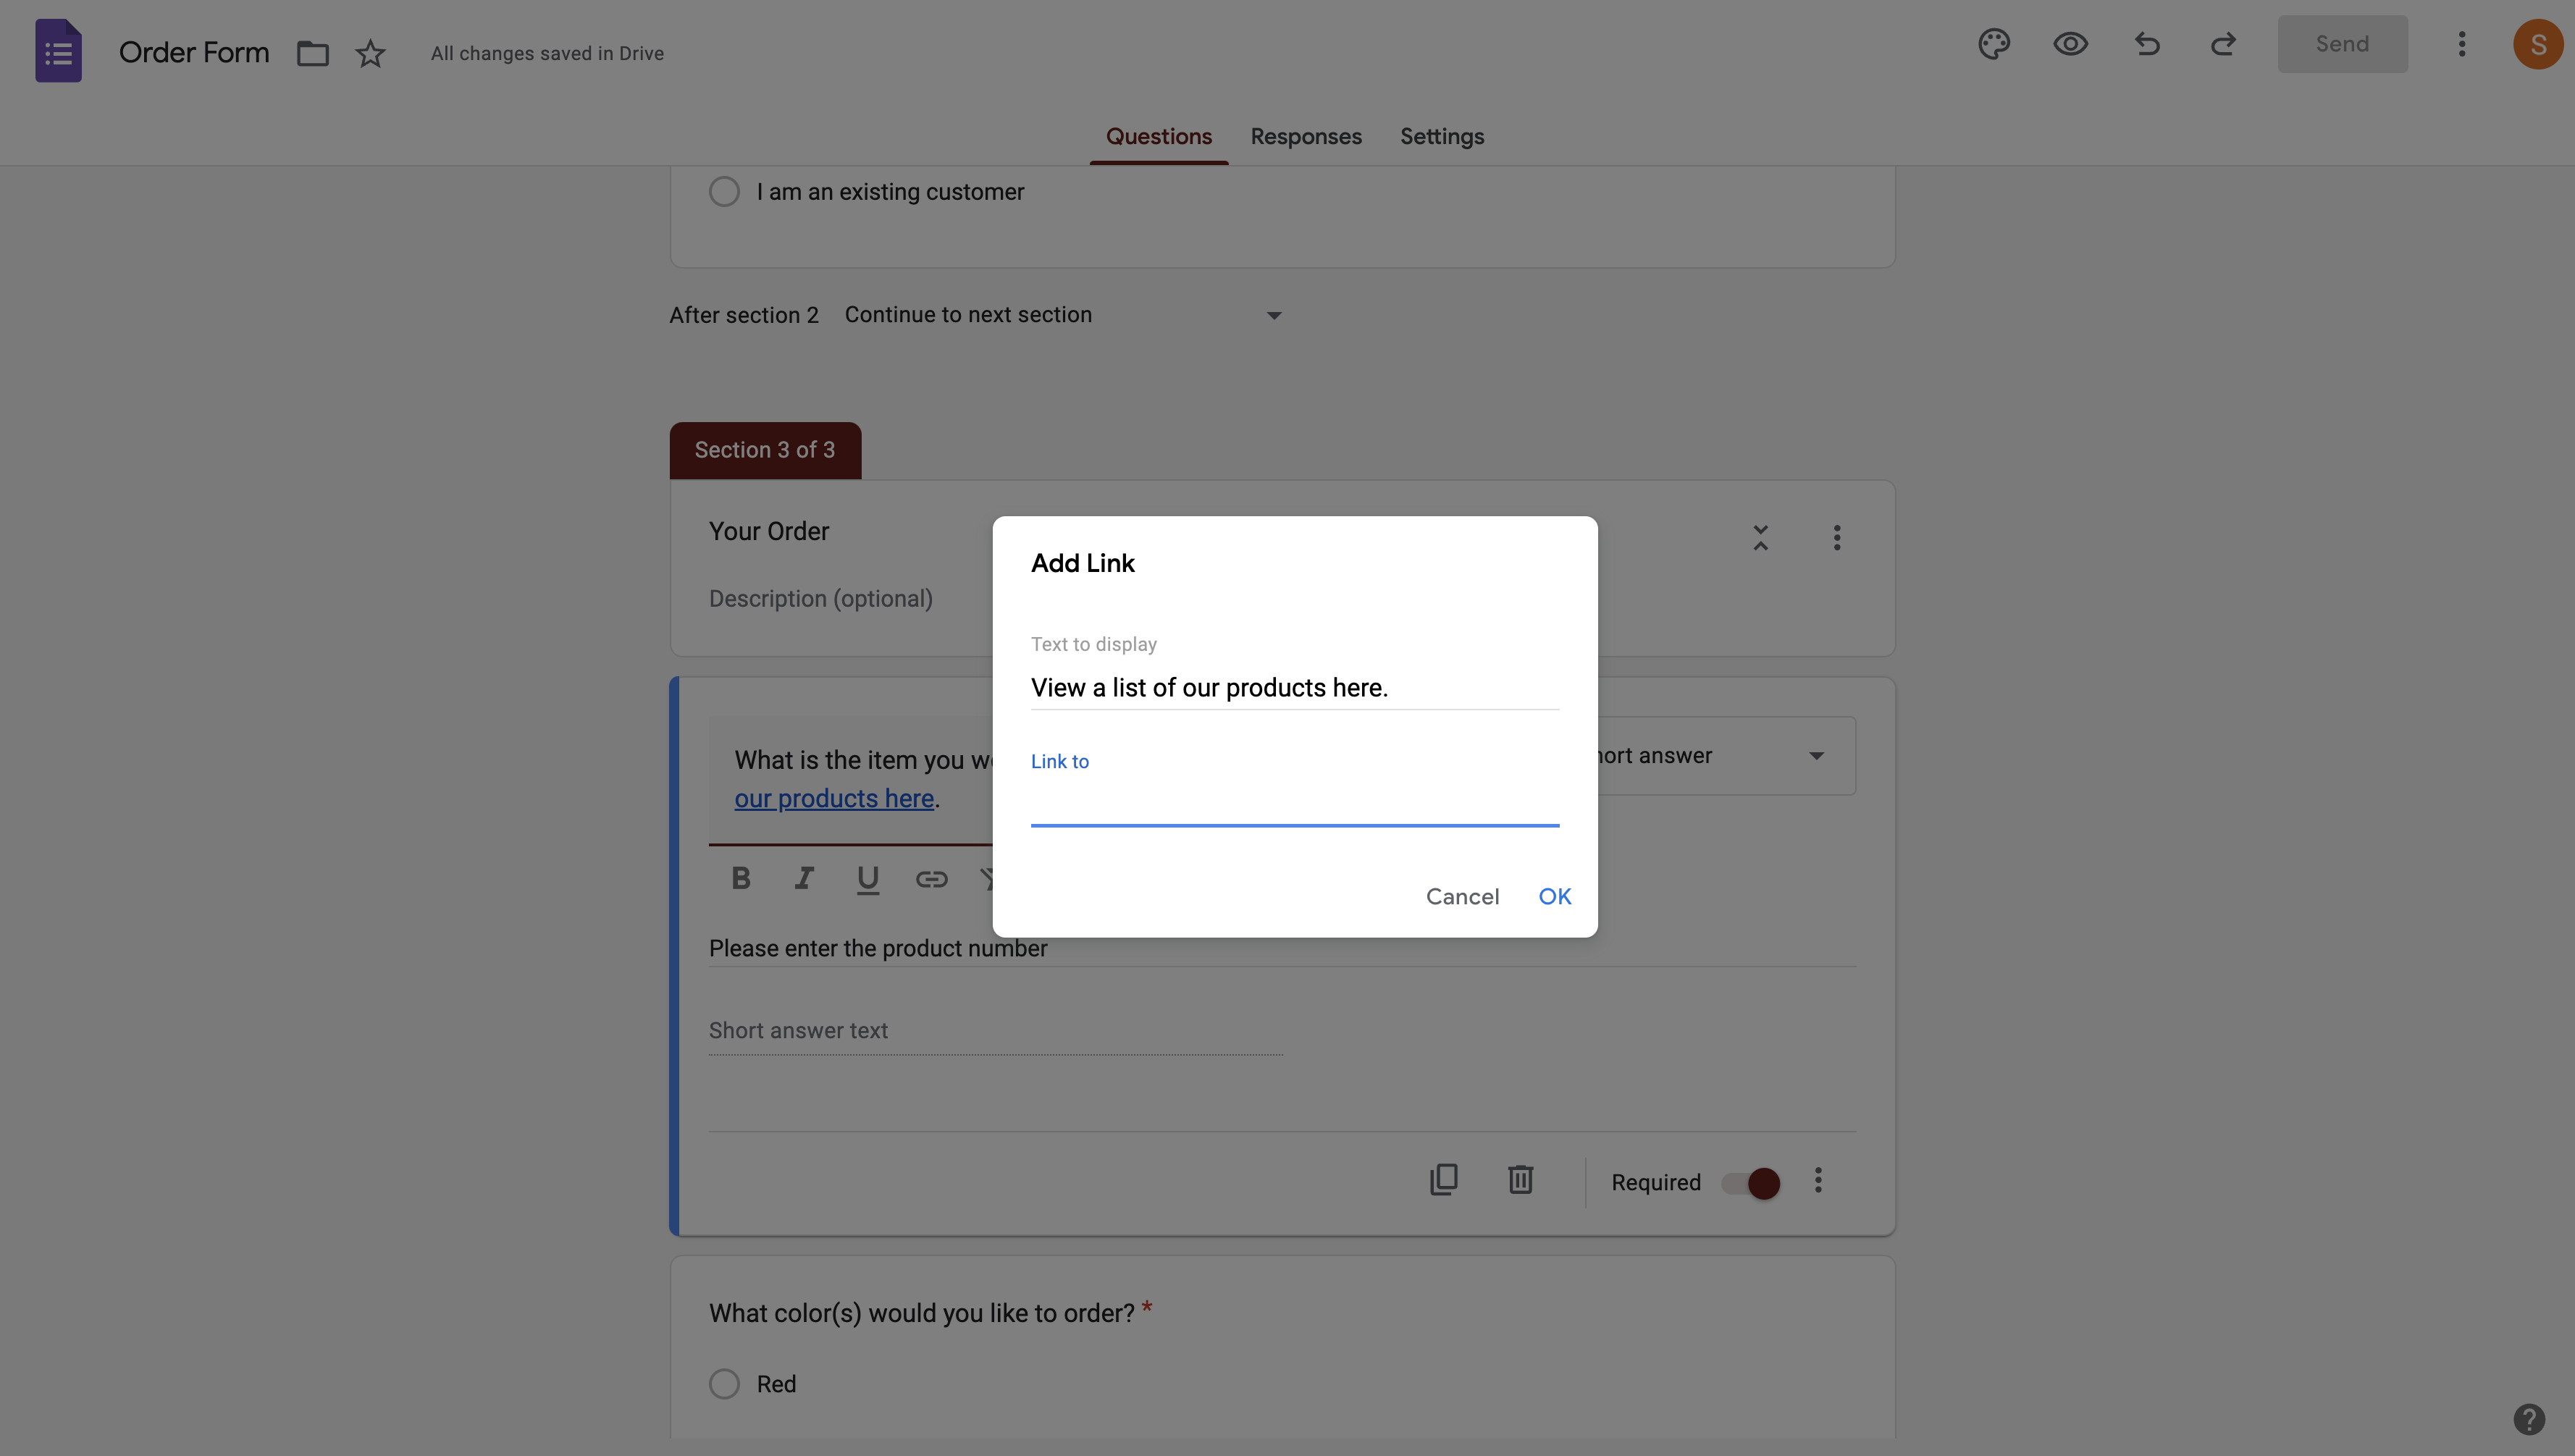
3. Add links anywhere
Any time you edit a text area in your form — like headers, questions, and descriptions — you’ll see a simple text editor. One of the options in the text editor is a link button that lets you send people to other websites. But you aren’t limited to text areas.
You can also add links to several answers as well. Just paste your URL into the answer area, and Google Forms will automatically convert it to a link.
For more information about how to add a link to a Google Form, read our guide.
Tips for using the form’s settings
You’ll find most of the cool stuff you can do in Google Forms in the Settings menu. To get there, click the Settings tab in the top navigation bar.
4. Create quizzes
One of the most popular uses for Google Forms is letting teachers create quizzes for their classes. If you click Make this a quiz, you’ll get a handful of options relevant to a quiz form.

Check out our guide, How to create a quiz in Google Forms, for more info.
5. Lock in responses
This setting prevents people from editing their form after they’ve submitted their response. But it’s especially useful for quizzes as a way to prevent students from cheating by not allowing them to change their answers after they get access to their phones again.
6. Shuffle the question order
This setting is also great for preventing cheating on quizzes. If your students are taking a quiz in class, it’s much easier for them to share information about their answers if the question order is always the same. You can also shuffle the answers for each individual question to make cheating even harder.
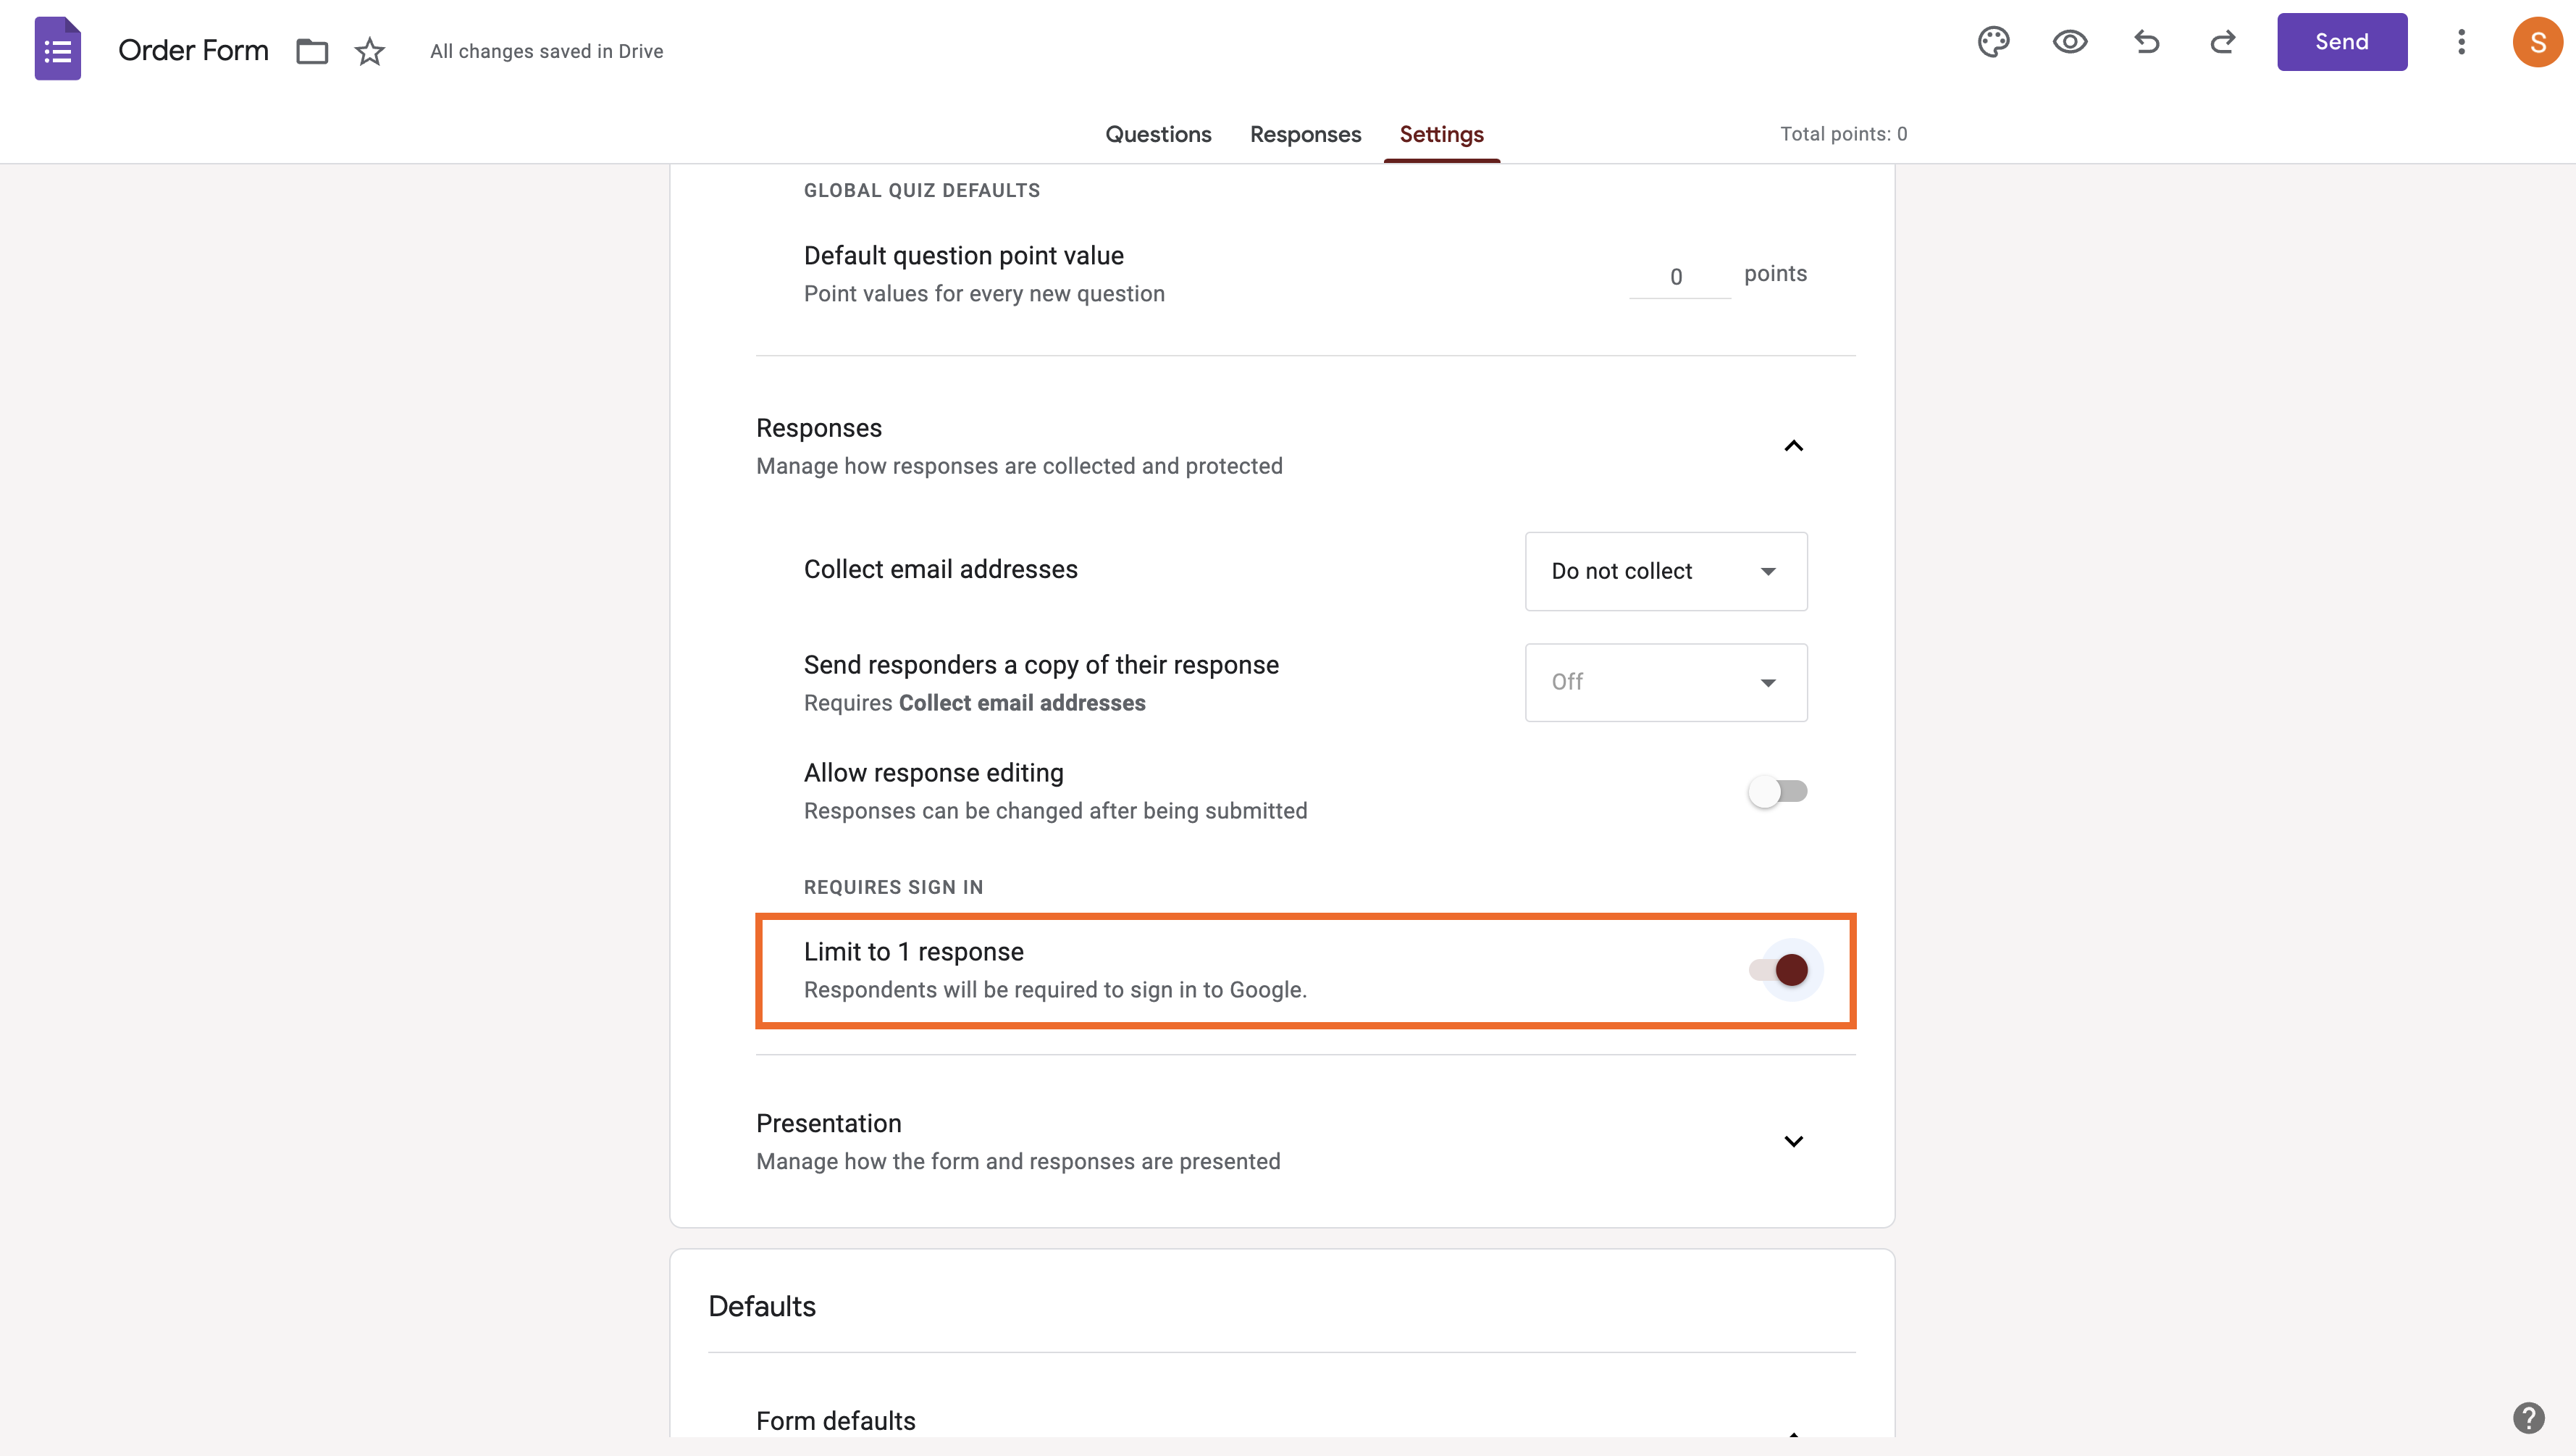
7. Restrict how many times people can fill out a form
You can use the Limit to 1 response setting under Responses to make sure that people can’t fill out your form twice. For example, this feature can be useful if you’re collecting RSVPs and you don’t want to count attendees twice.
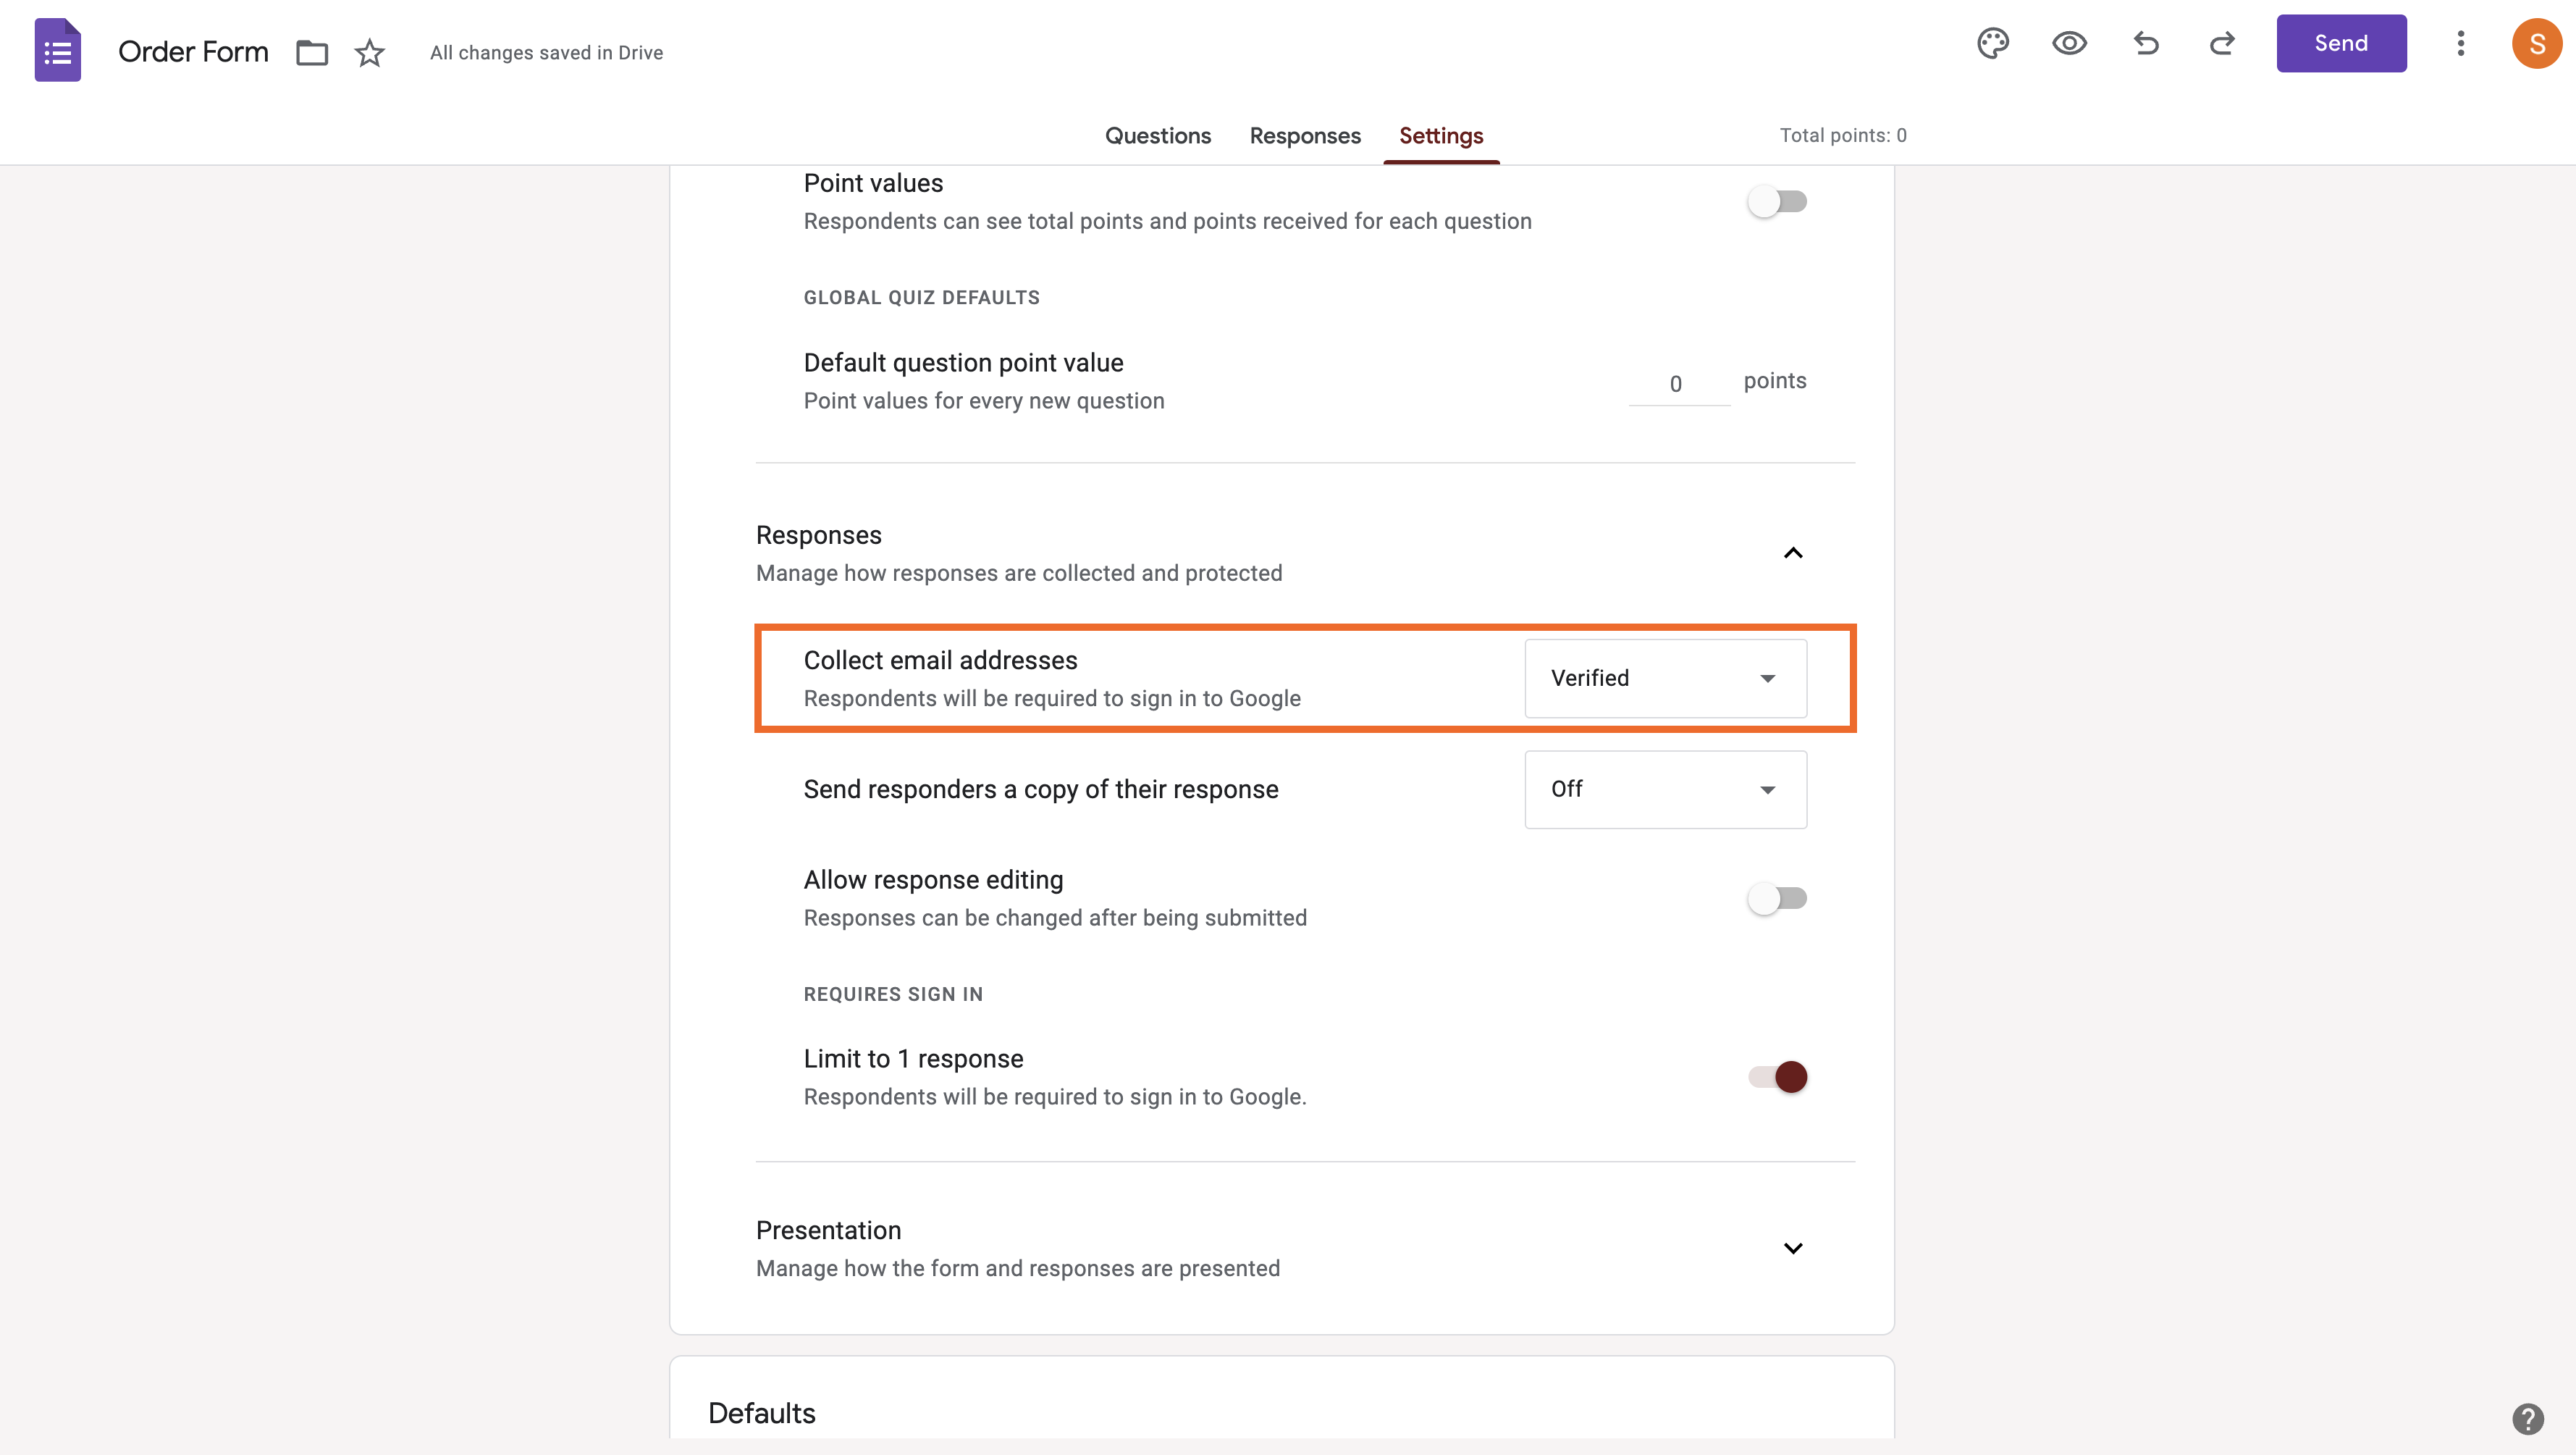
8. Keep track of respondents by gathering emails
Use the Collect email addresses setting under Settings to collect the email addresses of your respondents. Selecting this option will add an email collection field near the top of your form. As an added bonus, if the user is already signed in with a Google account, they won’t have to manually enter their email address.
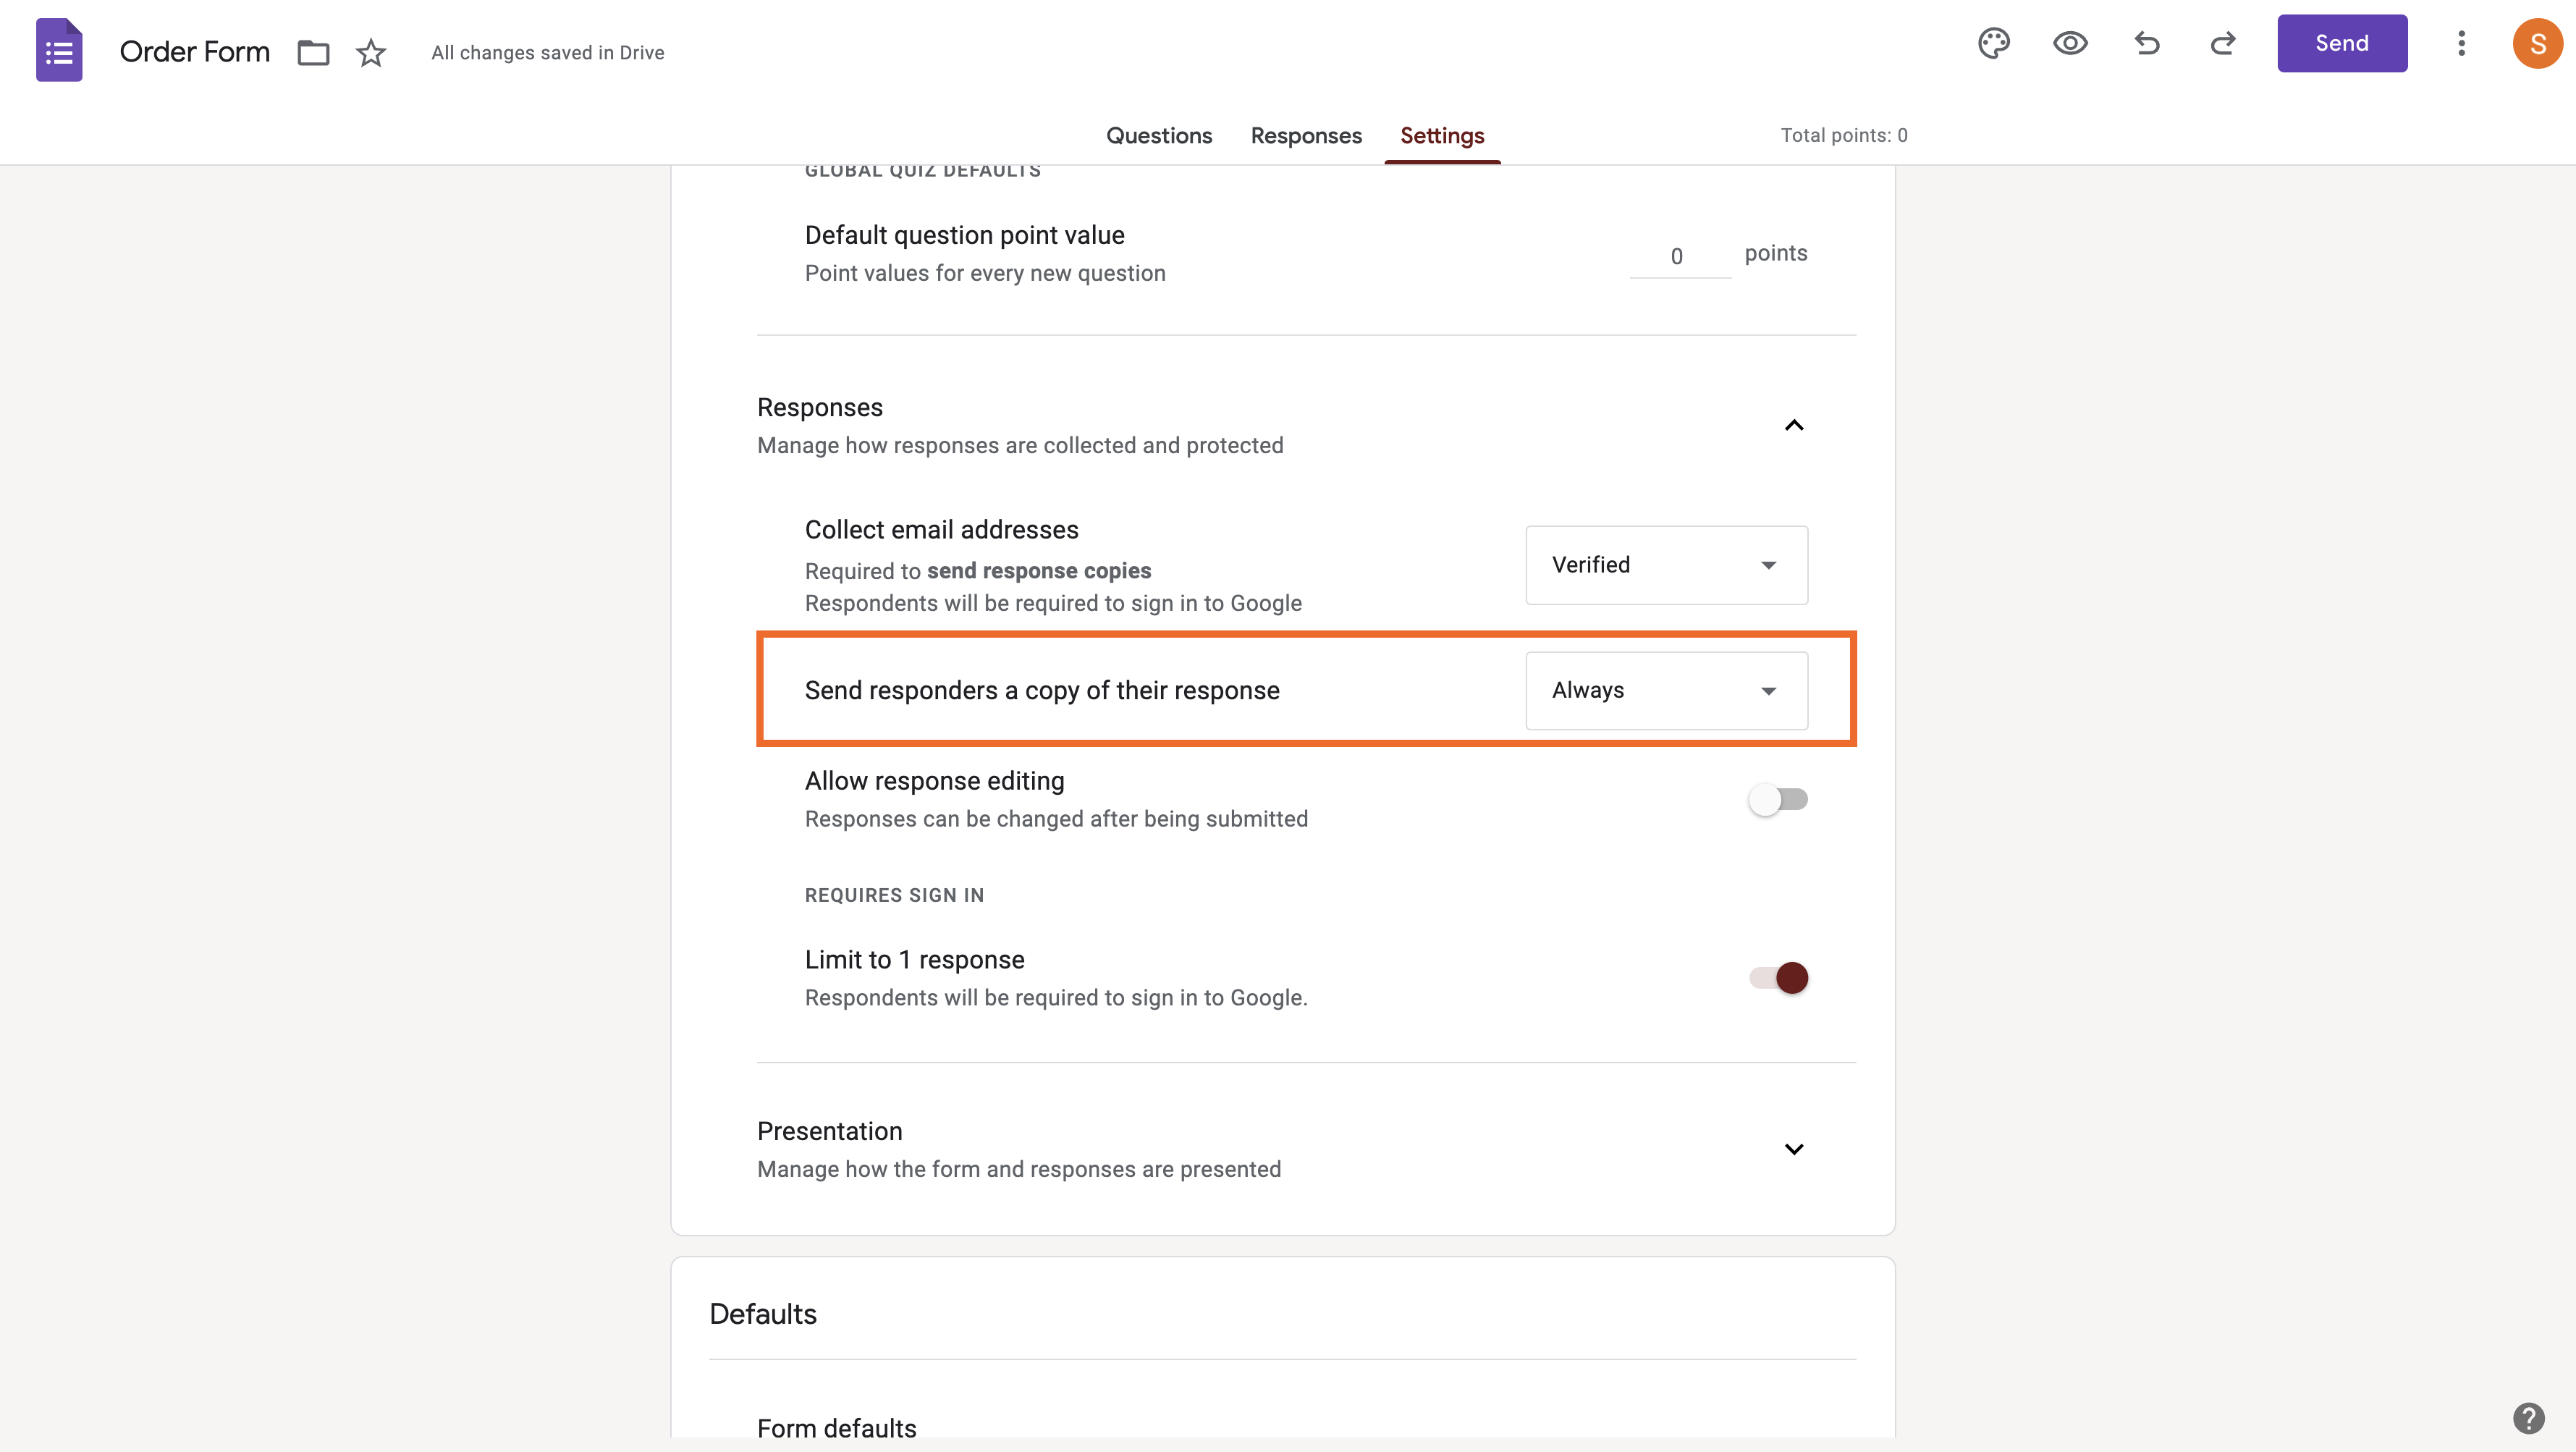
9. Give your respondents a record of how they filled out the form
You can use the Send responders a copy of their response option to send email notifications that allow users to review their answers. You’ll need to make sure that you turn on the Collect email addresses option for this to work. Just adding a field for email addresses won’t be enough to let Google know who to send the response to.
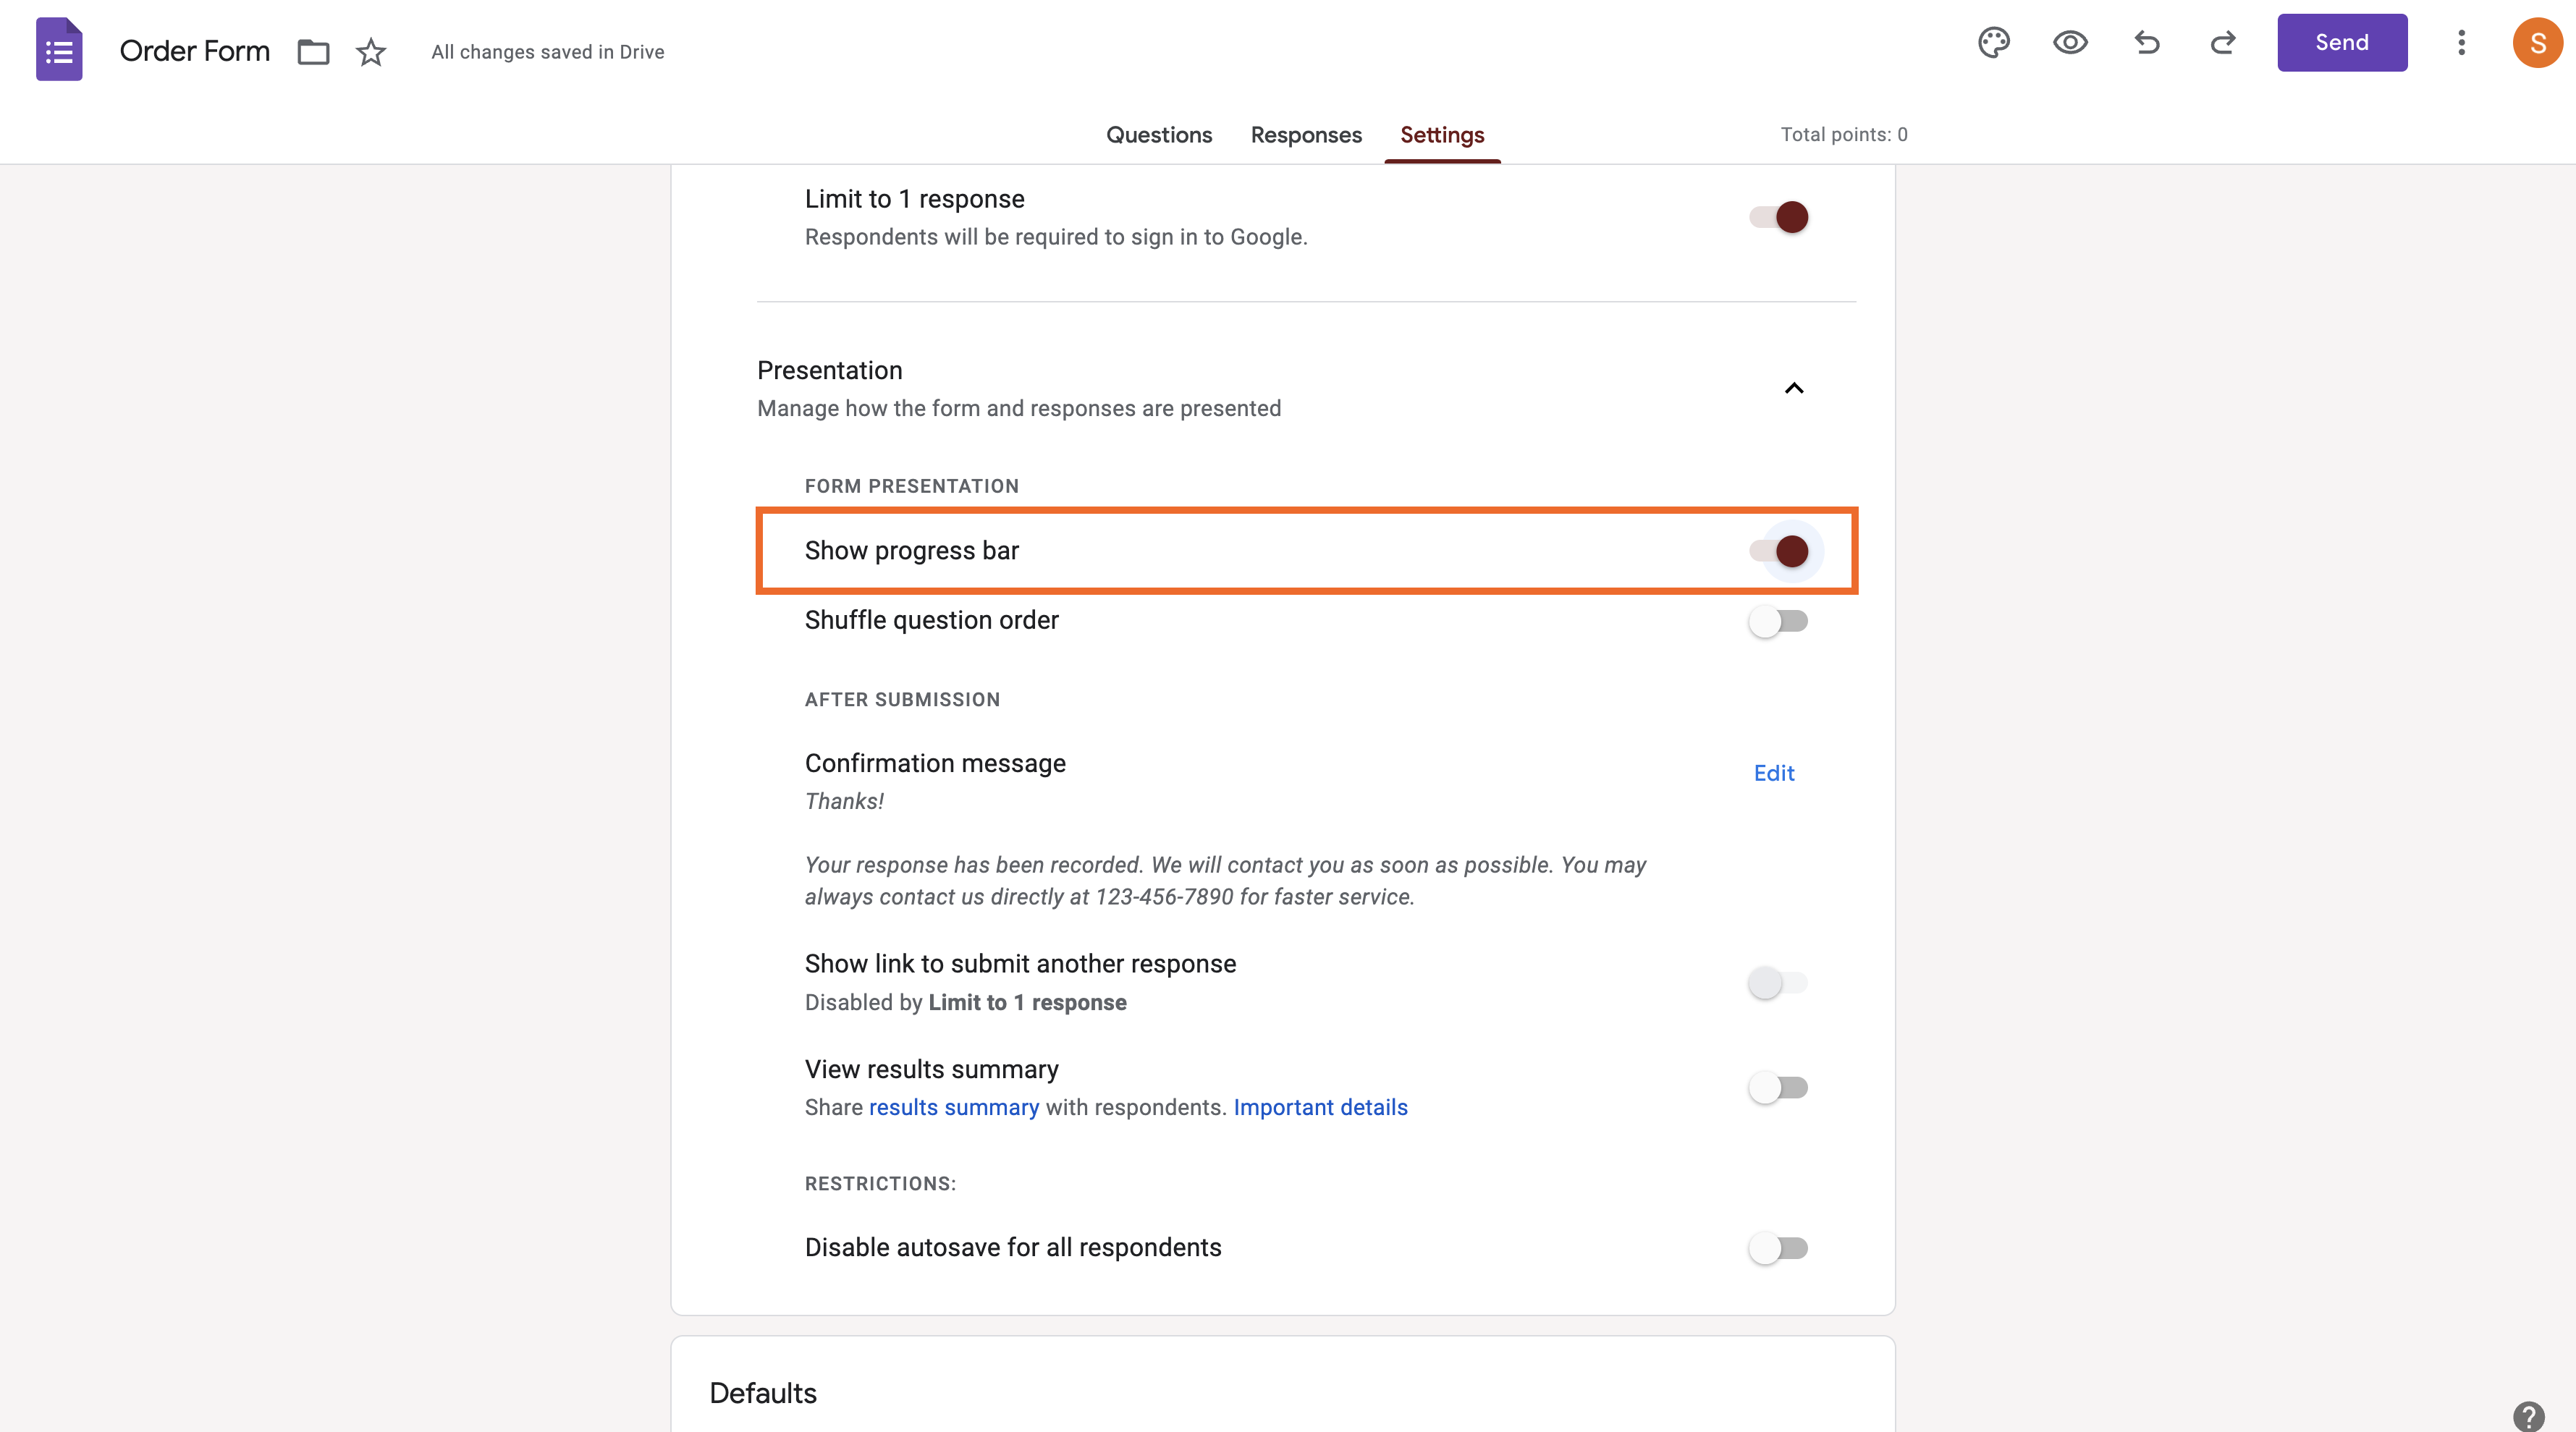
10. Show a progress bar to keep people engaged
Have you ever followed a link to fill out a “quick five-minute survey,” only to find that the survey just kept going and going? That can be aggravating, and it can cause people to abandon the form.
Fortunately, Google Forms has a Show progress bar option that lets people know exactly how far along in your form they are. It’s a good way to keep your respondents engaged and make sure as many of them as possible fill out your forms completely.
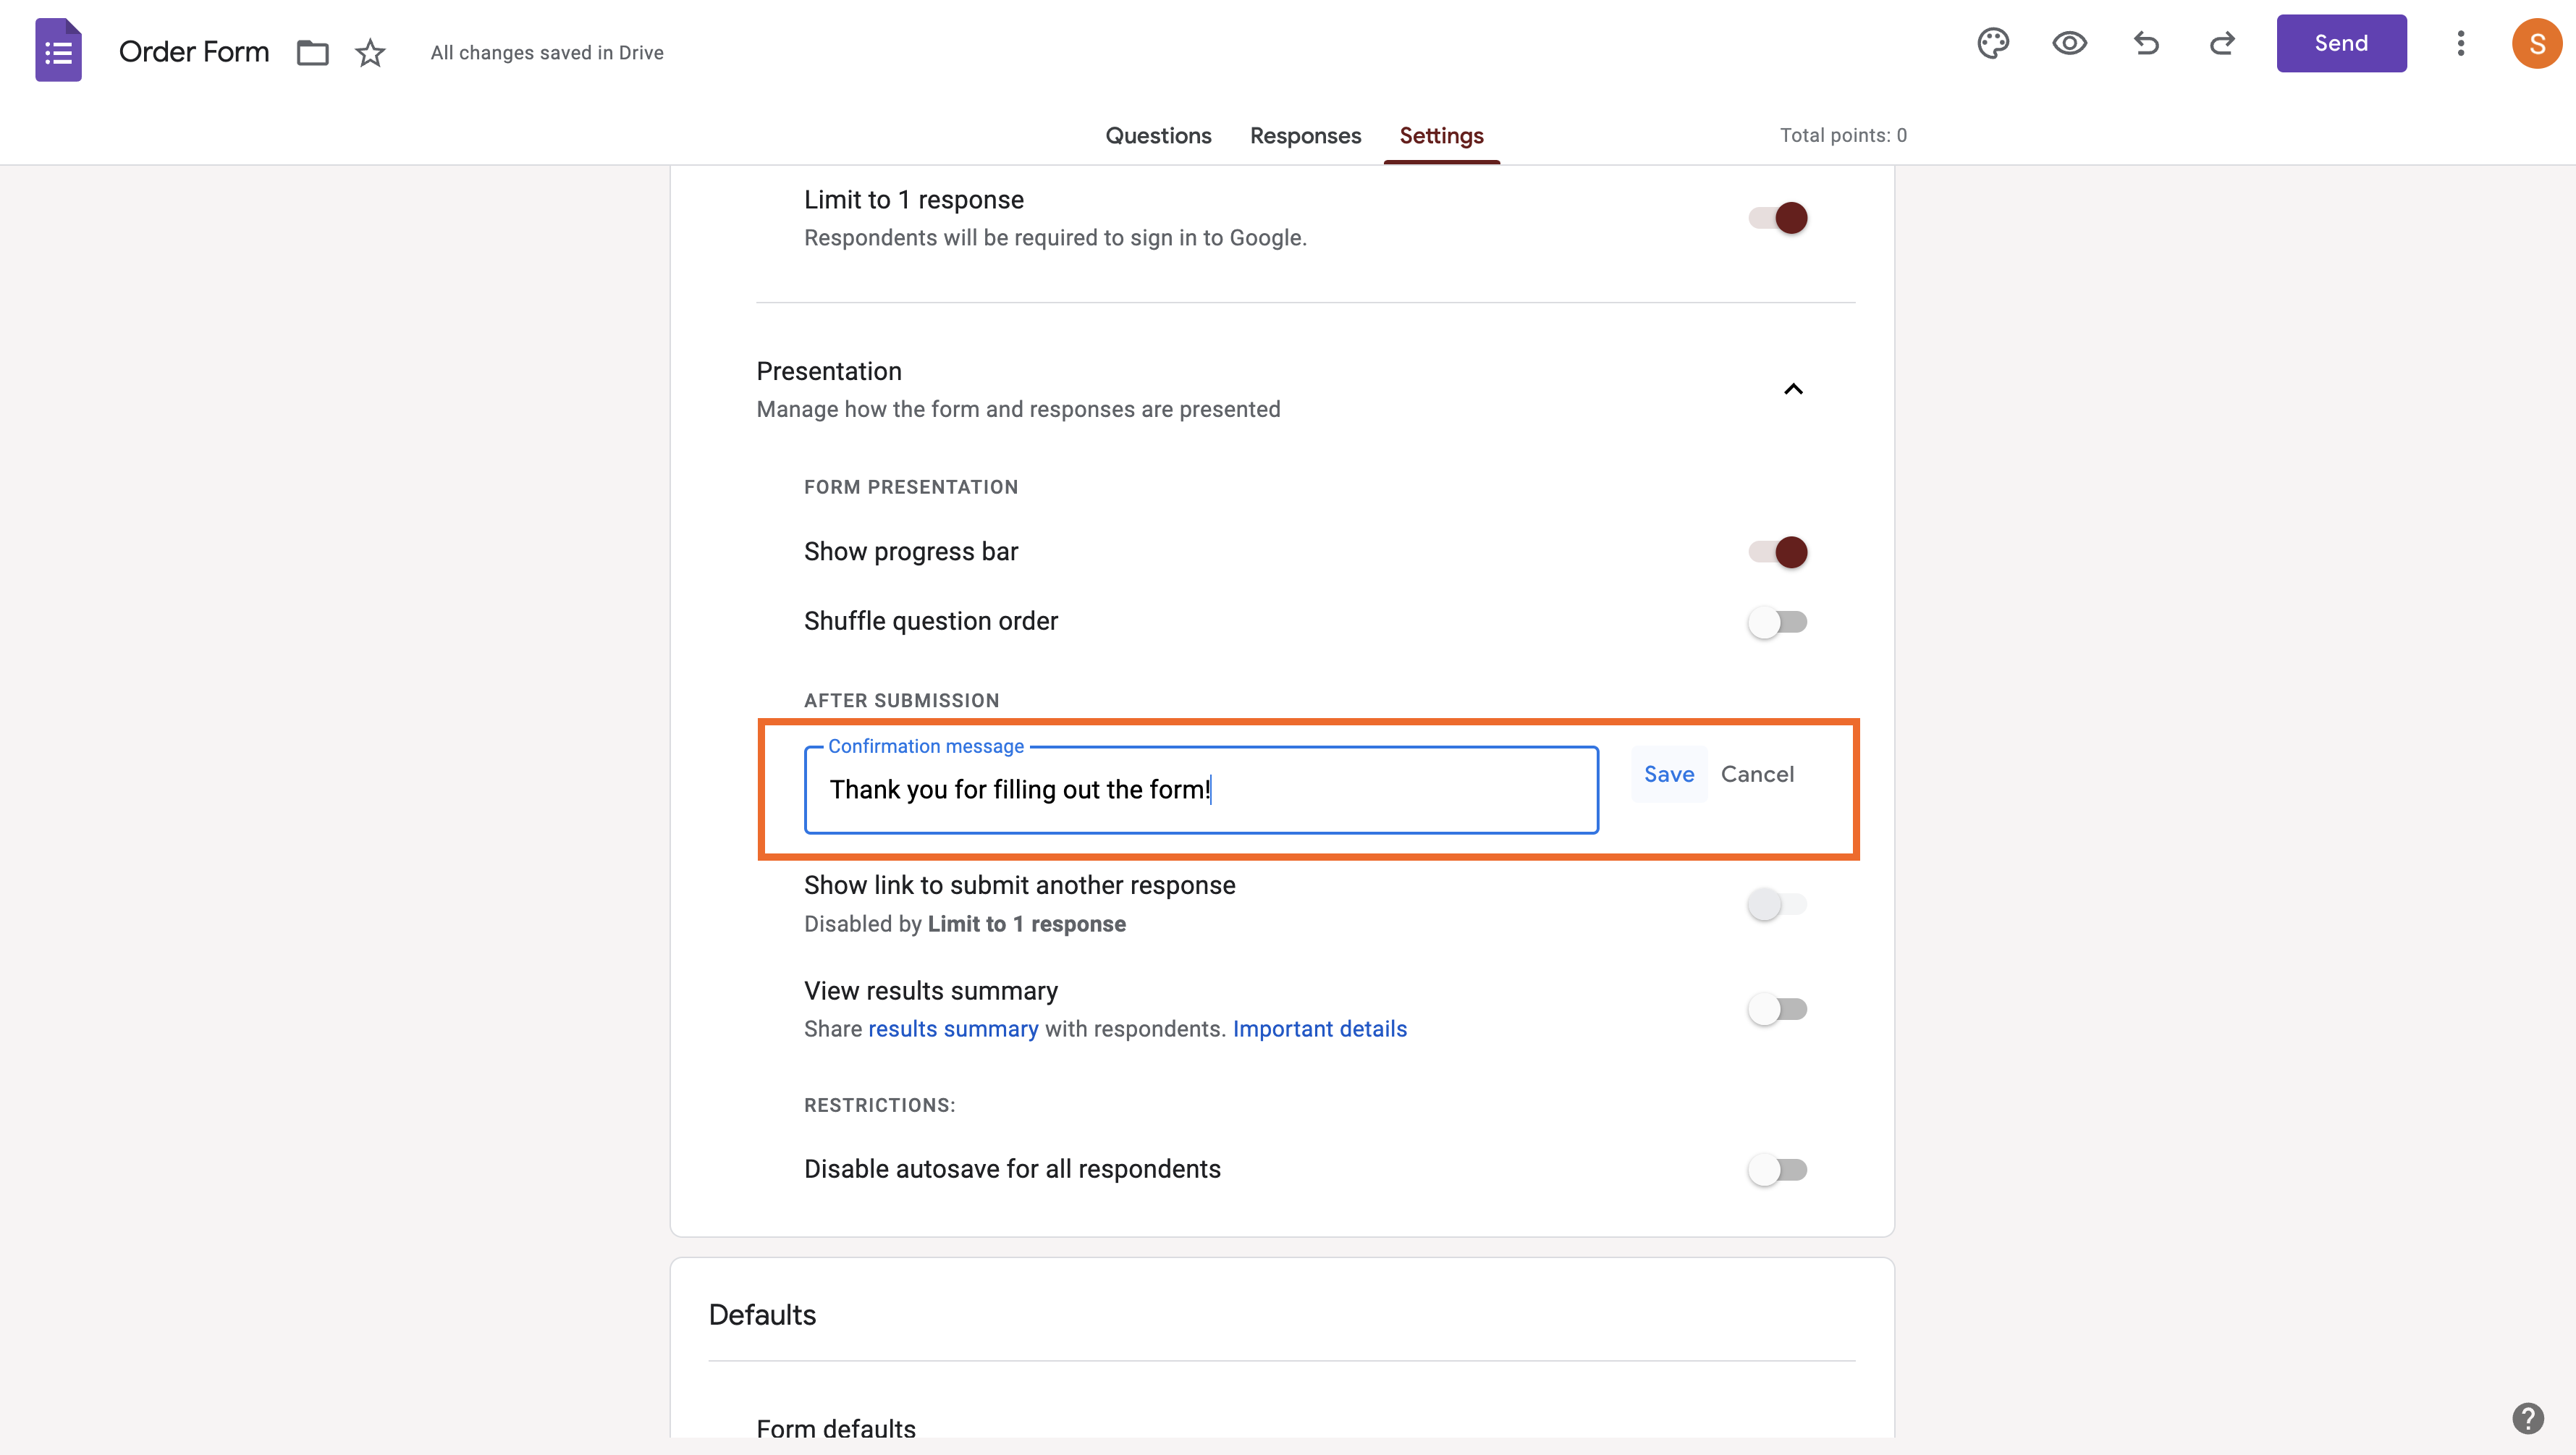
11. Show respondents a custom thank-you message
The default confirmation message in Google Forms is “Thank you for your response.” That works, but you may want to say something warmer, share a link, deliver an inspirational quote, offer them a discount as a reward, or do something else to say thank you. The Confirmation message option will let you do just that.
A few more tricks
These tips don’t really fit into the other categories, but they’re still some of the most useful.
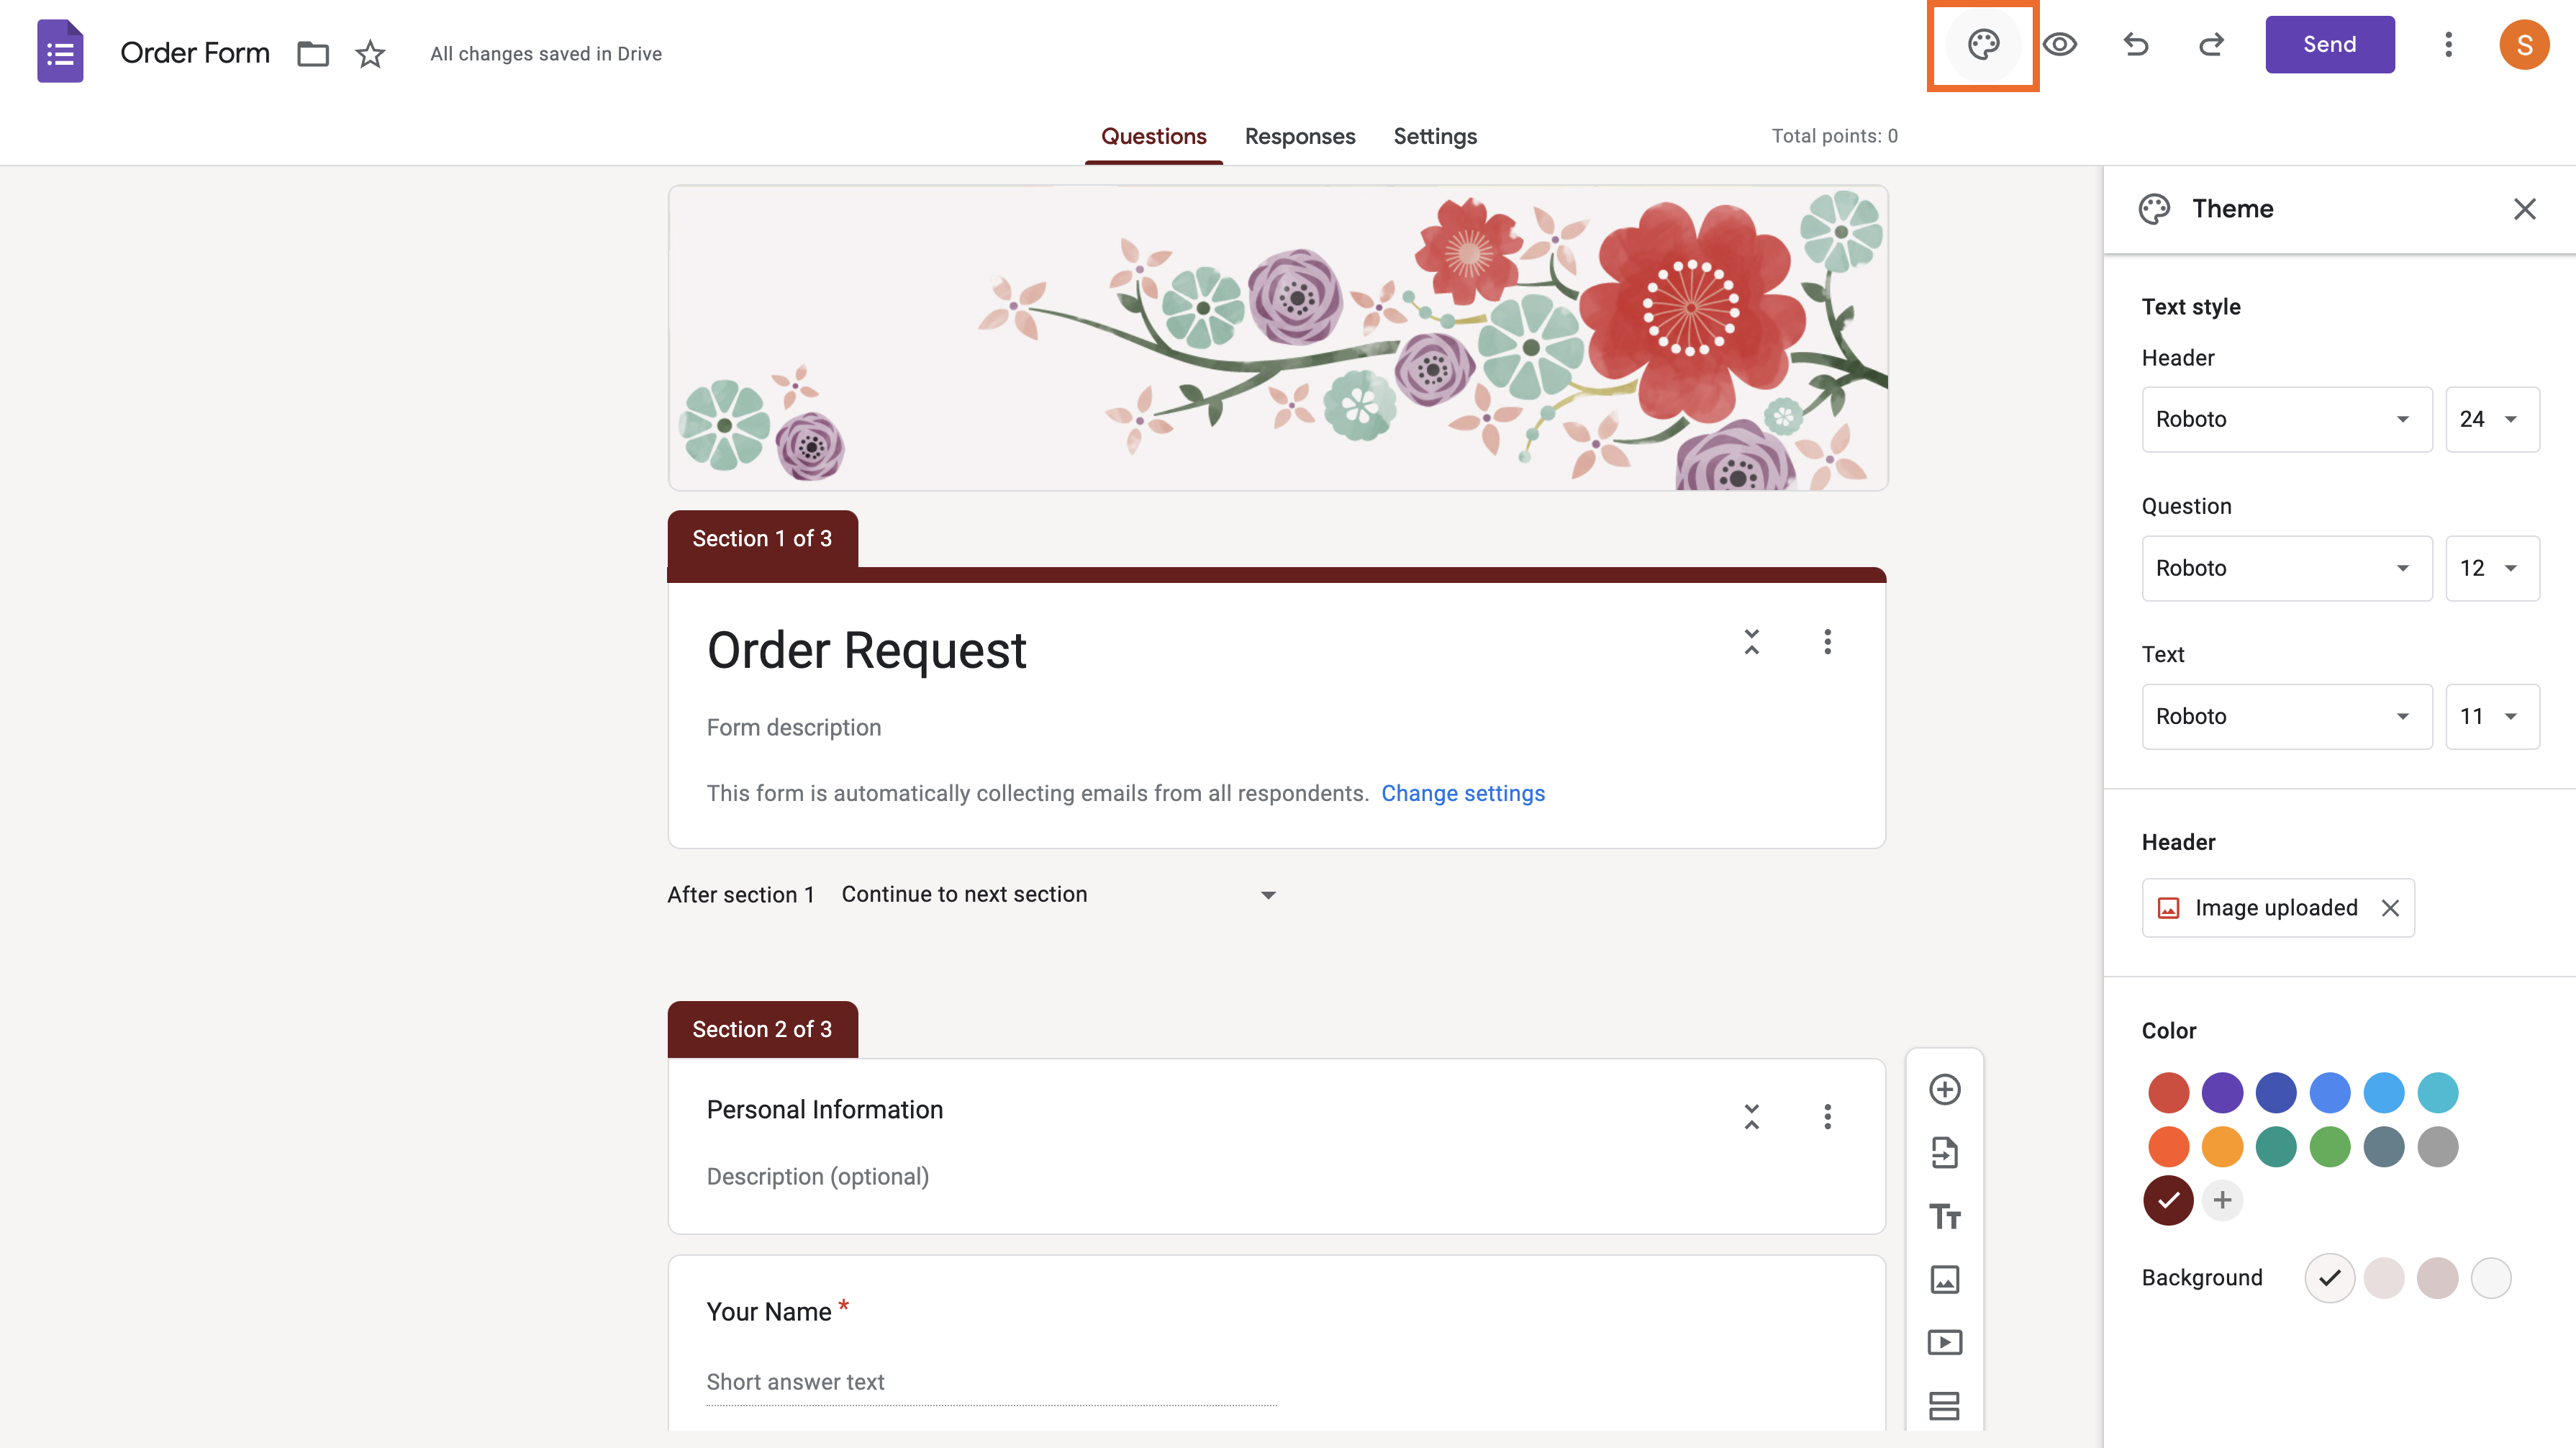
12. Use custom themes
You can change how your form looks and feels by customizing the theme. To do this, click the palette icon in the top bar. You’ll then see all the options to make your form more appealing. You can change fonts, colors, and the header image.
Learn more with our guide, How to customize Google Forms
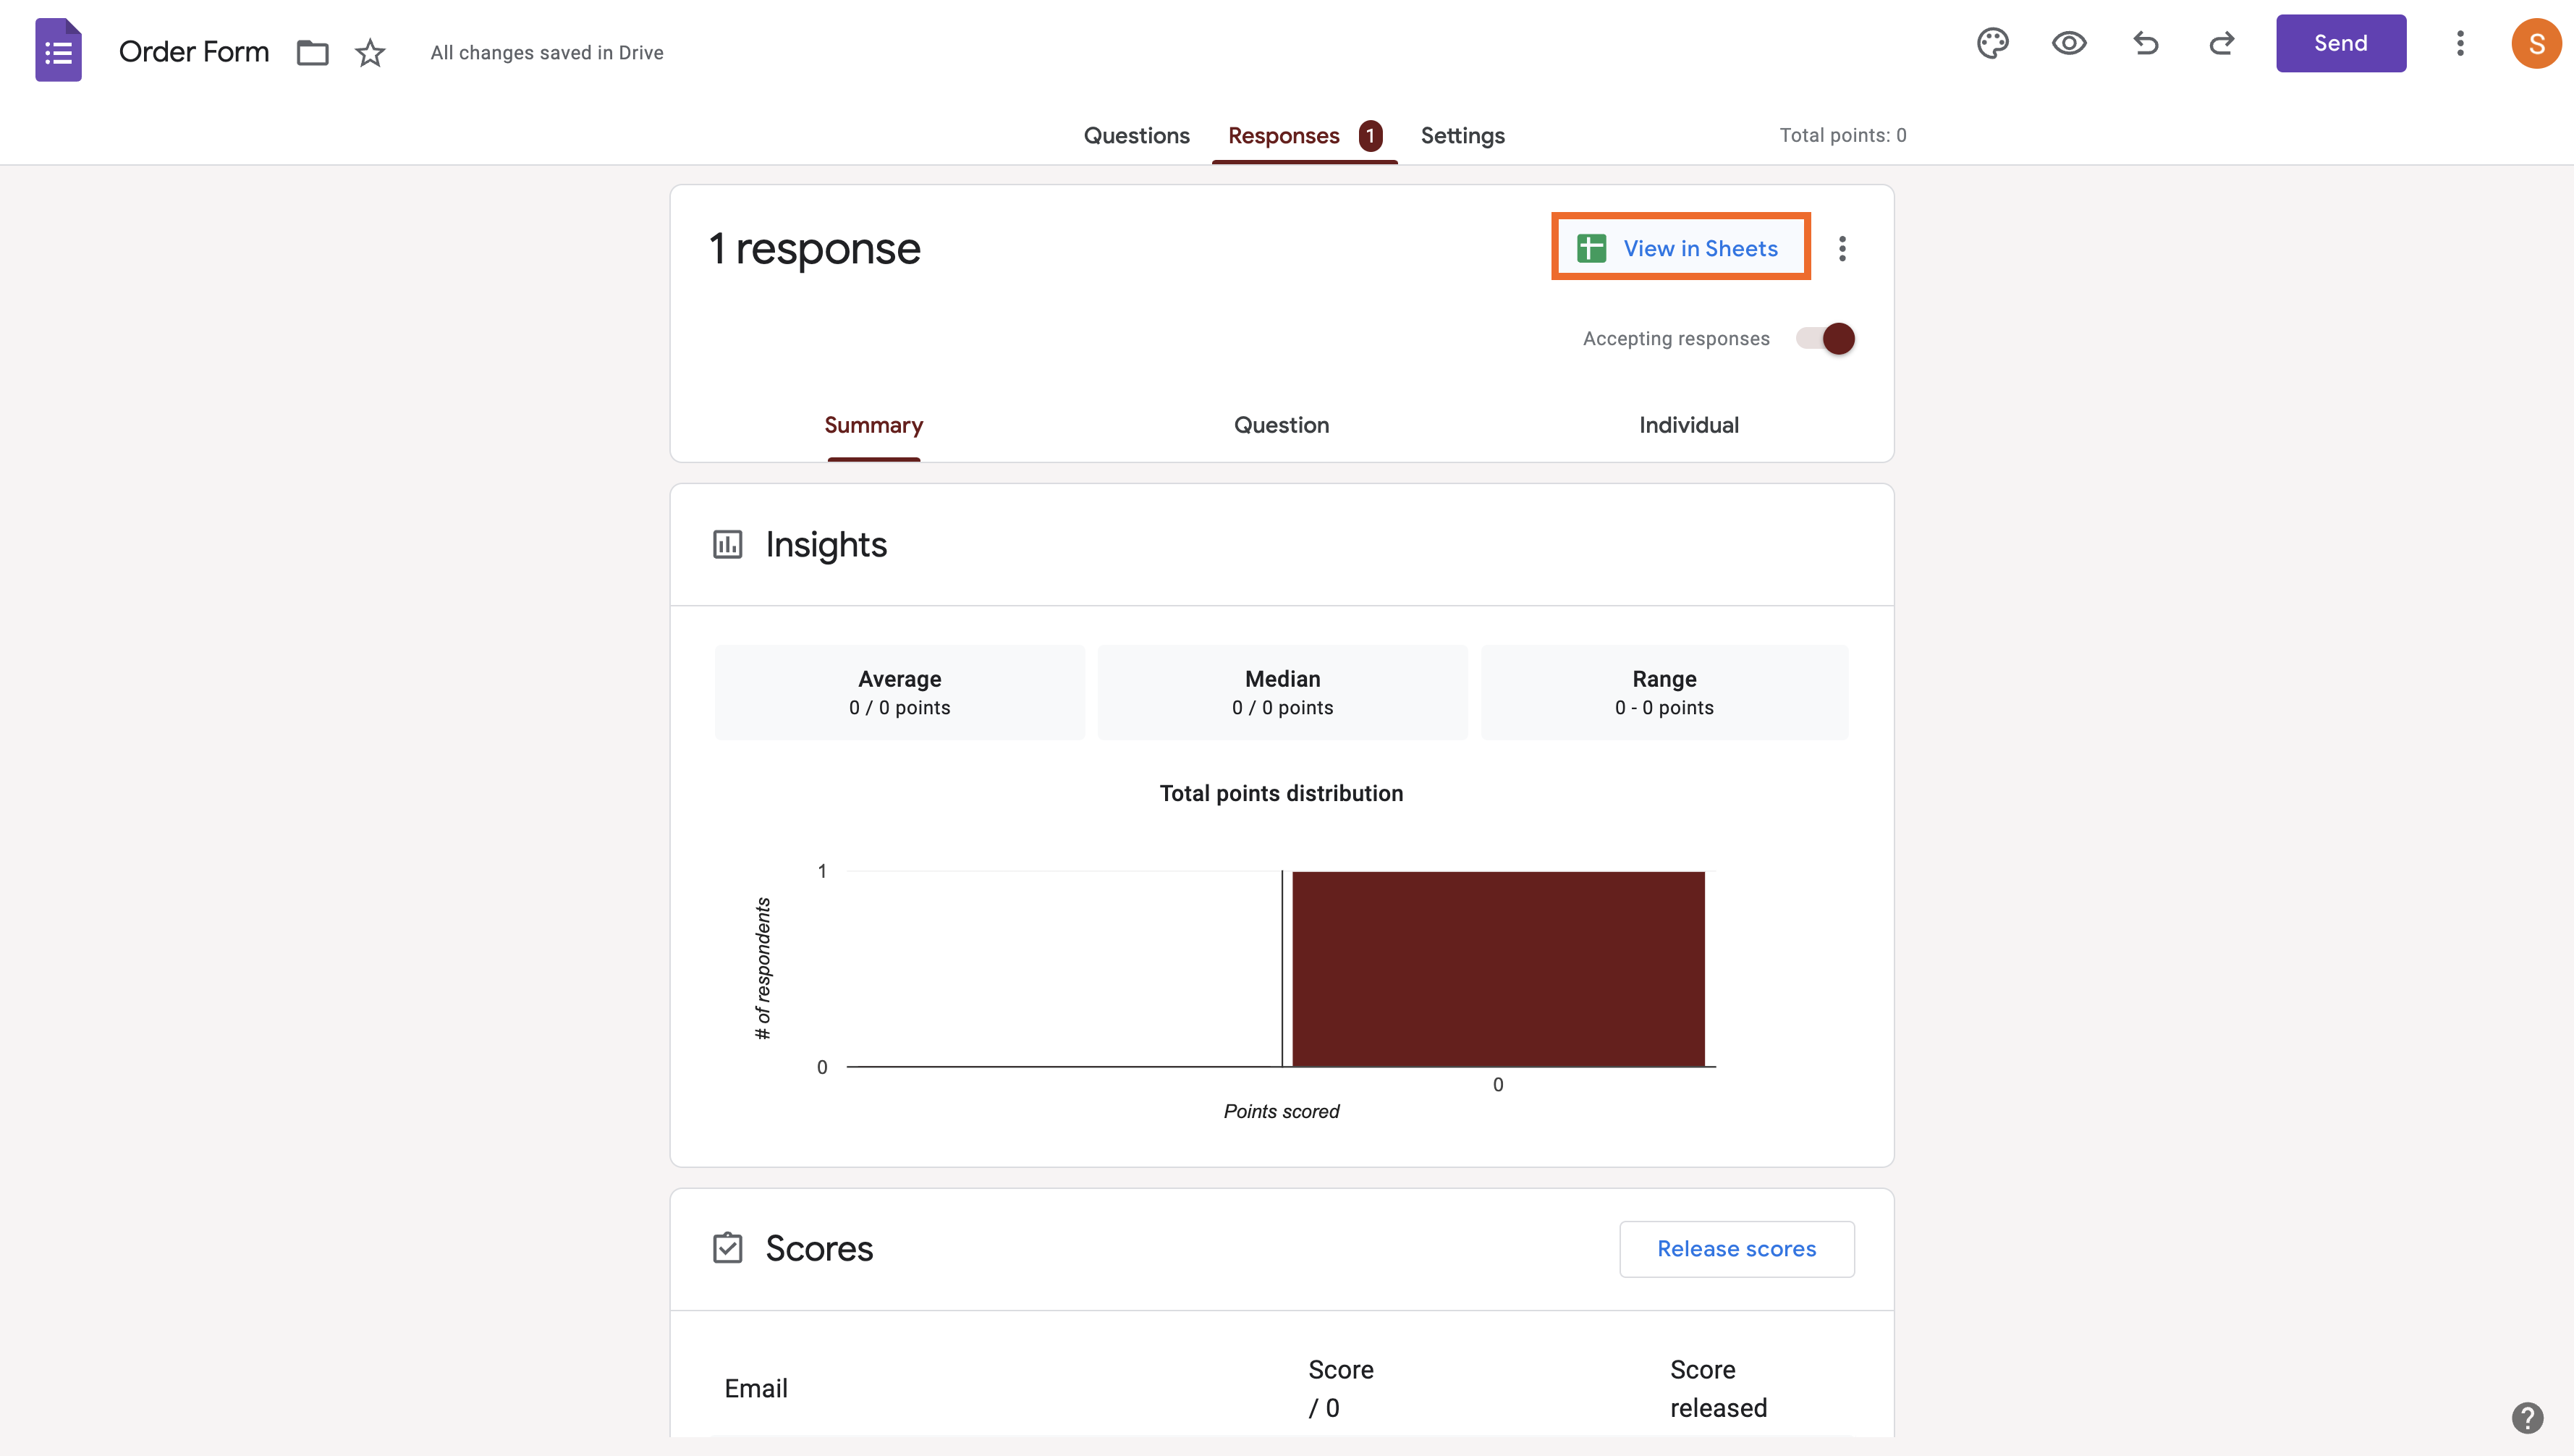
13. Use Google Sheets to analyze your data
The Responses tab at the top of your form will let you see how each person filled out your form. If you want to do something more with that data, like create reports, you can use Sheets to do just that. Click View in Sheets to automatically create a Google Sheets file of your form responses.
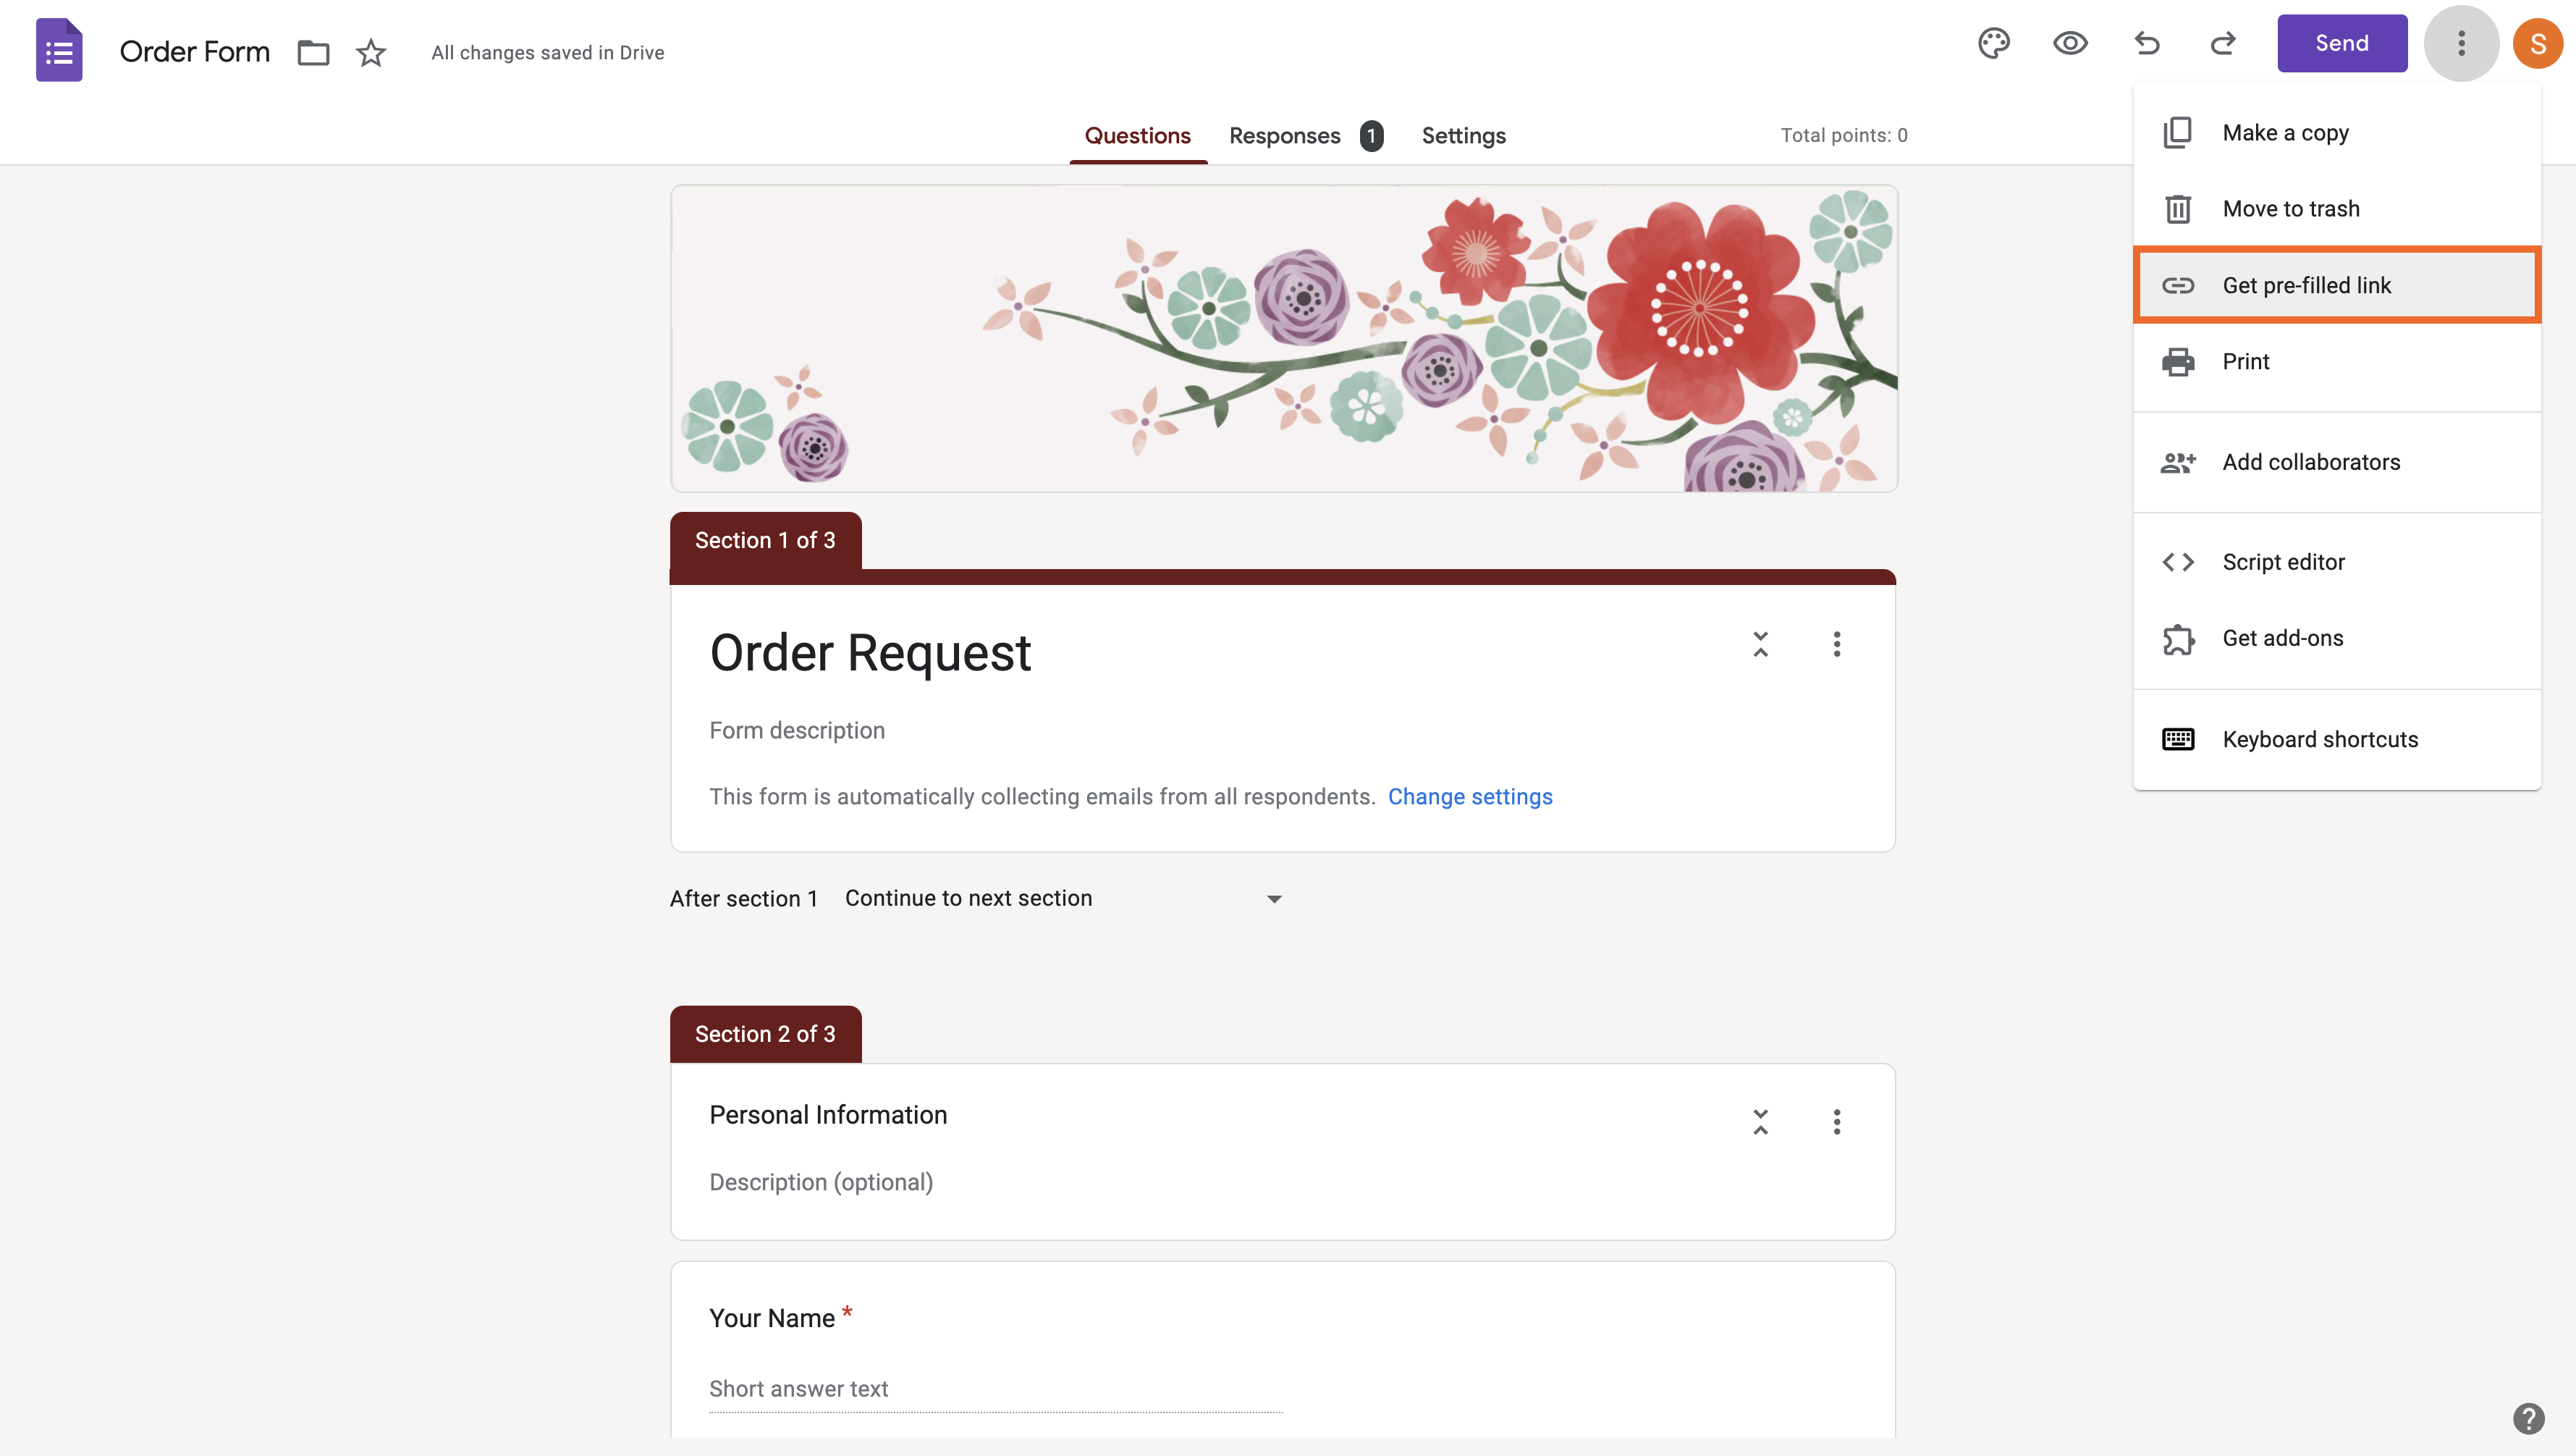
14. Prefill responses
If you click the three-dot menu button in the upper right corner of the form page, you’ll see a list of advanced options. Select Get pre-filled link to open a page that lets you prefill as much of your form as you want.
You can then send people a link to the prefilled form. This feature is useful if you already know some of your respondents’ information and just need to collect a little bit more.
Learn how to prefill a Google Form in our guide.
Add-on options
Google Forms is one of the most popular form tools on the internet because it’s so easy to access and learn. On the other hand, it’s a simple tool without a huge collection of features.
Create forms seamlessly in Google Workspace with Form Builder by Jotform. Discover more now!
Fortunately, there are several add-ons you can use to give it a bit more oomph. Here are a few good ones:
15. Limit form responses
If you want to apply restrictions to your form, formLimiter is a good option. For example, you can have first-come, first-served RSVP events with limited attendees. You can also make sure that people can’t fill out the form after the event has started.
16. Get notifications on form submissions
As we already discussed, you can automatically send an email to respondents when they fill out a Google form. But what if you want to get a notification after each response? In that case, Google has an official add-on called Form Notifications that does that.
17. Deeply configure the look and feel of your form
We mentioned themes in the last section. If you checked them out, you may have noticed that your options are somewhat limited. If you want more ways to customize the look and feel of your form, you can try Formfacade.
Many more tricks and features with Jotform
While Google Forms has some nice tricks, you may have noticed that there aren’t a lot of them. That’s because Google Forms isn’t a complete, standalone product. If it were, it wouldn’t need so many add-ons. And while the potential of those add-ons is nice, you’ll have to pay for many features that could be part of Google Forms in the first place.
That’s why using a dedicated form tool like Jotform is your best bet for getting a rich and complete feature set. Every feature in this list, including what you’d get with the add-ons, is included in Jotform. And Jotform also provides in-depth tools to configure and customize your form to your exact needs. Check it out for yourself and sign up today for free.
See also Jotform’s detailed guide about: Google Forms
Photo by Julia Khalimova


")


Send Comment: