
Connect Jotform and Klaviyo to add profiles
- Make sure that you have both a Jotform and a Klaviyo account
- Navigate to the Jotform + Klaviyo integration page on Zapier
- Confirm the action in Jotform that will trigger the automation
- Choose the resulting action
- Choose the data you want to send and then test and save the automation
In recent years, personalized customer experiences have gone from a nice-to-have to a must-have. These types of experiences require lots of data, so businesses have to be diligent when it comes to collecting and organizing customer data to ensure it’s ready to use.
Klaviyo is a marketing automation service that helps businesses talk to their customers through email and SMS, leveraging customer data to tailor experiences to each customer’s unique needs. You can use Klaviyo’s powerful lists feature to help you quickly send out tailored messages to the right people at the right time. You can organize lists by whatever metric makes the most sense.
One thing to note is the difference between lists and segments. Lists are a static group of people who fit a specific, predefined category. In contrast, segments are dynamic groups that change as people fit or no longer fit a set of predefined conditions. Using these two tools simultaneously is a great way to home in on the people best suited for your messaging.
Now that we understand what a list is, let’s look at how you add someone to your Klaviyo list.

Adding profiles manually to Klaviyo
Before you start, it’s important to understand what a profile is in Klaviyo. Essentially, each profile is a customer. A profile contains all the pertinent information on a single person, regardless of how many ways they interact with your company — and it prevents you from creating multiple records for the same person.
When adding profiles manually, you can add people individually or in bulk through a CSV file. Below are instructions for doing both. (Just a note that you should review and make sure you abide by Klaviyo’s terms of service before using the platform.)
Adding profiles in bulk with a CSV file
- First, make sure your CSV file is formatted correctly. The first column must contain one of the following labels: email, email address, or phone number. The other columns aren’t as strict, but you’ll want to label the header properly to transfer information correctly. (Note: You must match the headers to existing Klaviyo properties or create custom properties.)
- Next, you’ll either create a new list or upload contacts to an existing one. To start a new list, select the Lists & Segments tab, click Create List/Segment in the top right corner, give your list a name, and click Create List.
- You’ll then be able to click into your list and upload the CSV that contains your contacts.
- Map the columns from your CSV to the corresponding Klaviyo or custom fields. You’ll also be able to add GDPR-specific consent at this stage.
- Finally, review your import and click Start when ready.
- If you want to upload your contacts to an existing list, navigate to the list you want to edit, click Manage List in the top-right corner, and then click Import Contacts.
Adding a single contact to your list
- Click on the Lists & Segments tab and navigate to the list you want to add a subscriber to.
- You’ll see some links at the top of your list. From those links, choose the Quick Add link.
- Enter the profile information here, including if you’ve received GDPR consent. An email address is required at this stage.
- Review information and click Add Subscriber.
Adding new profiles to your lists isn’t hard, but the methods discussed so far are manual and time-consuming. Next, we’ll look at one more way to add profiles to your lists that automates the process.
Connect Jotform and Klaviyo to add profiles effortlessly
Jotform is a powerful online form builder that lets you collect customer data with ease. Setting up a Jotform and Klaviyo connection will allow you to automate the data entry process, ensuring data is always up to date and eliminating error-prone manual entry.
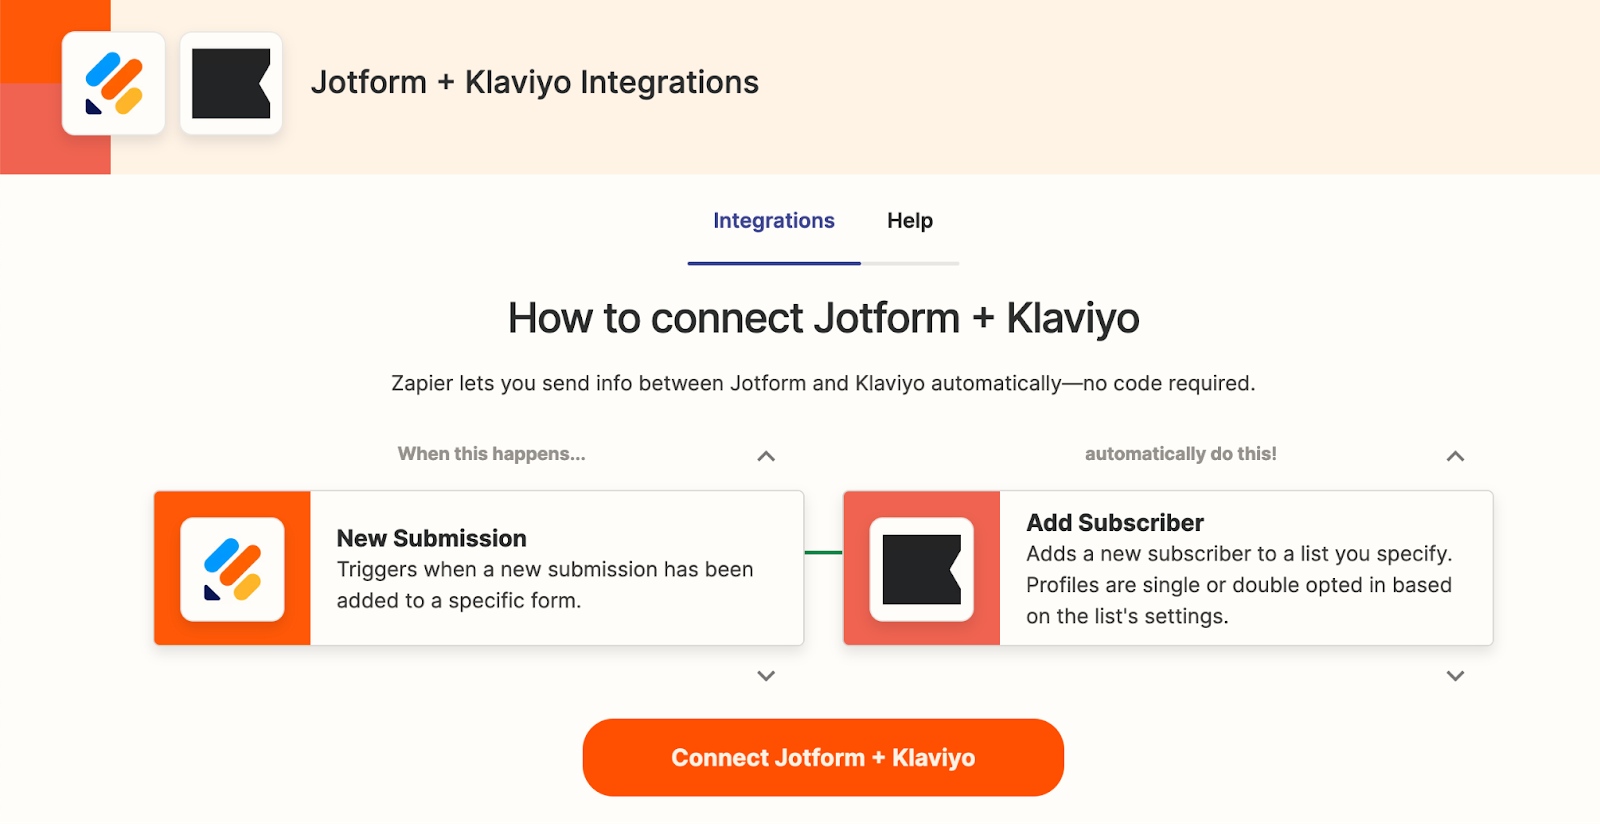
With this integration, when someone submits a form in Jotform, they will be automatically added as a subscriber in Klaviyo. Let’s look at how you’d set up this integration.
- First, make sure that you have both a Jotform and a Klaviyo account, as this will make the process much faster.
- Then navigate to the Jotform + Klaviyo integration page on Zapier.
- Next, you’ll confirm the action in Jotform that will trigger the automation. In this case, the action would be receiving a new submission.
- Then you’ll choose the resulting action, which would be to add a subscriber in Klaviyo.
- Finally, you’ll choose the data you want to send and then test and save the automation. And you’re done!
It only takes a few steps to connect Jotform and Klaviyo and build an automation that simplifies data entry and improves accuracy.
You can also adjust the Zapier integration to your needs. For example, you may want events created in Klaviyo to trigger Jotform to assign forms to specific subscribers automatically. By creating custom automations, you can really make your software work for you.
Making data your superpower
Data helps you tailor your messaging so it has a powerful impact on your audience. And gathering the data you need is easier with powerful forms and thousands of templates. Jotform allows you to create forms that you can send anywhere or embed on your website — increasing the likelihood that people will share their valuable data.
Learn how Jotform can help you make data your superpower by trying it for free today.


Send Comment: