
Imagine how much you could improve results in your business if you only knew what your customers and potential customers were thinking, what they wanted, what they disliked about other products and services like yours, or what (in an ideal world) would make your product or service the perfect solution to their challenges.
You can easily gather all of this intel and more with a Mailchimp survey. Mailchimp is what’s commonly known as an ESP (email service provider) or, as Mailchimp calls itself, the “all-in-one marketing platform for small business.”
Creating and sending a Mailchimp survey is simple and straightforward, and we’re going to cover how to do that.
Let’s start with the basics.
Of course, you need a Mailchimp account. You can sign up for a free Mailchimp account here, which allows up to 2,000 contacts (email addresses). Once you get past 2,000 contacts, you’ll need a paid account.
Coming up with your survey questions
Before you create a survey, it’s a good idea to understand what kind of questions are likely to get the most useful answers.
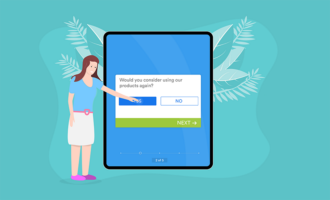
In order to get actionable survey responses, you need to ask questions that are directly relevant to improving some part (or parts) of your business. For example, you won’t be asking respondents what their favorite color is — unless that is relevant to your business.
Instead, focus on questions like these:
- How long have you been using our product/service?
- What are the top three benefits that result from using our product/service?
- What caused you to seek out our product/service?
You can devise any questions you like — as long as the answers will provide relevant intel for improving customer satisfaction and sales.
According to survey software provider, the top seven most used survey questions ask for the following information:
- The adjustments to a service that would make the most impact
- The feature customers appreciate most
- The adjustments to a new product that would make the most improvement
- The aspect of a product customers appreciate most
- The customer’s level of satisfaction with a product
- The age group of the respondent
- Whether the respondent is male or female
Just so you know
Create and share powerful surveys in minutes with Jotform. You can even use our free Mailchimp integration to add new subscribers to your email lists automatically!
How to create a survey in Mailchimp
You can easily create a hosted survey in Mailchimp and share it in your email campaigns, on the web, or via your social media channels. (A “hosted” survey means you’ll create the survey inside Mailchimp and copy the survey URL, which you can then share anywhere you like.)
Or you can use a third-party integration tool like Jotform to create a survey, which you can link to your Mailchimp campaign.
Here are the steps for creating a hosted Mailchimp survey. (You can find a more detailed version of the instructions below in Mailchimp’s help guide.)
- Sign into your Mailchimp account.
- From the Create dropdown menu, choose Survey.
- Select an audience and click the Begin button.
- To open the survey builder, click on Add Questions.
- You’ll see a Questions tab. From there, select Add a question.
- This will give you a list of question options. You might want respondents to click on radio buttons or checkboxes, or you may prefer a response that falls in a range of numbers from 0 to 10. Select the option that works best for you.
- Type your question into the What would you like to ask? field.
- A question settings sidebar allows you to choose whether you want to require respondents to answer the question before being allowed to submit their response.
You can also add your logo and edit background and button colors by clicking the Design tab.
Once you’ve completed the steps above, click on the Click to set the survey title field, where you can make adjustments to the title. This title is only visible to you inside your account; your survey respondents won’t see it.
Finally, click Save & Close.
You’ve just created your masterpiece!
How to share your survey
Next, you need to make your survey “live” so people can answer the questions. From the Survey Location section inside Mailchimp (the survey summary page), you’ll see a slider. Move the slider to Turn On.
You’ll have a few options there, including Share by Email, Share on Facebook, and Share on Twitter. Of course, you can also grab the URL and share it anywhere you’re able to embed links — for example, in a blog post, on a landing page, or elsewhere.
You can review your survey responses by going to the Surveys screen in Mailchimp and clicking on the name of your survey. You can also click on View All Responses to see the responses in graph form and even tag contacts who provided a specific answer.
For example, if you asked, “What new product would you like to see us create?” you could tag everyone who provided the same response to that question, and assuming a good number of people gave the same reply, you might decide to create the product. Once the product is ready, you can send an email only to those tagged contacts to let them know it’s available.
Your customers and potential customers are an excellent resource for gauging what to do next to uplevel your marketing, your customer service, and your product or service. And surveys are a great tool for finding out what’s on their minds and optimizing the performance of your business accordingly.


Send Comment:
1 Comment:
September 2, 2021
I don't understand how the 'share by email' in mailchimp survey works.