
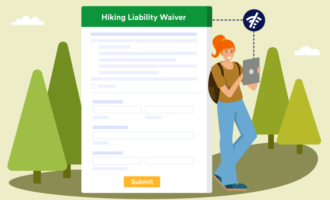
Create your Constant Contact survey
- Log into your Constant Contact account
- Click on the Campaigns tab
- Click the Create button
- Select the Survey Pages option
- Click on the survey name field
- Click the Survey Page Settings option
- Edit the Survey Page Title
- Edit the Survey Page Description
- Edit your survey expiration date
- Add text to customize your survey URL
- Click on the Images tab
- Click on the sample survey question
- Click on the placeholder text
- Choose multiple choice, checkboxes, open answer, rank order
- Click the +Add Response button
- Click on the Image icon
- Click on the Required question toggle
- Click Save
- Repeat this process by dragging additional question
- Click the blue Done button
- Click the Design tab
- Use the dropdown menus for the backgrounds and border colors
- Click the Preview button
- Click Publish to make the survey active
Online surveys are valuable ways to engage with your audience. You can use surveys to conduct market research, get customer feedback, and better understand who your customers are. Surveys are an essential part of your email marketing strategy, and they can make all of your marketing more effective.
But to use surveys, you need to determine the best ways to distribute them. You can always share them on social media, but sending surveys through email can help ensure they reach your target audience.
With Constant Contact, you can easily create custom surveys and share them through email campaigns. Here’s how.
Get started in Constant Contact
If you haven’t done so already, you’ll need to create a Constant Contact account. Constant Contact lets you sign up for free without requiring your credit card information.
Once you’ve signed up, you’ll get a 60-day free trial. During the trial, you can access many of the platform’s valuable tools, including customizable templates and real-time reporting.
At the end of your trial, you can choose from Constant Contact’s affordably priced plans. The Core plan starts at $9.99 per month, and the price will depend on how many email contacts you have. The Plus plan, which includes automation and a personalized kickoff call with an expert to help with your email marketing, starts at $45 per month.
Create your Constant Contact survey
Constant Contact lets you create a survey right within its platform. Follow these steps to create a survey page:
- Log into your Constant Contact account.
- Click on the Campaigns tab in the top navigation toolbar.
- Click the Create button on the right side of the page.
- Select the Survey Pages option toward the bottom of the list.
- Click on the survey name field to edit it, and create a unique name.
- Click the Survey Page Settings option in blue in the upper right corner of the page.
- Edit the Survey Page Title, which is what your contacts will see when they land on the survey page.
- Edit the Survey Page Description, which will appear if your survey is shared in Facebook or Instagram ads.
- Edit your survey expiration date, which is automatically set to six months from when the survey is published.
- Add text to customize your survey URL, if you’d prefer, then click Save.
- Click on the Images tab in the gray navigation bar on the left. From this editor, you can add your logo or other images to the survey.
- Click on the sample survey question to add your first survey question. You can drag and drop question blocks from the navigation bar on the left. The drag-and-drop editor is easy to use, and allows you to also add elements like dividers, images, and text boxes.
- As you add each element to the survey, just click on the placeholder text to edit that element. As you add questions, you can customize them and the available responses by clicking on the question and then selecting the Edit button that appears.
- From the dropdown Question type menu in the editing window, you can choose multiple choice, checkboxes, open answer, rank order, and numeric scale question types.
- If you want to add additional answer options to a question, click the +Add Response button and enter your response.
- To add a photo to an answer option, click on the Image icon to the right of that option.
- To require respondents to answer the question, click on the Required question toggle at the bottom right of each question.
- When you’re done with your first question, click Save.
- You can repeat this process by dragging additional question blocks into the survey.
- When you’re finished adding questions, click the blue Done button at the top.
- Click the Design tab in the gray navigation menu on the left side of the page.
- Use the dropdown menus to choose the backgrounds and border colors.
- Click the Preview button on the top of the page to view what your survey will look like, and then make any needed edits.
- Click Publish to make the survey active.
Share your Constant Contact survey
You can share your Constant Contact survey with your email list by following these steps:
- Log into your Constant Contact account.
- Click on the Campaigns tab in the top navigation menu.
- In the Campaigns drop-down menu, click on Surveys.
- Click on the name of the survey you want to share.
- Click the Share This Survey button in the upper right corner.
- Select Copy Link from the dropdown list. You can then paste that URL into an email, web page, or other location.
- Alternatively, click Share in an Email from the dropdown list. You can then edit and customize the email before sending it to your email contact list.
Pro tip: Use the Jotform-Constant Contact integration
You can also quickly and easily create and share surveys with Jotform. Thanks to Jotform’s Constant Contact integration, you can create a Jotform survey to send through Constant Contact and instantly add contacts from form submissions to your Constant Contact email lists.
With this integration, you’ll know that your contact lists are always up-to-date and you’re reaching the maximum number of subscribers with your newsletters, announcements, and other marketing materials.


Send Comment: