While notes are easy to jot down, they’re often difficult to keep organized. They end up scattered across notebooks, apps, sticky notes, chats, and email drafts. A custom note-taking app helps students, teams, consultants, and business owners turn that clutter into a simple, searchable system.
That’s where Jotform AI App Builder comes in. This no-code tool lets you generate a note-taking app with a simple text prompt. From there, you can customize the layout, add note forms tailored to different needs, and organize entries by category. You can add more utility to each note by attaching images or documents. Once the app is built, sharing is just as easy. You can distribute your app through a simple link or scannable QR code, with no technical setup required.
How to make a note-taking app
The next step is to understand the build process. As with all the tools you can create with Jotform Apps, Jotform AI App Builder handles the technical heavy lifting. That means you can focus on setting up a note-taking system that fits the way you work. Simply follow these steps:
1. Go to Jotform AI App Builder and enter your prompt
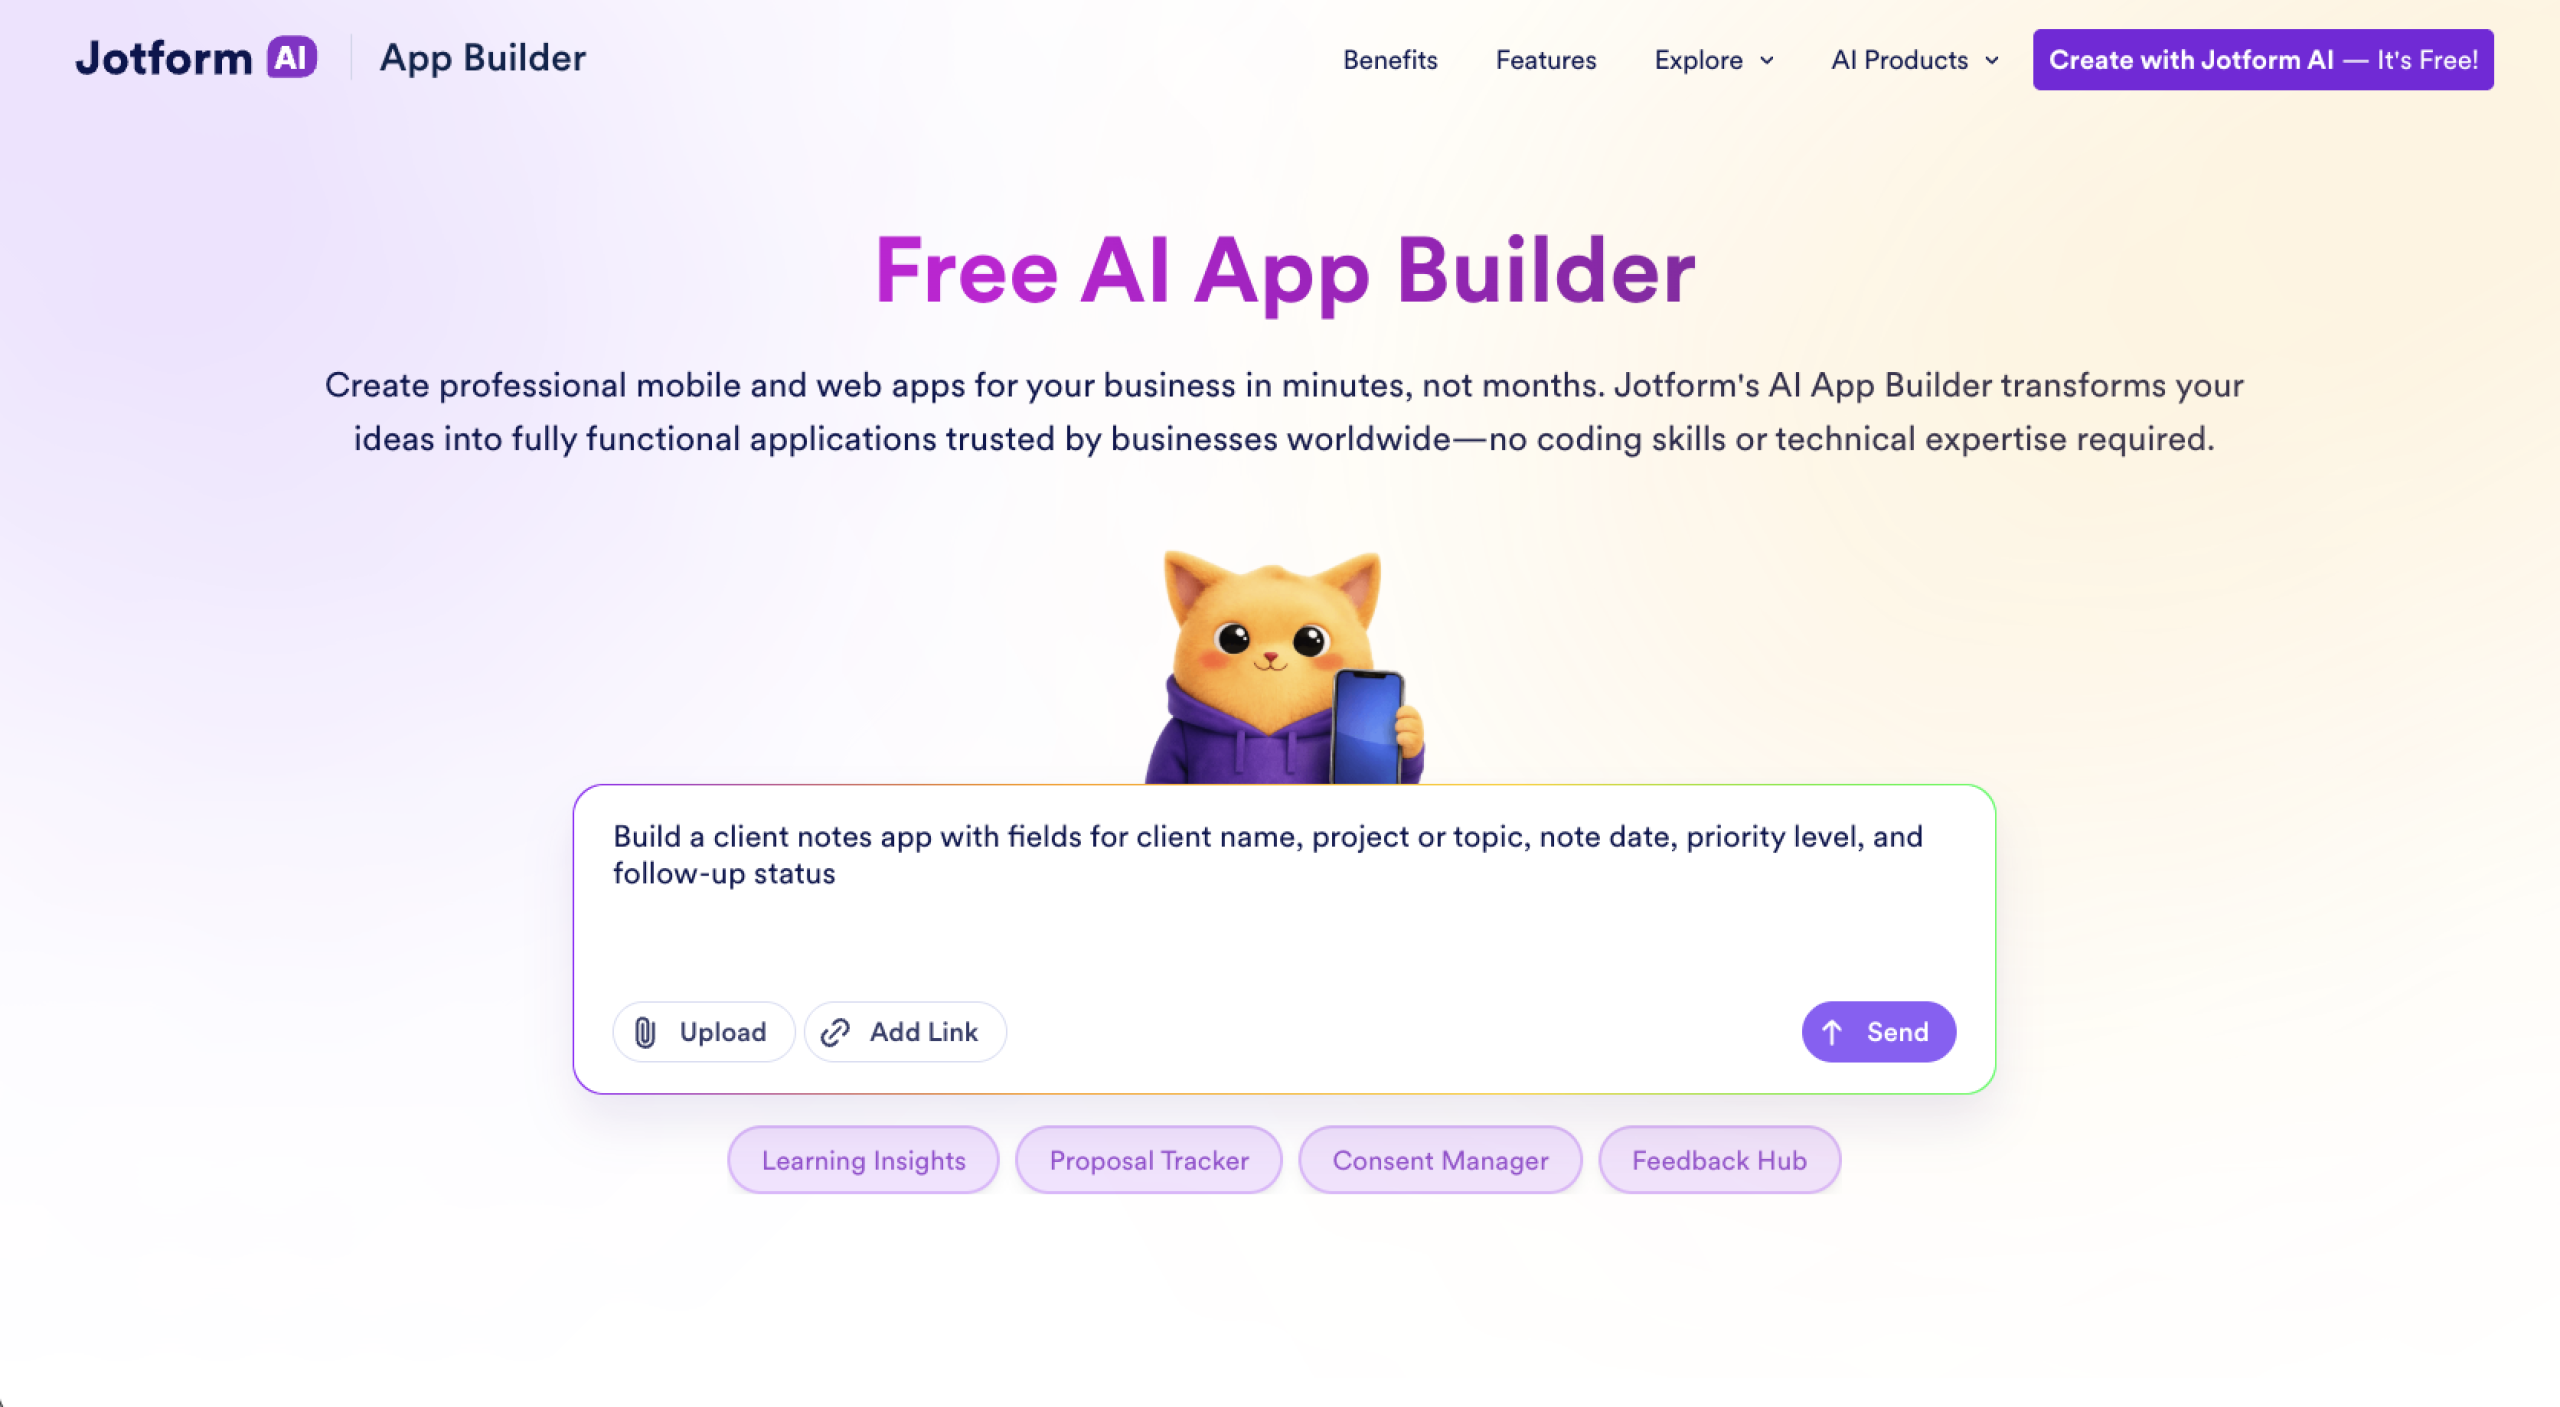
Head to Jotform AI App Builder and start with one of 3,200-plus free app templates or with a simple, plain-language prompt describing the app you want. For example, a student might use this prompt: “Create a note-taking app for organizing class notes by subject.” In seconds, the AI will generate a working app structure with a basic note form and layout you can revise.
2. Customize your app layout
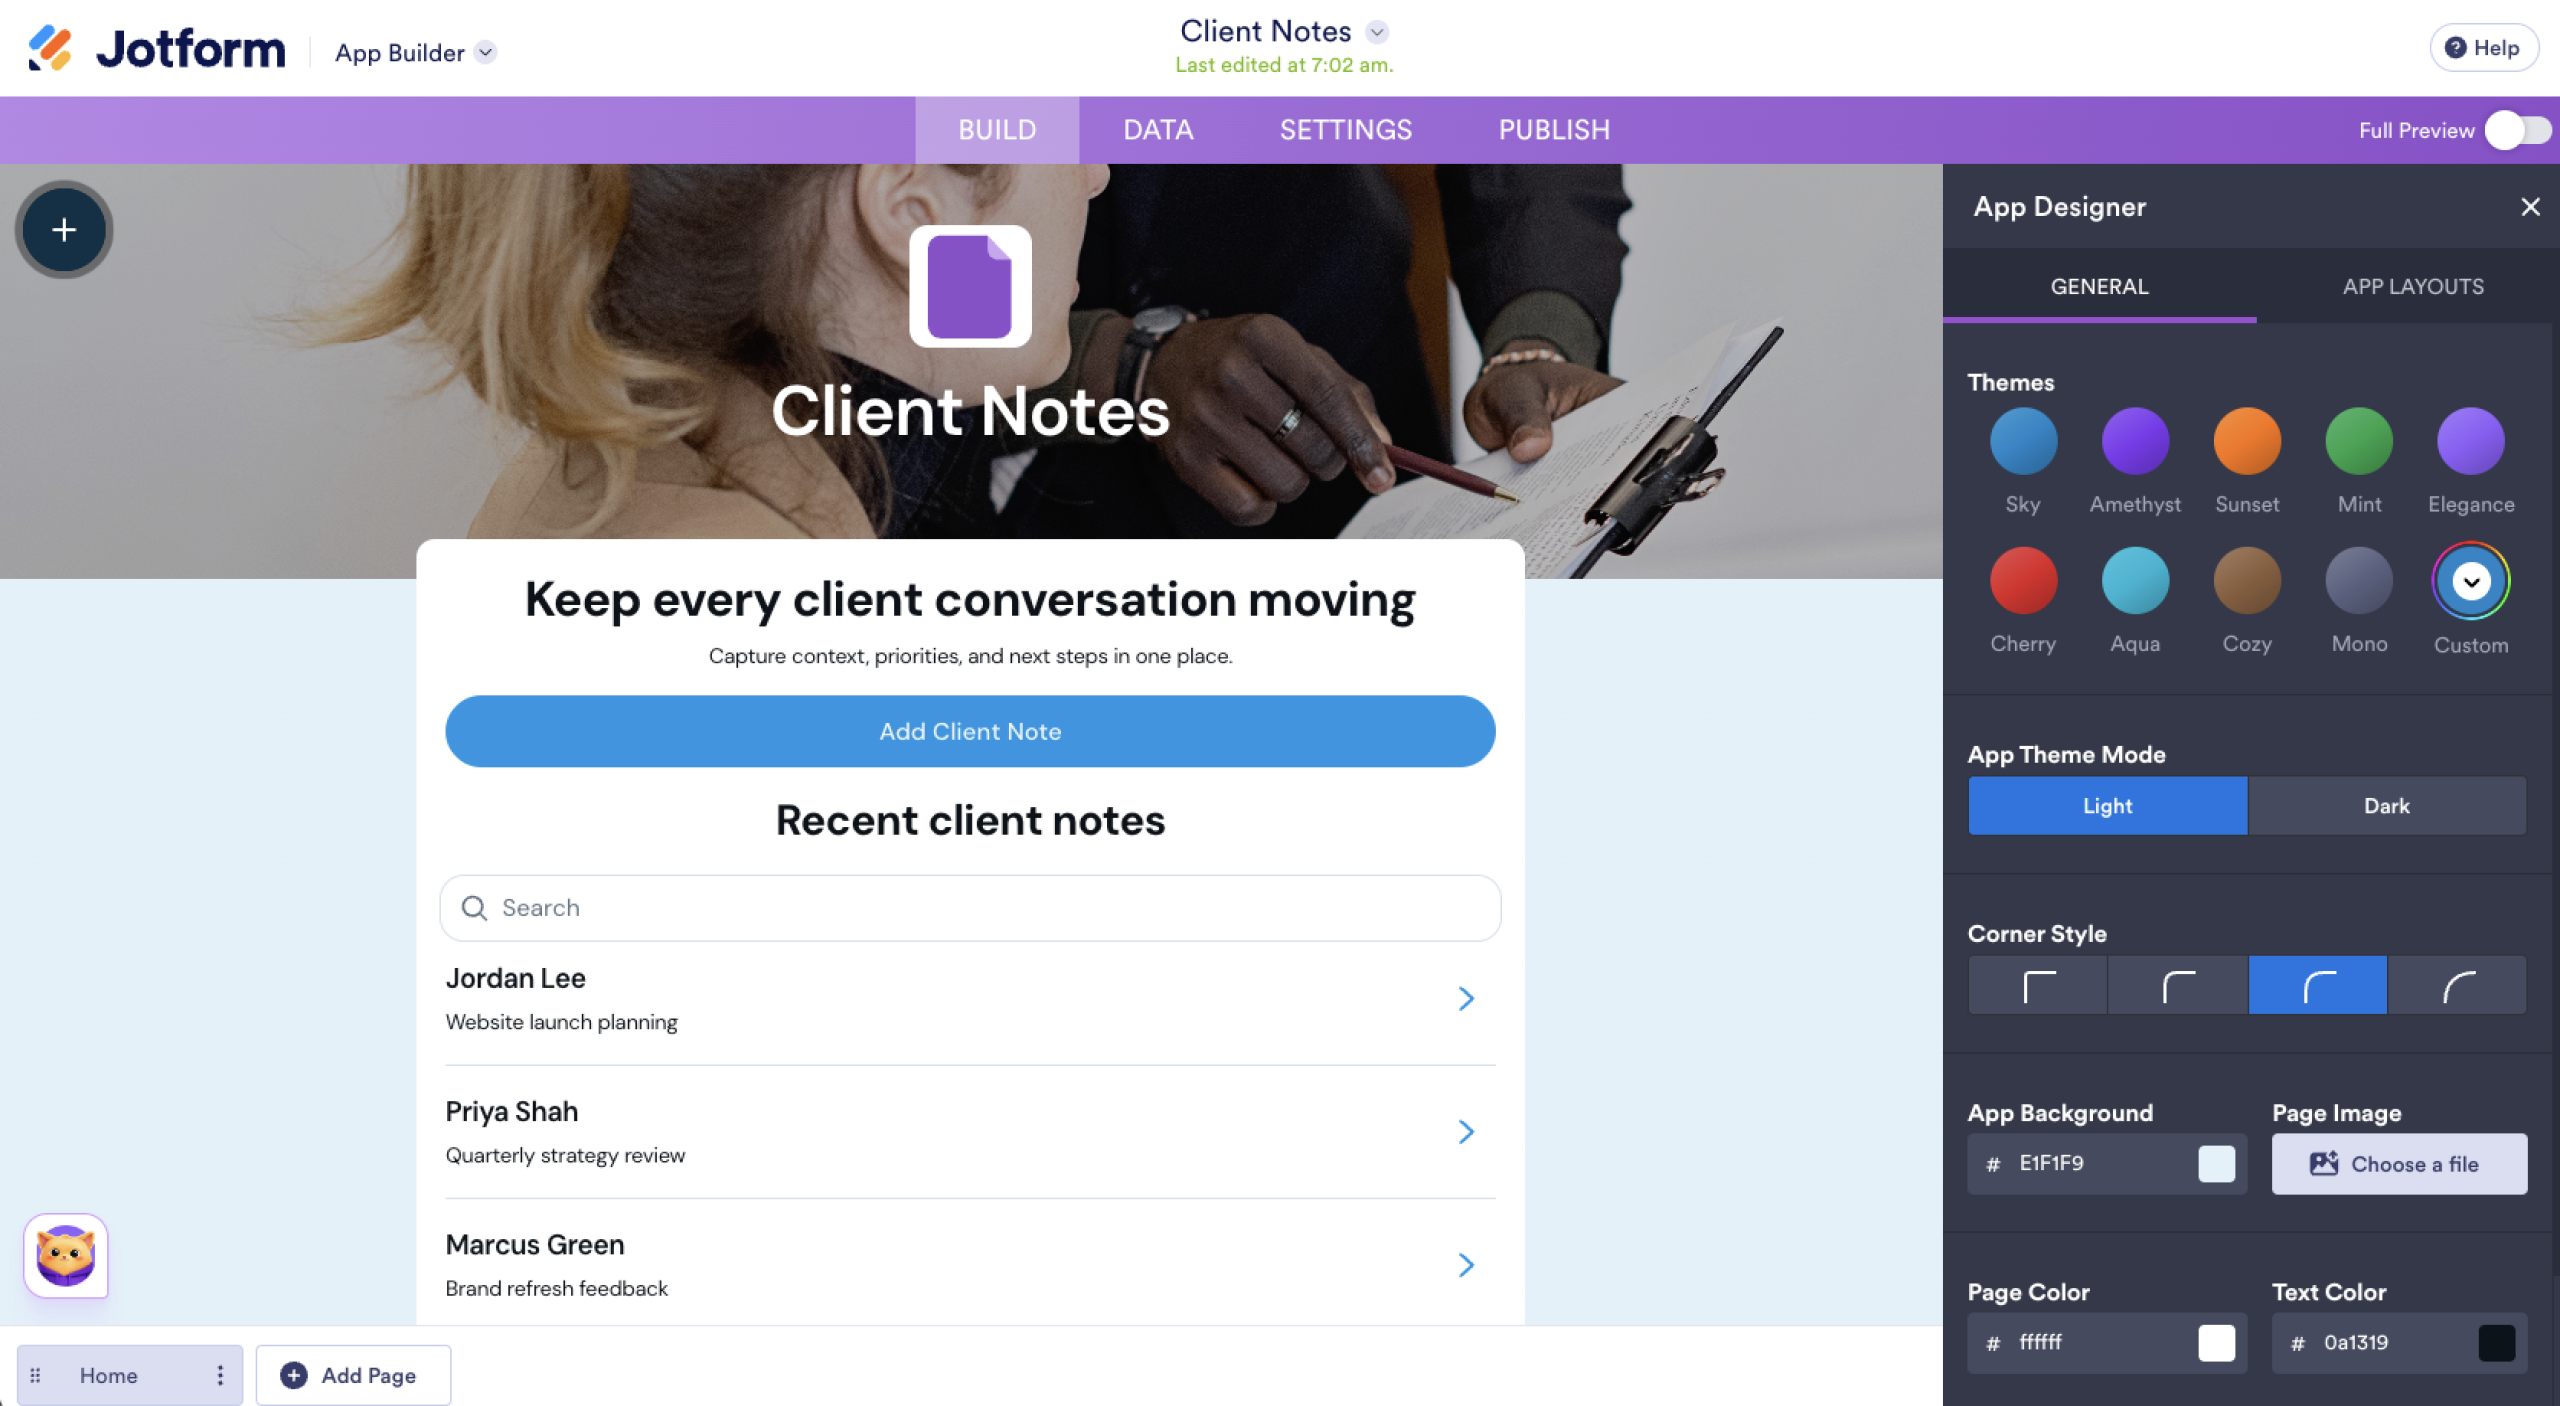
Next, personalize the app’s look and feel. Click the paintbrush icon in the upper right corner to select colors, fonts, and branding. Then think about your layout. Do you prefer a clean list view or a more visual card-based layout? You can rearrange the sections to match your preferences.
3. Add note categories
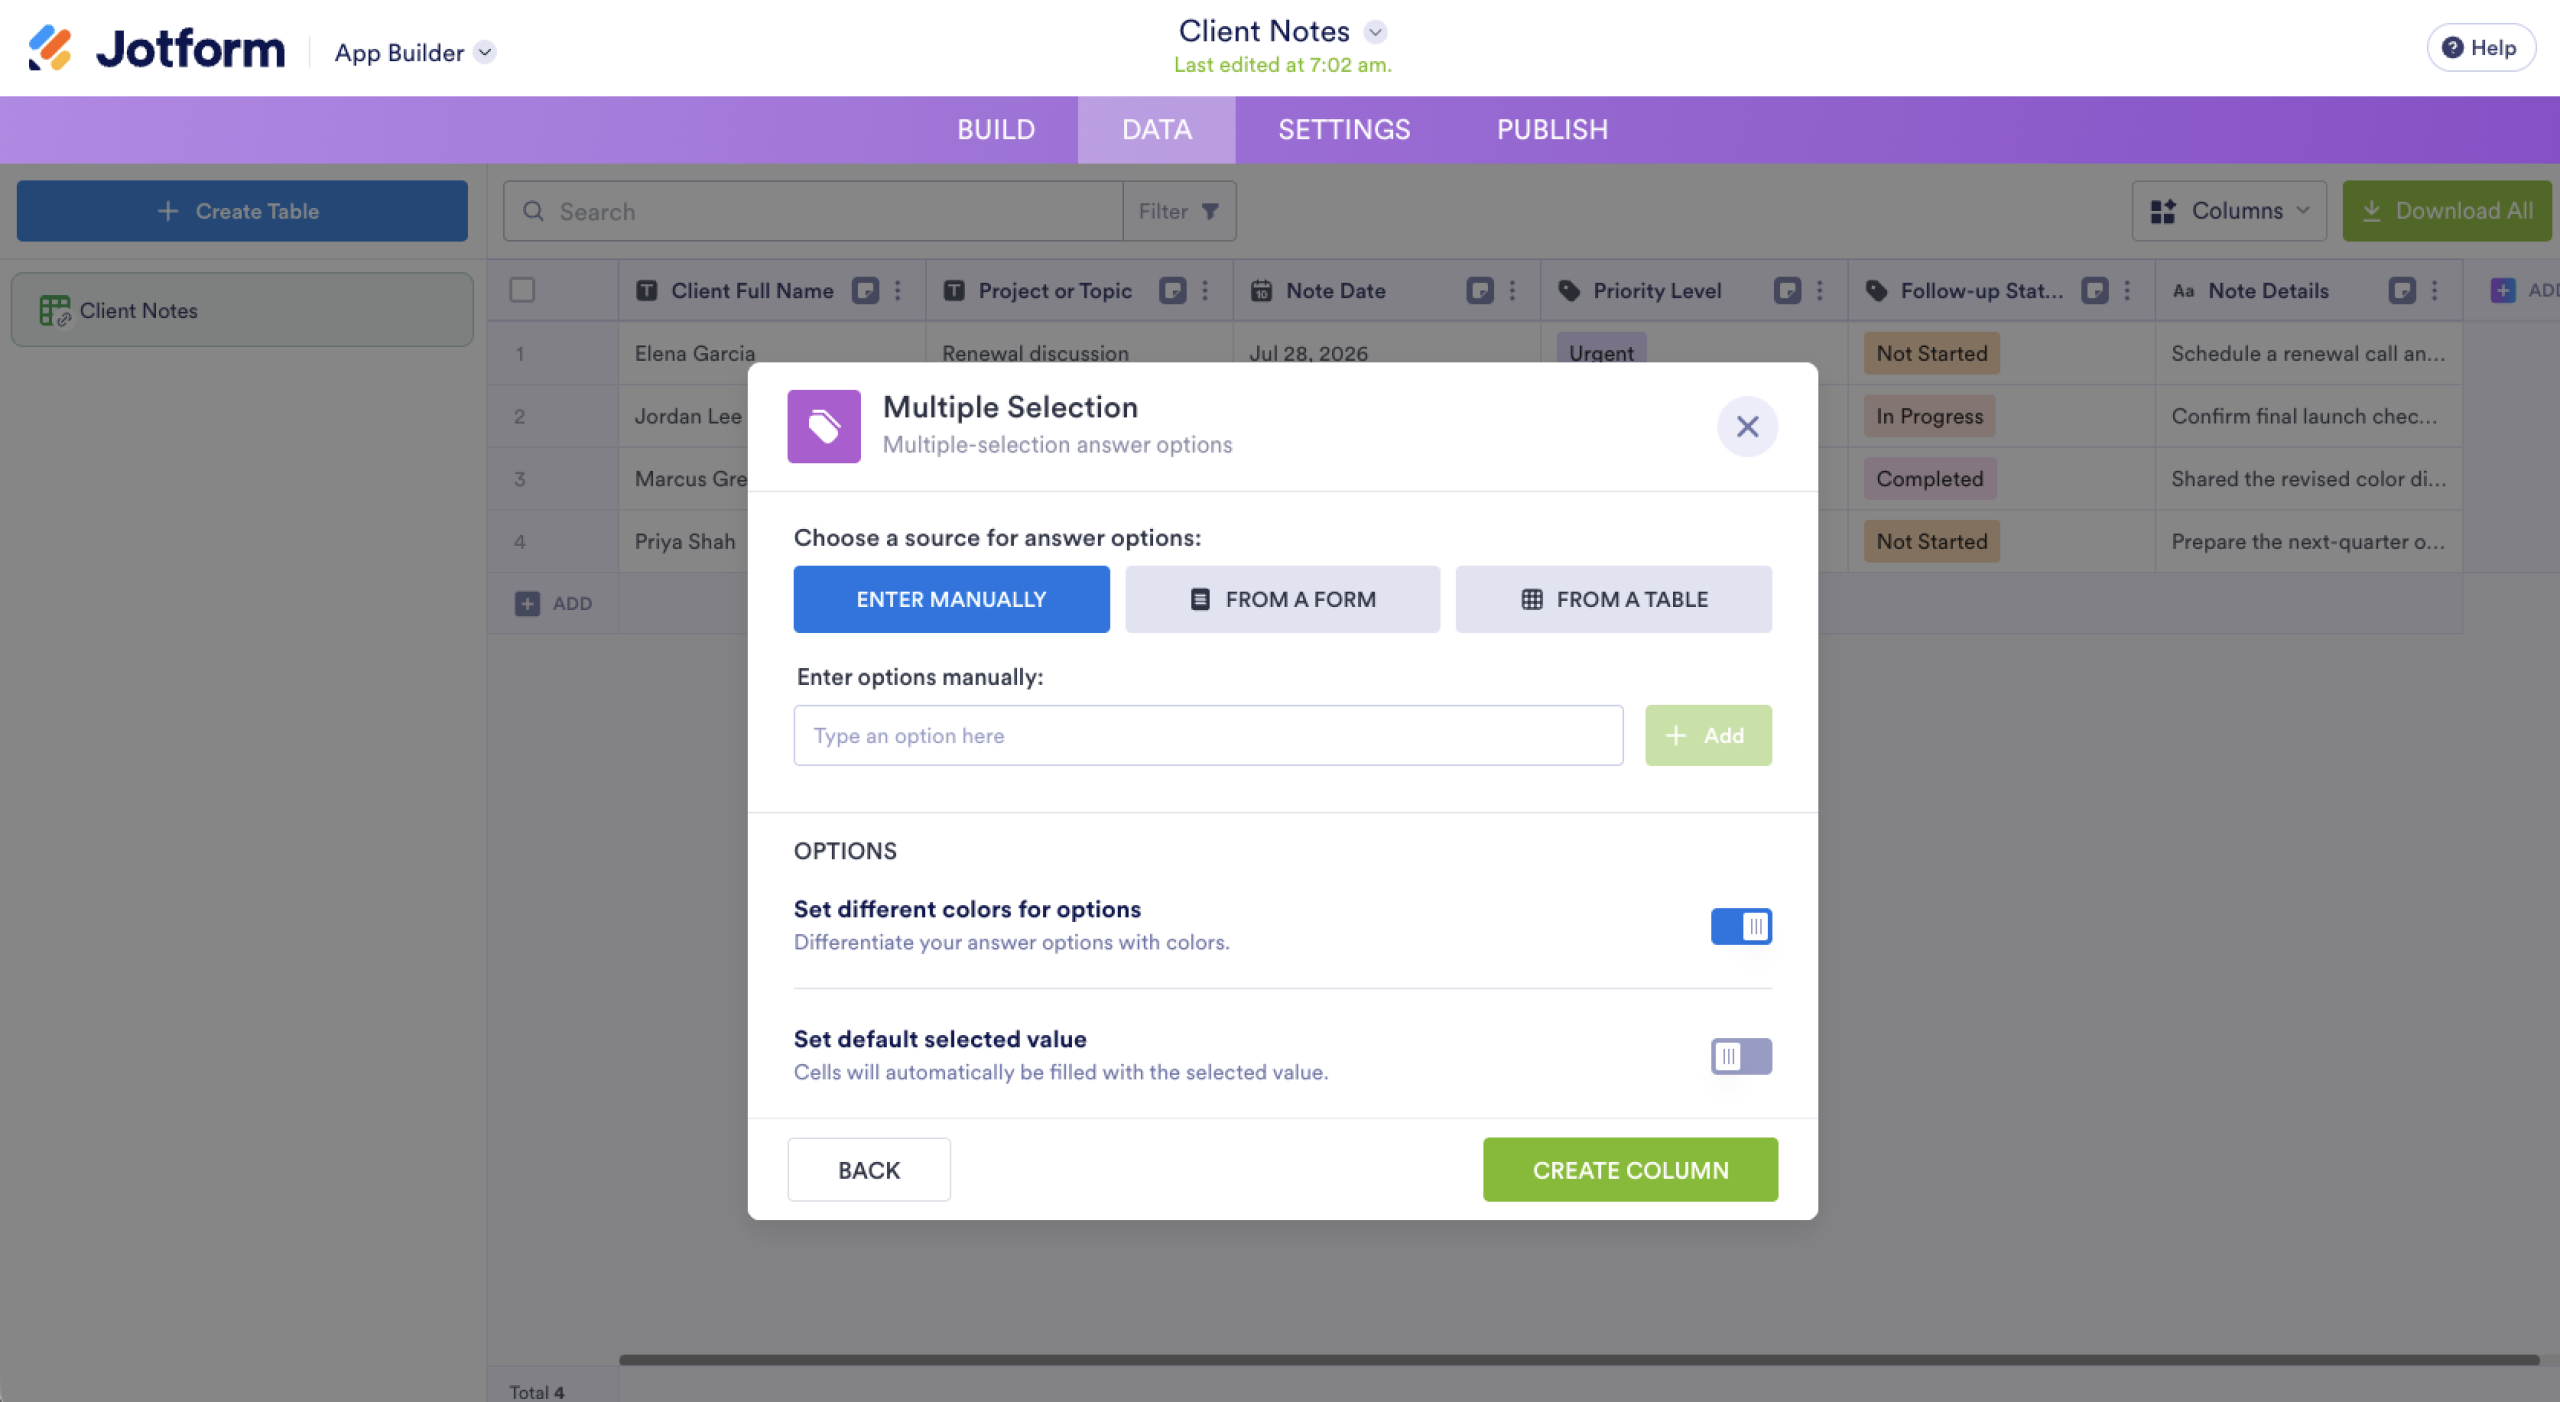
Organization is the whole point, so add structure and logic to your app by creating categories or tags. Click on the Data tab at the top of the screen, then click Add at the far right to add another column. From there, you can choose Single Selection or Multiple Selection and customize your categories. This makes it easy to filter and find notes later.
4. Add file upload and media fields
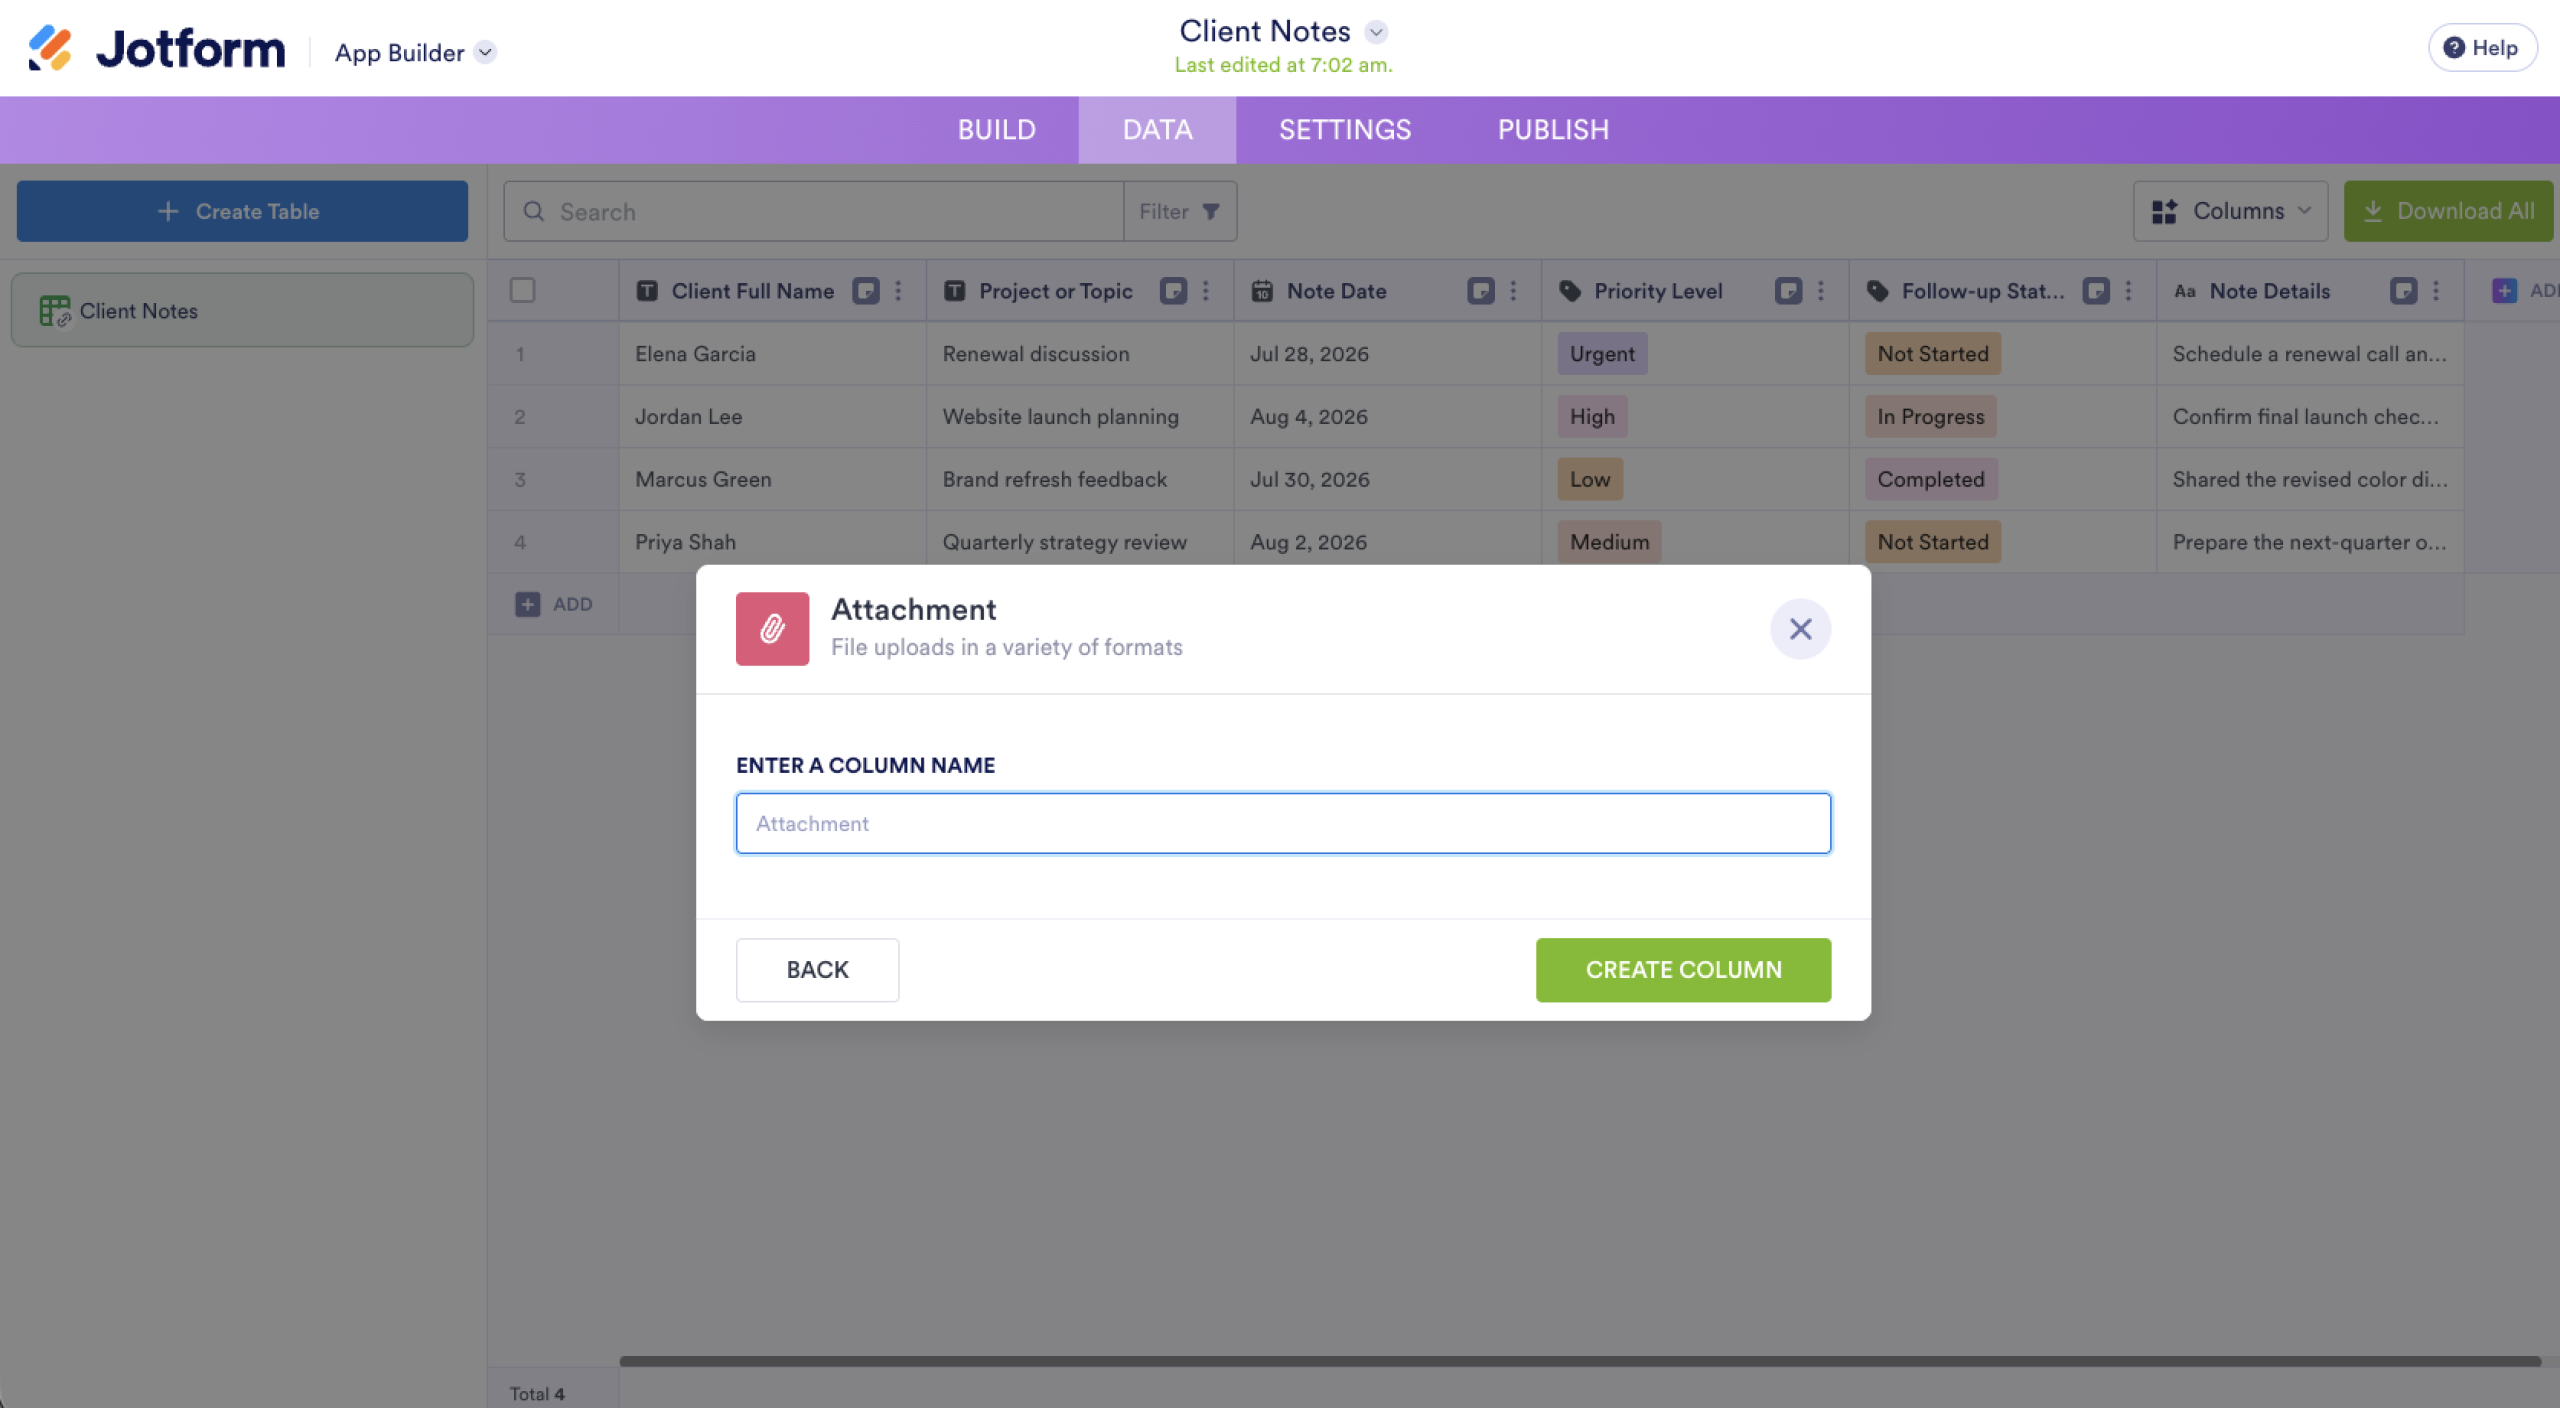
File upload fields let you attach images, PDFs, voice memos, or screenshots directly to individual notes. Click on the Data tab, and then click Add to add a new column. Select Attachment, click Next, type in your column name, and then click Create Column.
5. Test the note-taking experience
Before sharing your app, try it yourself. Create a few sample notes, upload a test file, and make sure the categories and search work. This is when you can troubleshoot anything that feels clunky or confusing.
6. Share your note-taking app
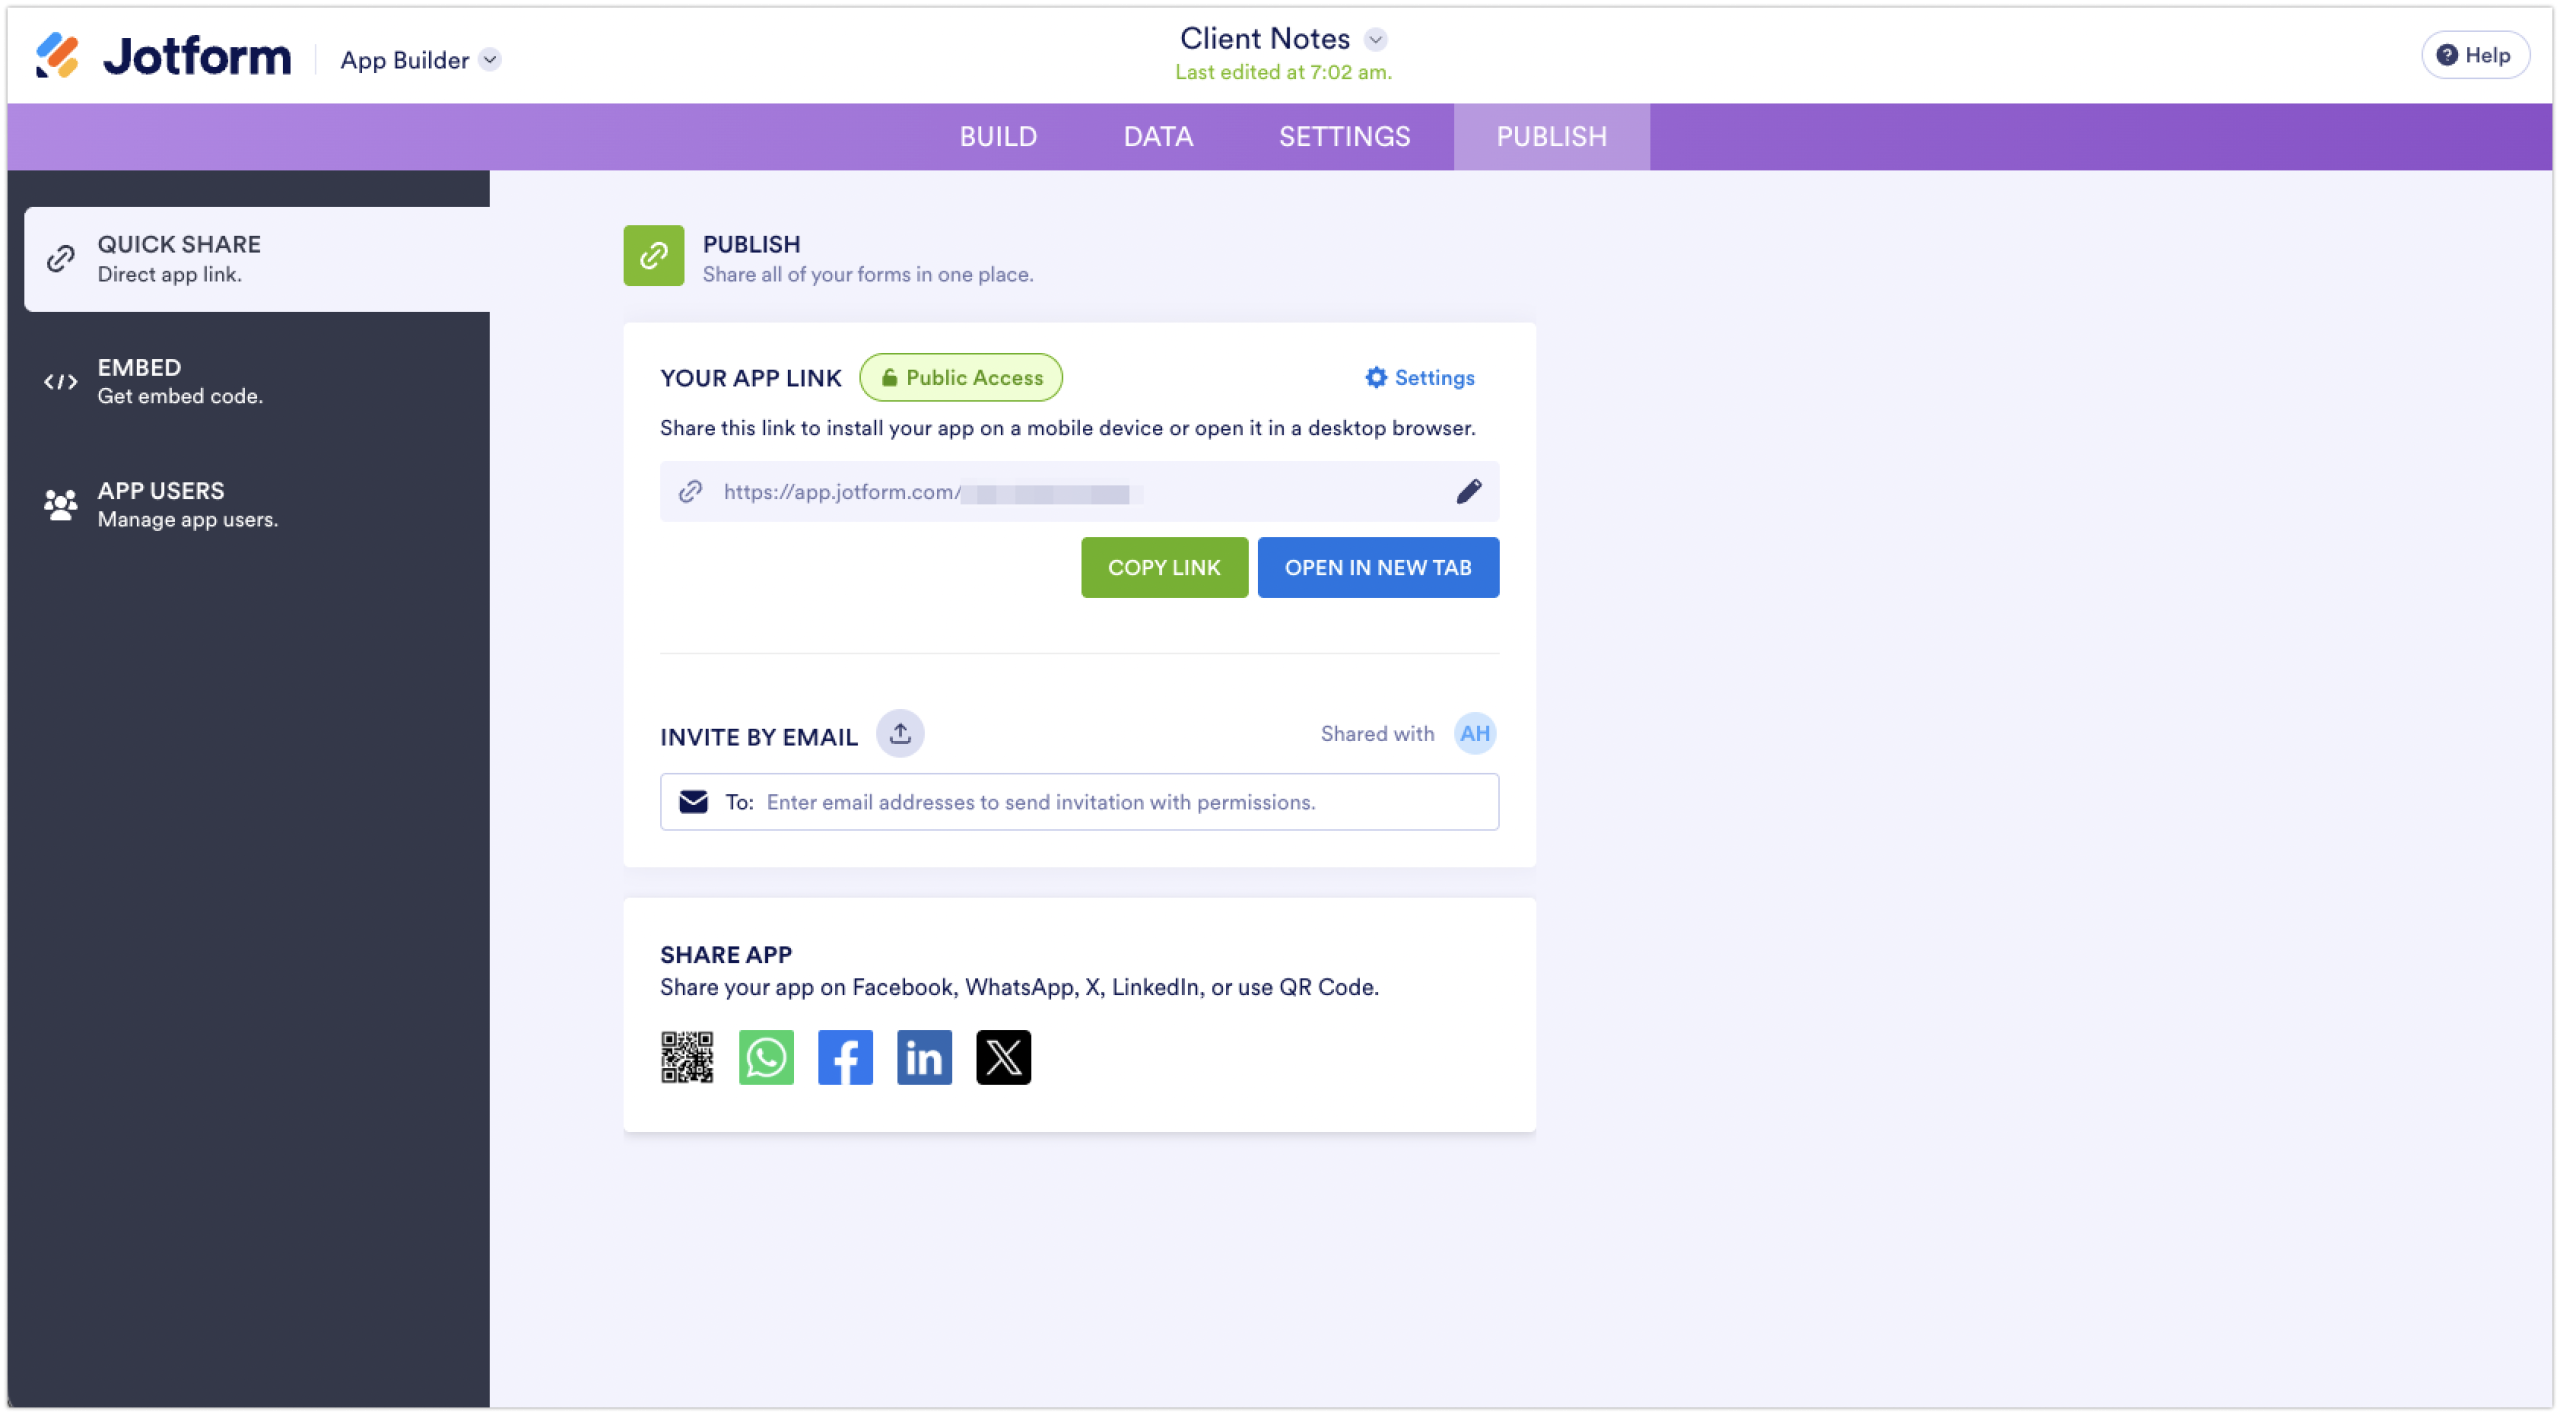
Once everything works the way you want it to, share your app with a link or QR code. Click on Publish, then choose to share via email, or use direct links or a QR code for social media.
What to include in a note-taking app
Before you start building your app, think through how you’ll use it. Are you jotting down quick reminders, or do you need to track detailed notes across multiple projects, classes, or clients? The fields you choose should reflect how you naturally organize information, as well as how you’ll want to search for it later.
Start with a simple structure, then add fields as you notice gaps in your workflow. Consider this checklist of common fields and features as you plan your note-taking app in Jotform:
- Note title field: Gives each note a short, identifiable name
- Note category: Groups notes into broader buckets, such as “Work,” “Personal,” or “Ideas”
- Date field: Automatically or manually logs when a note was created
- Long text field for notes: The core of the app, a spacious text area where the content of the note lives
- Tags or keywords: Adds a layer of organization, letting you label notes with specific searchable terms
- Project, class, client, or topic field: Ties a note to a specific context, which is helpful if you’re juggling multiple projects, classes, or clients
- Priority level: Flags how urgent or important a note is
- Action items: Captures any tasks or follow-ups tied to a note
- Due date: Tracks deadlines for any action items or time-sensitive notes
- Assigned person: Identifies who’s responsible for following up on a note or task, which is useful for shared or team apps
- File upload field: Lets you attach documents, PDFs, or other files directly to a note
- Image upload field: Allows you to add photos or screenshots, which is helpful for visual notes, whiteboard captures, or reference images
- Follow-up status: Marks whether a note or task is still open, in progress, or complete
- Searchable note records: Makes every note easy to find later by keyword, category, date, or tag
- Confirmation message: Lets users know their note was successfully saved
- Mobile-friendly navigation: Ensures the app is easy to use on a phone or tablet
While several drag-and-drop app builders are available, the Jotform AI App Builder lets you quickly and easily tailor your note-taking app to your specifications, and you can explore its capabilities for free.
5 note-taking app prompt examples
The easiest way to get ready to use Jotform AI App Builder is to look at prompt examples. The AI responds best to prompts that are specific about who the app is for and what kind of information it needs. The more context you give up front, the closer your first draft will be to what you need.
Use as is or customize the following sample app prompts.
Personal note-taking
Prompt: “Create a personal note-taking app with fields for a title, category, date, and long-form notes, plus tags for easy searching.”
This prompt is a good starting point for anyone who wants a simple, everyday space to jot down thoughts, reminders, or ideas. The category and tag fields make it easy to keep personal notes organized without overcomplicating the setup.
Meeting notes
Prompt: “Build a meeting notes app that captures the meeting title, date, attendees, discussion summary, and action items with due dates.”
This is designed for anyone who is in a lot of meetings and needs to log what was discussed and what should happen next. Including action items and due dates turns meeting notes into a follow-up tool rather than just a record of what was said.
Class notes
Prompt: “Create a class notes app organized by subject and date, with fields for topic, key takeaways, and file uploads for slides or handouts.”
This prompt works well for students who are juggling multiple classes and reading materials. Organizing by subject and date makes it simple to find notes when studying for a specific exam, and the file upload field keeps related handouts or slides attached to the right entry.
Client notes
Prompt: “Build a client notes app with fields for client name, project or topic, note date, priority level, and follow-up status.”
This prompt suits consultants, freelancers, or account managers who need to track conversations and details across multiple clients. The priority and follow-up status fields make it easy to see which notes need action.
Project notes
Prompt: “Create a project notes app with fields for project name, note title, date, assigned team member, and action items with due dates.”
This prompt is ideal for teams managing ongoing projects with multiple contributors. Assigning notes to specific team members and tracking due dates helps keep everyone aligned on responsibilities and deadlines without needing a separate project management tool.
Tips for creating a better note-taking app
A note-taking app is only as useful as the system behind it. A few small design choices can make the difference between an app you use every day and one that gets abandoned after a week. Here are some tips to keep in mind as you build and refine your app in Jotform:
- Keep the note entry form short: Stick to the fields you truly need. A title, category, and a text box are often enough.
- Use categories and tags consistently: An organizational structure works only if it’s applied the same way every time. Decide on a clear set of categories or tags early on, and stick to them so your notes stay searchable.
- Make search and filtering easy to access: A digital note-taking app has two equally critical functions: capturing the note itself, and storing it so you can easily find it again. Place search bars and filter options somewhere visible so you’re not digging through menus to find an old note.
- Design for mobile first: Most notes get created on the go: between meetings, during class, or while an idea is fresh. A clean, mobile-friendly layout ensures you can capture and review notes from your phone as easily as from a desktop or laptop computer.
- Add automation where it helps: Features such as autofilled dates, confirmation messages, and automatic reminders for due dates reduce manual work and help the app run smoothly in the background. These small touches save time if you’re logging a lot of notes.
- Revisit and refine your fields: Your first version doesn’t have to be perfect, and it probably won’t be, but it’s relatively simple to refine your app. Pay attention to how you use the app after a few weeks, and add, remove, or adjust fields as your note-taking habits become clearer.
Now that you know how to create an app without coding, use Jotform AI App Builder for your own note-taking app. Like many no- and low-code development platforms, it’s a simple way to craft something useful for your needs.
This article is for students, teachers, consultants, coaches, freelancers, team managers, and small business owners who want to create a custom note taking app for organizing ideas, meeting notes, class notes, client notes, project updates, or personal reminders without hiring a developer.

































































































Send Comment: