In business, it’s all about the customer, which is why we’re excited to announce a new QuickBooks integration for Jotform Enterprise that lets you automatically create new customer accounts and invoices.
Whether you’re connecting with prospective customers in the field, from your home office, or somewhere in between, our new QuickBooks integration makes it easy to flow customer submission data directly from your form to create new customer accounts in QuickBooks.


This new integration eliminates the need for manual data entry, saving you precious time and resources. If you’re using third-party software to transfer your data, it can save you money on that subscription as well.
Here are just some of the businesses that will benefit from the new QuickBooks integration:
| Financial services | Automatically add new clients through discovery forms |
|---|---|
| Real estate | Add prospective customers who sign in at open houses |
| Insurance | Issue updated invoices when customers request or report changes |
| Legal services | Add new accounts upon completion of retainers/agreements |
| Construction and design | Create customers and issue invoices for deposits from signed estimates/statements of work |
| Delivery services | Issue invoices upon receipt of delivery |
New to QuickBooks and need more inspiration? Use this link to get 30 percent off your first six months. Then read on for a quick-start guide to enabling the QuickBooks integration for Jotform Enterprise.
How to enable Jotform’s QuickBooks integration on your Enterprise forms
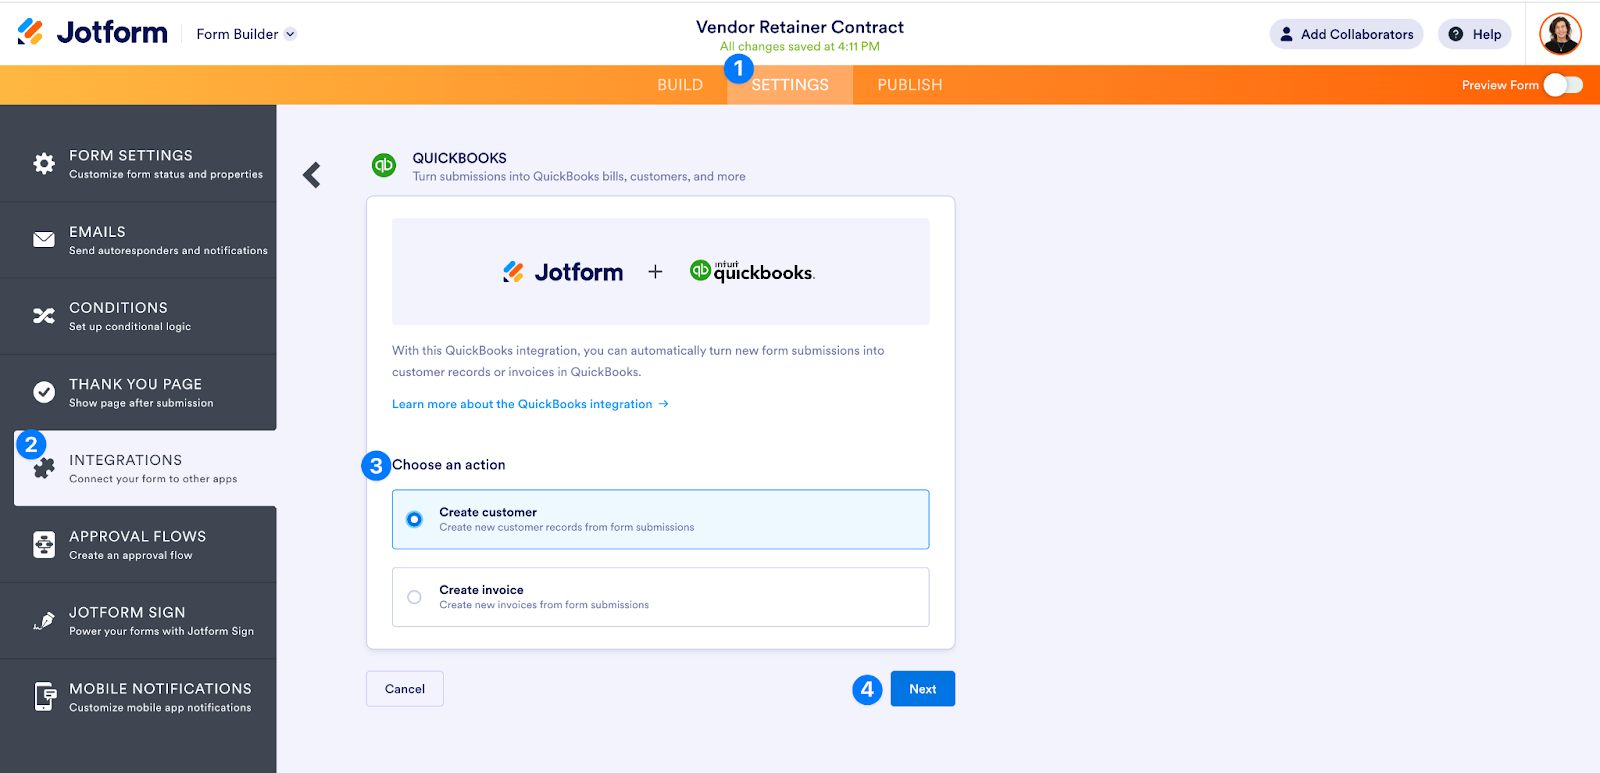
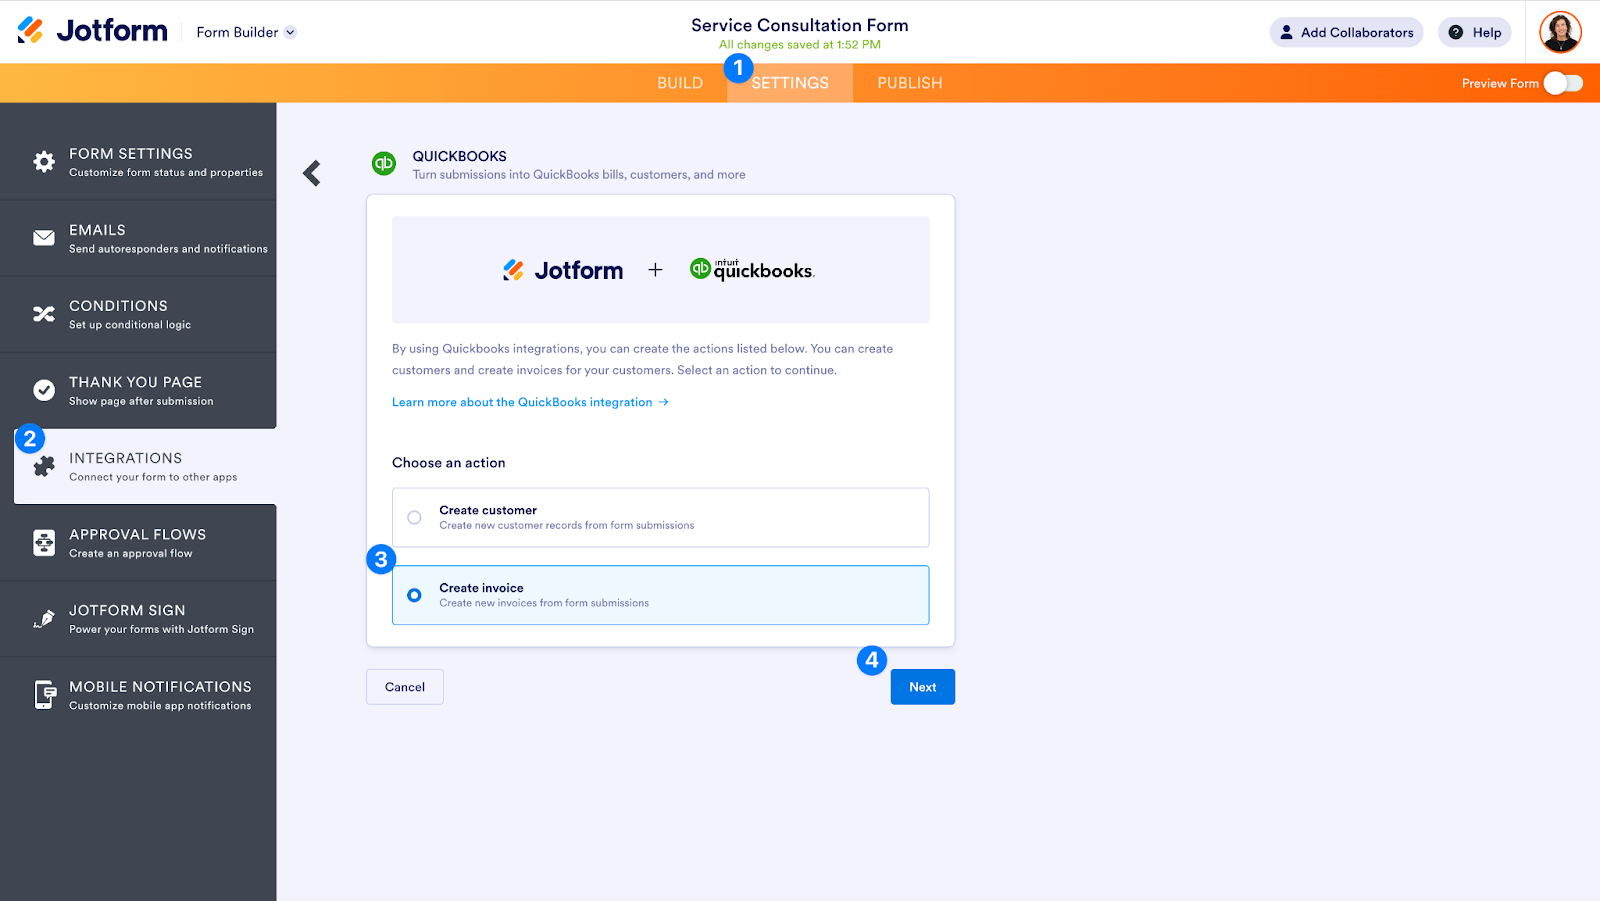
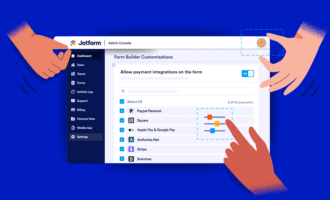
Go to the Settings tab (1) in the form you wish to connect to QuickBooks, and click the Integrations option (2) on the left. Once there, select whether to use the form submission data to generate a new customer or an invoice (3), then click Next (4).
Choose a QuickBooks mode to authenticate your connection.
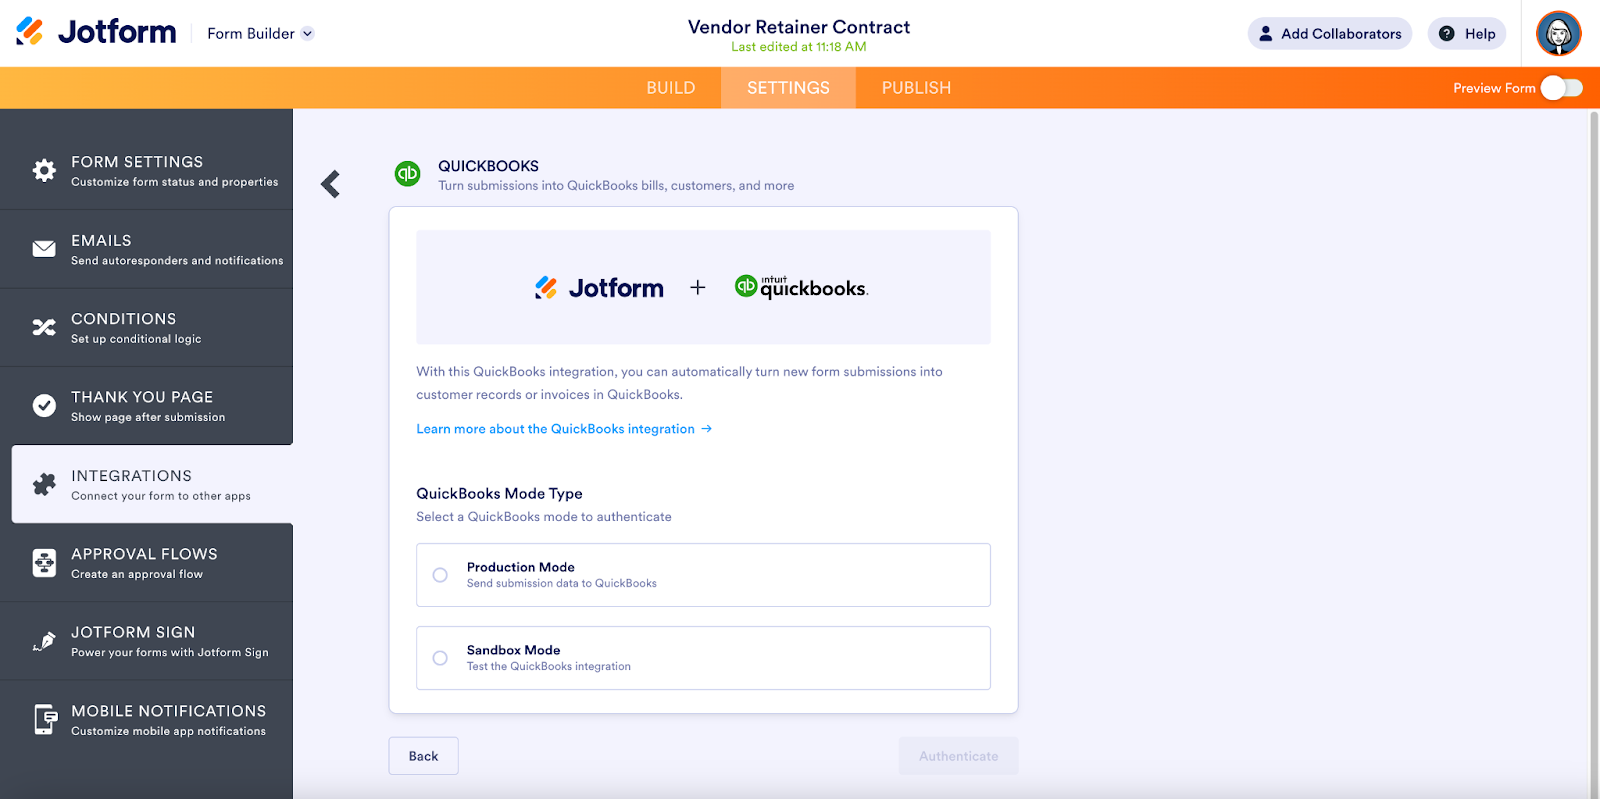
If you’re integrating with QuickBooks for the first time, you’ll be taken to the QuickBooks authentication page to log into your account. If you’re already logged in, click Add Action.
Once connected, use the dropdown menu and Add Field options to match your customer records in QuickBooks to your form fields. When you’re done, simply click Save.

Pro Tip
When updating an existing customer, make sure the Customer Display Name matches the name entered into your form exactly, or QuickBooks will automatically create a new customer.
That’s all there is to it. Now you’re ready to use QuickBooks to automate customer account creation.
But wait, there’s more! You can also automate the creation of invoices with the Jotform Enterprise QuickBooks integration. Enabling this feature can speed up your response time to customers and save your team from having to manually issue invoices, which are both good for business.
Key considerations for enabling the Jotform Enterprise QuickBooks integration for invoices
Below you’ll find the basic steps for creating an invoice with the Jotform Enterprise QuickBooks integration, but before you do, note these important considerations for naming conventions, existing payment gateways, and tax rates for those operating outside the U.S.
Additionally, if you’re using something other than the Product List element to itemize your products and services, follow these steps to make sure your settings are configured correctly prior to starting the integration.
Now, let’s explore how easy it is to set up an invoice.
How to create an invoice with the Jotform Enterprise QuickBooks integration
The process for setting up the integration to automate invoicing follows similar steps to those outlined above. First, open the form you wish to use to create an invoice. Click on the Settings tab (1), select Integrations (2) from the menu options on the left, choose the Create invoice option (3), and click Next (4).
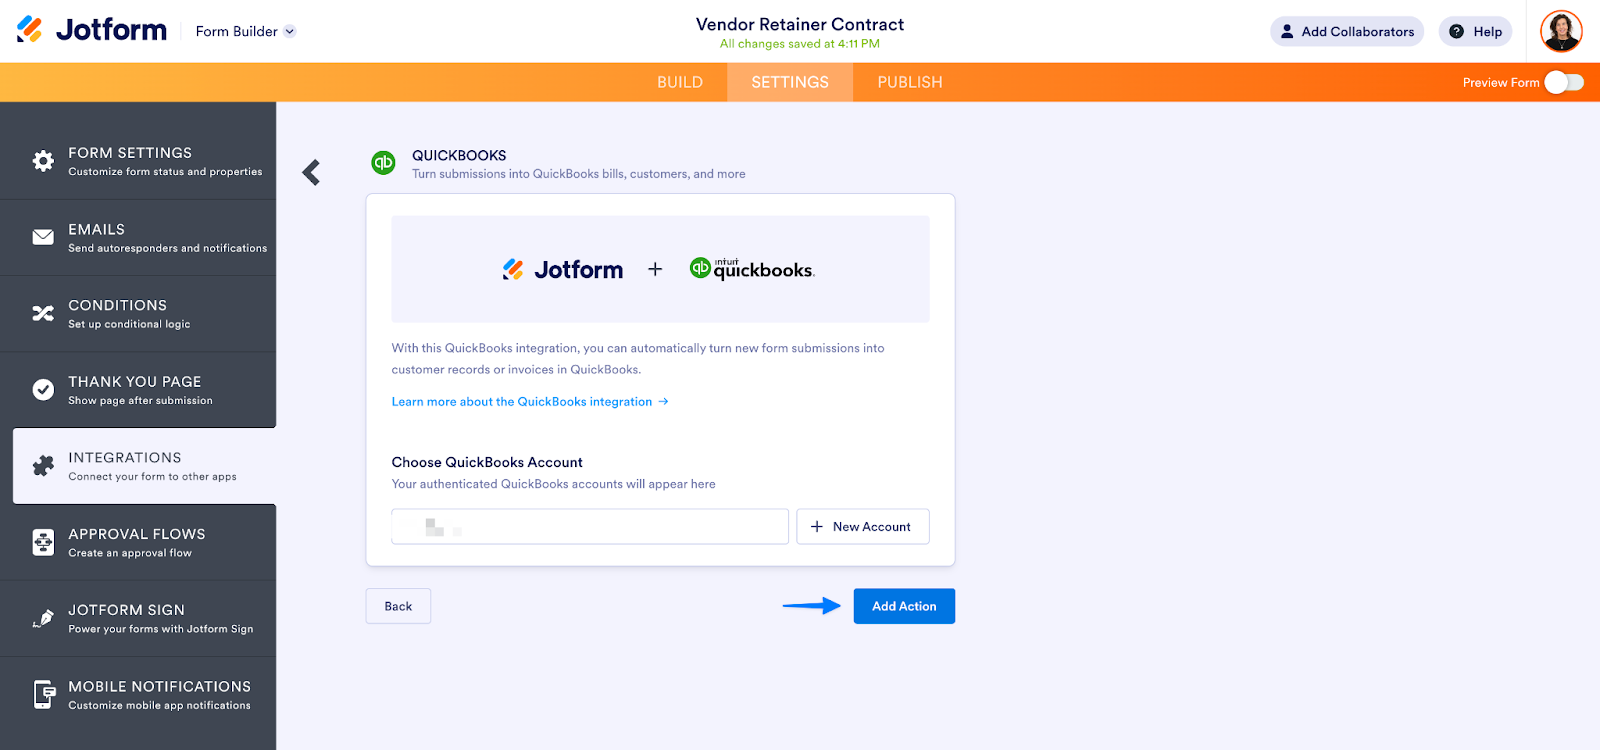
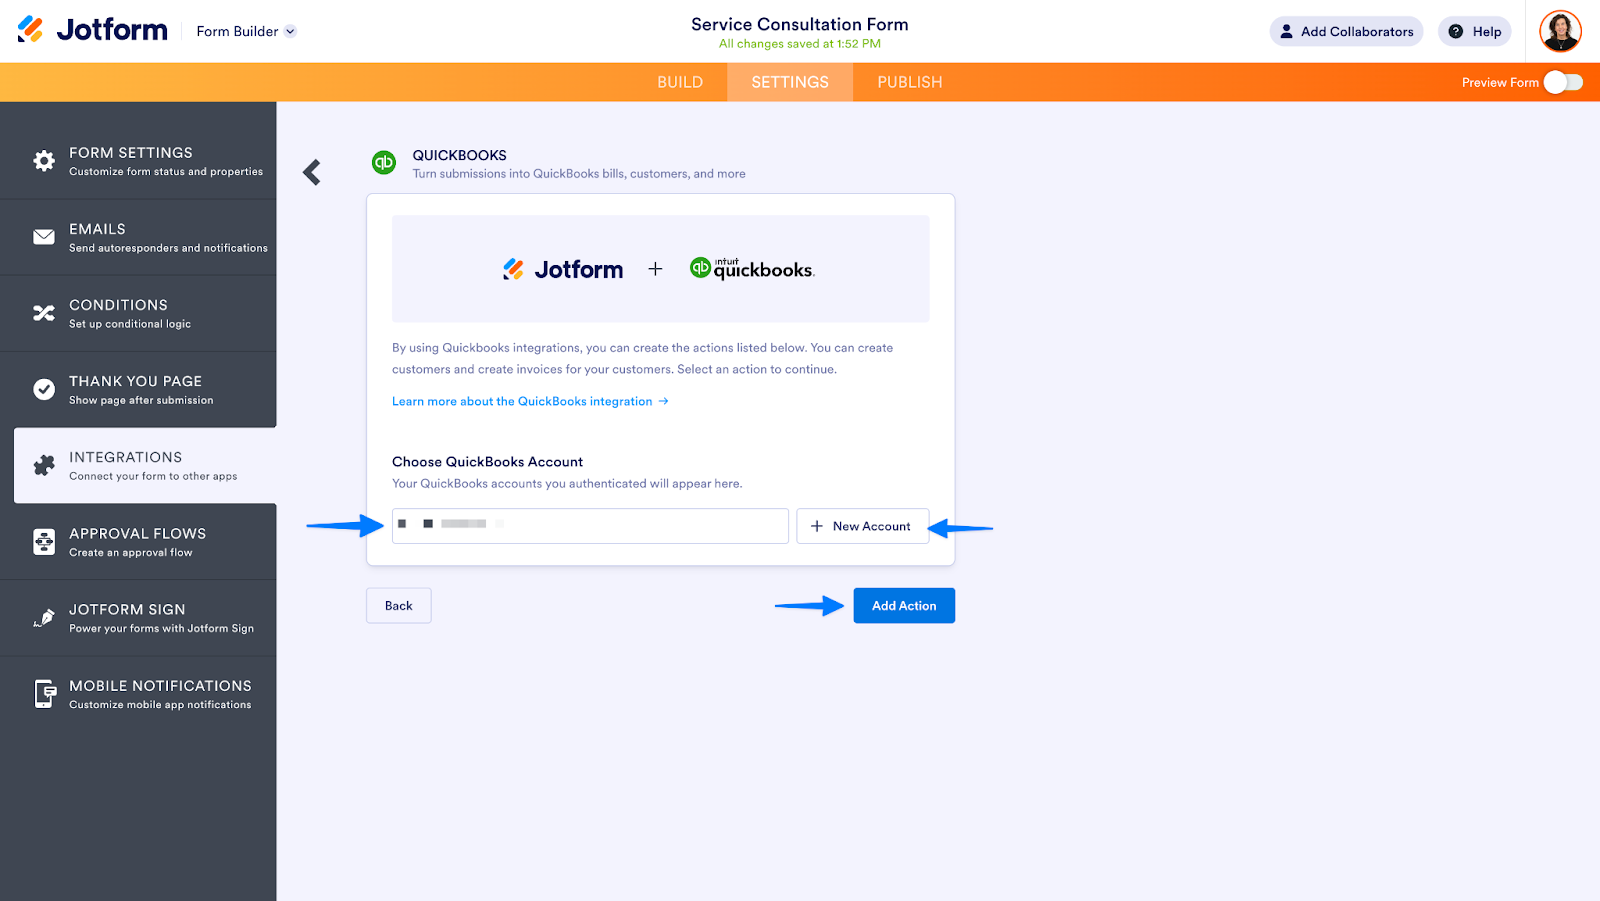
If you’ve already authenticated your QuickBooks account using the steps above, you will see it listed in the Choose QuickBooks Account options. If not, click the + New Account button, which will prompt you to select a QuickBooks account to authenticate.
Once your account has been authenticated, click the Add Action button to start designing your automation.
How to map QuickBooks information to your Jotform Enterprise submission data
On the next screen, you’ll be able to map your QuickBooks records to your Jotform Enterprise submission data. If you’re using the My Products element, simply match your listings to the QuickBooks items and click Save.
If you’ve itemized your products or services using the Single Choice, Multiple Choice, or Dropdown elements, review the key considerations referenced above and detailed in our user guide.
Congratulations! You’re now ready to serve your customers more efficiently than ever before with the new QuickBooks integration from Jotform Enterprise.
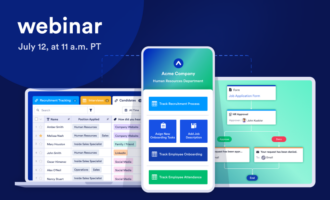
Want to learn more? Check out our user guides on how to create a customer and how to create an invoice. You can also register for our upcoming webinar.
Got ideas for more integrations? Let us know
Fun fact: This QuickBooks integration was one of the most requested by Enterprise users, and Jotform’s finance team gladly volunteered to test it. Join them in celebrating this new launch by getting your QuickBooks integration up and running today!
*Disclosure: Jotform may receive a commission for referred signups through this link. Refer to the linked provider’s website for information about their products, services, and pricing.


Send Comment:
2 Comments:
July 27, 2023
This is super helpful! Is there a way to integrate existing submissions on a live form? I tried the add button to the spreadsheet, but Quickbooks was not an option there. Am I missing something?
July 26, 2023
Would like to see the ability to add a vendor’s bill from Jotform to a QuickBooks Online company file.