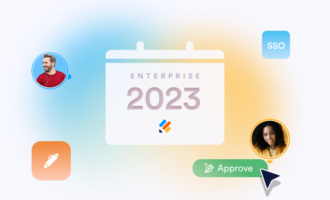
Are you ready to get organized? We’re thrilled to announce the new Calendly widget for Jotform Enterprise, which allows for seamless scheduling and information collection all in one place.
One of our most requested widgets to date, Calendly simplifies appointments and meetings by syncing calendars across multiple platforms. Gone are the days of double booking and manual meeting planning. Simply drag and drop the Calendly widget into your online forms to begin automating your scheduling processes today.
Who can benefit from the Calendly widget?
Anybody interested in scheduling meetings and appointments more efficiently can benefit from Jotform’s Calendly widget. Adding Calendly to your forms allows you to pair the automation capabilities of Jotform Enterprise with the convenience of Calendly scheduling.
Whether you want to collect external client information and schedule appointments, or simply better organize your internal team meeting processes, we’ve got you covered. Here are some specific use-case examples:
- Healthcare practitioners can securely collect patient information and schedule appointments at scale, all with HIPAA-enabled forms.
- HR teams can simplify and automate interview scheduling with Calendly forms and group approvals.
- Field service managers can more effectively coordinate equipment rentals and job scheduling.
- Sales teams can collect purchase information and schedule client meetings on the same form, speeding up the sales cycle.
No matter the nature of your organization, if you regularly spend time on scheduling, Calendly is a game-changer.
Setting Up Calendly with Jotform Enterprise
The first step in streamlining your scheduling processes with Calendly and Jotform Enterprise is to set up the Calendly widget:
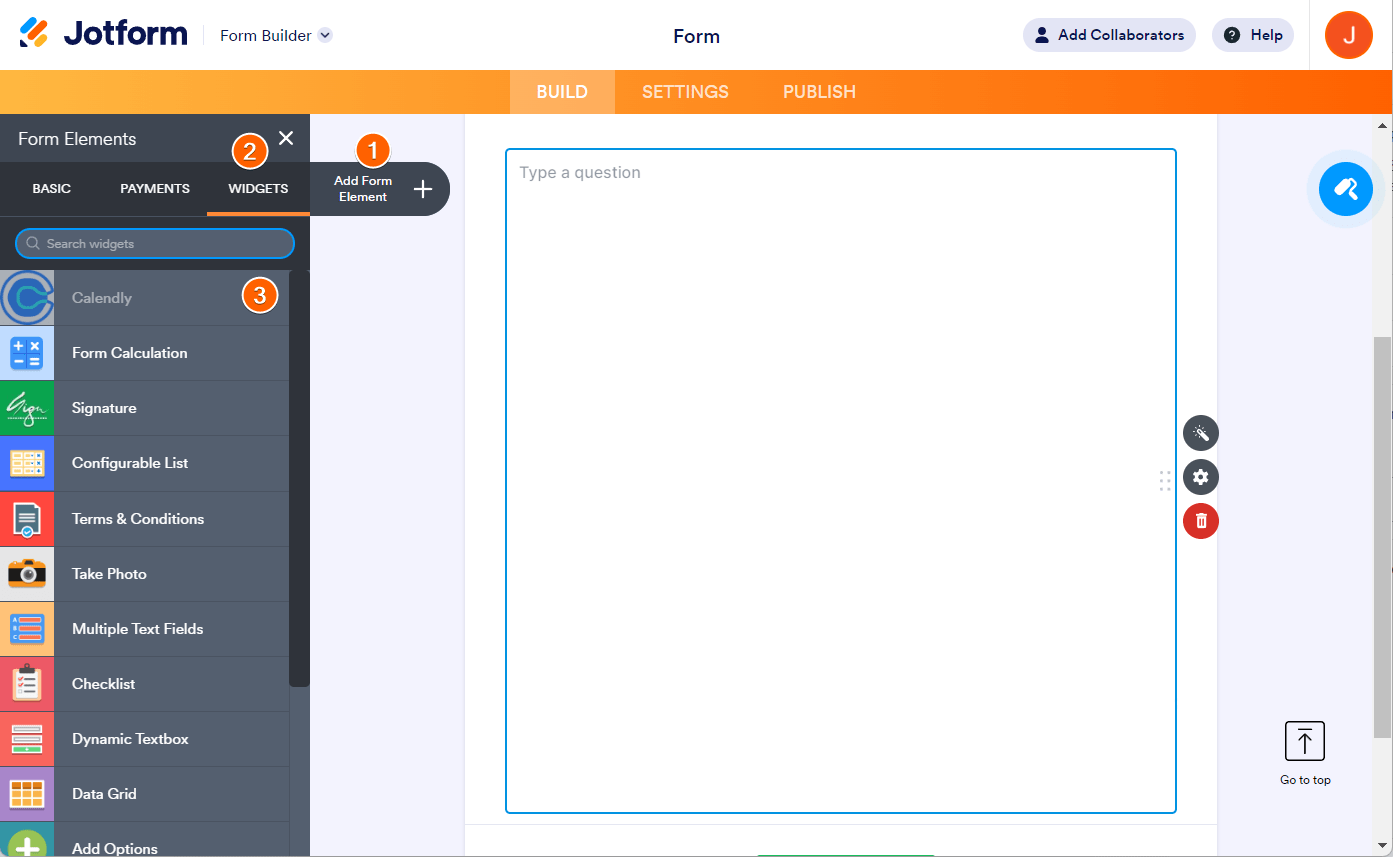
- In the Form Builder, click Add Form Element in the top left.
- Click on the Widgets tab.
- Search for Calendly in the widgets list, then drag and drop it into your form.
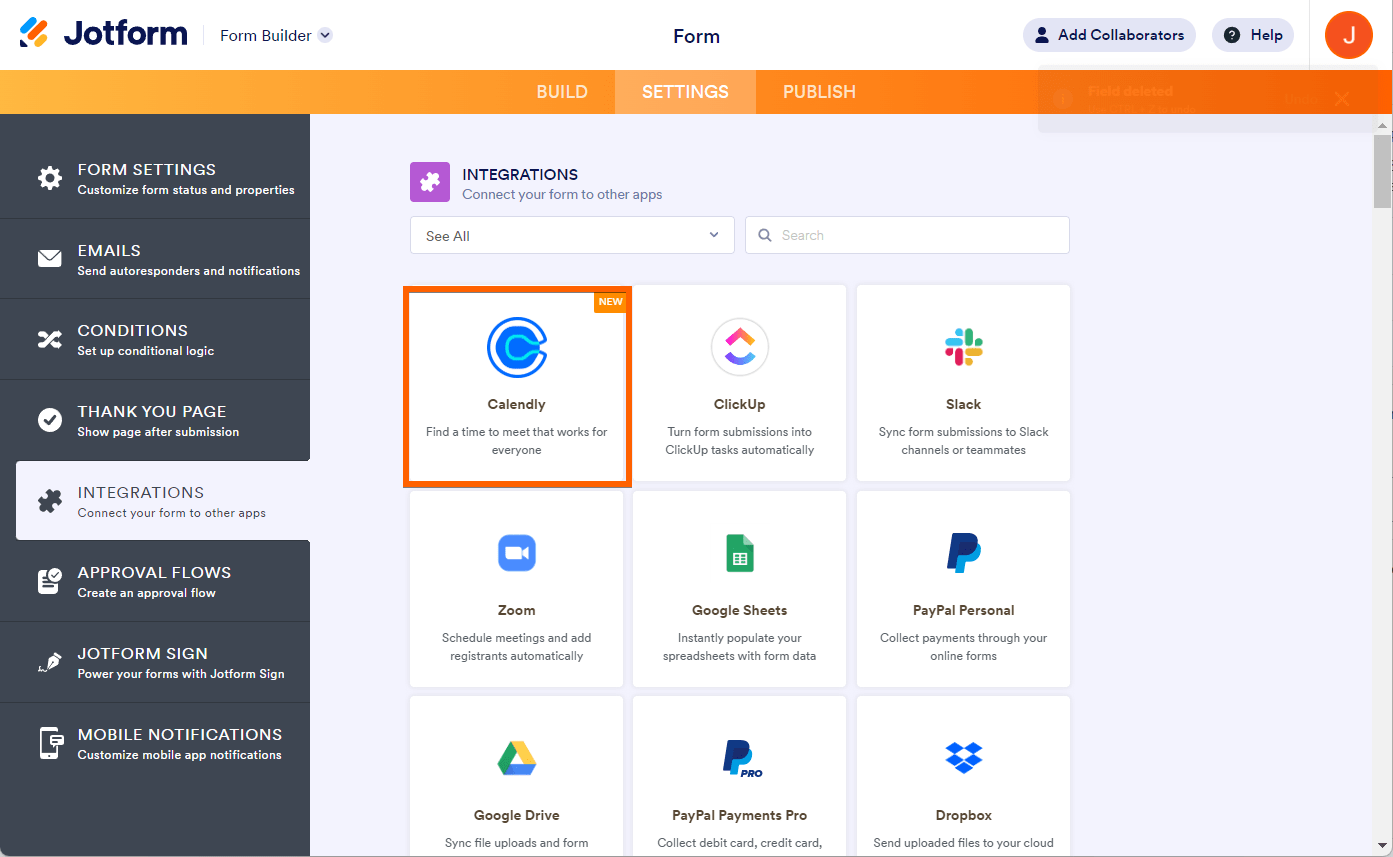
Alternatively, you can add Calendly by clicking on Settings in the top middle banner, then clicking the Integrations tab on the left.
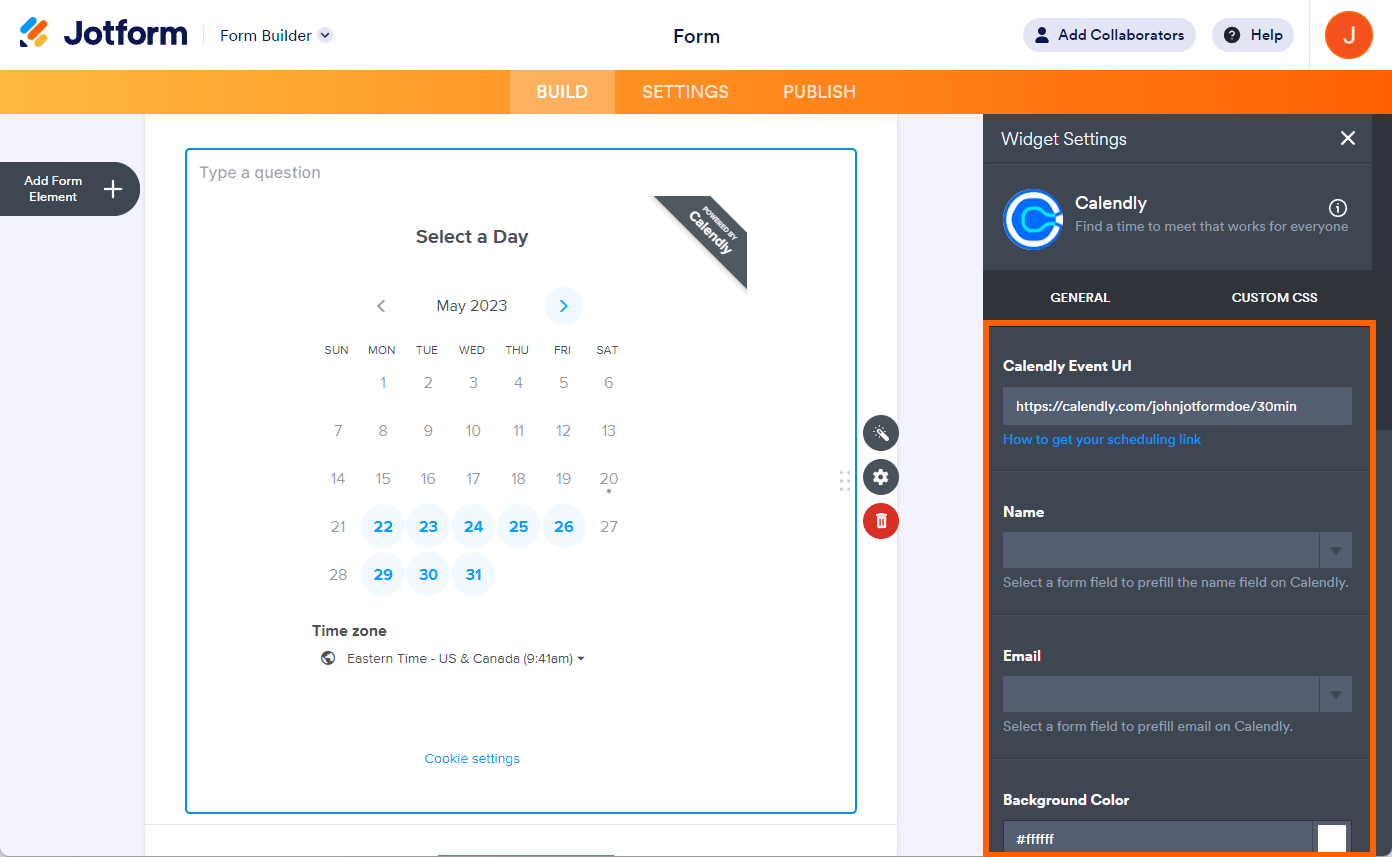
Once you’ve added Calendly to your form, you just need to input some simple information in the Widget Settings, and you’ll be ready to start scheduling. To do this, follow these steps:
- Ensure that you have Name and Email fields in your form.
- Click on the empty Calendly widget in your form, then click the Widget Settings wand icon.
- In the General tab, paste your Calendly link into the Calendly Event URL field. (Instructions are linked under the input field and can be found here.)
- Also in the General tab, select the Name and Email fields from your form. These fields are identifiers for your invitees. The widget won’t work if you don’t have them in your form.
- Customize other settings to your liking, such as color and field height.
- Click Update Widget at the bottom of the General tab to save your changes.
Automating scheduling processes
Once set up, a form containing the Calendly widget is a great scheduling tool. For simple use cases, these forms can be manually sent to clients and team members. When paired with powerful Jotform Enterprise features, such as conditional logic, workflows, and group approvals, Calendly forms can automate scheduling processes at scale, saving your organization valuable time and money.
To demonstrate how your organization can streamline scheduling processes, let’s look at an end-to-end workflow for an HR team using Jotform Enterprise and Calendly to automate hiring.
We’ll start with a job application form to collect applicant information. Using Jotform Approvals, we can create a workflow to automatically send completed applications to the HR team. The HR team can then approve or deny the initial application.
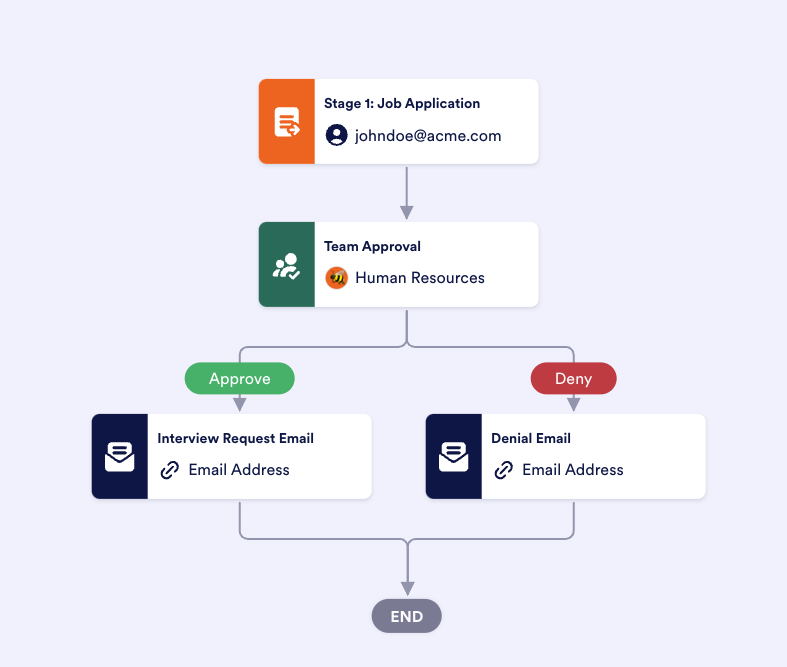
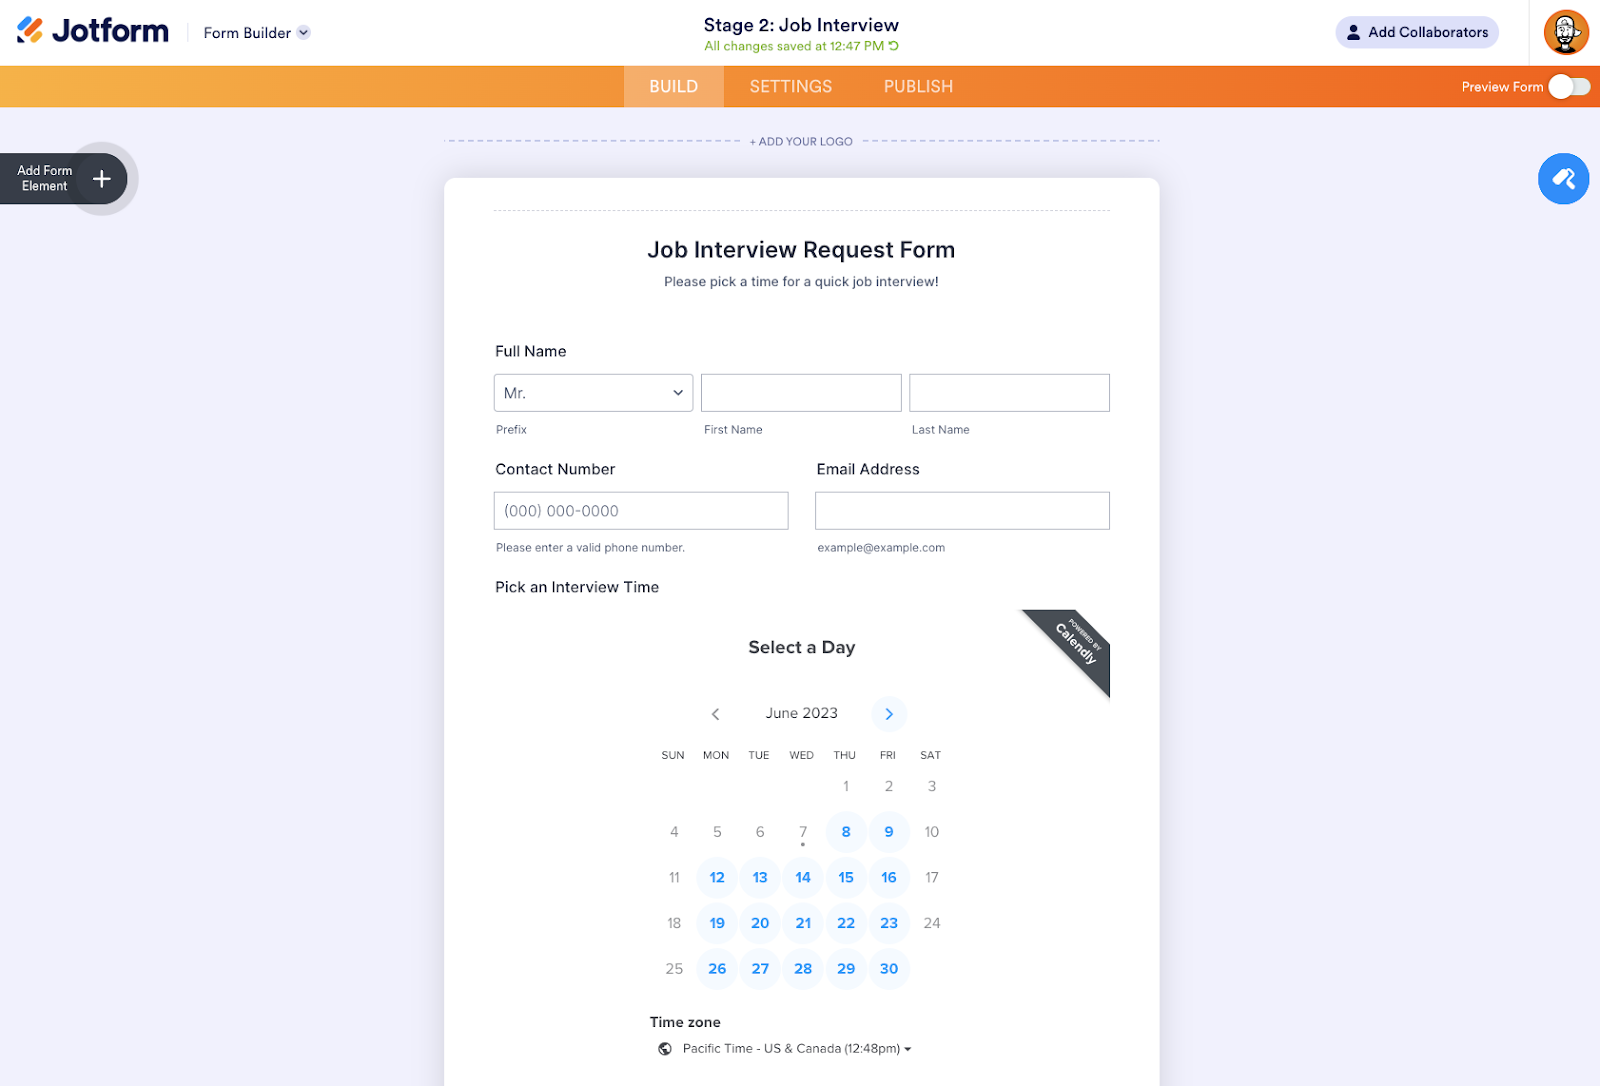
Next, let’s create an interview scheduling form using the Calendly widget to ensure accurate scheduling and no overlapping interviews. This scheduling form will automatically be sent to the applicant upon approval of the initial job application.
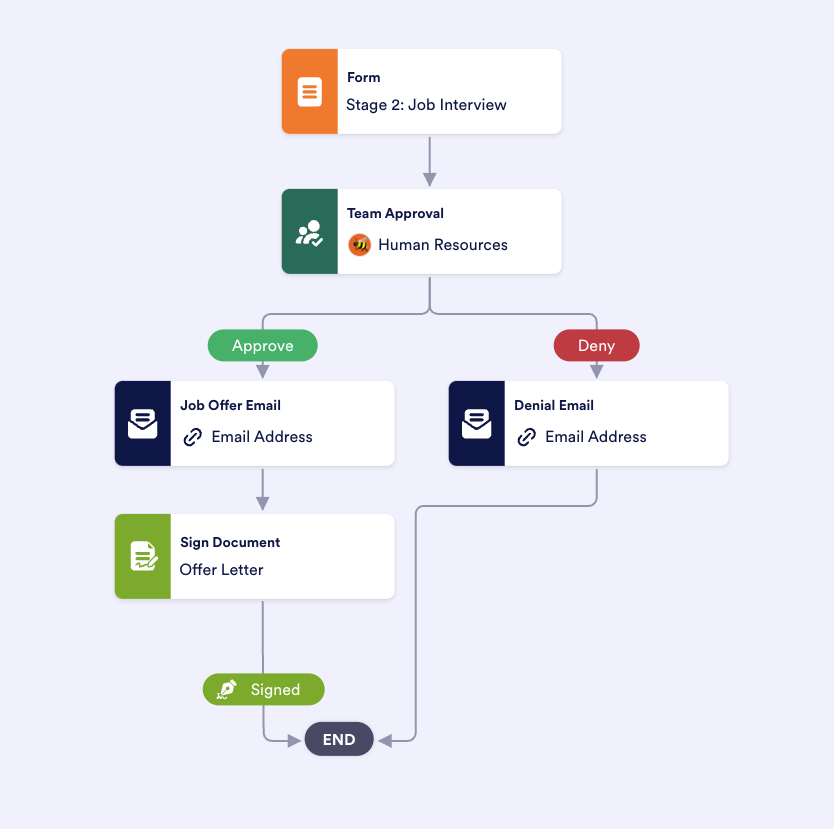
We can then add the Calendly scheduling form to our workflow. Just like with the initial application, we can automatically collect approvals from the HR team after the interview. If the applicant is accepted, they will automatically receive a Jotform Sign offer letter document via email.
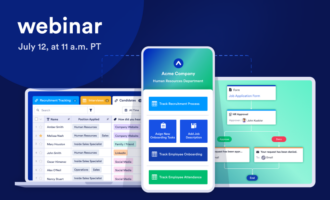
We hope integrating Calendly with Jotform Enterprise will help you streamline your scheduling processes and automate as much busywork as possible. If you would like to learn more about the Calendly integration for Jotform Enterprise, check out our upcoming webinar: “Seamless scheduling with Jotform + Calendly,” as well as our user guide: How to Add and Set Up the Calendly Widget.


Send Comment: