
Tourism boards, outdoor venues, and hospitality businesses can all benefit from adding local weather information to their websites. Travelers and eventgoers will often check the forecast before they book, so why not save them the extra step of opening a separate weather app by placing it directly on your page?
If your site is on WordPress, you may have noticed that its editor doesn’t include a native weather block. But with a WordPress weather widget, you can place the forecast anywhere on your site — including right next to your booking details — so that customers can plan their visit without toggling between tabs or apps.
You can add a WordPress weather widget in one of two ways: by installing a weather plug-in from the WordPress plug-in directory, or by embedding a free widget that you customize in a separate tool and paste into your page.
Whether you’re a local business owner, tourism site manager, or blogger who wants to add a weather widget in WordPress without registering for an API key, this guide covers your options. We start with plug-ins.
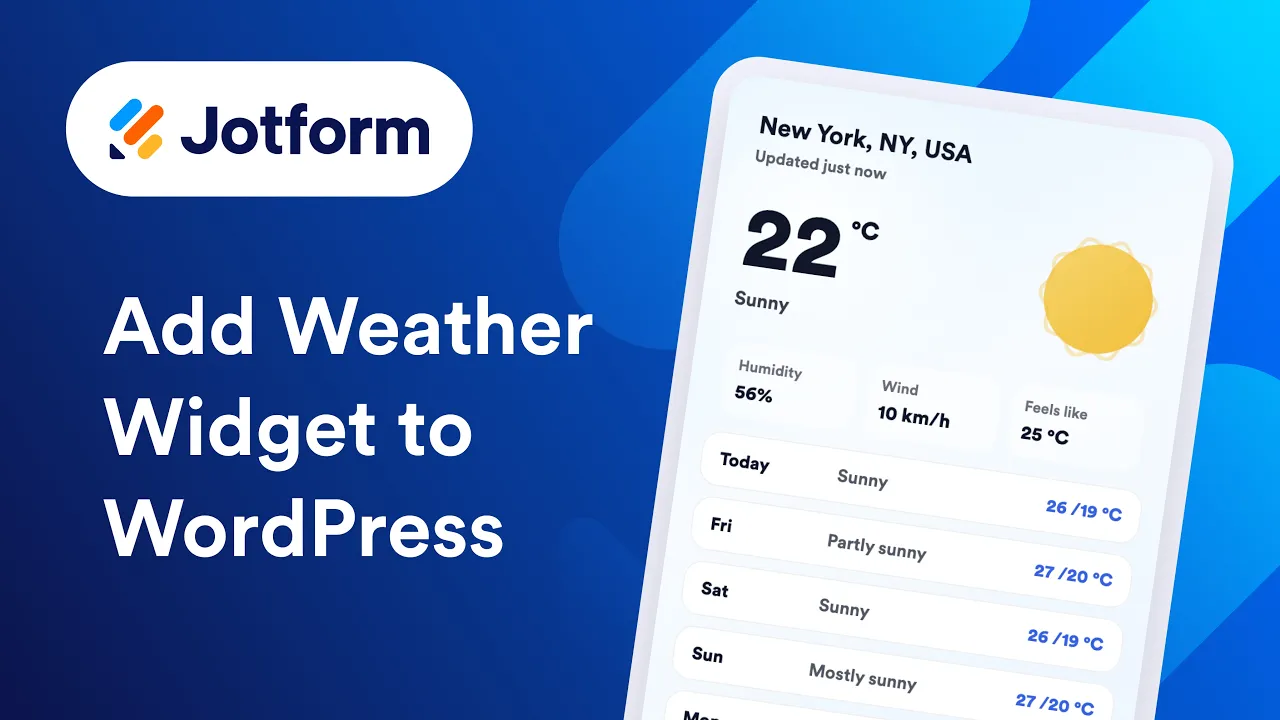

Option 1: Install a WordPress weather plug-in
To install one of the best WordPress plug-ins, you can find plenty of options in the native plug-in directory, such as Location Weather and wp-forecast. Plug-ins integrate with your WordPress dashboard, so if you already know how to use WordPress, you can manage the forecast from the same place as the rest of your site.
The drawback is that even a free WP weather plug-in doesn’t provide weather data on its own, so you may have to register for an API key with a provider like OpenWeather and configure it in the plug-in’s settings before the WordPress weather widget can display a forecast. Those free keys come with daily request limits, and the free versions of these plug-ins often lack styling options, can slow down page load times, and reserve several features for paid upgrades.
If you’d still like to manage the forecast from your dashboard, here’s how to add a weather widget in WordPress with a plug-in:
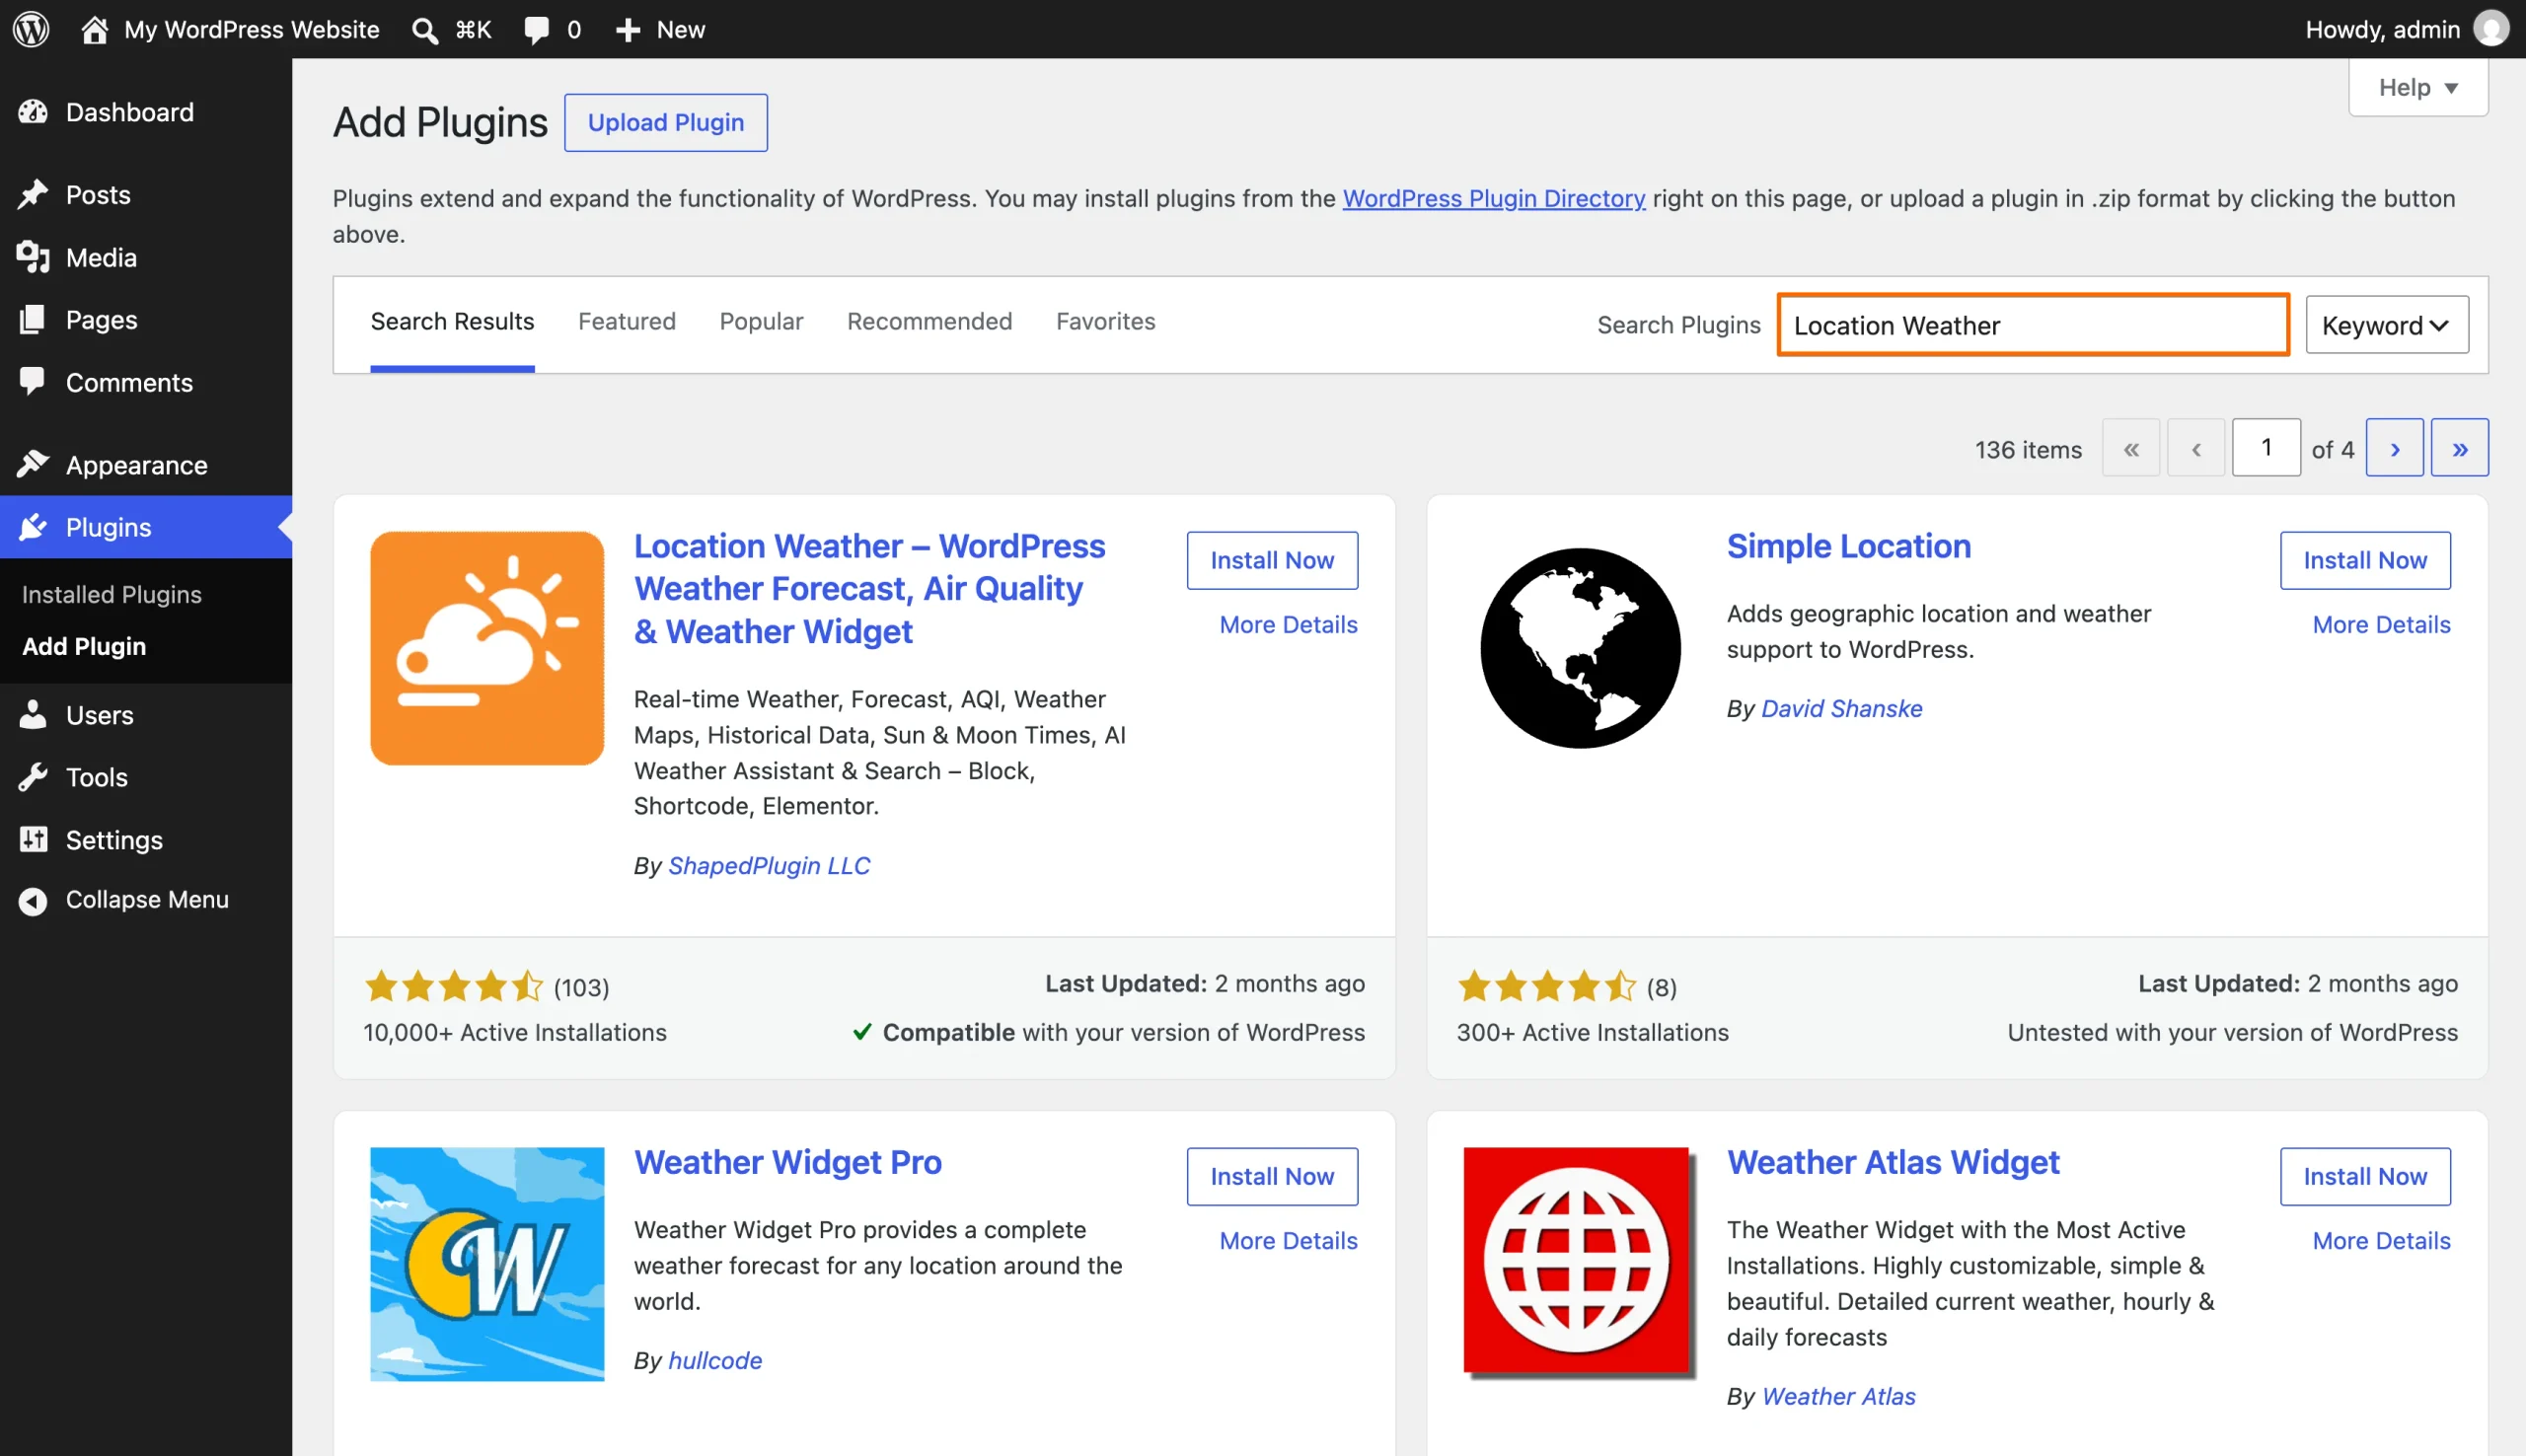
- Install the plug-in: From your WordPress dashboard, go to Plugins, then search for a weather plug-in like Location Weather. Click Install Now and then Activate.
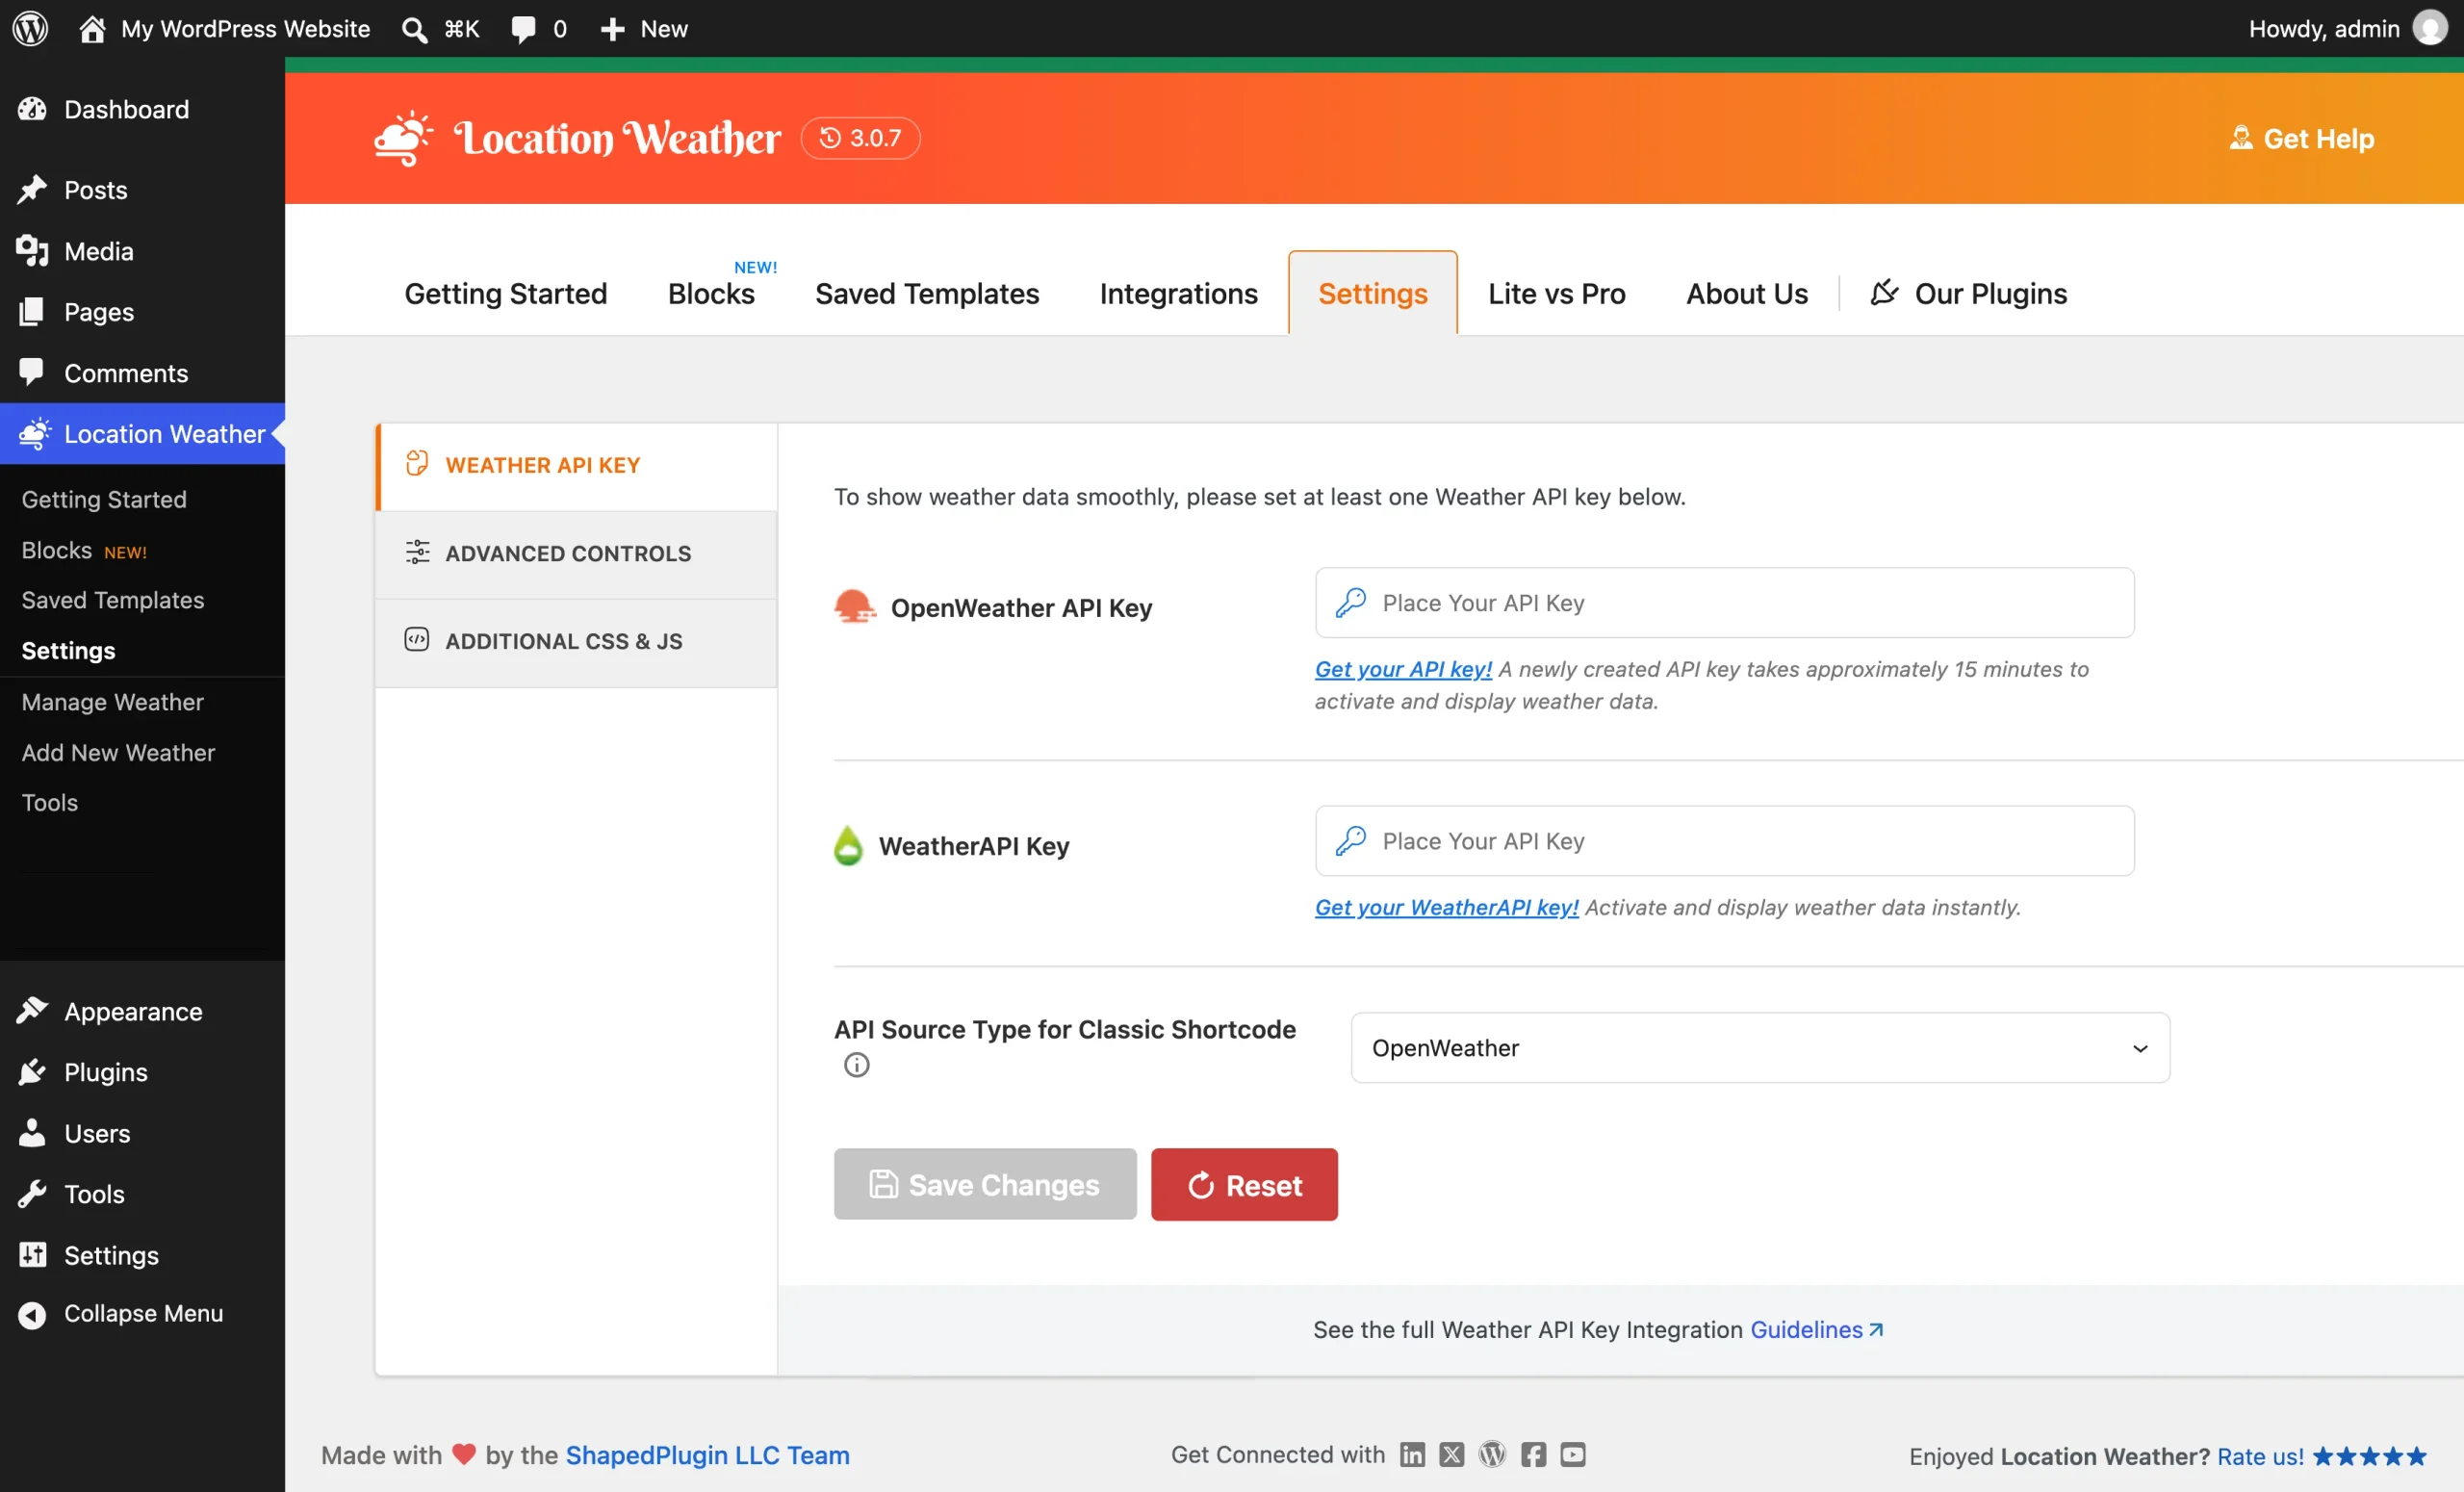
- Add your API key: Open the plug-in’s new menu item in your dashboard, go to its settings, and paste in a free API key from a provider like OpenWeather. Set your default location and temperature units, then save.
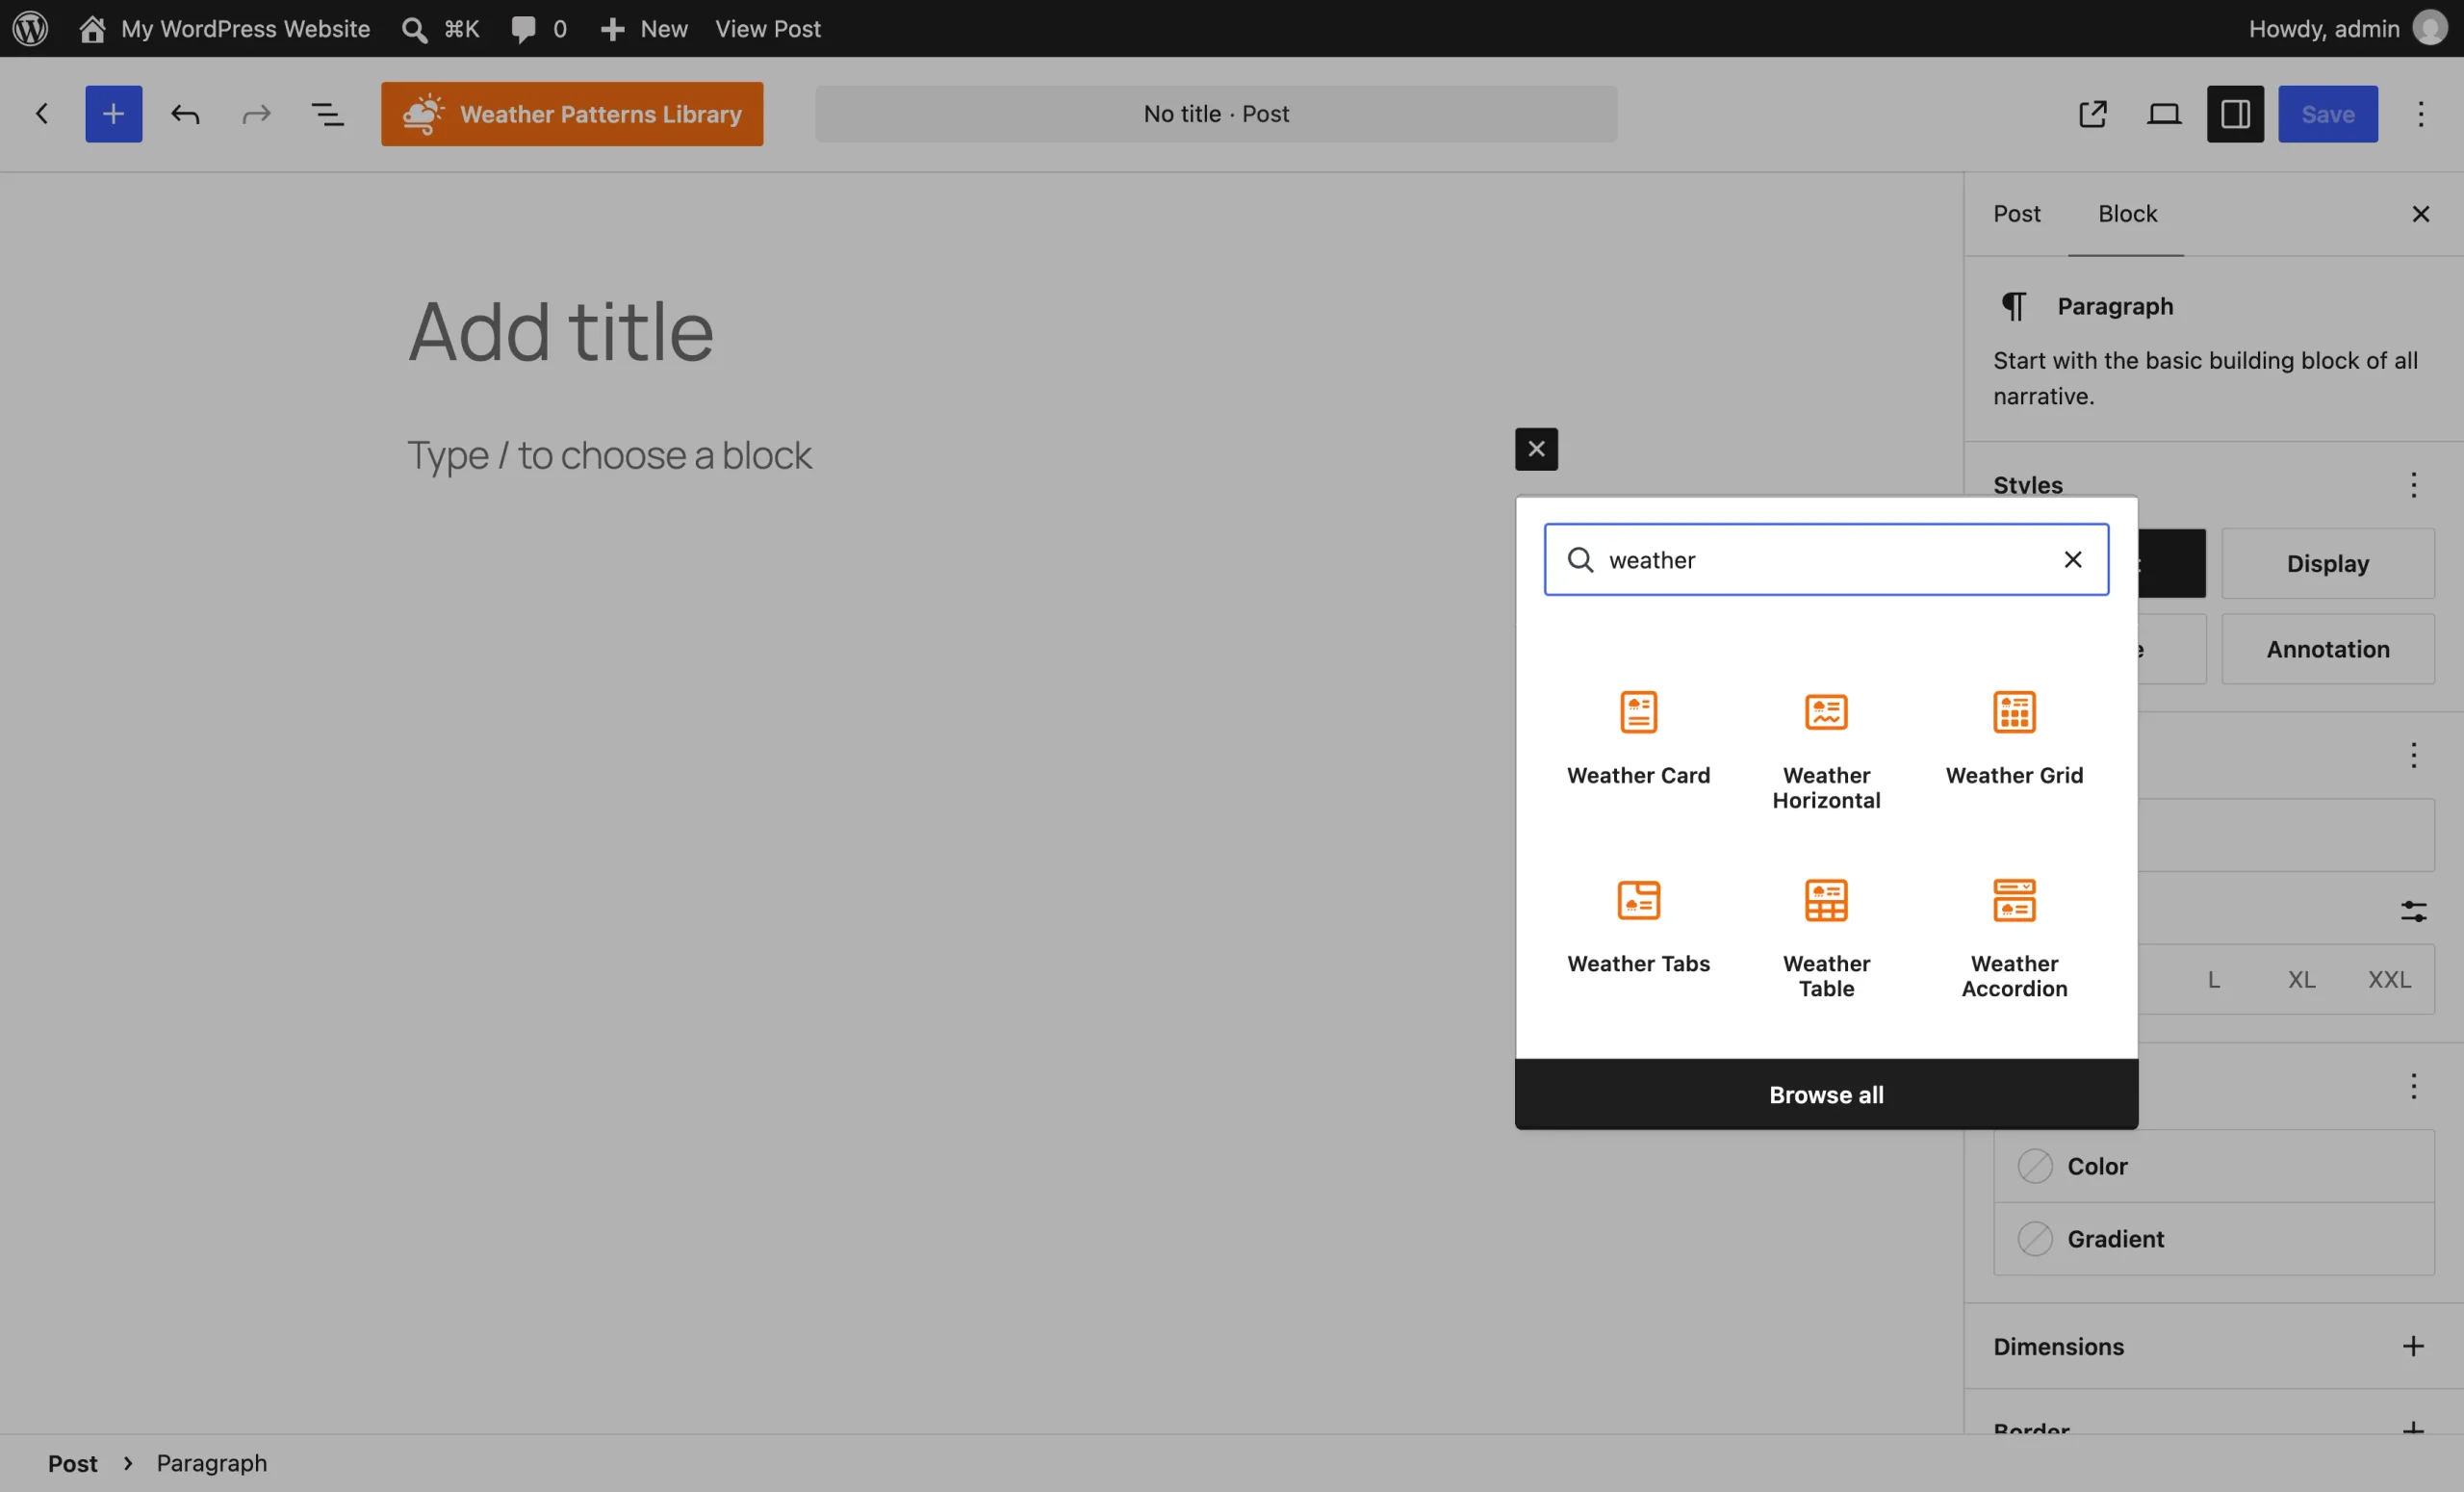
- Add the forecast to your site: Open your page in the block editor, add the plug-in’s weather block or paste its shortcode, and click Update. To place it in a sidebar or footer instead, go to Appearance in your dashboard sidebar, then Widgets, and add it there.
Option 2: Use a free weather widget (recommended)
If you’d rather not add a plug-in that could slow your page load times or deal with the technical headache of generating API keys, a hosted widget like Jotform Weather Widget, which you add with a short embed code, is the simpler option. It’s free, and setting it up only involves choosing a location, styling the forecast, and pasting the embed code into WordPress’s native Custom HTML block.
Here’s how to add a weather forecast widget to WordPress with Jotform:
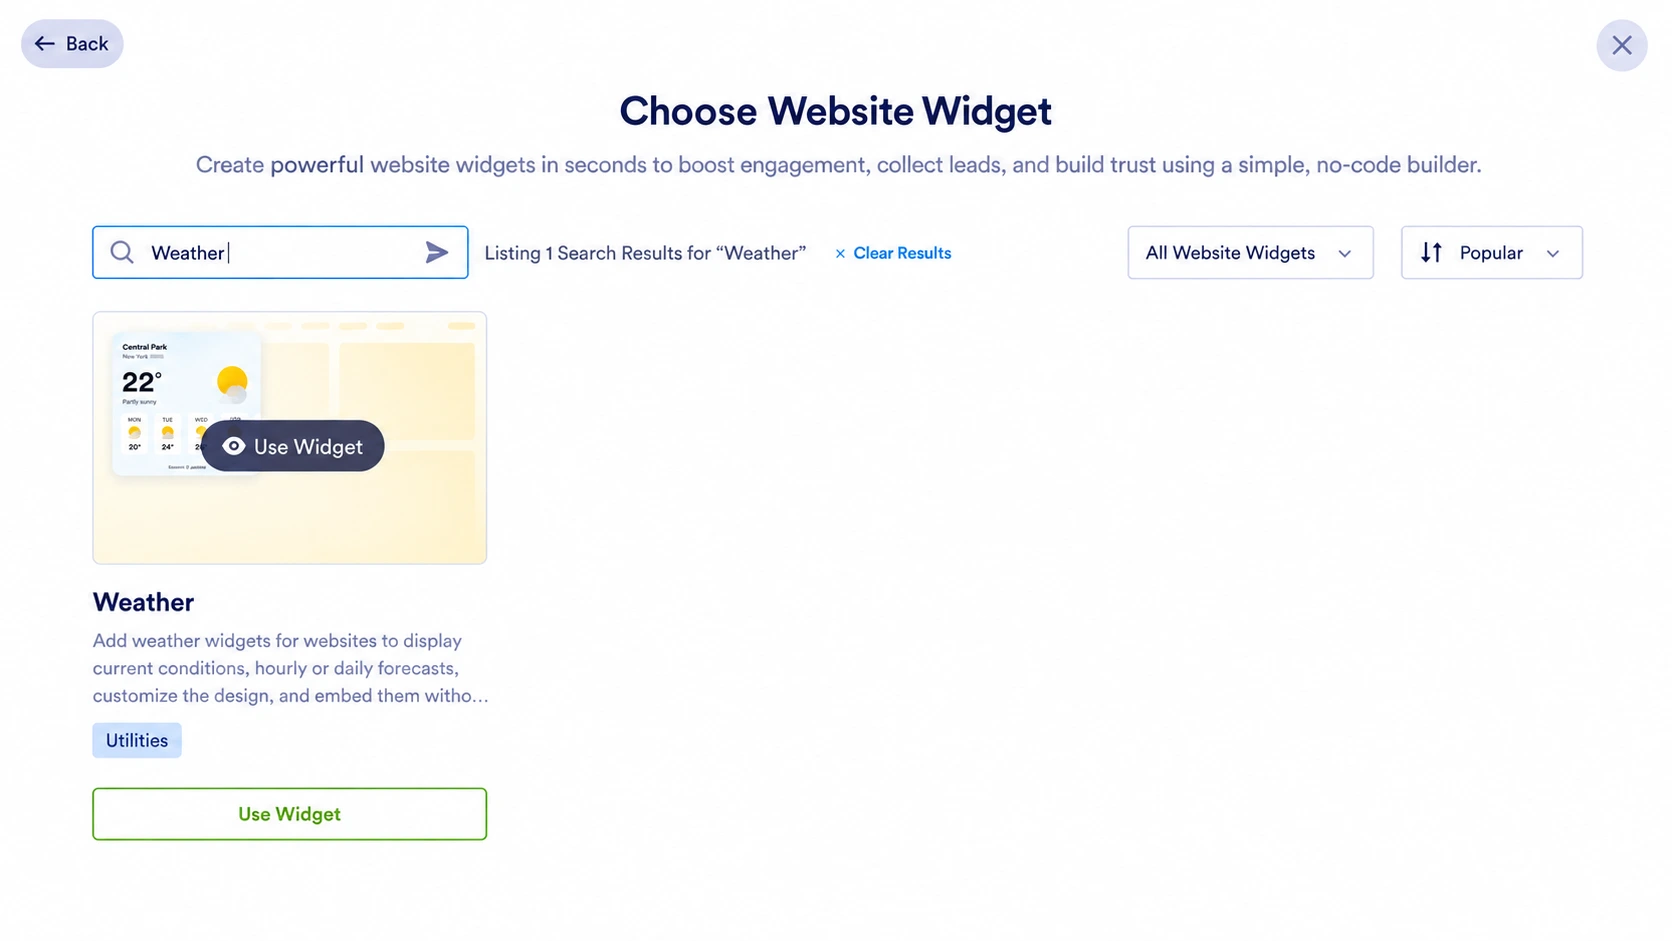
- Create the widget: On your Jotform Workspace page, click Create, select Website Widget, search for “Weather,” and then click Use Widget.
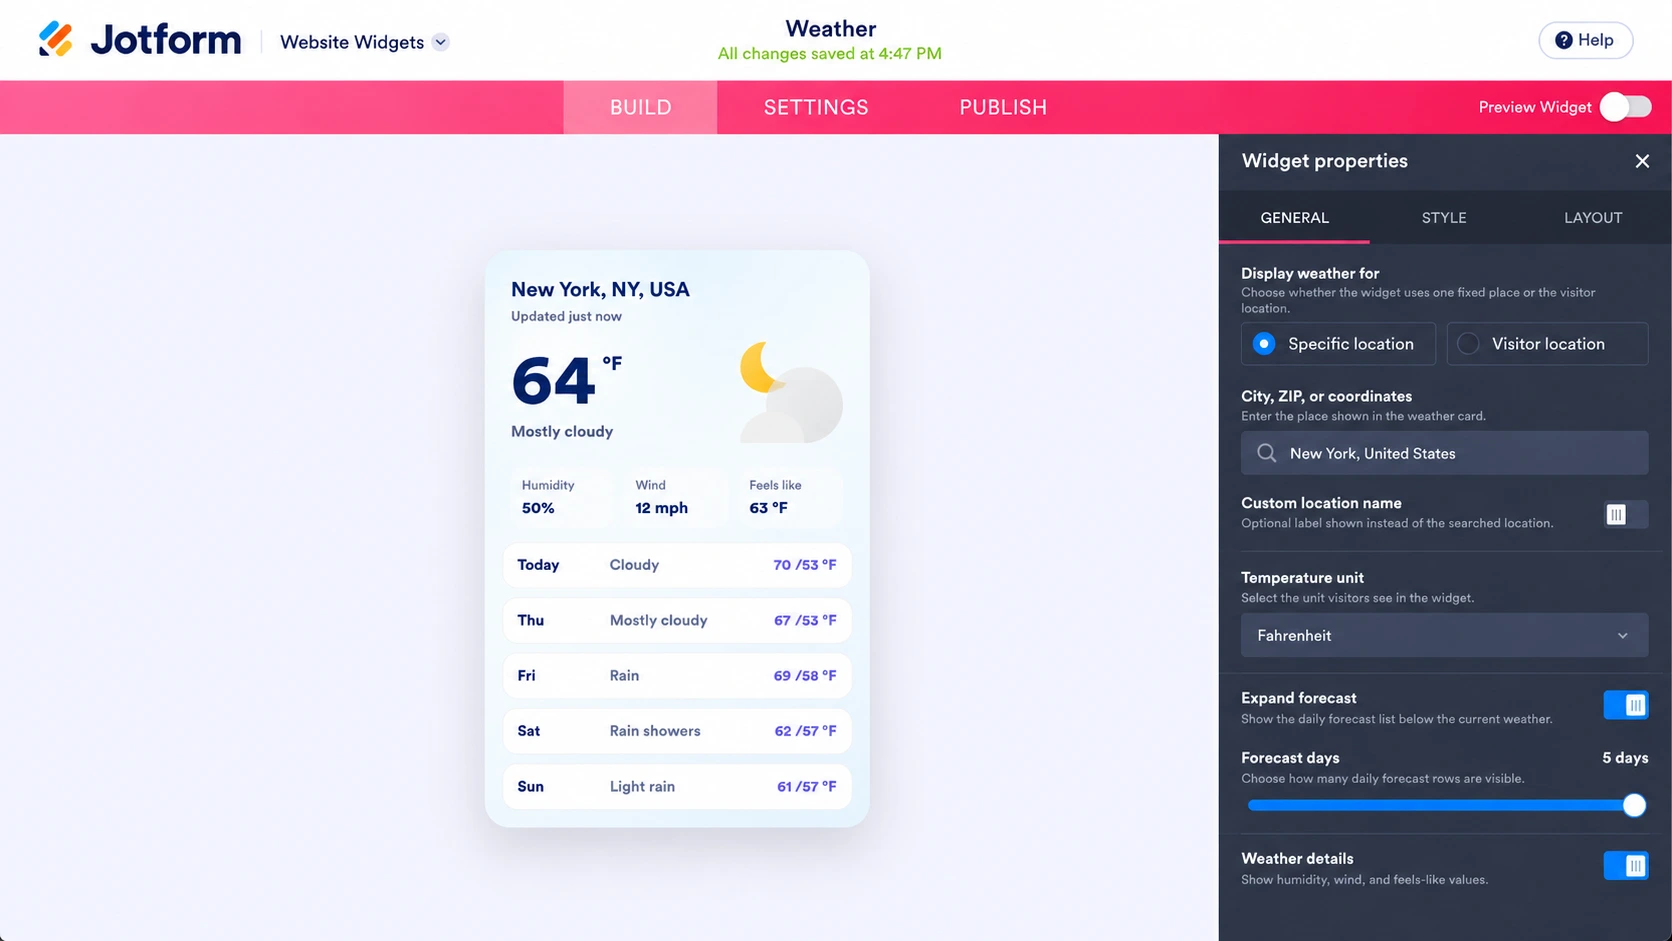
- Set your location and style: In the General tab under Widget properties, enter a city, ZIP code, or coordinates. Alternatively, choose Visitor location so that each visitor sees their local forecast. Choose Fahrenheit or Celsius. Under the Style tab, pick a weather template layout (hourly, daily, detailed, current-weather, or temperature-only) and adjust the colors to match your theme. Under the Layout tab, you can change the card width to match your preferences.
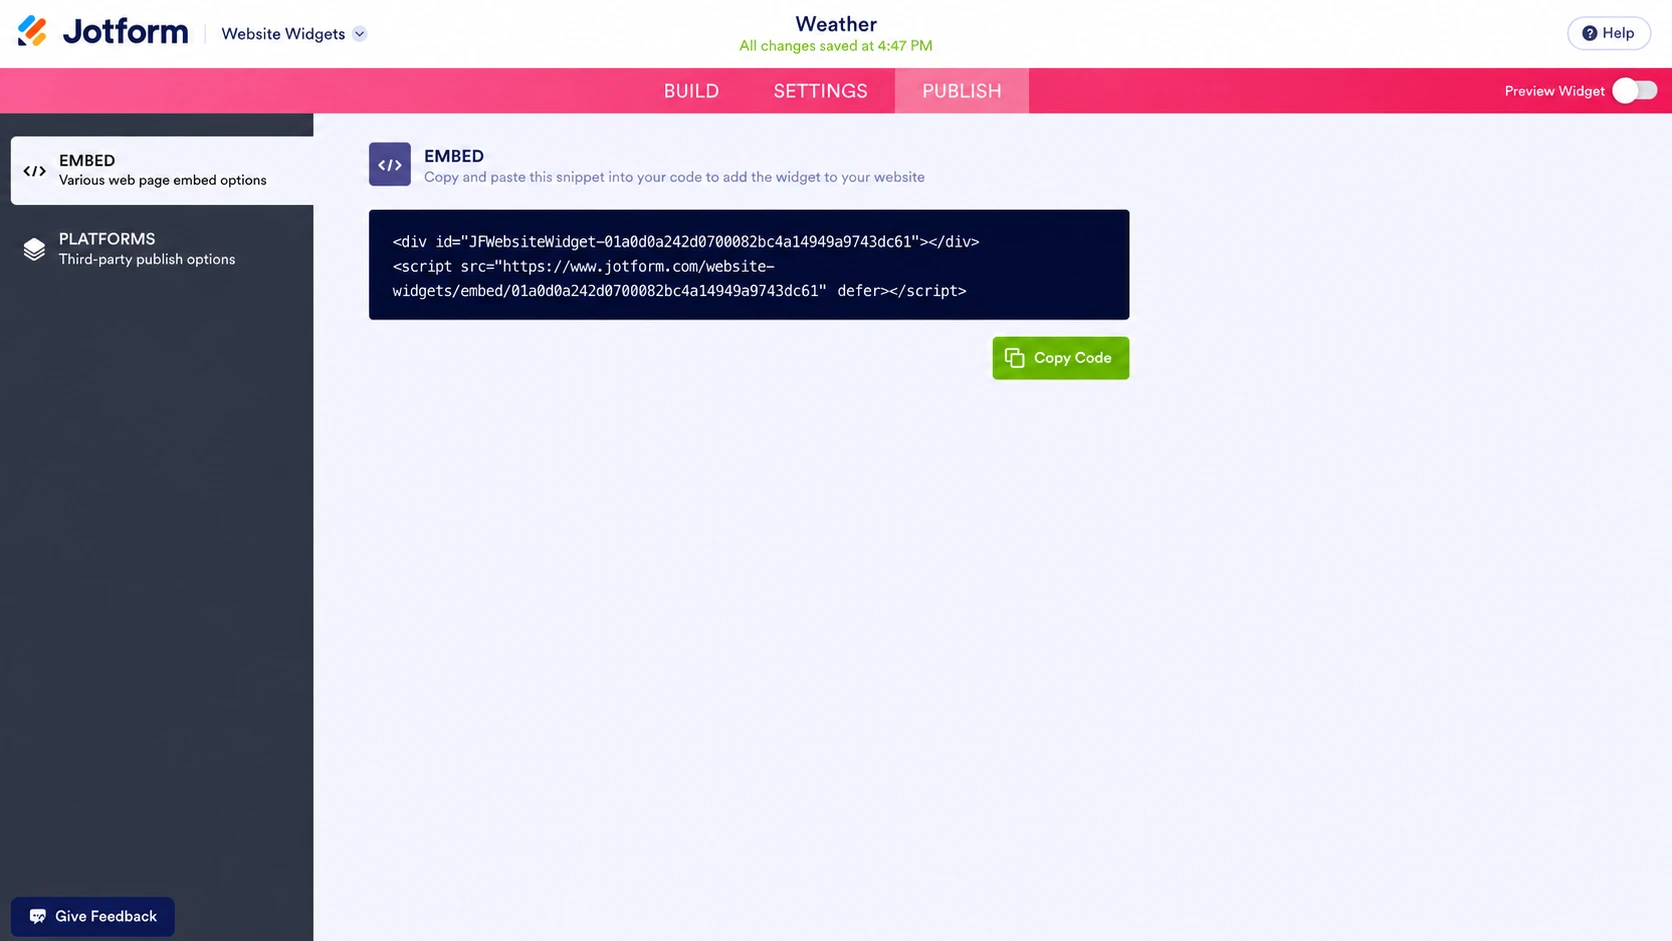
- Publish and embed it: Click Publish at the top and copy the embed code. To embed the weather in WordPress, open your page in the WordPress block editor, add a Custom HTML block, click Edit HTML, paste the code, and click Update.
Because the widget runs on Jotform’s servers rather than on your WordPress site, you don’t need a plug-in, and it won’t affect your site’s speed.
Here’s how the Jotform Weather Widget will look once it’s embedded on your website:
Enhance your WordPress site with smart, no-code widgets
Keeping the number of active WordPress plug-ins to a minimum is good practice for site speed and security, since every plug-in gives you more software to update and maintain. Embedded tools like the Jotform Website Widgets, which need no plug-in or API key, are a smarter way to add features to a local business site. And Jotform’s free website widgets directory has more than 150 of them, including
- A click-to-call button that floats on every page, so visitors checking the forecast can call to book with one tap
- A WhatsApp chat button for guests who would rather send a quick question than call
- A countdown timer for an upcoming event, tournament, or seasonal opening
Each one embeds through the same Custom HTML block as the weather widget. If you’re also taking reservations or inquiries, Jotform’s WordPress forms let customers reach you from the same page as your forecast. Browse the directory today to add the features your site is missing and improve its functionality without sacrificing performance.
This article is for local businesses (restaurants, event venues, golf courses, hotels), tourism websites, and bloggers using WordPress who want to display real-time local weather forecasts to their visitors without slowing down their site.




































































































Send Comment: