
Adding frequently asked questions, or FAQs, to your website provides visitors with answers to common queries, making it easier for them to find the information they need quickly. FAQs also help search engines and AI tools understand, surface, and deliver clear answers to the questions people are asking.
But to benefit both human readers and bots, your FAQs must be implemented correctly on your website. Including invisible schema code for FAQs adds an additional layer of structured data to help tools interpret your content. And you also need to make the question layout attractive and easy to read for humans.
This creates a challenge for WordPress users: Without a dedicated, native block for FAQs available in this platform, how can you add the necessary JSON-LD code while also displaying a readable FAQ section?
You’re left with two choices:
- Use SEO plug-ins like Yoast or Rank Math for Gutenberg FAQ blocks that address both the bot and human requirements simultaneously
- Go with a free, lightweight serverless widget and handle the schema manually — separating the back- and front-end tasks.
At first glance, the former option may seem more desirable, but it has some drawbacks as you’ll see below. In this article, we’ll show you how to add FAQ schema in WordPress both ways so you can decide what’s right for your website.

Option 1: Install a dedicated WordPress FAQ block plug-in
To solve both the SEO and human-visual needs of FAQs, many users turn to third-party SEO or FAQ-specific plug-ins from the WordPress repository, such as Yoast, Rank Math, and FAQ Schema Ultimate.
Be aware that this method requires installing new software on your server in order to build the FAQ accordion structure (which expands and collapses when clicked) in your dashboard.
Additionally, plug-ins sometimes present more problems than they solve. They tend to add heavy CSS and JavaScript across your site, which can slow down page rendering times. Some plug-ins also have rigid design limitations that may hinder your ability to customize the front end to your liking, which can create a disconnect in your website’s style. What’s more, many plug-ins use the freemium business model, where specific features like color customization or live search bars are locked behind an expensive paywall.
That said, some users view these limitations as a necessary trade-off. If you’d like to try this method, here’s how to add a Gutenberg FAQ structured data block in WordPress with a plug-in:
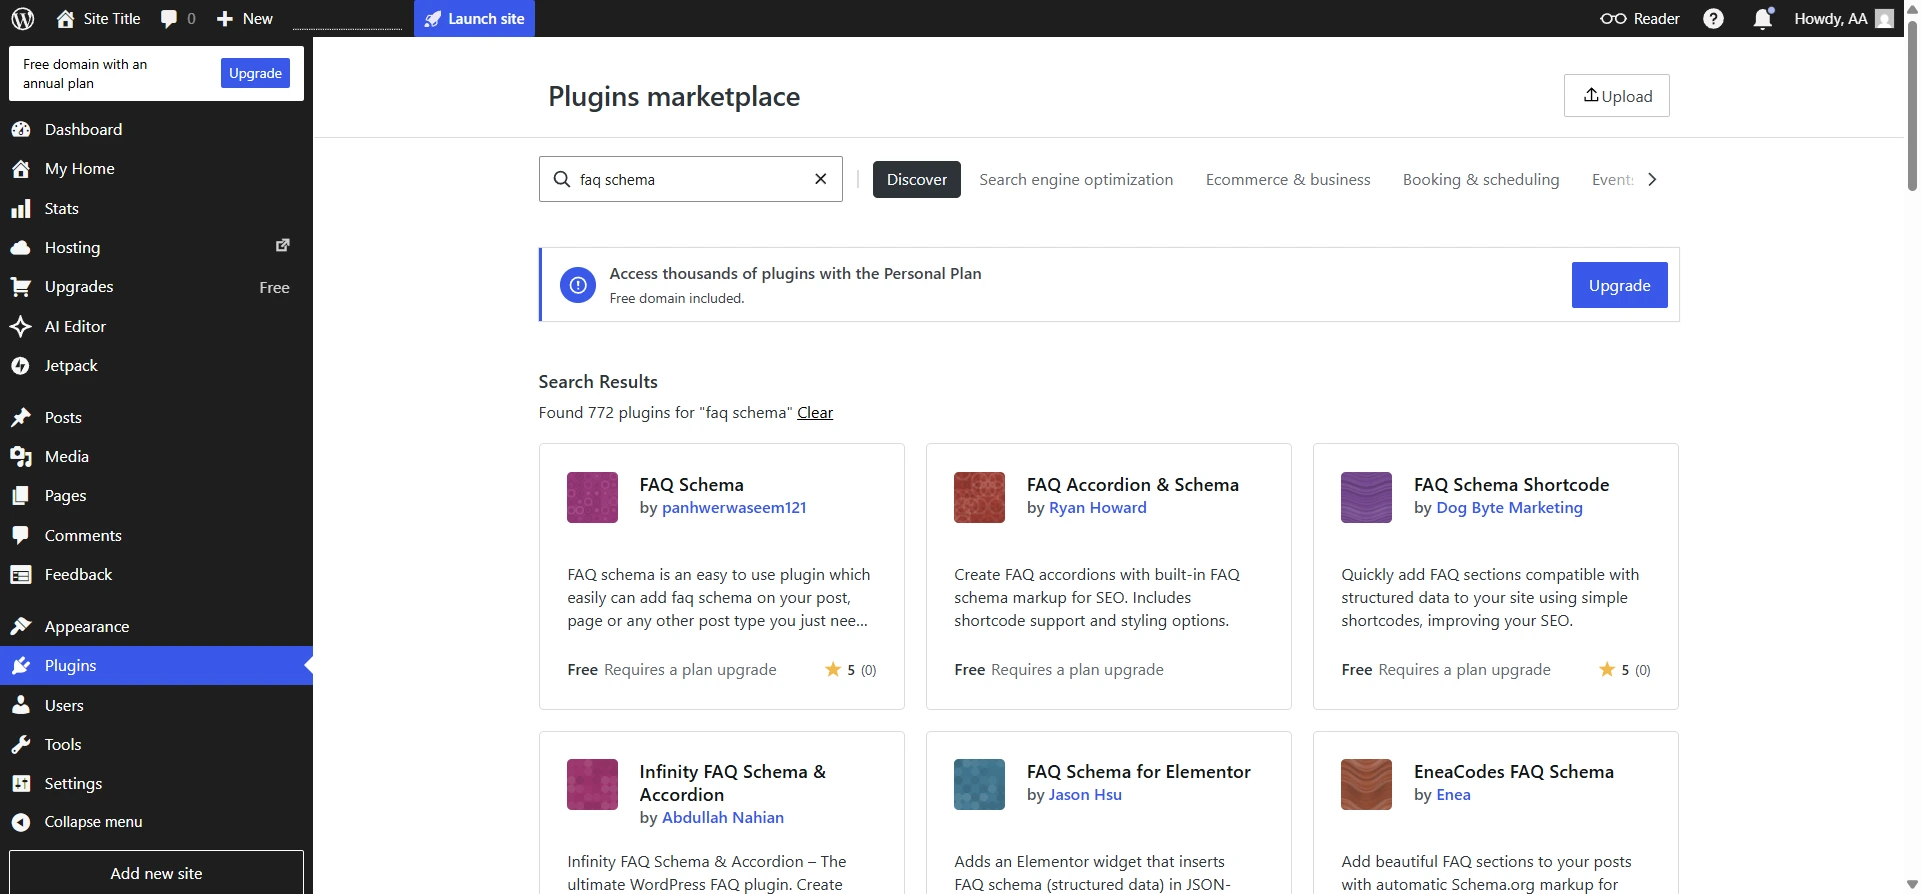
- Install an FAQ schema plug-in: Head to the WordPress dashboard and click Plugins. Search for “FAQ schema” and select the plug-in you want to install from the available results.
Follow the prompts to install and activate the FAQ schema plug-in. The exact instructions for installation will depend on the specific plug-in you’re using. Keep in mind that many plug-ins are available for free, but you’ll only be able to use them on a paid WordPress plan.
- Add your FAQs: Navigate to the page where you want to add FAQ content. Depending on the plug-in you’ve used, you’ll either be able to add an FAQ block to the page or enter your questions and answers into the plug-in’s FAQ fields.
- Enable FAQ schema: Some plug-ins apply the FAQ schema type automatically. In others, you’ll have to select FAQ as the schema type.
Review the newly added content to make sure it will read well for human visitors.
Pro Tip
Want to know how to use WordPress plug-ins effectively? Check out our article, how to use WordPress, for details on plug-in functionality and maintenance.
Option 2: Add manual schema and a free FAQ widget (recommended)
If you’re looking for a Rank Math or Yoast FAQ block alternative, try this approach: Add the invisible WordPress FAQ schema manually (or via an SEO plug-in you’re already using to avoid additional plug-ins) and then use a reliable, externally hosted widget for the visual FAQ accordion.
The Jotform FAQ Widget is a great free option for the front-end solution. It provides a sleek and searchable visual accordion for your human visitors, while handling the formatting completely off-server so it doesn’t impact page rendering times.
Here’s how to use the Jotform FAQ Widget:
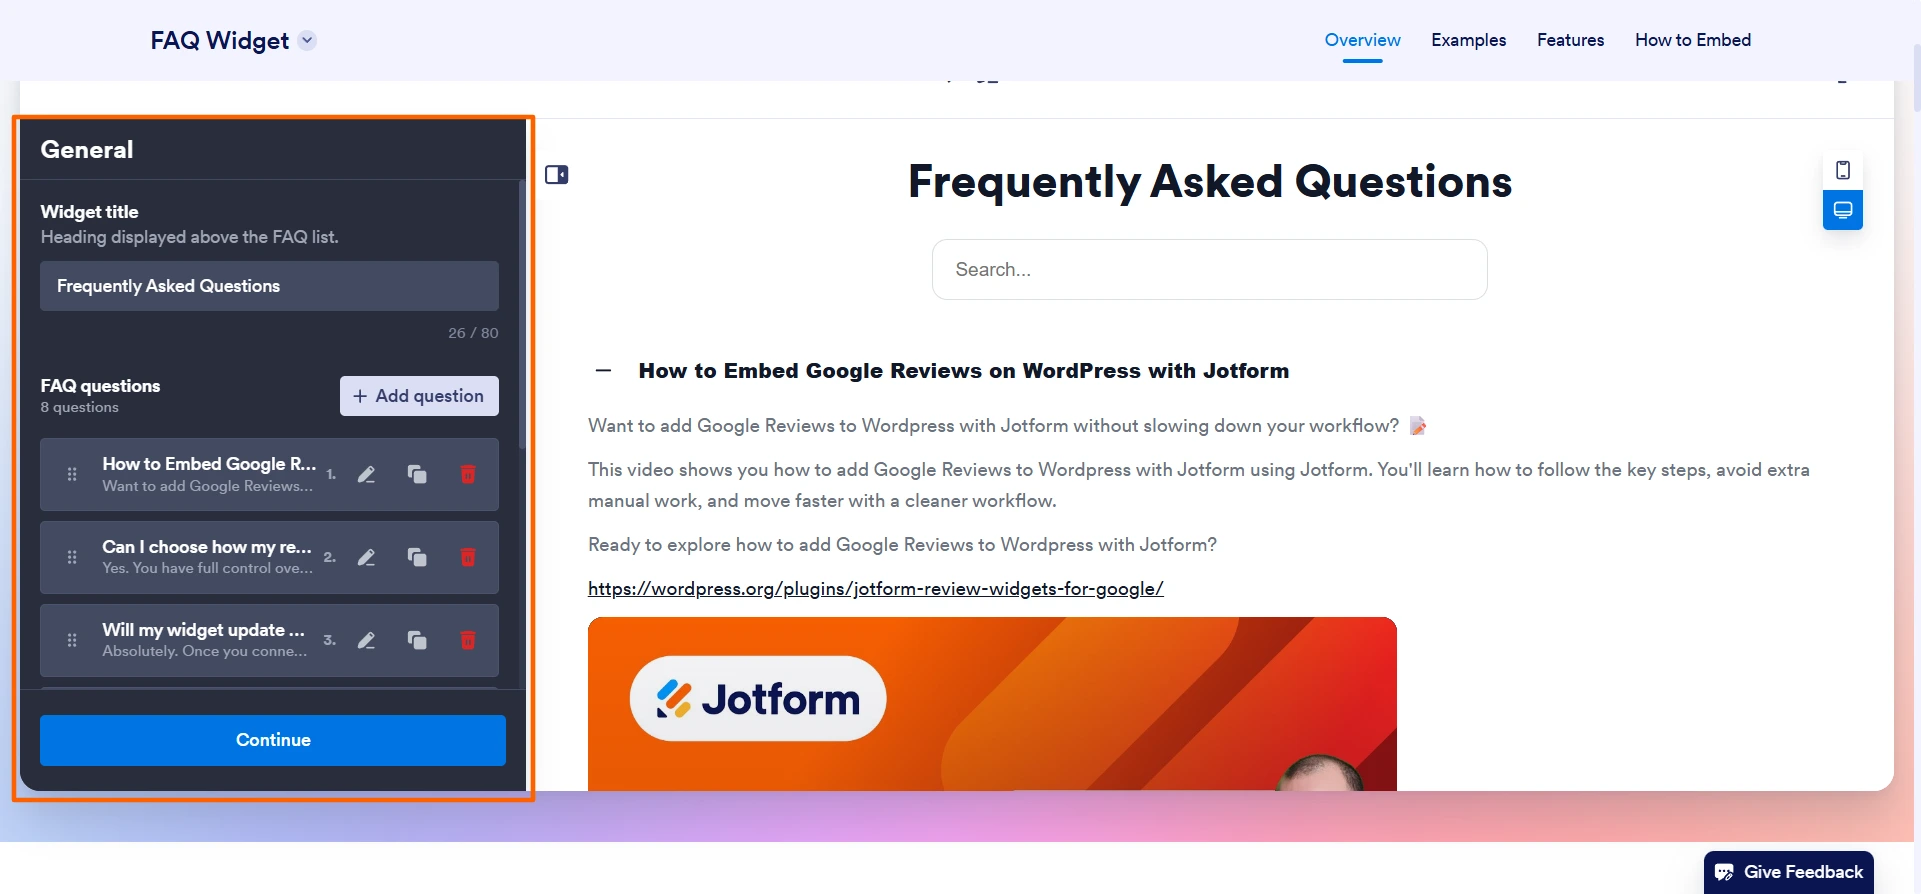
- Add FAQ questions and answers: Go to the Jotform FAQ Widget page and add your FAQ questions and answers in the widget settings. You can reorganize questions, add links or images to answers, and delete questions as needed. Click Continue.
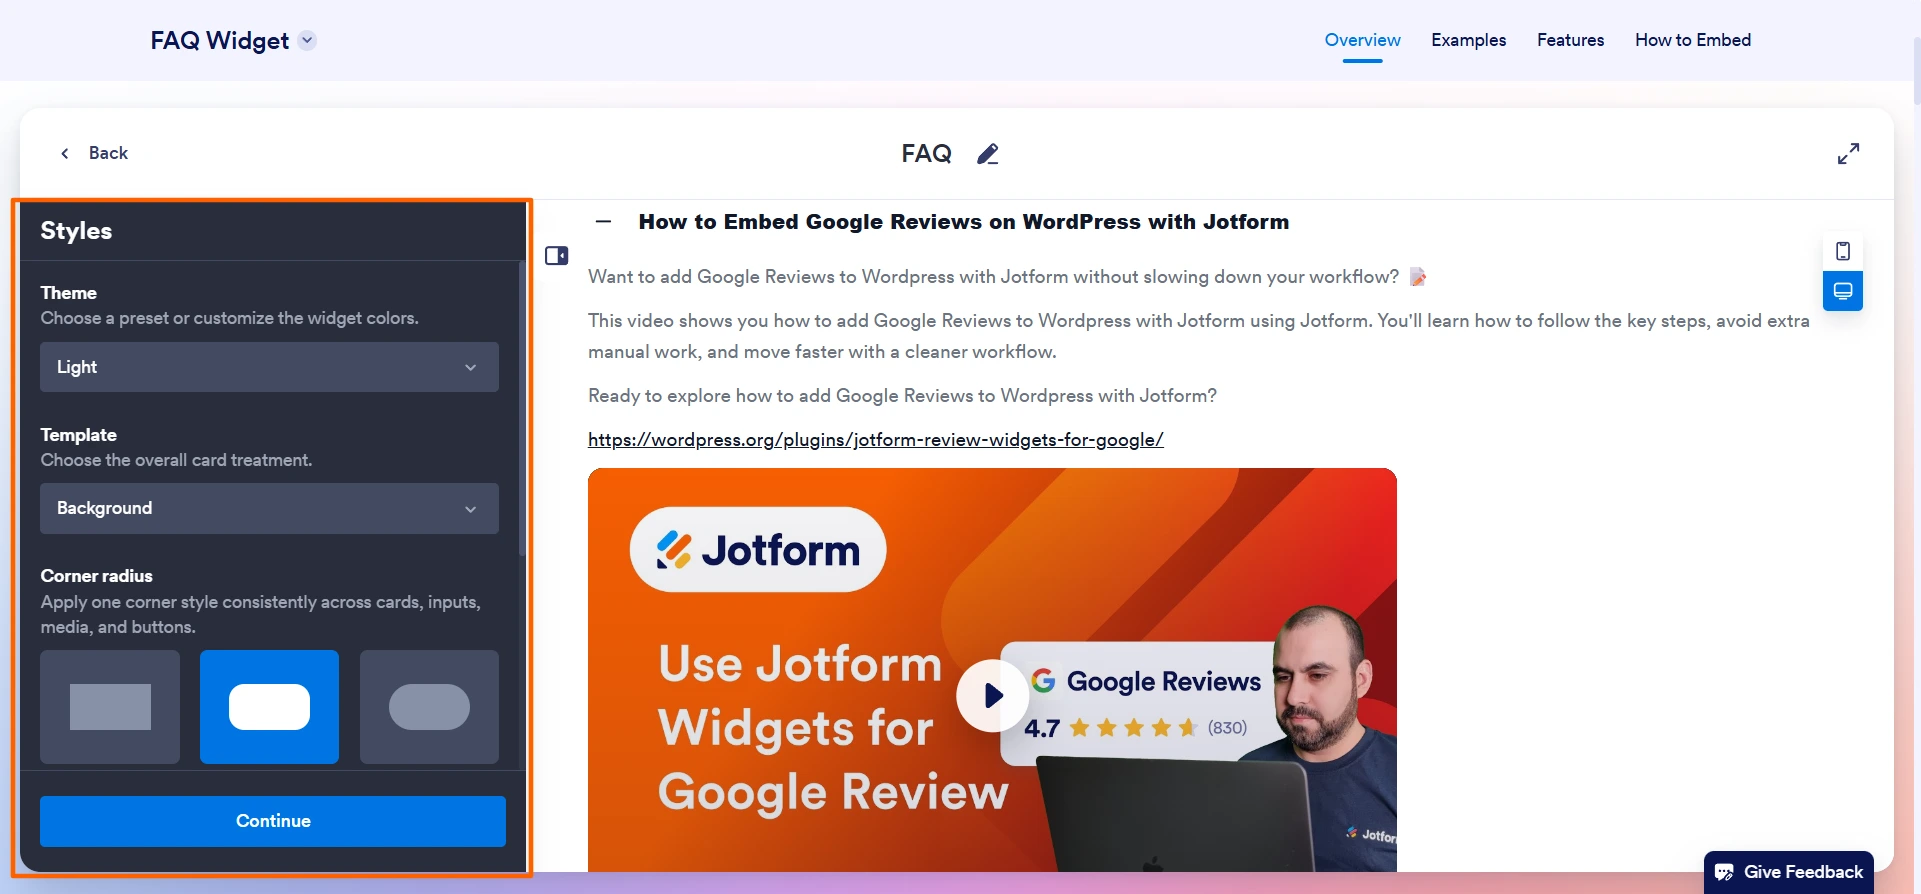
- Customize the layout and style: Jotform gives you unparalleled visual control over your FAQs by enabling you to select the theme, template, corner radius, font, accordion positioning, accordion layout, and so much more. You can even add a live search bar — all without requiring premium WordPress plug-in upgrades that can slow down your site.
Scroll down and specify all your desired settings to customize your FAQ section.
- Copy the widget embed code: Once you’ve finished customizing the FAQ, click Try it on your website for free. Jotform will give you an embed code for the FAQ widget. Click Copy Code to copy the embed code. Note that Jotform will prompt you to sign up or log in to get the code.
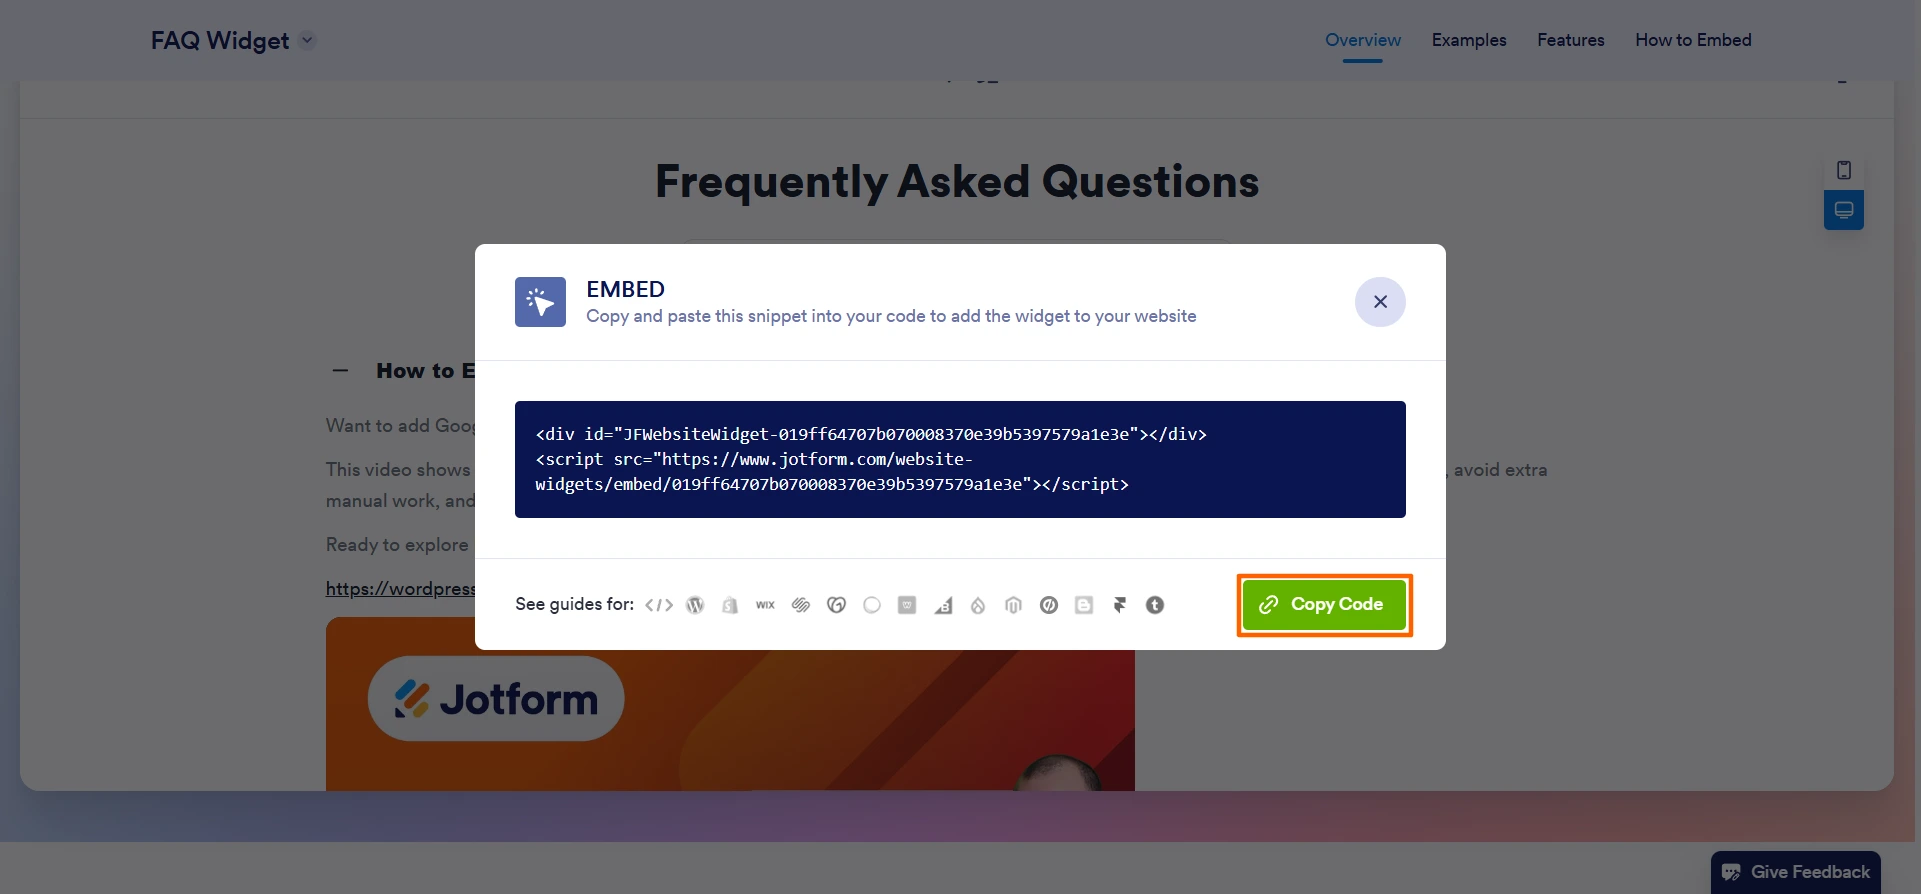
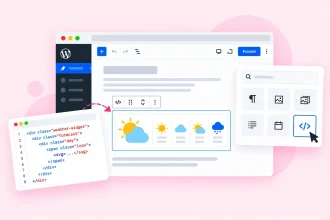
- Paste the embed code into WordPress: Go to your WordPress site and add a Custom HTML block from the Block Inserter on the page where you want to add the FAQs. Paste the FAQ widget embed code into the HTML block. Click Update. WordPress will automatically insert the custom Jotform FAQ Widget into your WordPress site.
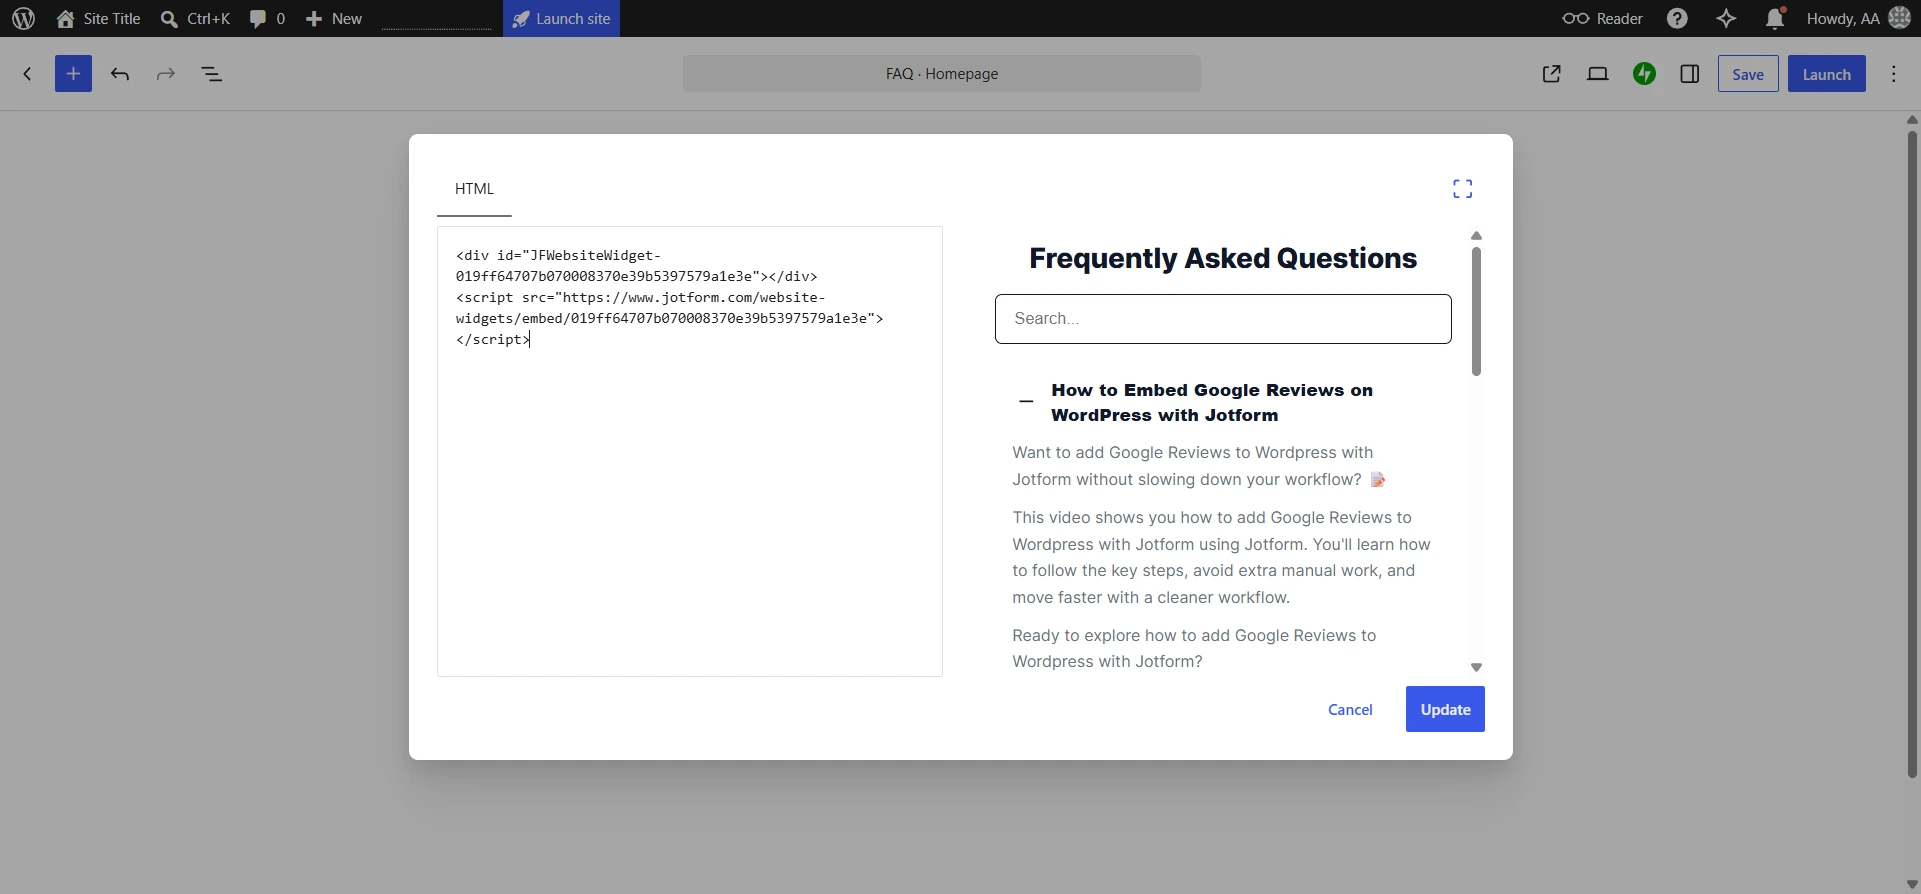
Be sure to add the invisible schema code manually or with an existing plug-in after completing this widget embed process.
Supercharge your WordPress site with smart, serverless widgets
Adding FAQs to WordPress is no easy task, especially when you want to ensure they can be both crawled by bots and read by human visitors. To provide a frictionless and interactive website visitor experience, you need the Jotform FAQ Widget.
Splitting the FAQ back end from the front end is a smarter strategy than relying on another heavyweight plug-in. Instead, manually add the FAQ schema and use a free, externally hosted tool like the Jotform FAQ Widget, which enhances your visual front end and keeps your WordPress architecture lean. That way, you have more control over how the FAQs look to your website visitors and how structured data is implemented in WordPress.
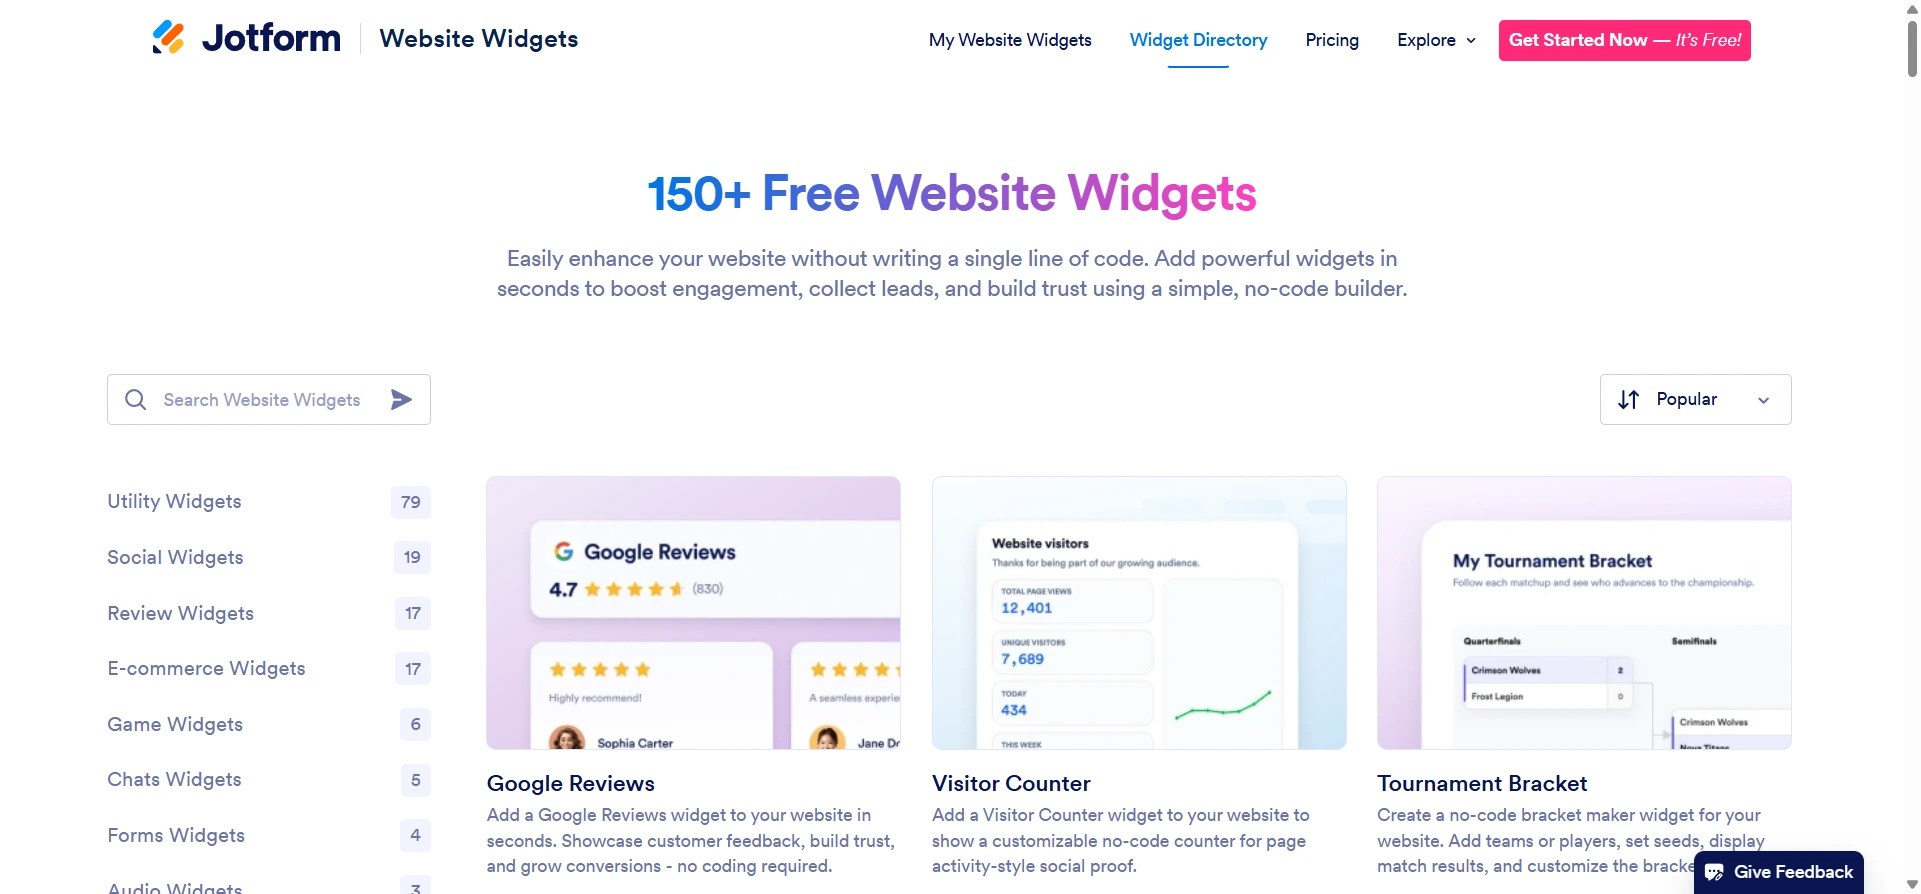
The Jotform FAQ Widget isn’t the only thing Jotform has to offer. It also comes with over 150 free website widgets that you can use to add more functionality to your site with ease. For example, the Weather Widget displays current local conditions while the Accessibility Widget creates a more comfortable browsing experience for all your visitors.
You can also collect data from your website users using WordPress forms, such as on the contact pages, order pages, and lead magnet pages. In addition, Jotform has a native integration with WordPress, which enables you to enhance your WordPress forms with branding assets, custom form fields, and integrations with payment processors.
Best of all, Jotform is free to get started. Explore the platform today, and see how easy it is to add FAQ schema to WordPress while keeping the front end and back end separate.
This article is for WordPress site owners, SEO specialists, and content marketers who want to earn Google rich snippets for their FAQs while keeping their frontend visual design clean and lightweight.



































































































Send Comment: