
If you’re using WordPress to sell something or grow an email list, a banner across the top of your page can be invaluable. It’s often what people notice first, so it’s a great place to announce a seasonal sale, introduce a new product, or trade a free download for an email address.
WordPress does offer native ways to make a banner, and a Gutenberg custom banner usually means combining a Cover block with a heading and a button, since there’s no banner block of its own. For a simple announcement with a link, those options are enough. But if you want your banner to earn clicks rather than blend into the page and get scrolled past, you might want something a little different.
Those blocks can’t do anything interactive, since there’s no countdown timer for sales and no email capture field inside the banner itself. Creating a banner with elements like that (without writing HTML and CSS) takes one of two approaches: You can either install a dedicated banner plug-in, or you can use a free hosted widget and paste its embed code into a Custom HTML block.
If you’re a blogger, publisher, or WooCommerce merchant who wants to add a custom banner in WordPress with a countdown or signup form, read on. This guide covers how to add a banner in WordPress, starting with plug-ins and then the widget.

Option 1: Install a dedicated WordPress banner plug-in
The standard WordPress approach is to install a plug-in from the repository. Dozens of banner and notification bar plug-ins are available, and once one is active, you can configure your campaign from your dashboard rather than the block editor.
Here’s how to add a banner in WordPress with a plug-in:
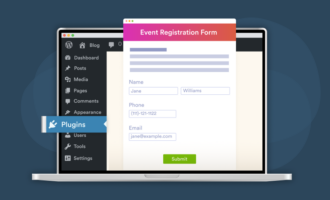
- From your WordPress dashboard, go to Plugins, search for a banner or notification bar plug-in, then click Install now and activate.
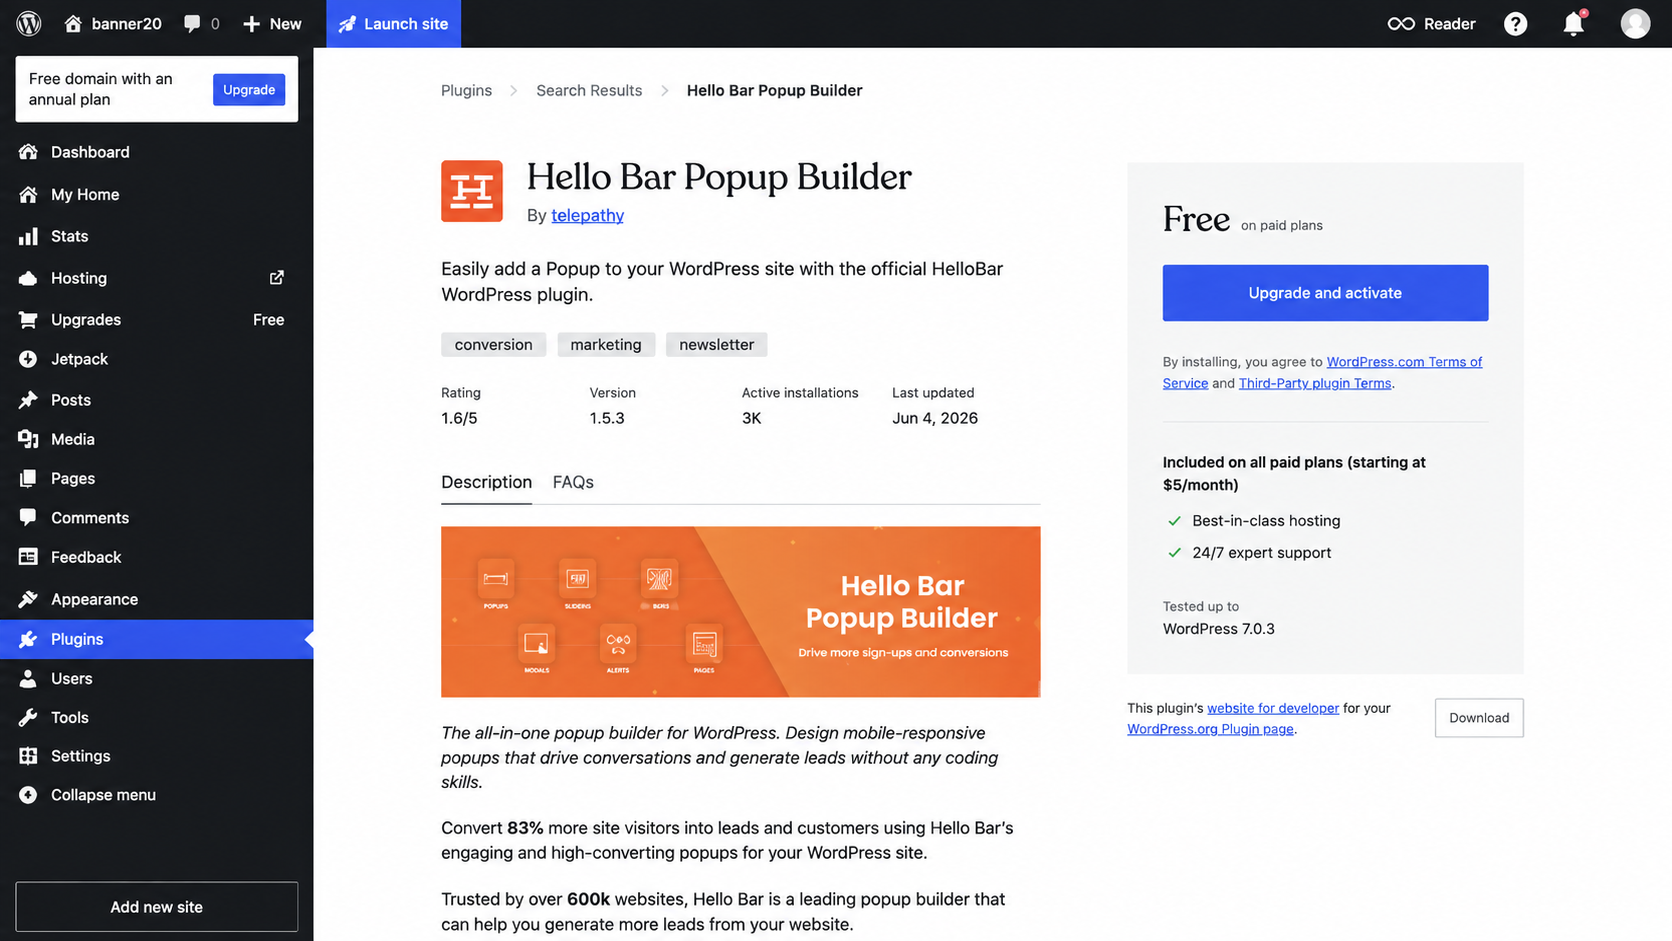
- Look for the plug-in’s new menu item in your left sidebar; refresh the dashboard if it doesn’t appear right away. Enable the banner, then add your text, images, colors, and target URL.
- Choose which pages or posts will display the banner, set any scheduling or targeting rules, save your changes, and then view your live site to confirm it looks right.
Free versions vary widely in what they include, and the premium features that make a banner worth having — countdown timers, targeting rules, and removing someone else’s logo from your promotion — often require payment.
For example, Hello Bar’s free plan limits you to a single bar and keeps the Hello Bar branding unless you upgrade, with paid plans starting at $29 a month billed annually. OptinMonster has a free tier, but campaign types and traffic limits scale with paid plans from $7 to $49 a month. And Icegram’s premium plan starts at $129 a year.
Several of these also require an account with the plug-in’s own service, since the plug-in acts as a connector while the campaign is edited in the company’s cloud dashboard. That’s worth knowing if you prefer to work solely on your own site.
Option 2: Add a free, interactive banner widget (recommended)
If you want a banner with a countdown, a coupon code, or an email field, and you’d rather not pay for a premium plug-in to get it, a free banner widget for WordPress covers your needs. You configure the banner in a visual builder, copy the embed code, and paste it into a Custom HTML block in Gutenberg.
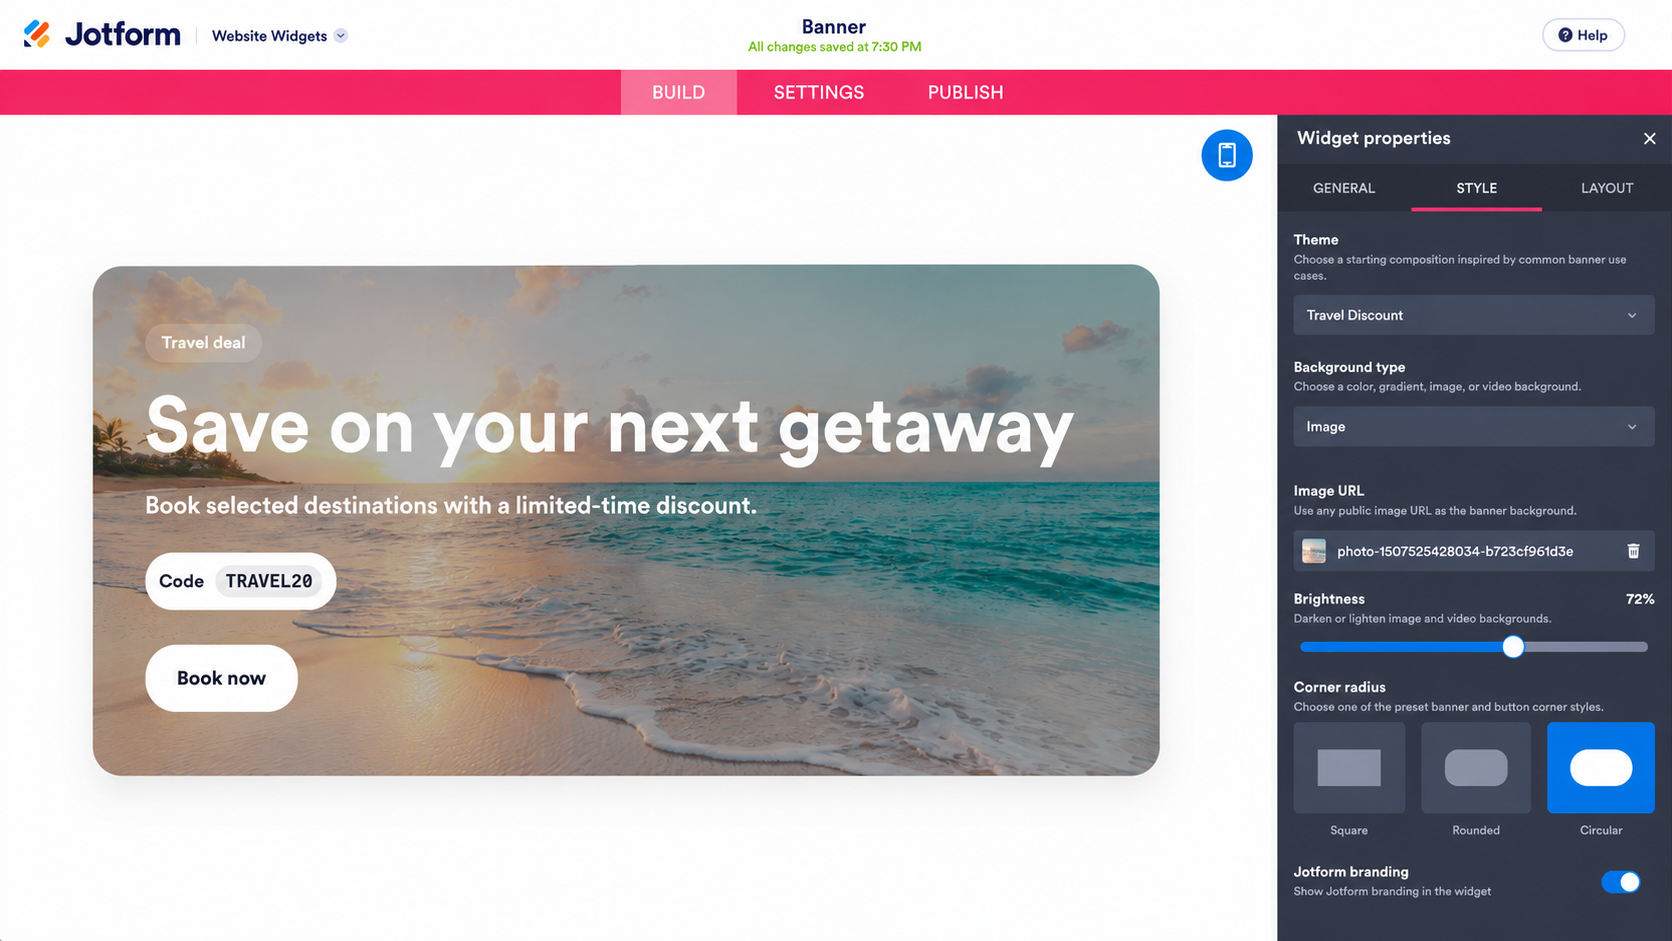
Jotform Banner Widget handles the elements that Gutenberg’s blocks can’t. You can use a solid color, gradient, image, or a YouTube or Vimeo video as the background, then add CTA buttons, text links, coupon codes, countdown timers, or an email capture form. And you can make the whole banner clickable if you want.
Here’s how to add a banner in WordPress with a widget:
- On your Jotform Workspace page, click Create, select Website Widget, search for “Banner,” and then click Use Widget.
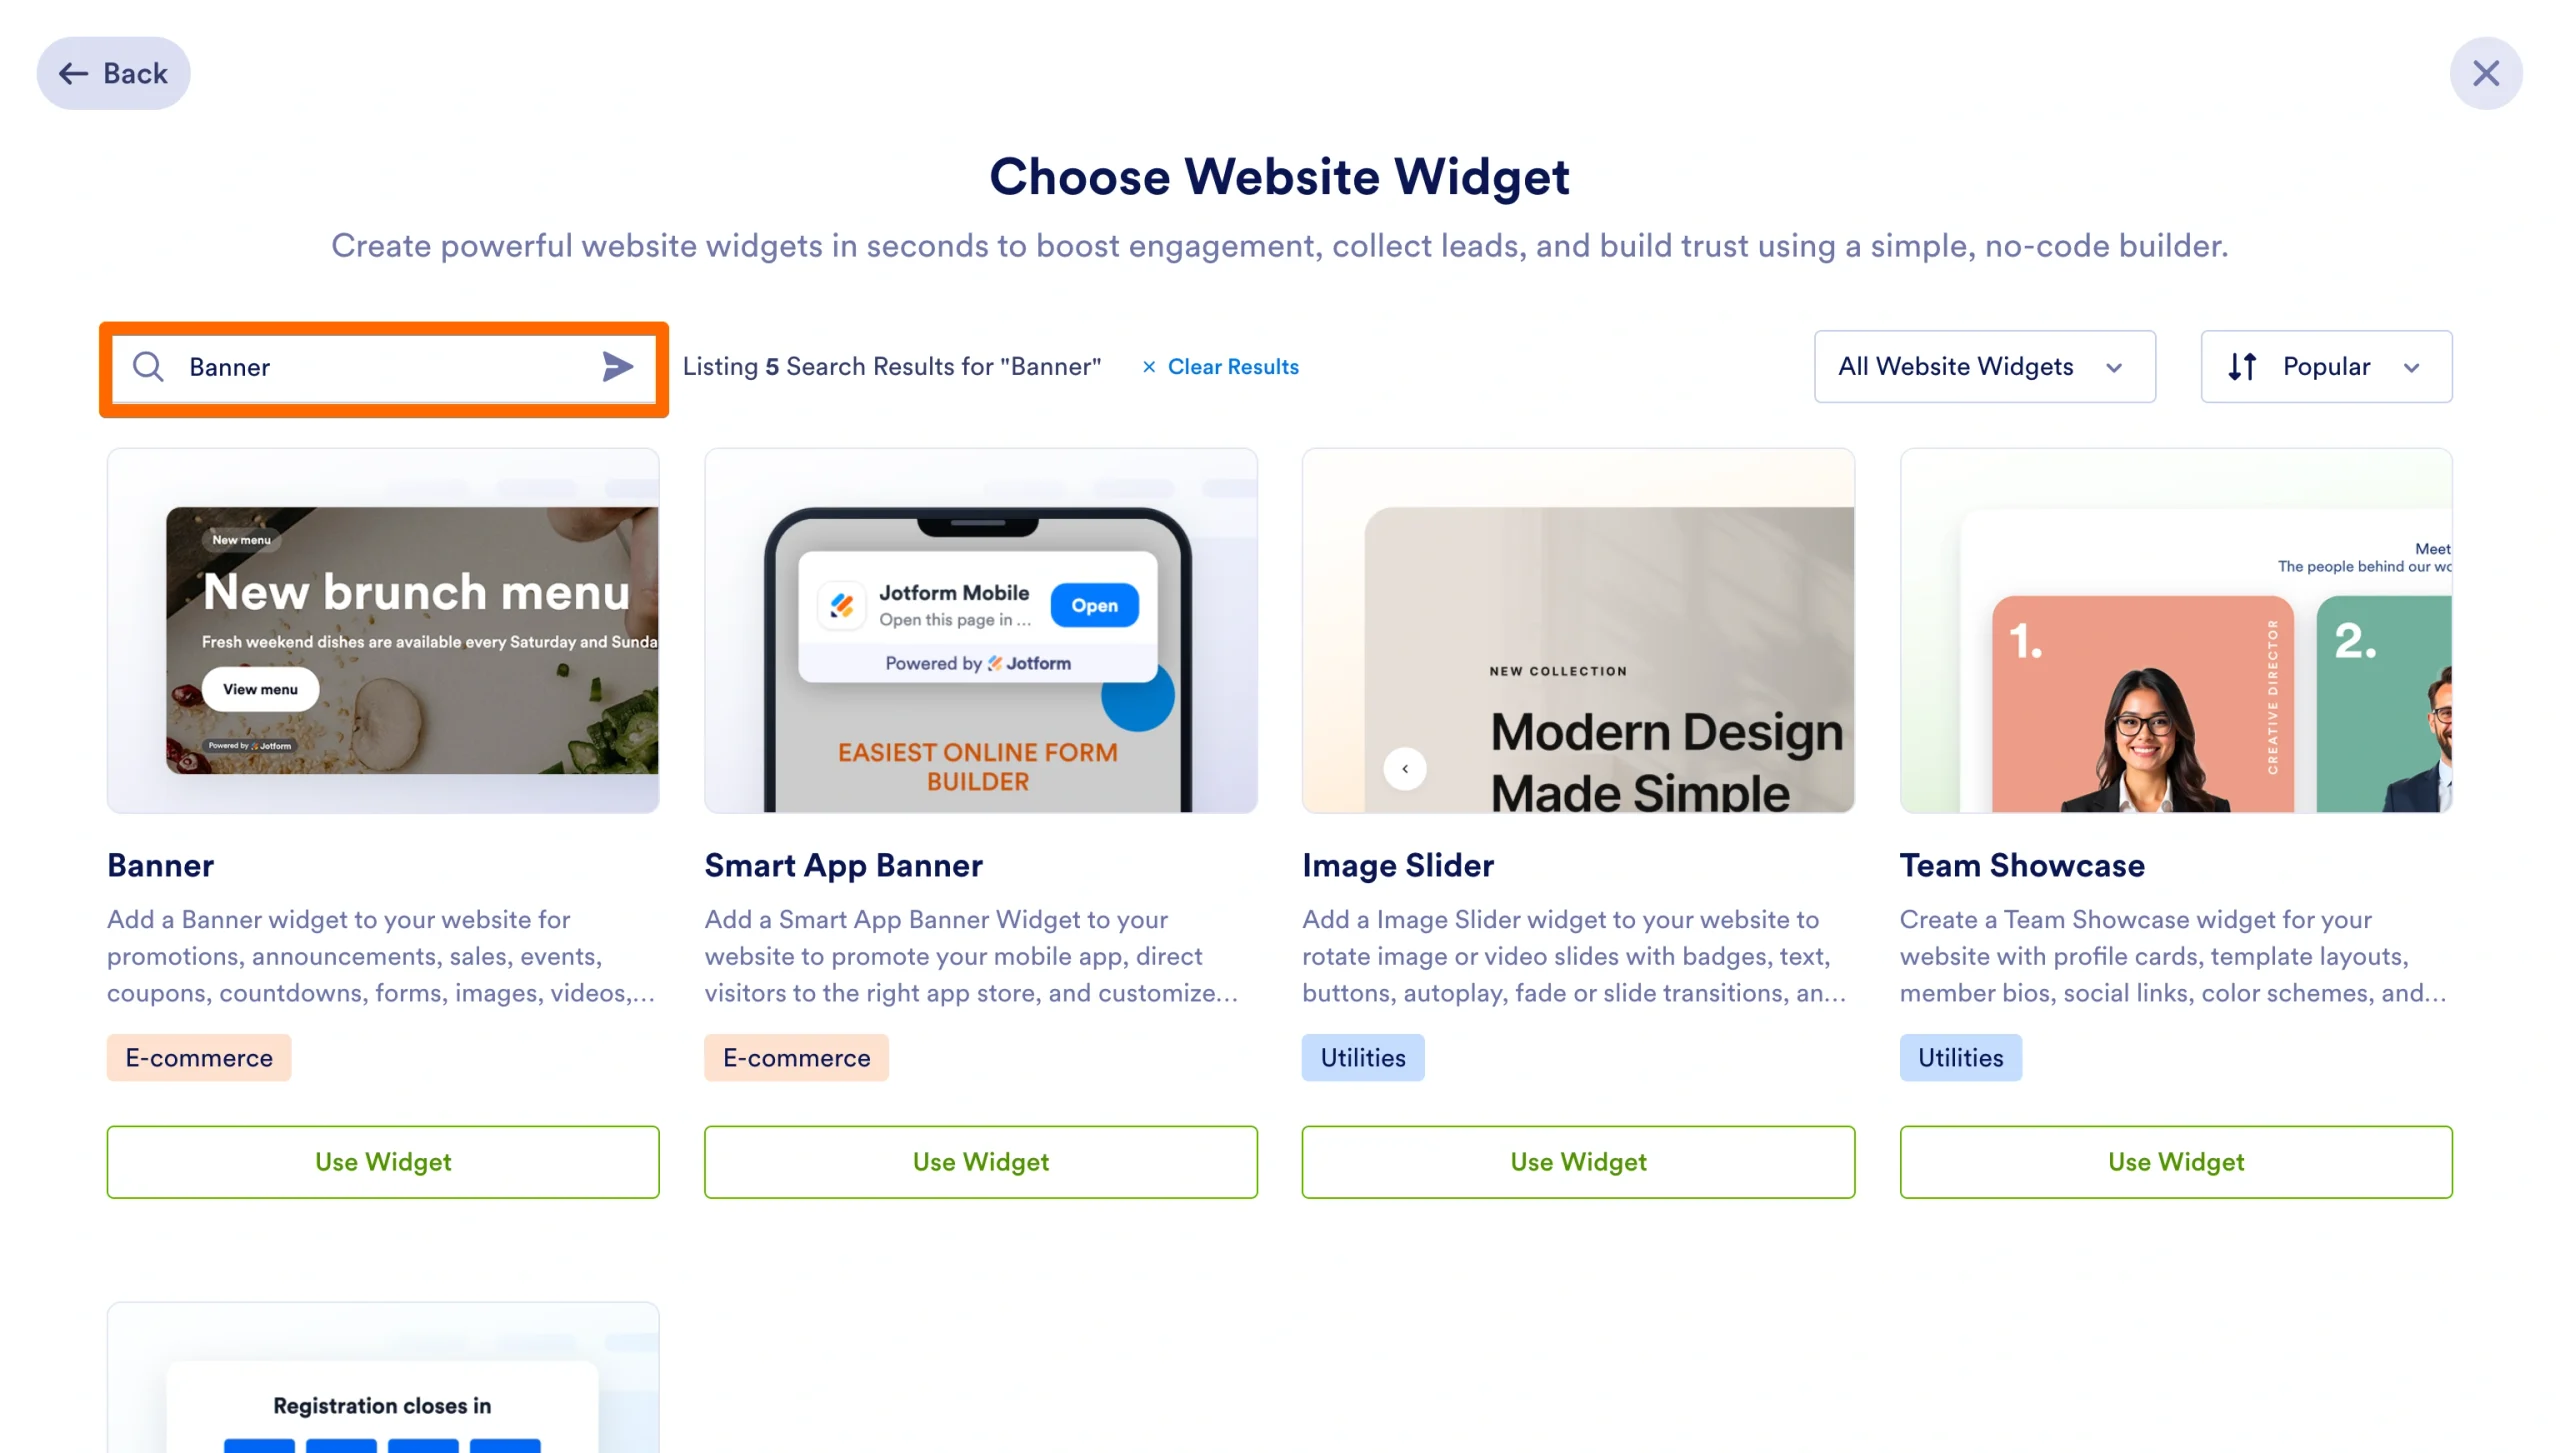
- Pick a banner style and add the elements that your campaign needs, whether that’s a countdown, a coupon, a signup form, or a button.
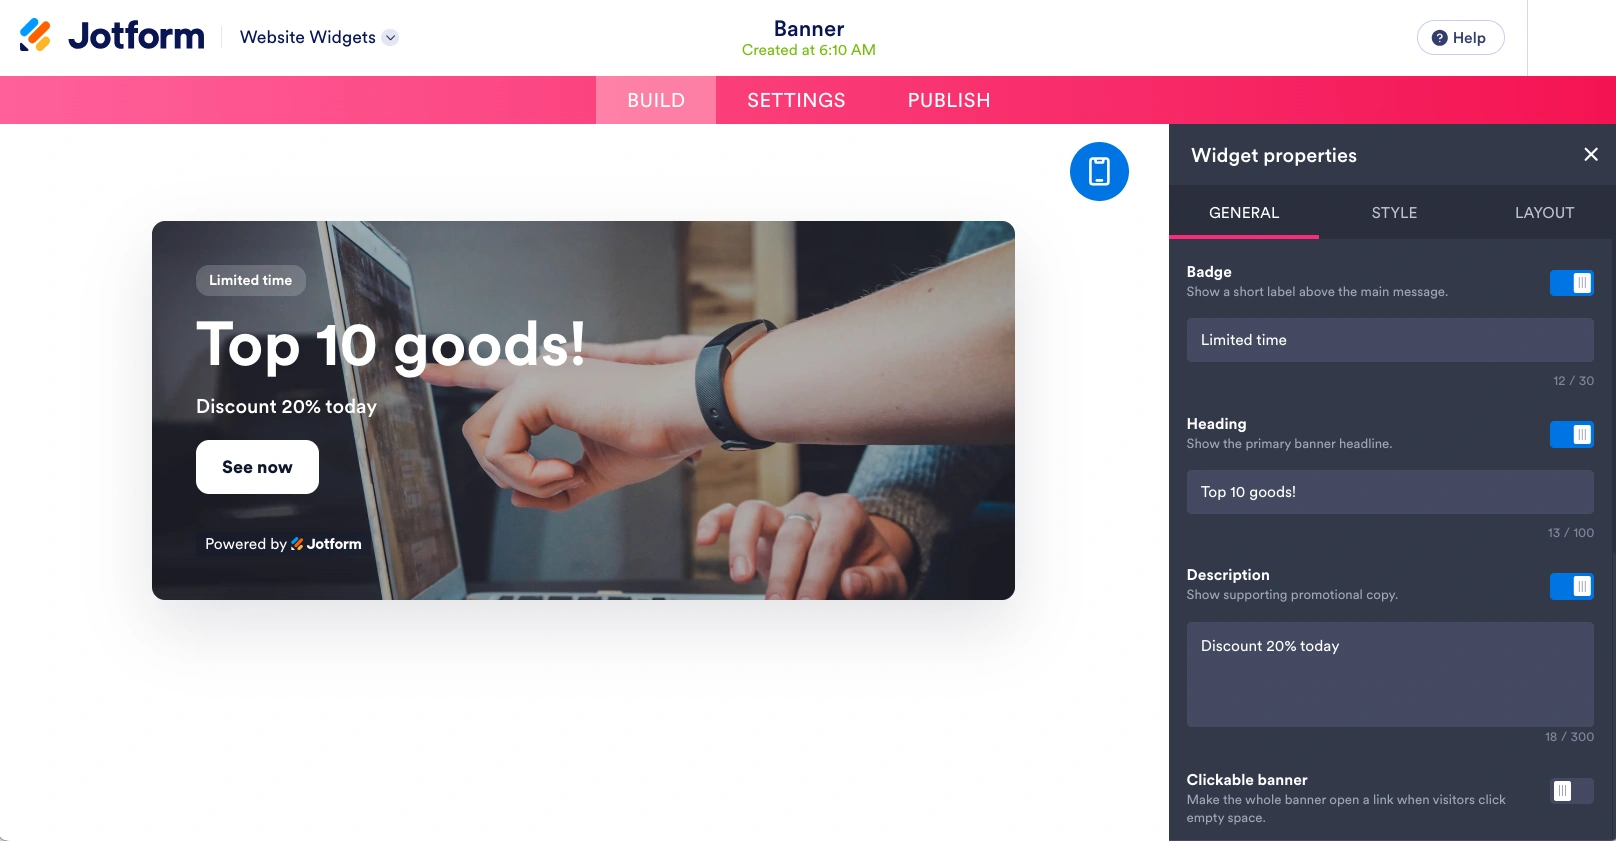
- Set your background, colors, and layout; choose a horizontal or vertical view; adjust width, padding, and corner radius; and decide whether the banner appears on all devices or only desktop or mobile.
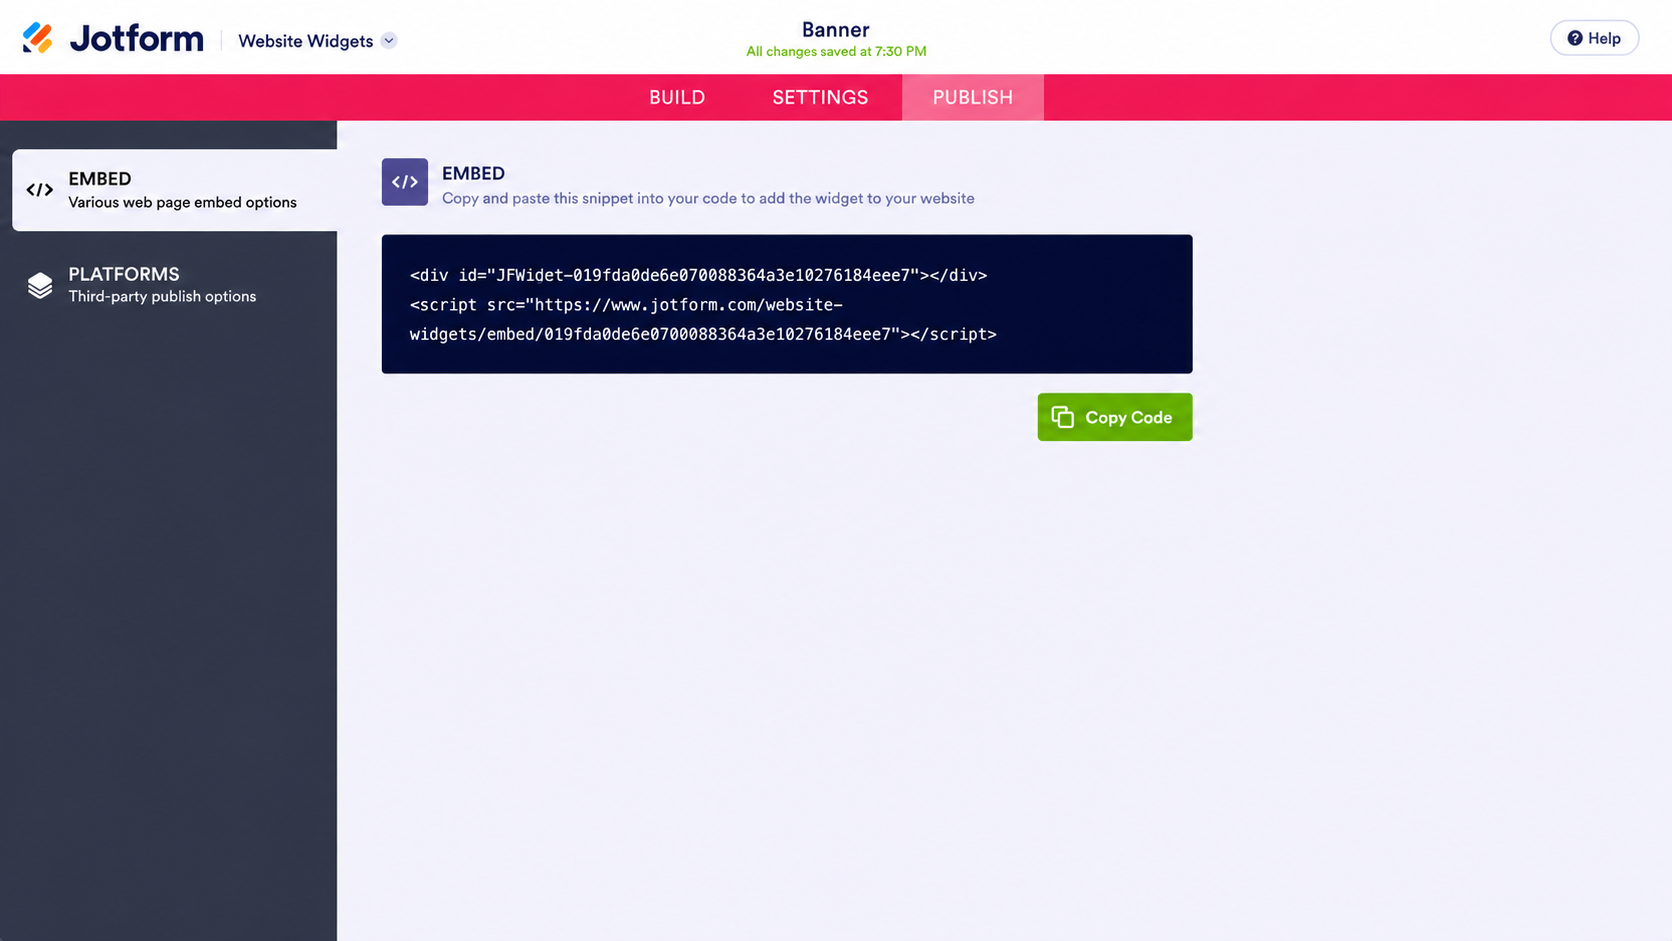
- Click Publish, then Copy Code in the Embed section. The Platforms menu also has WordPress-specific embedding instructions.
- In the Gutenberg editor, click the + icon to add a block and search for and select Custom HTML. Click Edit HTML and paste your embed code, then click Update and Save.
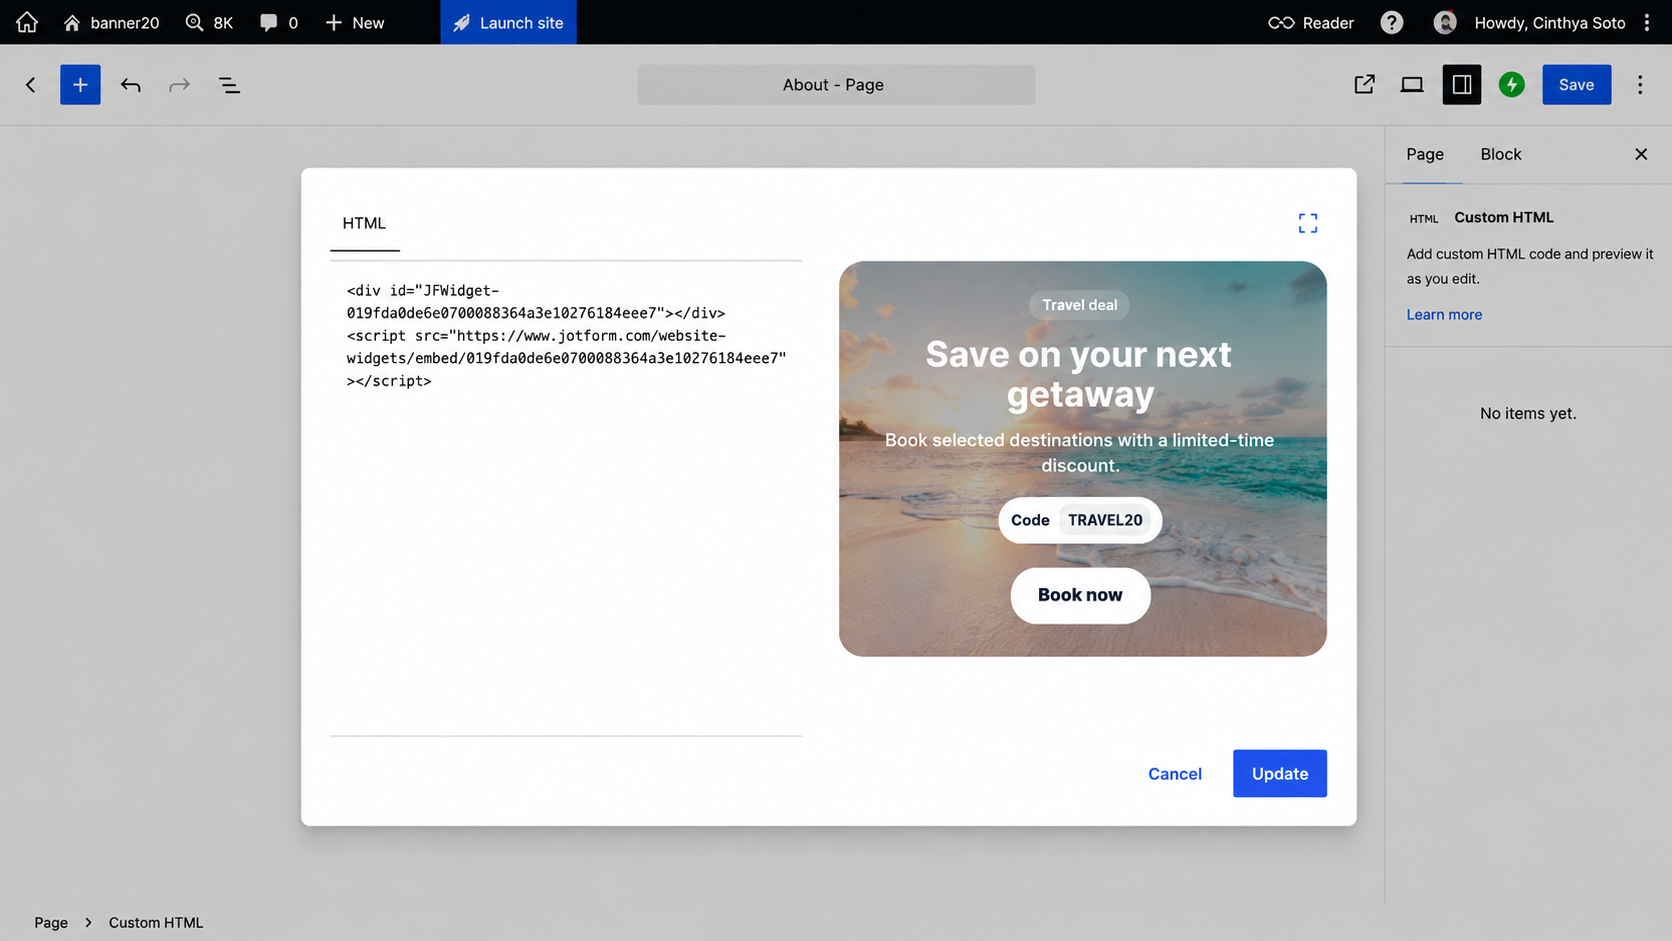
Editing the banner later means opening the widget rather than upgrading a plan to unlock a feature. Custom CSS is also available if you want finer control, and Jotform scopes those selectors to the widget so your styling won’t affect other elements on the page.
Supercharge your WordPress site with smart, serverless widgets
A banner is one of several elements you can add to a WordPress site without another premium plug-in subscription. Jotform’s free website widgets directory has more than 150 options, including
- Announcement Bar Widget that functions as a WordPress announcement bar alternative, skipping the plug-in entirely and covering the slim notification strip across the top of a page
- Popup Widget for the exit-intent and signup offers that usually come bundled in premium conversion plug-ins
- Pricing Table Widget that lays out your plans without a page builder add-on
Each widget embeds through a Custom HTML block the same way the banner widget does, so you aren’t adding a plug-in, an account, and an annual renewal every time you want one more element on a page.
As a creator, publisher, or WooCommerce merchant, your budget should go to growing your business and making things worth promoting, not an annual fee to display a temporary banner. The Jotform Banner Widget gives you the countdown, the coupon, and the signup field without any of that hassle, and WordPress forms work the same way when you need to collect information rather than announce a promotion or event.
This article is for WordPress site owners, bloggers, and WooCommerce merchants who want to embed rich, interactive promotional banners with countdowns or lead capture forms without relying on basic Gutenberg blocks or installing heavy plugins.






























































































Send Comment: