
Are you a stylist, decorator, retoucher, or other professional who needs to show the visual results of your work? A before-and-after slider, featured on your website, is easy to use and communicates value instantly. Unfortunately for WordPress users, the platform doesn’t have a native slider feature.
But it’s not impossible to add a slider to WordPress. You have three options: Use a third-party plug-in, use a free lightweight external widget, or create a slider from scratch by writing custom code.
This article describes how to add a before-and-after slider in WordPress using all three methods so you’ll know which one is right for your needs.


Option 1: Install a WordPress slider plug-in
One of the most common ways to add a before-and-after slider is to use a WordPress plug-in. However, this approach comes with a couple of drawbacks.
Some plug-ins add extra CSS and JavaScript across your site, which increases page load times. In addition, “heavy” page builders, like Elementor, force you to manage the slider via complex shortcodes (text-based, WordPress-specific codes), which can be a nightmare for beginner users. If you accidentally delete part of the code, the slider instantly breaks. Plus, some plug-ins have a freemium business model, locking advanced features behind a paywall.
Plug-ins aren’t a fit for every user, but they’re a solid solution if you’re tech savvy and comfortable with WordPress. Follow these instructions to install a WordPress before-and-after plug-in:
- Install the plug-in: Go to the WordPress dashboard and click Plugins. Enter “before-and-after slider” in the Search bar, and select the plug-in you want to use from the search results. (There are dozens. Check out a list of the best WordPress plug-ins for other types of tasks.)
Follow the prompts to install the plug-in. (The exact installation instructions will depend on the specific plug-in.)
Note that while many plug-ins are free, others have a one-time cost. In most cases, you can use them only with a paid WordPress plan.
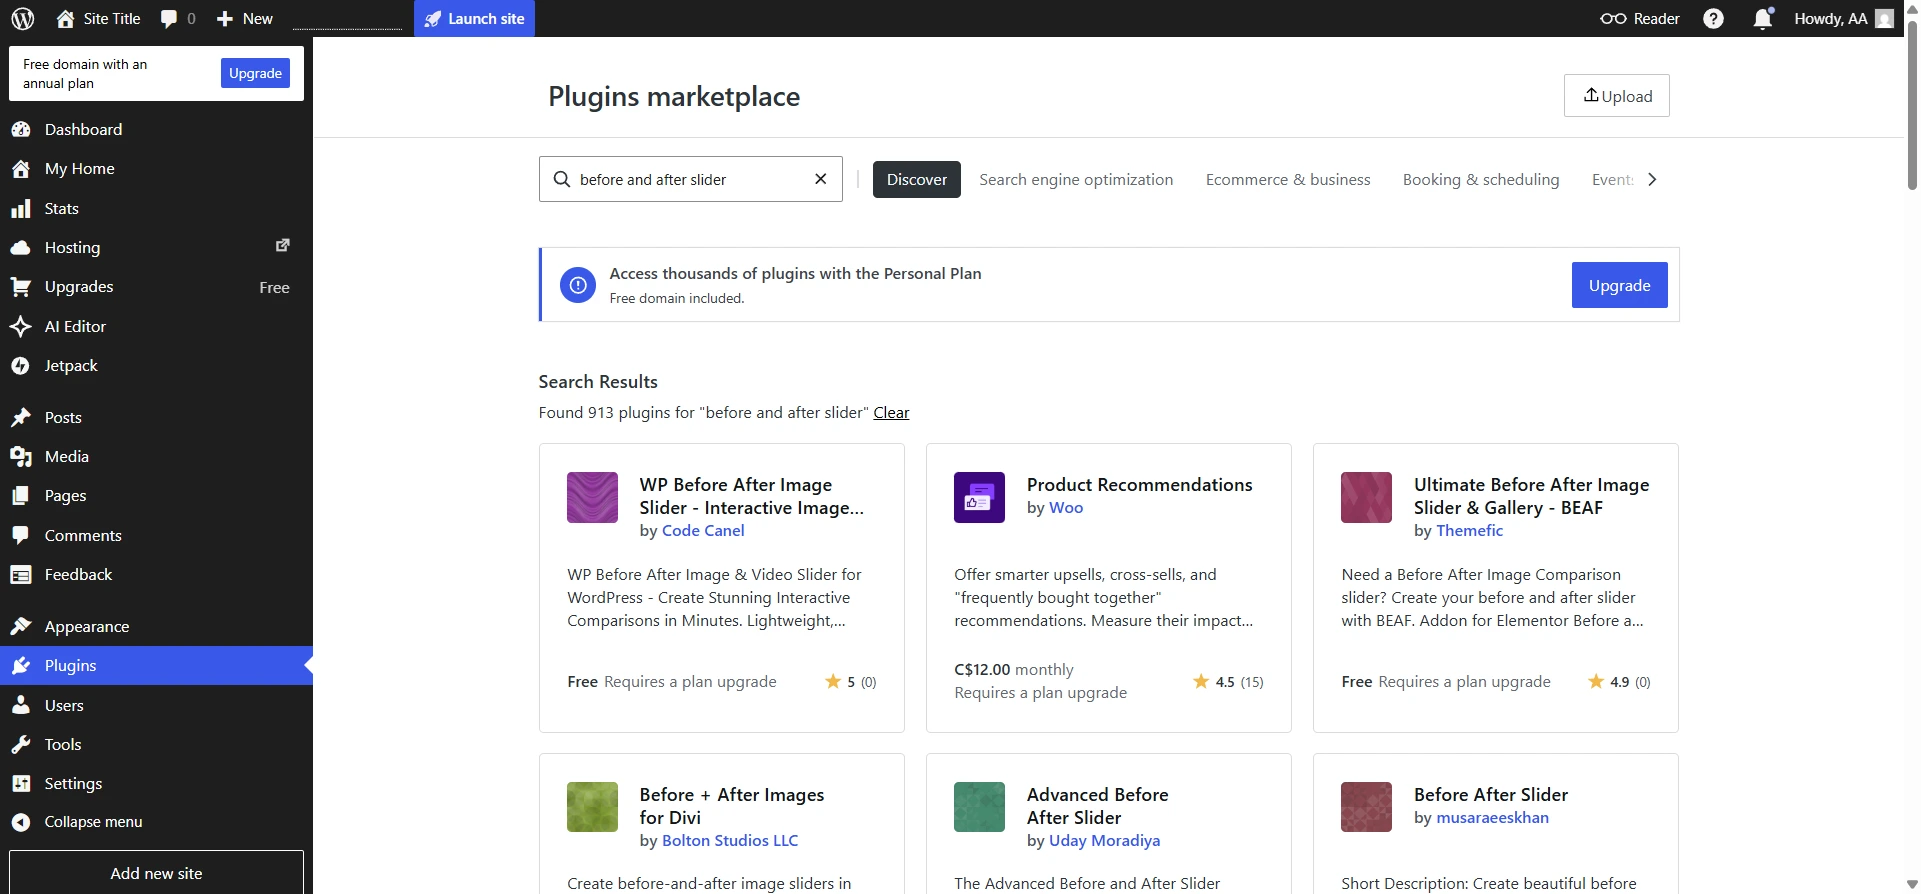
- Create the before-and-after slider: Open the plug-in from the WordPress dashboard. Select the option to create a new before-and-after slider. Upload your before-and-after images. To follow best practices, use images that have the same framing and dimensions.
- Customize the before-and-after slider: Most plug-ins allow you to adjust settings such as image labels, starting position, handle appearance, and slider orientation. Adjust your settings and save.
- Add the before-and-after slider to your WordPress site: Open the WordPress page on which you want the slider to appear. Depending on the plug-in, you can add it by creating a dedicated WordPress block or by adding shortcode to the page.
Pro Tip
Need more guidance on using WordPress plug-ins? “How to use WordPress” is a detailed tutorial that provides key information on using WordPress plug-ins, forms, themes, and more.
Option 2: Use a free, no-code slider widget (recommended)
If you don’t want to deal with tedious shortcodes or heavy plug-ins that make your WordPress site load slowly, your best option is to use a no-code slider widget. Jotform Before and After Slider Widget is completely free and easy to use. Because the widget is serverless, it doesn’t impact your site’s speed at all. And it works perfectly on a desktop and smartphone.
Jotform’s Before and After Slider Widget offers a visually interface with no coding needed. Just upload two images into the widget builder, customize the drag-handle colors, and set the default starting position. Then copy the code and drop it into WordPress.
Here’s more detail:
- Add image pairs: Head to the Jotform Before and After Slider Widget page, and upload your before and after images into the widget settings box. Edit your widget title, and specify the type of interaction you want to offer (drag and click versus hover). Click or tap Continue.
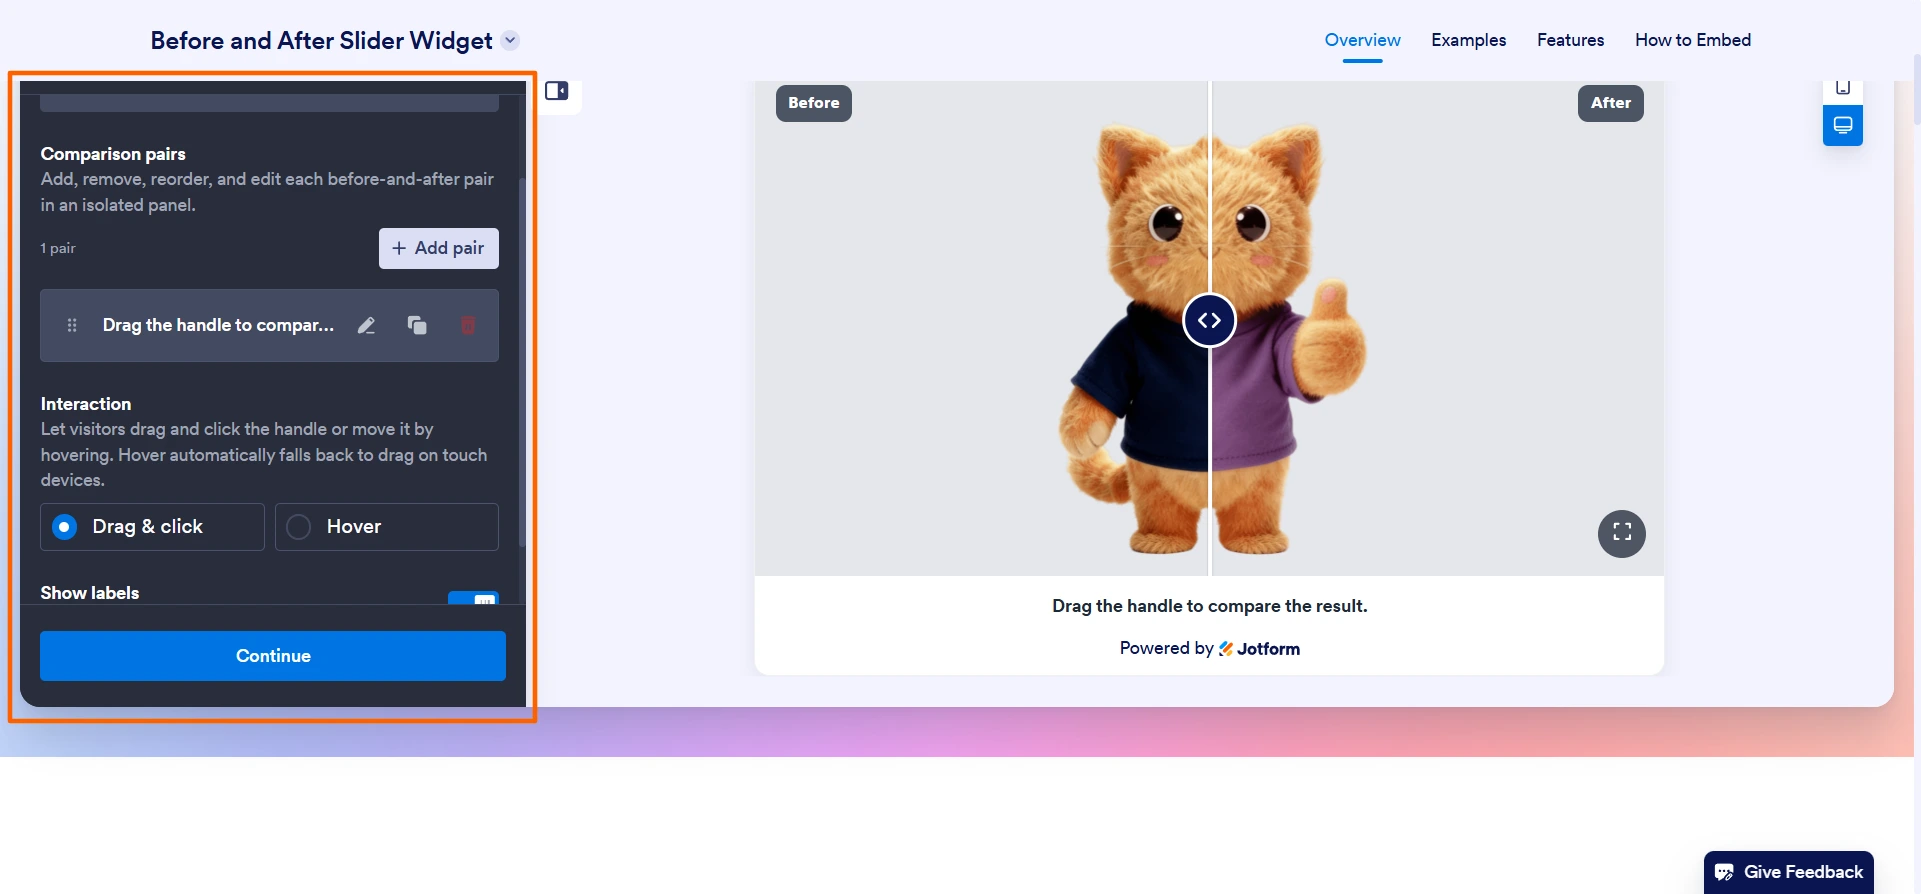
- Customize the slider settings: You can adjust settings, such as the image ratio, corner radius, divider thickness, and slider colors. Scroll down to select all your specifications.
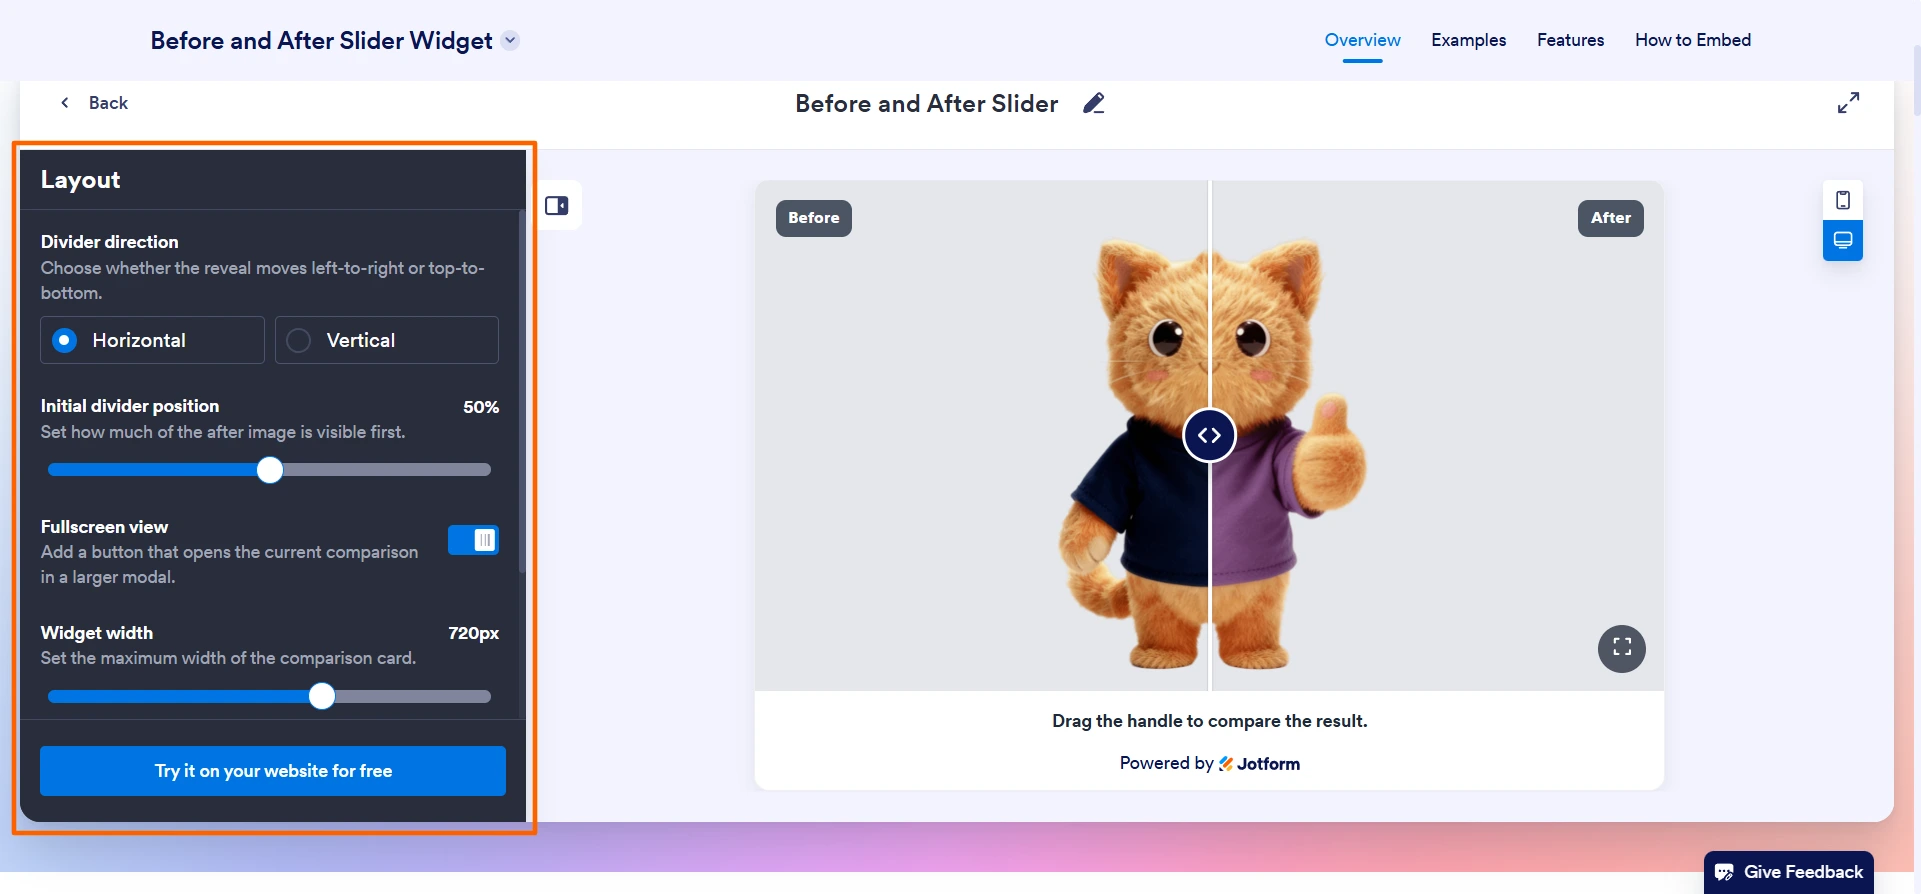
- Get the embed code for the slider widget: Click or tap Try It on Your Website for Free. Jotform will provide an embed code for the slider widget. Click or tap Copy. Jotform will prompt you to sign up or log in to get the code.
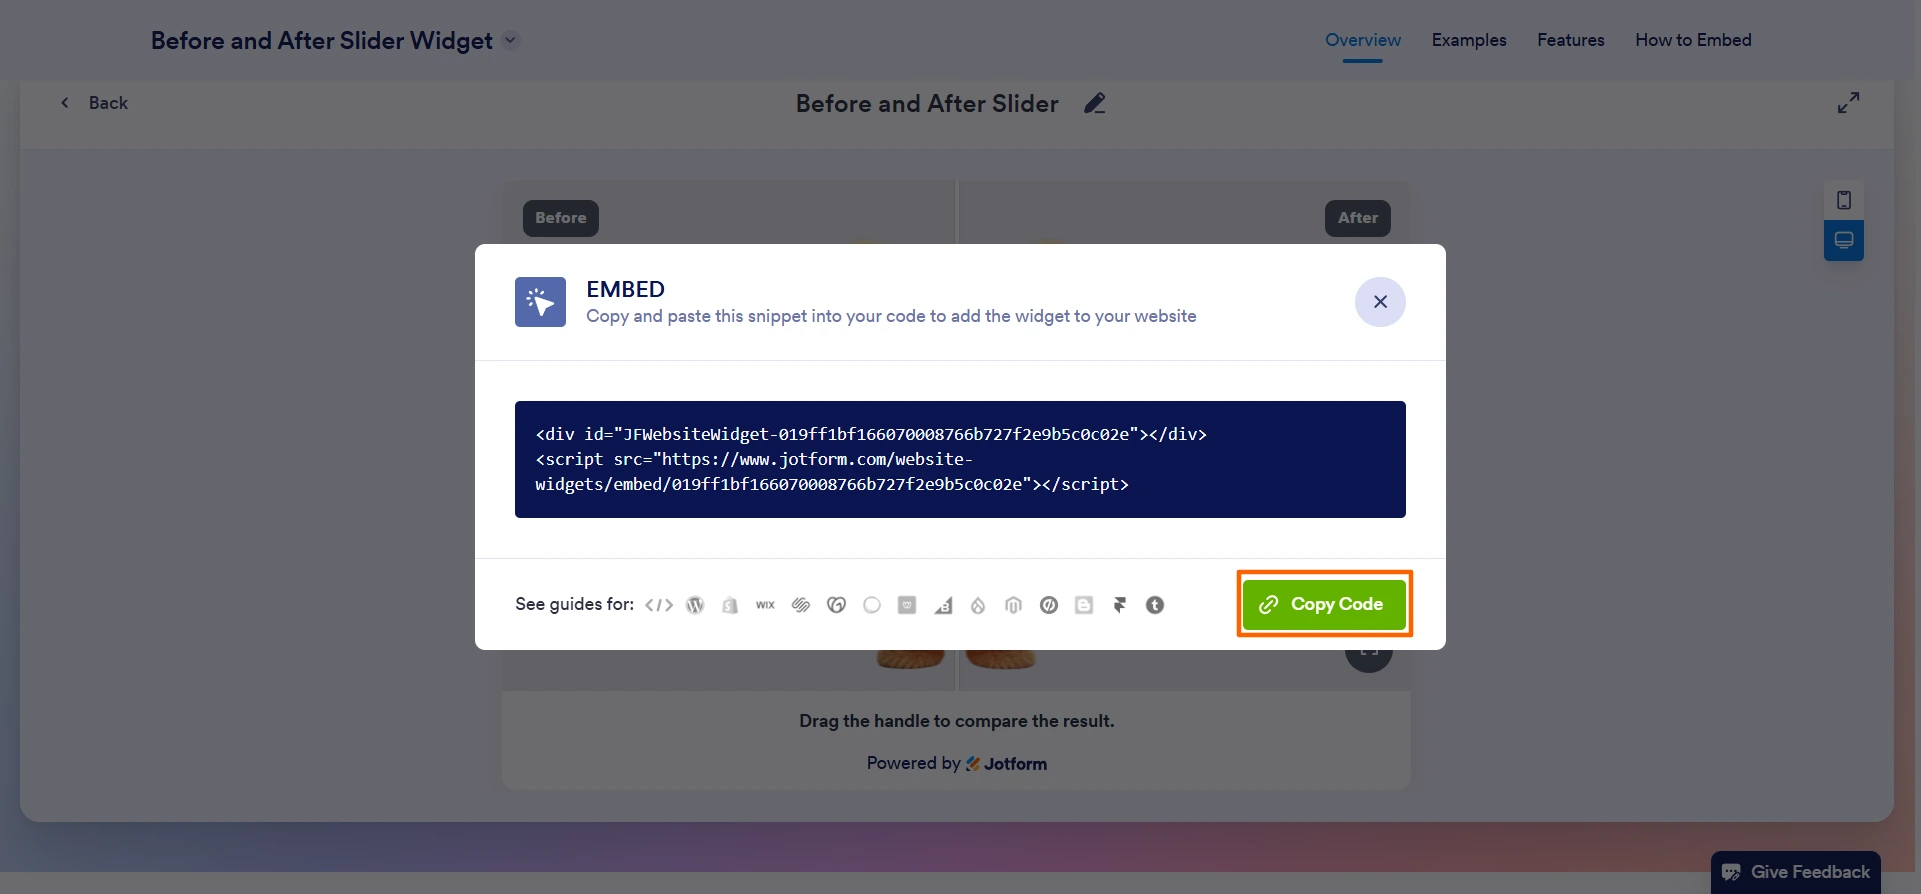
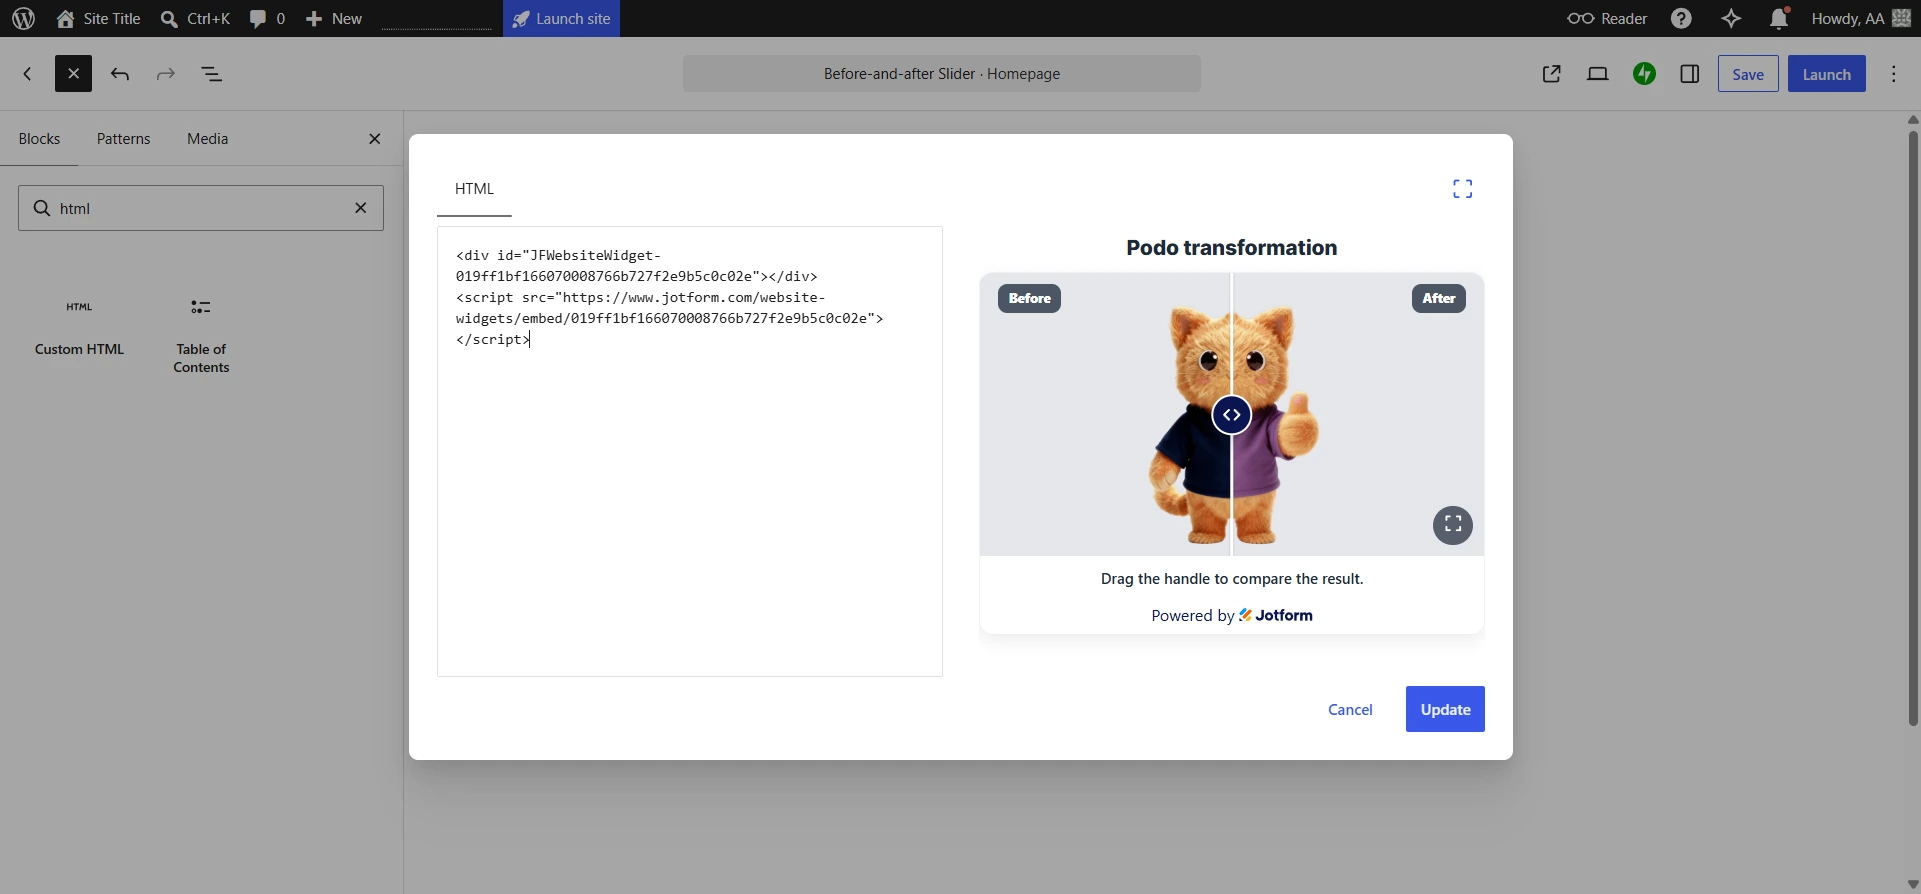
- Paste the slider embed code into WordPress: Go to your WordPress site, and add a Custom HTML block from the Block Inserter. Paste the embed code into the HTML block. Click or tap Update. WordPress will automatically insert the before-and-after slider widget into your WordPress site.
Option 3: Code a custom HTML/CSS slider
If you’re a WordPress purist who prefers to avoid third-party plug-ins or external widgets, you can build a slider from scratch, using raw code.
While this method is technically free and native to WordPress, it is not easy. You will need to have advanced experience writing code, especially if you want website visitors to be able to use the slider while on a smartphone. And a single coding mistake can break the slider and impact smartphone responsiveness, among other things.
Here’s how to add a before-and-after slider in WordPress with custom code:
- Upload the before-and-after images: Add both images to the WordPress Media Library.
- Create the custom HTML/CSS code for the slider: Write the HTML/CSS code to structure and style the slider. You may also need JavaScript to add interactive dragging and swiping.
You can write this code yourself, work with a colleague who has coding experience, or use an AI tool to generate the code.
Copy the code.
- Add the code to your WordPress site: In your WordPress site, add a Custom HTML block, and paste your code into the block. Add CSS and JavaScript as needed through the WordPress theme or site setup.
Enhance your WordPress site with smart, no-code widgets
If you want to prioritize site speed and security, keep costs down, and avoid complex code, Jotform’s Before and After Slider Widget is an excellent way to add rich, interactive media to your website. It’s completely free to use, ideal for novices and professionals, and doesn’t involve writing any code.
But that’s not all Jotform has to offer!
In the Jotform Website Widgets directory, you’ll find over 150 free website widgets that can enhance your WordPress site. For example, the Visitor Counter Widget is a great way to display how popular your site is, while the Countdown Timer Widget helps build urgency around important events and campaigns.
Jotform also offers thousands of WordPress forms, such as contact forms, lead generation forms, and order forms. Add them to your site to collect important visitor information.

Jotform has a free plan. Try it to start exploring the widgets and see how easy it is to improve your WordPress site’s functionality without sacrificing performance or writing code.
This article is for WordPress bloggers, portfolio owners, and agencies who want to showcase visual transformations (like photo retouching, UI redesigns, or renovations) without slowing down their site with heavy plugins or wrestling with complex shortcodes.





































































































Send Comment: